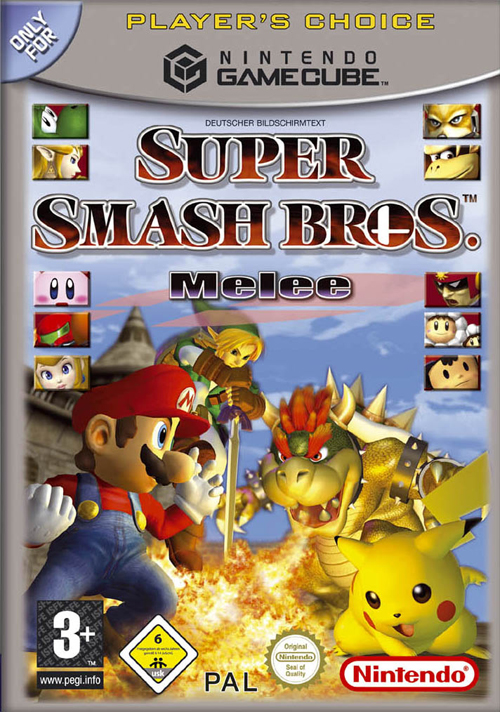

Begin with a Classic clear, unlock the hidden fighters, then work through Adventure, All-Star and the event matches. This Super Smash Bros. Melee guide covers the Nintendo GameCube version, including the full roster, eleven hidden VS stages, the two secret campaign bosses, Stadium challenges and trophy progression.
Unlock all fighters
The starting roster contains Mario, Peach, Bowser, Yoshi, Donkey Kong, Captain Falcon, Fox, Ness, Ice Climbers, Kirby, Samus, Zelda/Sheik, Link and Pikachu. Zelda and Sheik share a character-select slot. There are eleven hidden fighters, bringing the selection to 25 slots.
Meet a fighter’s condition, then win the challenger battle. The VS-match totals below provide an alternative to the individual tasks. These are completed matches, not the number of opponents defeated in one match.
- Jigglypuff: finish Classic or Adventure with any fighter; alternatively, play 50 VS matches.
- Dr. Mario: clear Classic with Mario without continuing; alternatively, play 100 VS matches.
- Pichu: clear Event 37, Legendary Pokémon; alternatively, play 200 VS matches.
- Falco: clear 100-Man Melee; alternatively, play 300 VS matches.
- Marth: use every starting fighter in VS Mode; alternatively, play 400 VS matches.
- Young Link: finish Classic or Adventure with ten different fighters; alternatively, play 500 VS matches.
- Ganondorf: clear Event 29, Triforce Gathering; alternatively, play 600 VS matches.
- Mewtwo: accumulate 20 human-player hours in VS Mode; alternatively, play 700 VS matches.
- Luigi: complete the special Adventure sequence described below; alternatively, play 800 VS matches.
- Roy: clear Classic with Marth without continuing; alternatively, play 900 VS matches.
- Mr. Game & Watch: clear Target Test with all 24 other fighters, or clear Classic with all 24; alternatively, play 1,000 VS matches.
Luigi’s Adventure condition
Finish the opening Mushroom Kingdom course with 2 as the ones digit of the seconds. For example, 5:22:99 and 4:12:50 both fit XX:X2:XX. Luigi replaces Mario in the next battle. Defeat Luigi and Peach within one minute, finish the rest of Adventure, then win Luigi’s challenger battle. Crossing the flag with 2 in the tens position alone does not meet the condition.
Mewtwo and player hours
Human-player time is added together. Two human players need ten hours of match time to reach 20 player-hours; four human players need five. CPU fighters do not multiply the total. Finish the match after reaching the requirement so that the challenger can appear.
A practical unlock order
Start with Mario’s no-continue Classic run, then use the starting roster in VS Mode. Complete 100-Man Melee for Falco and play the available events toward Ganondorf and Pichu. Continue clearing Classic with different fighters for Young Link and the character trophies. Once Marth is available, complete his no-continue run for Roy. Attempt Luigi’s timed opening during an Adventure run, build the VS requirements for Mewtwo, then finish the remaining Target Tests or Classic clears for Mr. Game & Watch.
Classic Mode
Classic changes its opponents between runs, but keeps the same overall sequence: a single battle, a team battle, Target Test, another single battle, a giant battle, Snag the Trophies, another single battle, a multi-opponent battle, Race to the Finish, a metal battle and Master Hand.
Use the opening fights to build a safe run rather than chasing quick offstage finishes. In team fights, help your CPU allies concentrate on one opponent. A giant target is easy to hit but can punish an unsafe approach severely; attack after its move ends instead of standing directly in front of it.
Target Test rewards familiarity with your fighter’s layout. Use projectiles and recovery moves where needed, and practice the layout separately if it repeatedly slows your run. During Snag the Trophies, hit the falling trophies into the collection area rather than letting them drop away. In Race to the Finish, decide how far you can safely reach before committing to the longer route.
The metal opponent resists knockback, so build damage before attempting a finish. A sideways launch followed by safe ledge pressure is generally more useful than repeatedly attacking upward from the middle. Preserve a recovery option whenever you leave the platform.
Master Hand and Crazy Hand
Master Hand is defeated by reducing its HP, not by launching it out of the arena. Watch the preparation for each attack, move away from the strike and answer during the pause afterward. Short aerial attacks let you hit the hand without remaining underneath it for the next attack.
On Normal or higher, reach the final battle quickly enough to meet the 5-minute-50-second requirement, then reduce Master Hand to half its starting HP. Crazy Hand joins the fight. Watch both hands before committing to a counterattack, and concentrate damage on one so that you can finish against a single boss.
Adventure Mode
Mushroom Kingdom to Brinstar
Mushroom Kingdom: follow the platform course to the flag and defeat the Yoshi group blocking the route. Mario and Peach wait after the finish; use the timed flag condition above if you are working toward Luigi. Keep the pair on one side of you instead of landing between them.
Kongo Jungle: defeat the two tiny Donkey Kongs, then face Giant Donkey Kong at Jungle Japes. Do not mistake the smaller targets for harmless opponents. Build damage with attacks you can recover from and finish from a stable position.
Underground Maze: search the possible chambers for the Triforce. Master Swords mark Link encounters. Jump over a sword if you want to avoid the extra duel; repeatedly entering an unnecessary fight costs both time and health. After finding the Triforce, defeat Zelda or Sheik at Temple.
Brinstar: defeat Samus, then climb the escape shaft before the 40-second countdown ends. Focus on reaching the next platform rather than attacking. Failing the escape costs a stock, so preserve a clear route upward even when a collectible lies off to the side.
Green Greens to Onett
Green Greens: defeat Kirby, then the Kirby team. Clearing the first fight and the team fight in less than 31 seconds each triggers Giant Kirby. For the team, use launching attacks that leave you ready to face the next arrival.
Corneria: defeat Fox, then handle the second battle while watching the Arwings. Falco can replace Fox in the later encounter once he is unlocked. Keep an eye on the firing line so that a stage attack does not interrupt your attempted finish.
Pokémon Stadium: defeat the Pokémon team while competing for Poké Balls. Pikachu dominates the initial lineup; unlocked Pokémon fighters can also appear. A useful summoned Pokémon can clear several opponents, but do not run through an attack just to reach the item first.
F-Zero Grand Prix: advance along the course and get onto a safe raised platform when the warning signals approaching cars. Cross the exposed section after the traffic passes. Captain Falcon waits at Mute City after the running stage.
Onett: deal with the three Ness opponents without standing in the road. Mr. Saturn items and passing cars can interrupt a slow attack. Separate an opponent from the others, finish the exchange and move before the group closes around you.
Icicle Mountain to Giga Bowser
Icicle Mountain: keep pace with the scrolling camera and choose your next landing before jumping. Fight the Ice Climbers when they arrive, but keep checking the platform below you. Winning an exchange is little help if you fall behind the camera immediately afterward.
Battlefield: clear the Fighting Wire Frames, then face Metal Mario. Metal Luigi joins him if Luigi is already unlocked. Work toward a sideways launch and avoid spending your last jump chasing a metal opponent beneath the stage.
Final Destination: defeat Giant Bowser. On Normal or higher, defeating him within 18 accumulated minutes triggers Giga Bowser. To earn the Giga Bowser trophy, maintain a no-continue run through the victory.
Giga Bowser’s size makes him easy to hit, but his attacks cover a huge area. Move clear of the attack before punishing its recovery. Stay out of the space directly in front of him when you have high damage, and choose an aerial approach only if you can land without being trapped by the next swing.
All-Star Mode
Unlock the full roster to open All-Star. Your damage carries between battles. The rest area provides only three Heart Containers for the run, so plan their use around your remaining health and the fights ahead rather than using one automatically after every difficult round.
The opening rounds contain single opponents, later rounds combine two and then three, and the final encounter is a group of Mr. Game & Watch fighters. Launch the lightweight final opponents cleanly instead of following each one offstage. Your first completed All-Star run unlocks Battlefield and awards that fighter’s All-Star trophy.
Unlock all 29 VS stages
Eighteen stages are available initially. Complete these requirements for the other eleven:
- Brinstar Depths: 50 VS matches.
- Fourside: 100 VS matches.
- Big Blue: 150 VS matches.
- Poké Floats: 200 VS matches.
- Mushroom Kingdom II: obtain the Birdo trophy.
- Flat Zone: clear Classic with Mr. Game & Watch.
- Past Stages: Yoshi’s Island: reach 400 meters in Home-Run Contest.
- Past Stages: Kongo Jungle: clear 15-Minute Melee.
- Past Stages: Dream Land: clear Target Test with all 25 fighters.
- Battlefield: clear All-Star.
- Final Destination: clear Event 51.
Unlocking every playable stage also opens Sound Test in the Data menu. Do not confuse playing an event on an otherwise locked stage with unlocking that stage for normal VS matches.
All 51 event matches
Clear six events to open 11–15, ten for 16–20, sixteen for 21–25 and twenty-two for 26–29. Twenty-seven clears open Event 30. Events 31–39 additionally require Jigglypuff, Luigi, Dr. Mario, Falco and Young Link. Unlock every fighter and reach 27 event clears for 40–50. Event 51 requires all earlier events plus at least one Classic and one Adventure clear.
Events 1–10
1 — Trouble King: punish Bowser after a missed attack. Build damage before using a smash or throw near the edge; an unsafe chase can cost more time than another short exchange.
2 — Lord of the Jungle: use Giant Donkey Kong’s reach against the smaller opponent. Keep the fight on a platform where you can land safely rather than falling after a target you can barely see.
3 — Bomb-fest: watch the explosive items before committing to an attack. Move away from a blast, then punish an opponent who is recovering. Do not pick up an explosive beside another active hazard.
4 — Dino-wrangling: the enormous Yoshi is easy to hit. Use fast attacks to raise damage, then choose a launch from a position that leaves you room to dodge the response.
5 — Spare Change: gather 200 coins within 1:20. Repeated hits produce coins, so collect the nearby drops instead of chasing only knockouts. Avoid letting a fall undo the benefit of a good exchange.
6 — Kirbys on Parade: keep the small Kirbys in front of you. Their size can make a slow attack miss, so use reliable low coverage and finish one opponent before being surrounded.
7 — Pokémon Battle: Pokémon attacks are the way to damage your opponent. Reach the Poké Balls safely and create space for the summoned Pokémon to act instead of relying on ordinary attacks to finish the fight.
8 — Hot Date on Brinstar: both fighters start with high damage. Look for a quick, safe launch, and keep clear of the acid. A single careless approach can lose a stock.
9 — Hide ’n‘ Sheik: finish the opponents while they are Sheik. A knockout in Zelda form does not complete the objective. Wait for the transformation before committing to your finishing attack.
10 — All-Star Match 1: defeat the opponents in sequence within four minutes. Use a consistent opening against each rather than wasting time setting up a risky offstage finish.
Events 11–20
11 — King of the Mountain: survive for one minute. Keeping up with the platforms is more useful than chasing a knockout. Move away from the Ice Climbers if fighting would cost your next safe landing.
12 — Seconds, Anyone?: you have seven seconds against an opponent who also starts at 100%. Use an immediate launching option, but avoid charging so long that the timer expires.
13 — Yoshi’s Egg: protect the egg for 55 seconds. Keep opponents away from it and avoid adding unnecessary damage with your own attacks. Watch where the moving stage will carry the egg next.
14 — Trophy Tussle 1: win the battle on the Goomba trophy. Let an opponent overextend, then punish while keeping your footing. Winning earns the Goomba trophy.
15 — Girl Power: your small size makes a direct exchange dangerous. Use movement and items to create an opening, and avoid landing between several opponents at once.
16 — Kirby’s Air-raid: use Warp Stars to defeat the Kirbys. Pick a landing point that catches an opponent, then immediately look for the next available star before the short timer runs down.
17 — Bounty Hunters: Samus must land the decisive KO. Damage the target and finish it yourself rather than allowing Captain Falcon to take the final hit.
18 — Link’s Adventure: use Link’s range against the dark counterpart. Fight where you have room to recover, and punish a missed attack rather than repeatedly trading sword swings.
19 — Peach’s Peril: keep Peach alive for one minute. Intercept the attacker and move the fight away from her. The objective is protection, so do not leave her exposed while chasing an unnecessary KO.
20 — All-Star Match 2: preserve your stocks through the successive fights. Use the first clean opening on each stage and avoid taking extra damage after an opponent has already been launched away.
Events 21–30
21 — Ice Breaker: KO the two Nanas without KOing the Popos. Watch which partner you are actually hitting and separate the pair before using an attack that covers a large area.
22 — Super Mario 128: clear the tiny Marios with broad, repeatable attacks. Face the next incoming group and stay away from an edge where a stray hit can end your run.
23 — Slippy’s Invention: the opponents are invisible. Follow dust, attack effects and landing positions to track them. Do not stand still charging a smash while both fighters are unaccounted for.
24 — The Yoshi Herd: launch the ordinary Yoshis quickly, leaving enough time for the giant one at the end. Use attacks with good coverage when several Yoshis arrive together.
25 — Gargantuans: concentrate on Giant Donkey Kong. The tiny fighters can distract you, but pursuing them does not replace defeating the main target. Keep a safe landing available during the large exchanges.
26 — Trophy Tussle 2: fight on the Entei trophy without being caught between the other fighters. Finish a weakened opponent when you have an opening; the reward is the Entei trophy.
27 — Cold Armor: the metal opponents resist knockback. Build damage and launch them sideways, watching the shifting footing at Brinstar Depths before committing to an edge guard.
28 — Puffballs Unite!: handle the Kirbys in groups. Use a launching attack that leaves you ready for the next approach, and avoid being trapped beneath several different copied abilities.
29 — Triforce Gathering: defeat Ganondorf while keeping both yourself and Zelda alive. Push the fight away from Zelda and do not abandon her for a deep offstage chase. Clearing the event triggers Ganondorf’s challenger battle.
30 — All-Star Match 3: work through the opponents within the timer. Favor a safe punish after a missed move over a long setup that might fail and cost a stock.
Events 31–40
31 — Mario Bros. Madness: finish with the better score in the timed match. Secure KOs while avoiding self-destructs; repeatedly falling offstage can erase the advantage of several good exchanges.
32 — Target Acquired: earn more Jigglypuff KOs than the Arwings. Take the finishing opportunity quickly rather than building damage that a stage attack then converts into somebody else’s KO.
33 — Lethal Marathon: complete the accelerated F-Zero course. Use the safe platforms when traffic approaches. An uncontrolled sprint is less useful than a short pause that avoids being hit.
34 — Seven Years: use Young Link’s mobility and ranged options to create an opening against Link. Do not repeatedly challenge the longer sword from the same distance.
35 — Time for a Checkup: stay out of the space between the two opponents. Use Peach’s movement to separate them, then attack the exposed fighter before the partner can interrupt.
36 — Space Travelers: protect Ness’s single stock across the successive opponents. Recover carefully and reset your position after each KO instead of rushing straight into the next fighter.
37 — Legendary Pokémon: collect Poké Balls safely and let their effects help control the giant opponents. Avoid a direct trade while outnumbered. Completing the event opens Pichu’s challenger battle.
38 — Super Mario Bros. 2: use spacing to keep the opponents from surrounding you. Their attacks can interfere with one another, giving you a chance to punish without standing in the middle of the group.
39 — Jigglypuff Live!: use a clean launching attack rather than a long damage sequence. Keep your own recovery controlled, since the match’s knockback makes an ordinary mistake costly.
40 — All-Star Match 4: treat each opponent as a new positioning problem. Move back to safe ground after a finish and preserve your remaining stocks through the full sequence.
Events 41–51
41 — En Garde!: use Marth’s reach and punish Link after an attack misses. Avoid forcing an aerial exchange when your landing would leave you exposed to the next sword swing.
42 — Trouble King 2: the huge opponent covers much of the nearby space. Move away from the attack first and use its recovery for your own hit instead of trying to trade at close range.
43 — Birds of Prey: the moving vehicles at Big Blue are as dangerous as Fox and Falco. Plan your next landing before attacking and do not follow a launched opponent onto unsafe traffic.
44 — Mewtwo Strikes!: avoid Zelda until Mewtwo appears after 15 seconds. KO Mewtwo to win. KOing Zelda fails the event, so do not use a broad finishing attack that catches her as well.
45 — Game & Watch Forever!: launch the lightweight opponents and turn toward the next arrival. Stay on Flat Zone rather than following a fighter who is already falling out of the arena.
46 — Fire Emblem Pride: avoid landing between Marth and Roy. Work toward removing one opponent first, then use the room from the resulting one-on-one fight.
47 — Trophy Tussle 3: maintain your footing on the Majora’s Mask trophy. Punish an exposed opponent without allowing a second fighter to hit you from behind. The mask trophy is the reward.
48 — Pikachu and Pichu: concentrate on the two Pichu. Pikachu is the distraction; fighting it instead of the actual targets wastes the openings you need.
49 — All-Star Match Deluxe: use a fighter you can recover with reliably. Preserve your stocks through the six-opponent sequence and take the first safe finishing opportunity rather than extending a dangerous exchange.
50 — Final Destination Match: Master Hand and Crazy Hand attack together. Watch both sets of preparations and focus your damage on one hand. Eliminating it reduces the number of attacks you must avoid in the remaining fight.
51 — The Showdown: you face Giga Bowser, Ganondorf and Mewtwo, with three stocks each. Friendly Fire is disabled for their team, so waiting for them to damage one another is not a winning plan. Keep the group on one side of you, attack an exposed target and recover before being trapped between the three.
Giga Bowser is easy to hit because of his size, but attacking him carelessly leaves you exposed to the other two. If using Jigglypuff, practice a safe Rest opening first; a missed Rest gives the group time to punish. Remove stocks when an opening appears rather than splitting damage without securing a KO. Victory unlocks Final Destination for VS play.
Stadium challenges
Target Test
Every fighter has a dedicated layout. Identify which targets require projectiles, a recovery move or an unusual jump before attempting a fast route. Complete the safe targets first while learning, then practice the difficult section separately. Clearing all 25 layouts unlocks the N64 Dream Land stage.
Home-Run Contest
You have ten seconds to damage Sandbag and launch it with the Home-Run Bat. Keep Sandbag on the platform while building damage, collect the bat in time and leave enough room to connect the final smash attack. A controlled attempt is more useful than reaching a high percentage and knocking Sandbag off before the timer ends. Reach 400 meters to unlock the N64 Yoshi’s Island stage.
Multi-Man Melee
For 10-Man and 100-Man Melee, use attacks that cover the Wire Frames‘ approach and leave you ready for the next group. Completing 100-Man Melee unlocks Falco. During 3-Minute and 15-Minute Melee, survival matters throughout the timer: preserve your recovery and avoid risky ledge exchanges. Completing the full 15 minutes unlocks the N64 Kongo Jungle stage.
Endless Melee continues until you lose your stock. Cruel Melee gives the opponents much stronger attacks, so ordinary damage-trading is especially dangerous. Learn a safe way to draw an opponent into an exposed position before attempting a high score.
Trophies and extras
Collect trophies through the single-player modes, events, Stadium records and the Lottery. The normal NTSC and PAL releases offer 290 trophies through regular play. A fighter’s regular trophy comes from Classic, the first Smash trophy from Adventure and the second from All-Star.
Start the Lottery with small coin investments while many ordinary trophies are missing. Increasing the stake later can improve the chance of a new trophy, but a higher investment does not guarantee one. Mode-specific trophies still require their own accomplishments.
Mew can appear from a Poké Ball after the roster is unlocked. For Celebi, unlock every stage, earn Score Display through 5,000 VS KOs and encounter Mew at least once. Both Pokémon are rare appearances rather than usable fighters. Keep working on the other records while accumulating the requirements instead of expecting either to appear immediately.
Advanced movement basics
Short hop: tap a jump button briefly. Combine it with an aerial attack to cover the area just above the ground, then concentrate on landing safely before adding more actions.
Fast fall: press down after reaching the falling part of a jump. Learn the timing with an ordinary jump first; forcing a fast fall while recovering can send you below the ledge.
L-cancel: press L, R or Z shortly before landing from a regular aerial attack to reduce its landing lag. Practice one repeatable aerial and landing before combining the input with a short hop and fast fall.
Dash dance: reverse the stick during the opening dash to change direction rapidly. Use the movement to make an attack miss, then approach during the opponent’s recovery.
Wavedash: jump and immediately air dodge diagonally toward the ground. A successful input produces a sliding landing. Practice away from the ledge until the direction and timing are consistent.
Directional influence and teching: use the stick during a strong hit to influence the launch angle, and time L or R before colliding with a surface to tech when the situation allows it. These can preserve a stock, but they do not replace choosing a safe position before an attack connects.