

World 3 — Water Land. Swim through the water courses, use the Frog Suit for current-blocked rooms and stay above Boss Bass. The map has branching routes and drawbridges, so this chapter lists every course in a practical full-tour order.
Courses in this world
- World 3-1
- World 3-2
- World 3-3
- Fortress 1
- World 3-4
- World 3-5
- World 3-6
- World 3-7
- Fortress 2
- World 3-8
- World 3-9
- Airship — Wendy O. Koopa
World 3-1
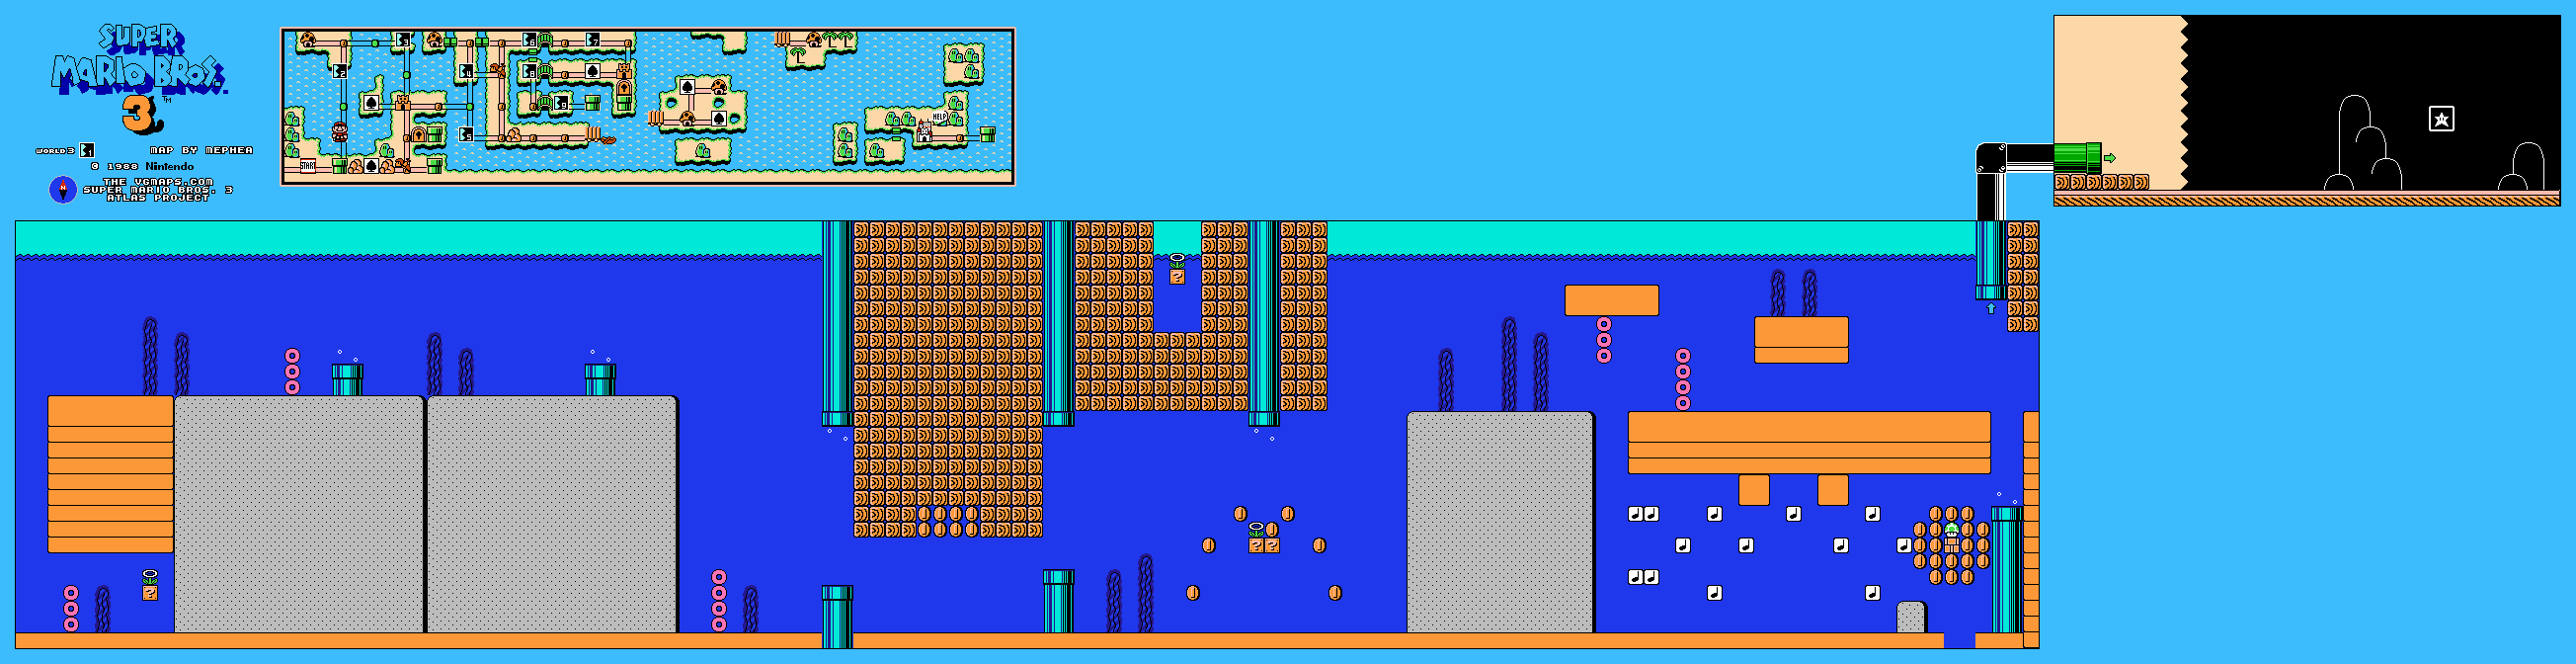
At the start, explore the left-hand drop for a power-up before swimming right. Keep clear of the Bloobers and the flower-like Lava Lotuses’ projectiles. Use the surface route to jump above the pipe for another hidden power-up, or follow the lower underwater passage.
The later room splits again. The upper passage has a Bloober with children; the lower passage uses Note Blocks around a Lava Lotus and leads to a 1-Up surrounded by coins. Approach the Note Blocks gently so they do not bounce you into an enemy. Rejoin the main route, pass the final Bloober and enter the pipe to the goal. Open water below the level boundary is still a fall, not another safe passage.
World 3-2
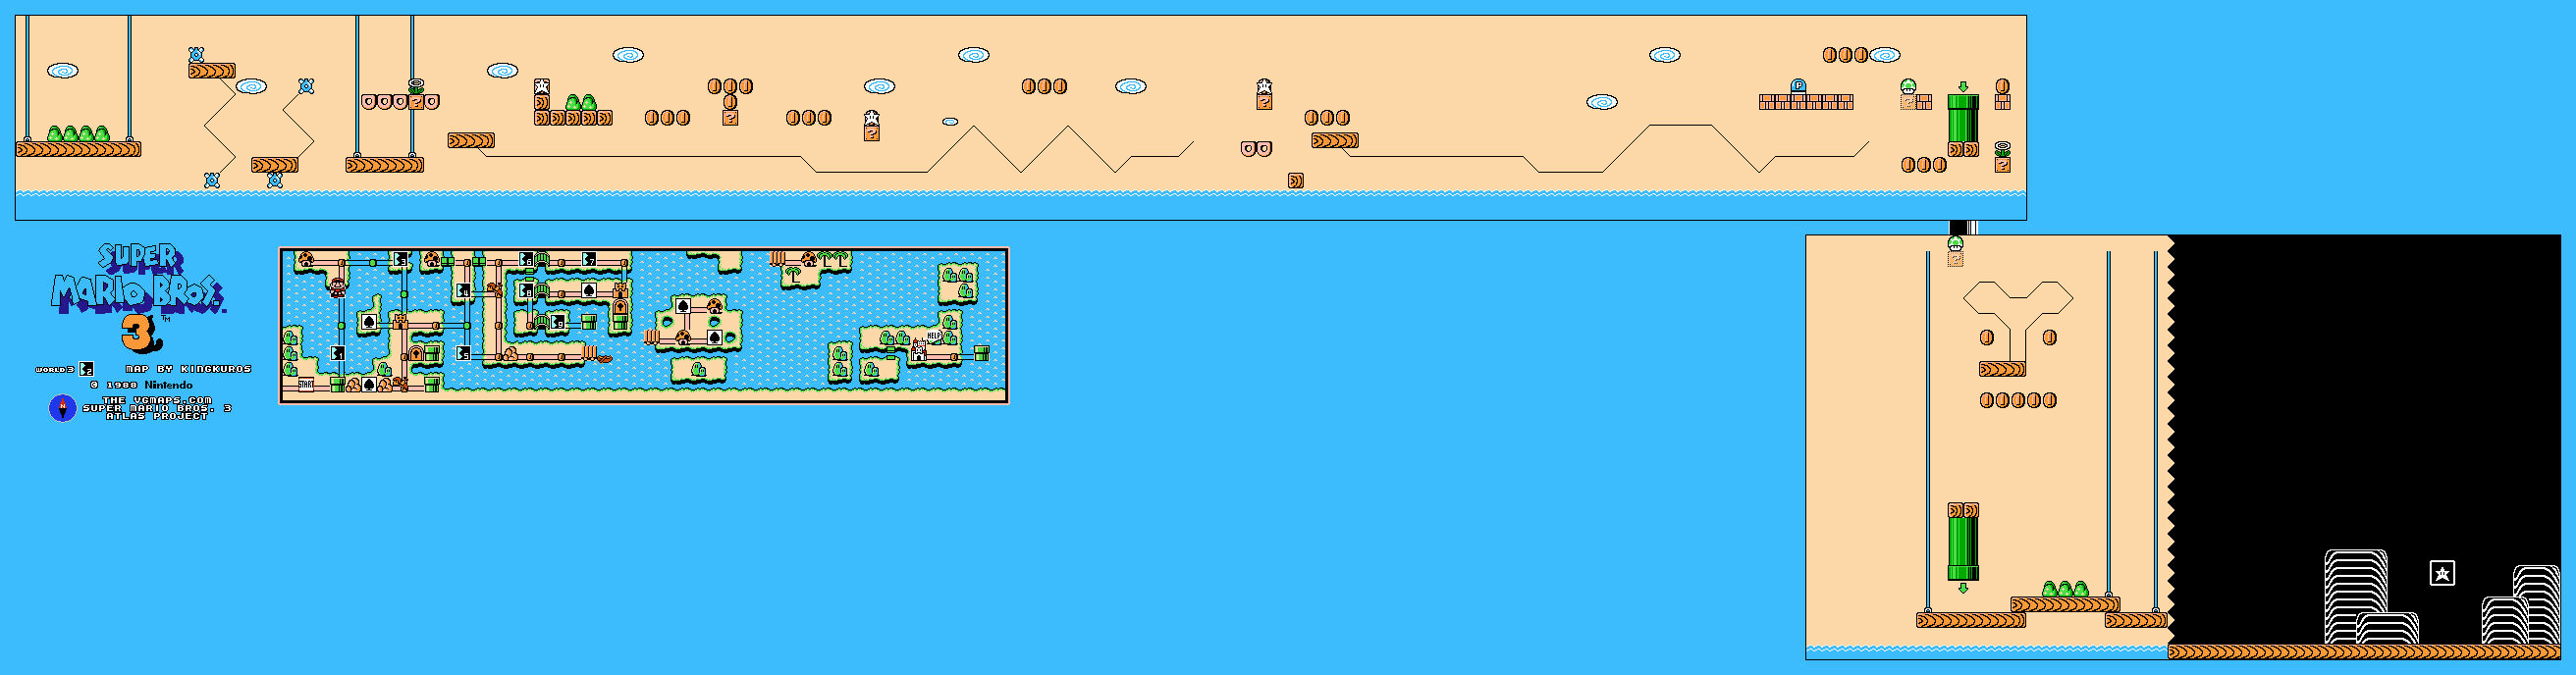
Use the two opening rail lifts and collect the power-up above the Donut Lifts. On the long moving-platform section, bump the middle wooden block of the L-shaped group to begin the Super Star chain. Hit the later star blocks while still invincible to renew the effect. Keep watching the jumping fish even while moving between lifts.
Near the end, the third brick from the left in the overhead group holds a P-Switch. It turns the coins beside the pipe into stepping blocks for a hidden 1-Up. Take the pipe to the short final platform section. With a tail, fly above that pipe to another rail lift and hidden 1-Up; otherwise cross the lower islands and reach the goal.
World 3-3

Boss Bass pursues Mario while the tide changes the height of the usable platforms. Stay on high ground and jump before a rising tide puts your landing within the fish’s reach. Its bite can defeat Mario regardless of his current size, so do not treat a power-up as protection against being swallowed.
Use the P-Switches to create temporary footing from the coin trails. A Super Leaf helps with landing control, while fireballs can remove Boss Bass temporarily. The exit pipe appears near the right end; continue beyond it only if you want the 1-Up in the brick on the extra platform. Return to the pipe afterward to reach the goal.
Fortress 1
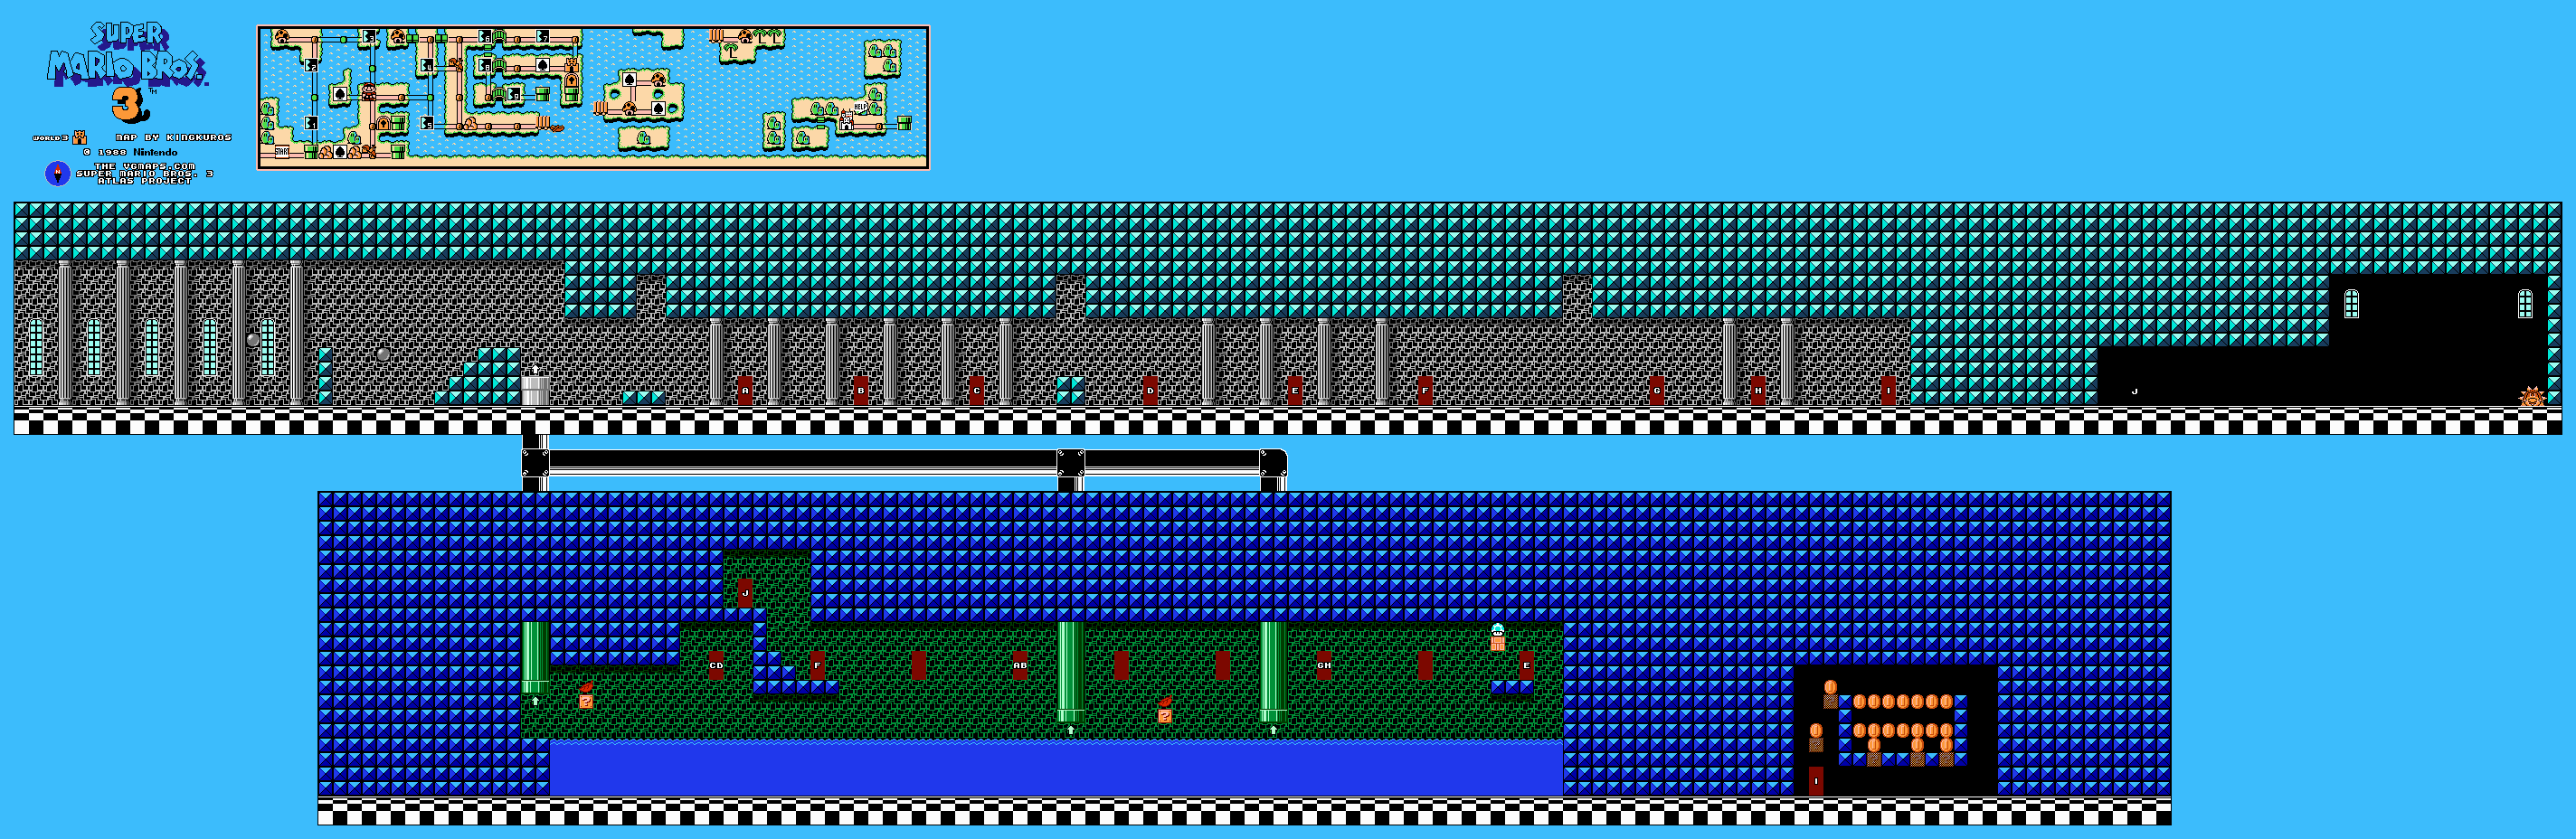
Cross the first Roto-Discs and approach the nine doors in the main hall. Numbering from left to right, door six leads to the raised lower-floor route and the next door to Boom Boom. Most other choices drop Mario into the flooded basement, whose pipes return to the upper hall.
For optional treasure, door four reaches the platform with a 1-Up block. Door nine reaches the enclosed coin room; reveal the two hidden blocks above its doorway to climb inside. Keep the nearby Boos in view and bait Thwomps before crossing. Boom Boom grows wings after the first hit, so let him finish a dive before lining up the next stomp. Three hits and the magic ball clear the fortress.
World 3-4

Slide down the opening hills and jump at the slope’s foot to cross the pond. If the jump falls short, reveal the hidden stepping blocks to climb back out. Use the early Leaf or later Fire Flower as needed, then search the block group near the Para-Goombas for the P-Switch and blue coins.
Before Lakitu appears, one brick in the last low group holds a 1-Up. Once the cloud enemy follows you, keep moving and watch where the green Spiny Eggs bounce. Build a proper running start for the first long gap instead of jumping from a standstill. The final power-up pair precedes the slope down to the goal. This course is a map branch; it is not necessary to mistake every visible path for a separate exit.
World 3-5
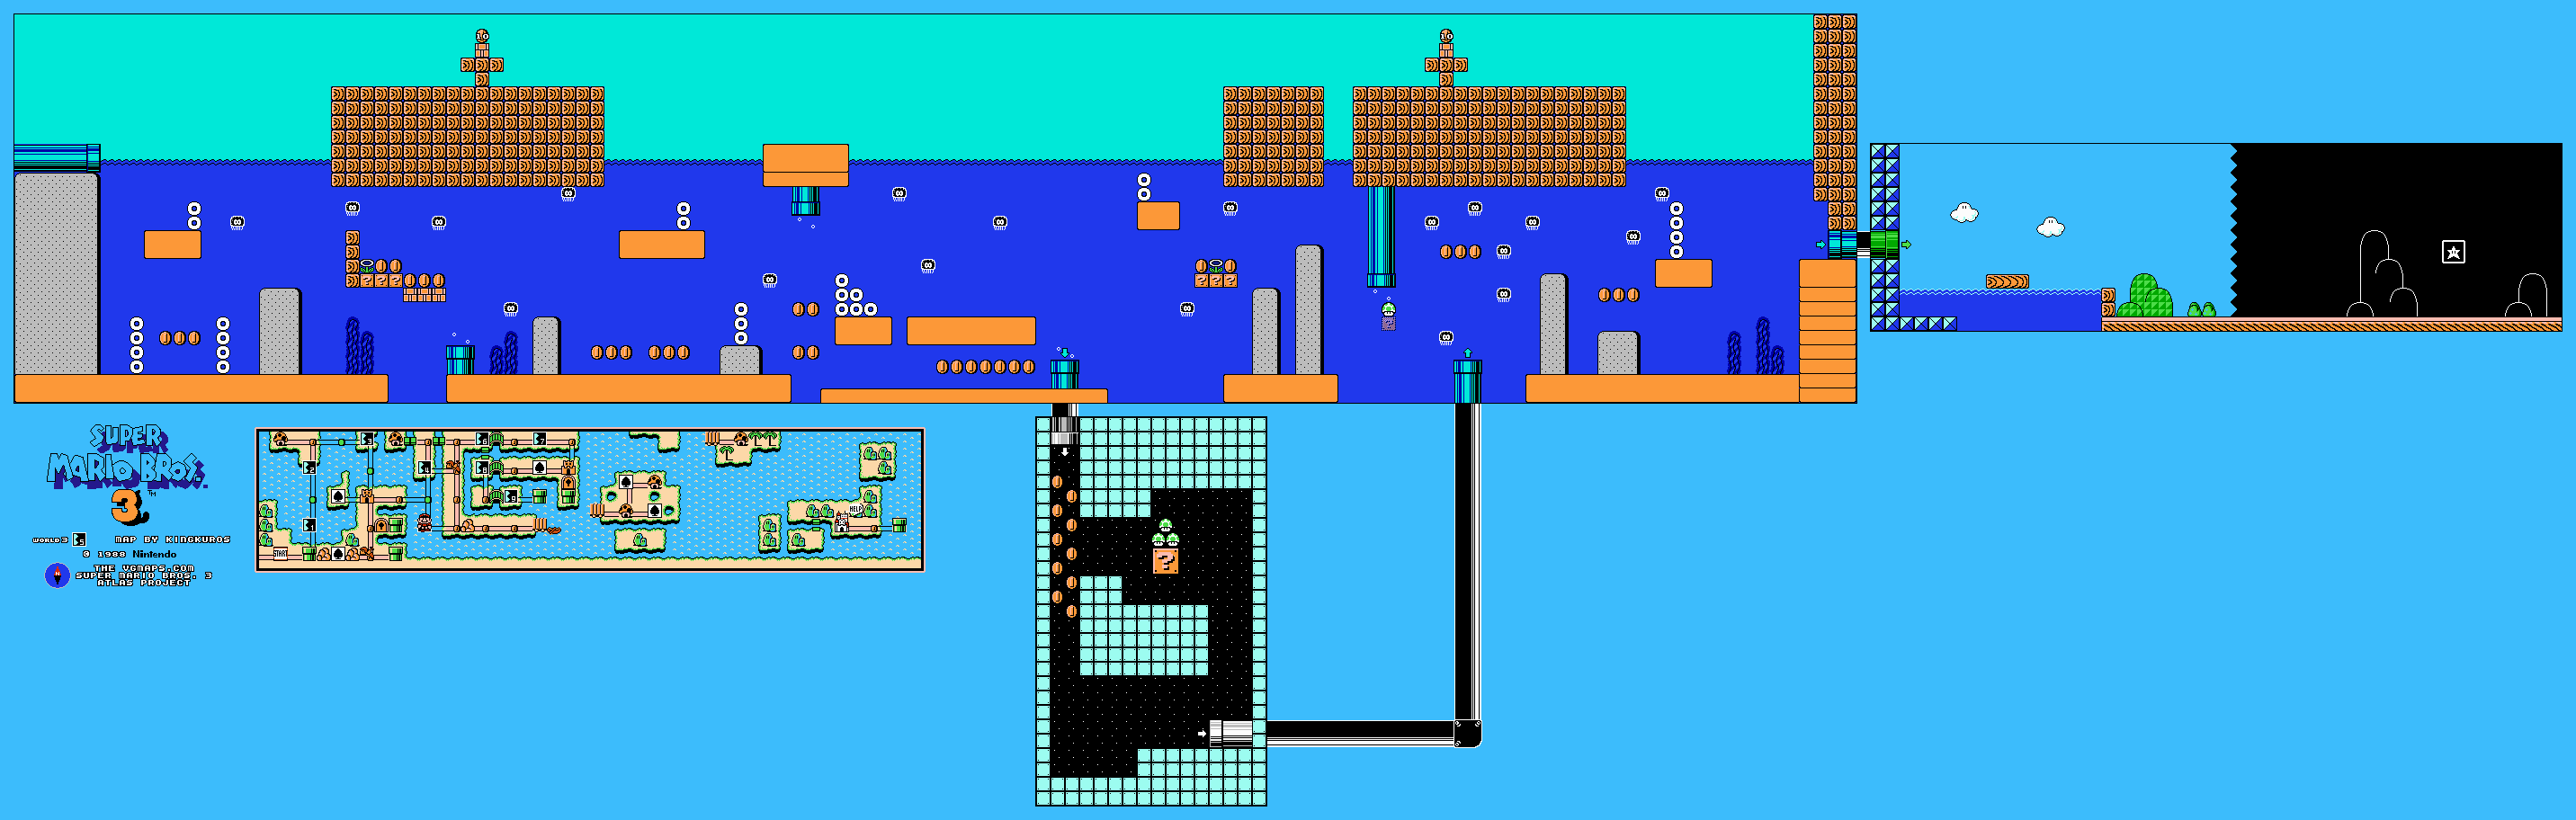
Swim around the Jelectros rather than touching or attacking them. Big Bertha patrols the narrow passages, and the bubble-jet pipes push Mario upward. Take the power-up near the opening blocks and move through the gaps between fish and currents.
If wearing a Frog Suit, push down through the strong current into the secret pipe for three 1-Ups. An ordinary swimming form cannot use that approach reliably. Continue through the second section, where more question blocks supply coins and a power-up. Search for the hidden extra-life block near the later Big Bertha if the area is safe, then enter the exit pipe. The high hard-block route has coin blocks if you arrive with a flight power-up.
World 3-6

The screen scrolls through Donut Lifts and spinning platforms. Step off each Donut Lift before it sinks below the next landing, and wait for a spinning bar to offer a usable angle. Take the early power-up and keep a Koopa shell available for blocks that are hard to reach from below.
In the later platform groups, the brick contains a 1-Up and another contains a P-Switch. Collect the temporary coins only if they do not pull you behind the scroll. Pass the final Paratroopa, use the last rotary platform and enter the pipe. A remaining Paratroopa waits between Mario and the goal. The map’s drawbridge can alter whether you reach 3-8 directly or continue through 3-7 and its fortress.
World 3-7
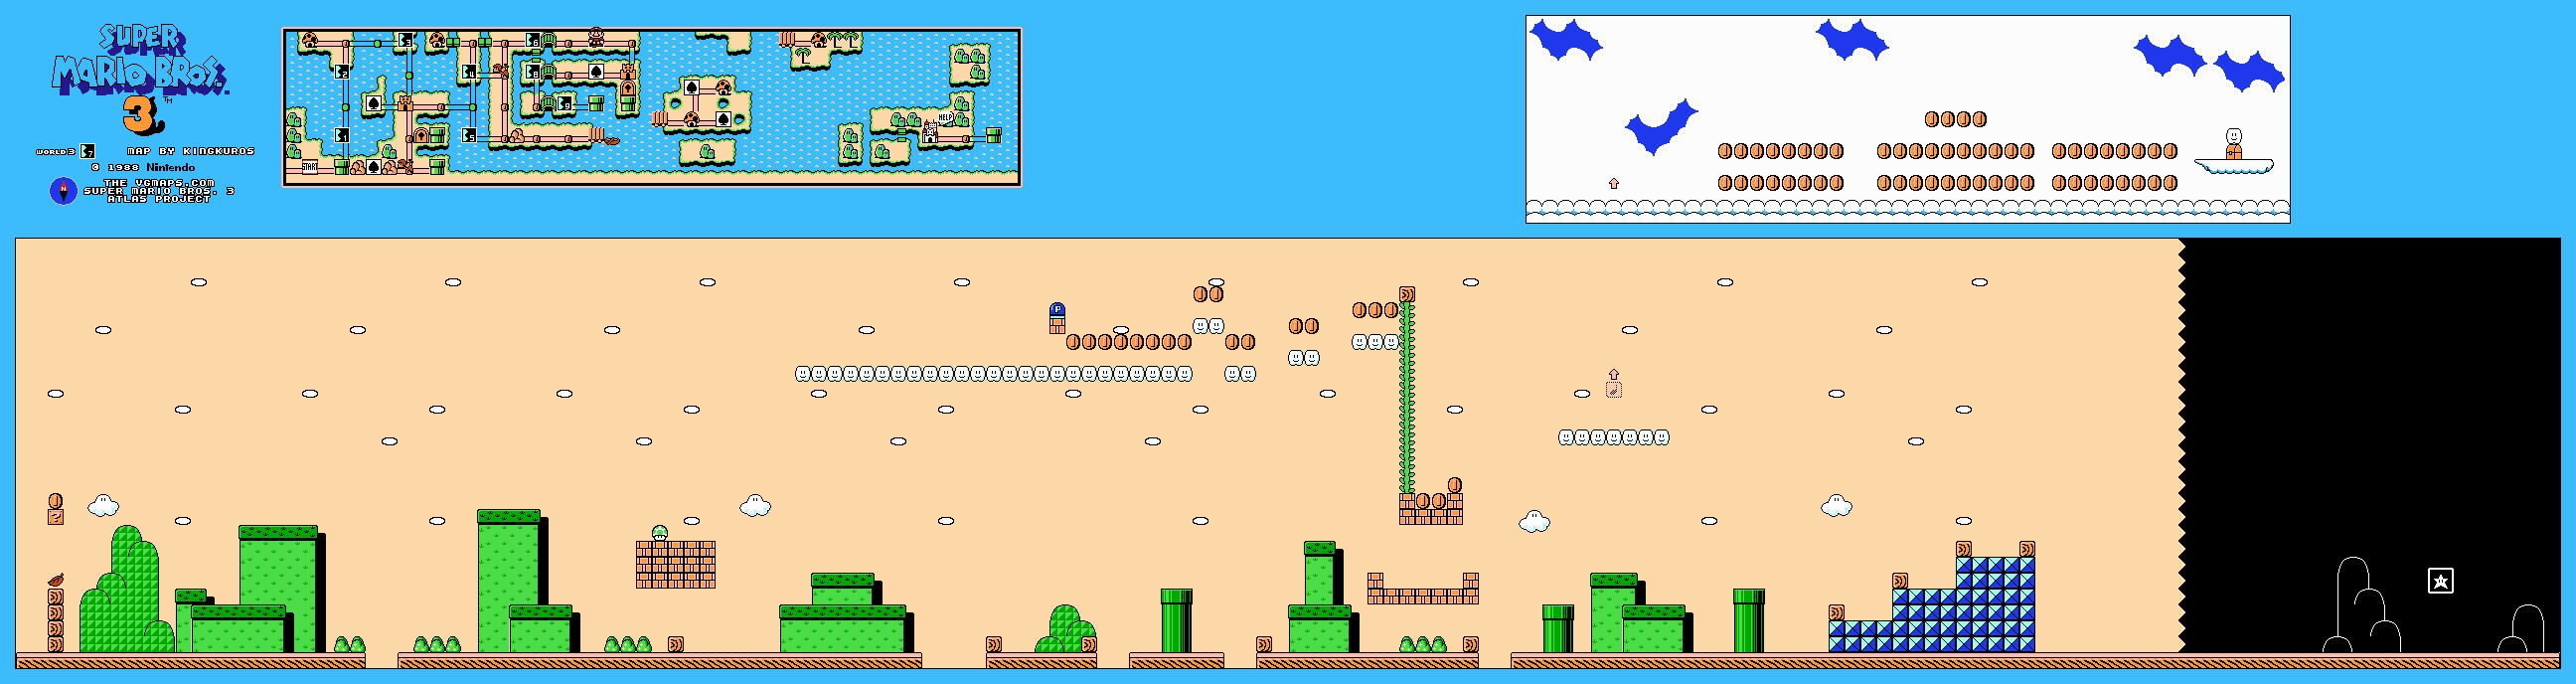
Watch the Spikes’ thrown balls and jump only after the next landing is clear. Take the opening wooden-block power-up and search the early brick rectangle for a 1-Up. Use a shell or a powered-up Mario to reach and reveal the middle vine.
Above the vine, the left cloud branch offers coins and a P-Switch. The right branch contains a hidden pink Magic Note Block leading to Coin Heaven and a chest with a Jugem’s Cloud at its end. Opening that chest finishes the stage through its bonus route. For the ordinary goal, return along the main level and pass the remaining Spikes, plant and Paratroopa. This is one of the stages where the special-item finish and normal card finish are alternatives.
Fortress 2
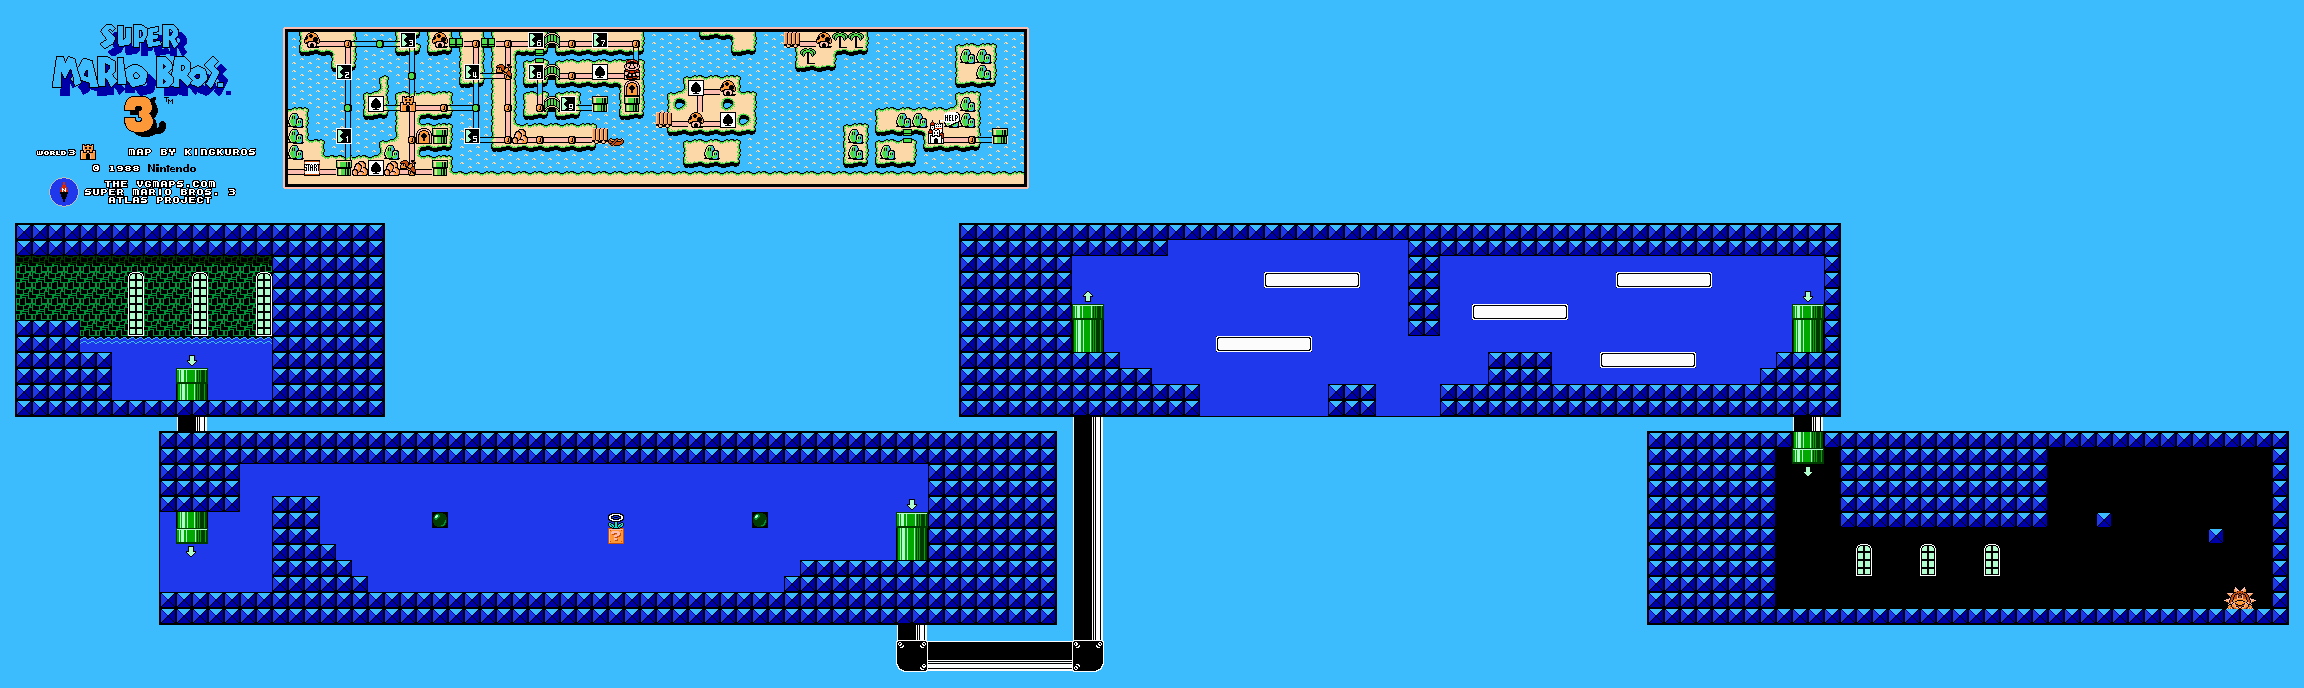
Enter the submerged fortress and swim past the first Roto-Disc and Cheep-Cheeps. The question block between the fish is the only power-up block here. Stay above or below the second disc’s orbit as the nearby fish crosses; squeezing between both without waiting is unnecessary risk.
The next pipe leads to corridors lined with Stretches. These ghosts rise from the tops and bottoms of their platforms. Wait for an opening and swim through the clear side instead of trying to stomp them underwater. The final pipe reaches Boom Boom. He flies after the first hit, so dodge his movement and stomp when his head is exposed. Three hits clear the route to 3-8.
World 3-8

Boss Bass returns and the tide shifts quickly. Reveal the vines from the low bricks so you have safe high perches. Use the Koopa shell or a tail swipe on the early left brick for the first vine, then take the multi-coin block in the next raised section. Later vines provide further escapes from the rising water.
For the White Mushroom House, collect at least forty-four coins during this run. Combine ordinary coins, the multi-coin block and the later P-Switch route instead of relying only on the last switch. The switch is under the low-roofed structure near the floating lift. The brick stack above it has another 1-Up. Enter the pipe and cross the final bridge to the goal; the reward house contains a P-Wing.
World 3-9
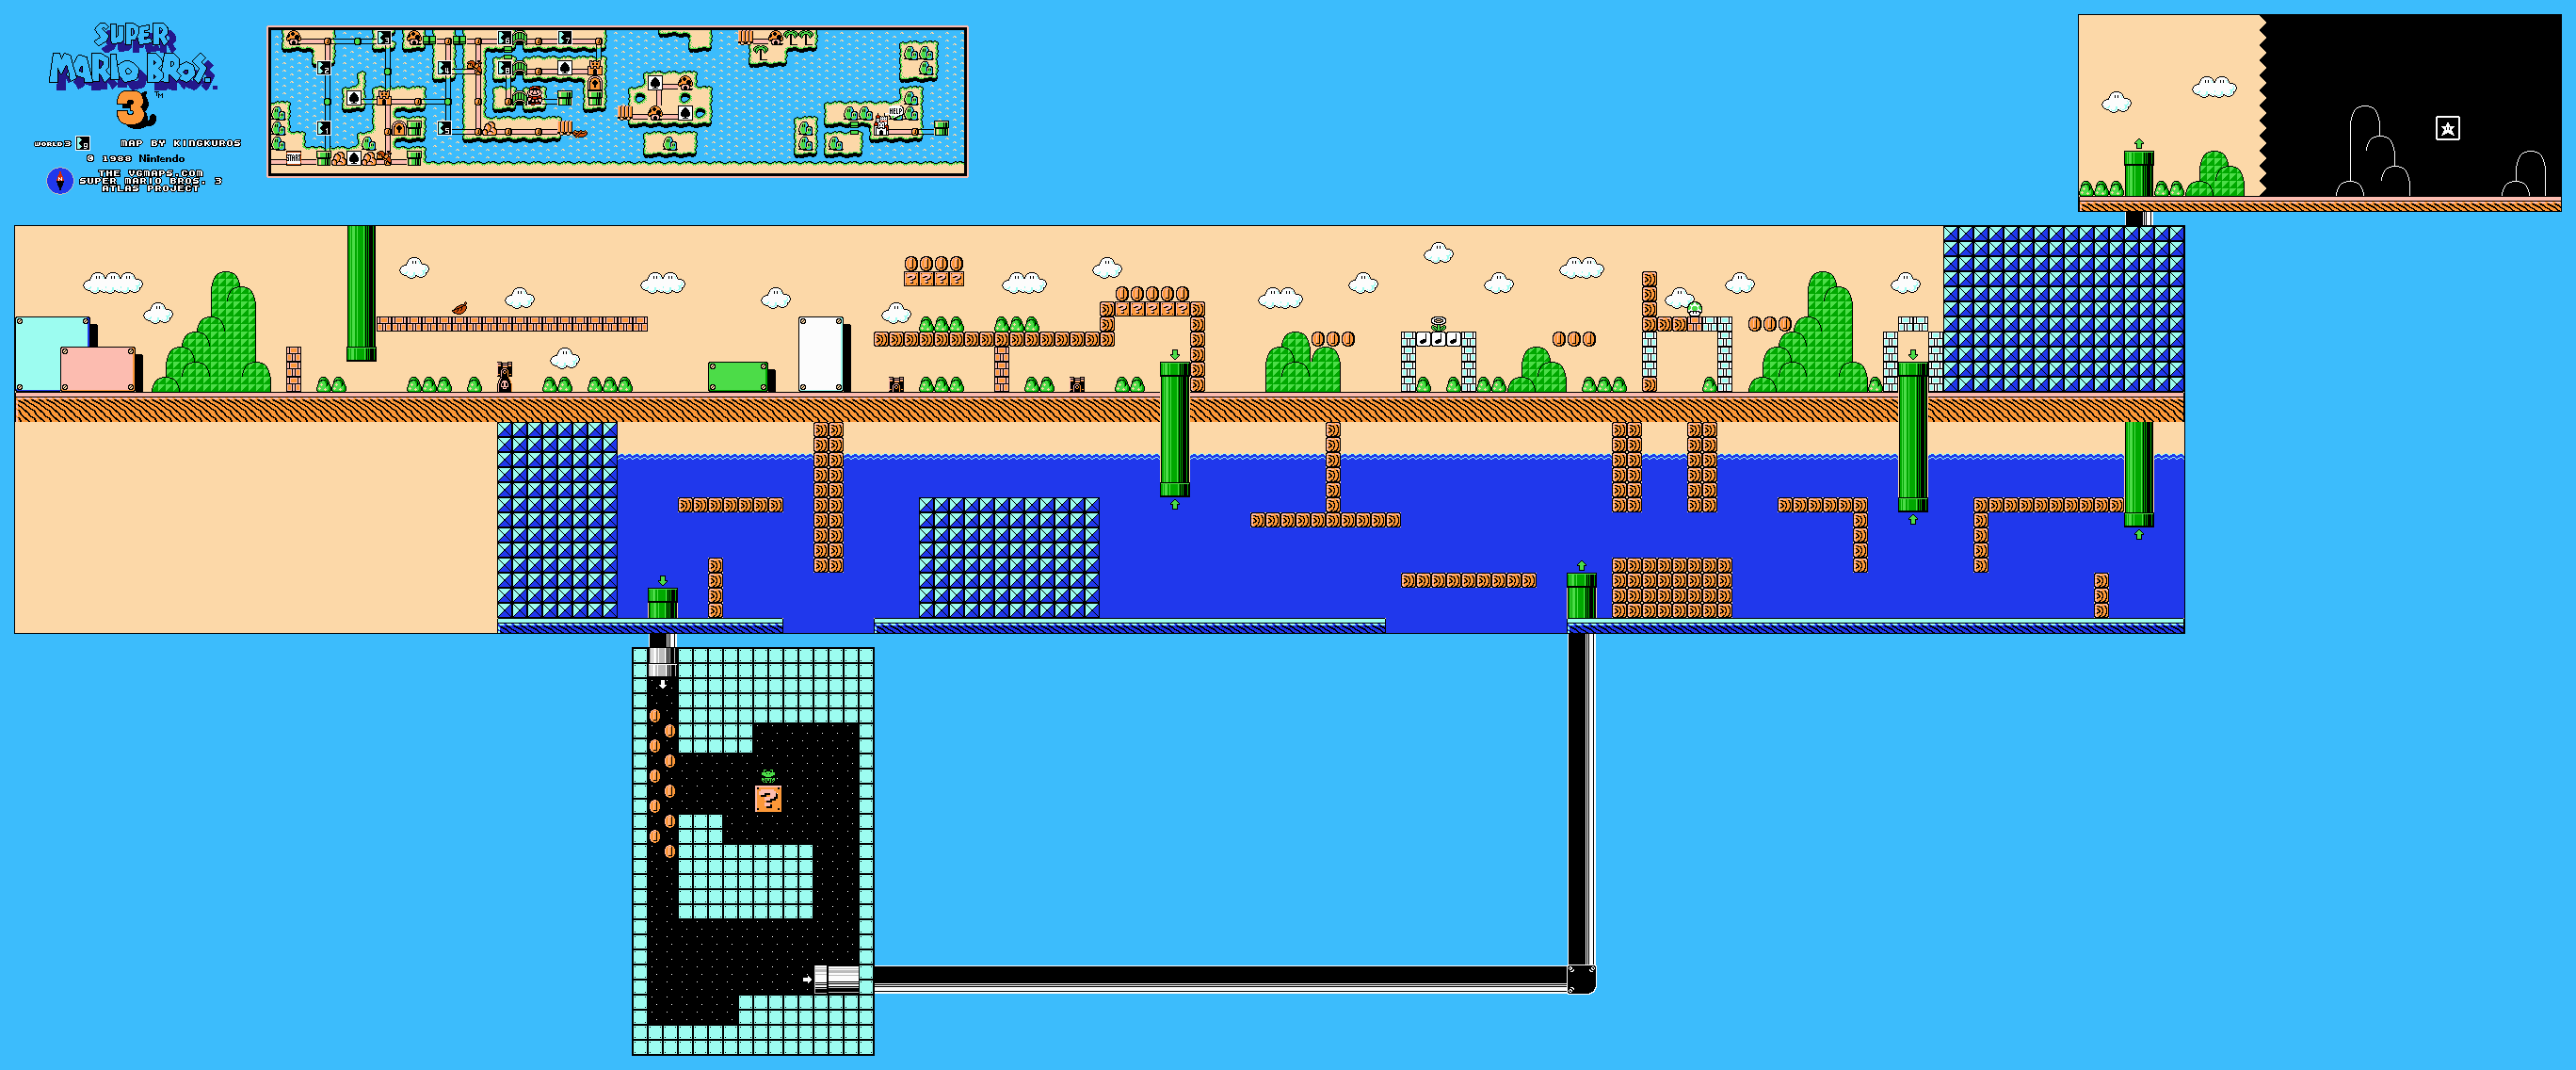
Cross the upper ground past the Paratroopas, block piles, cannons and Bob-ombs. A tail lets you break the low brick wall beneath the wooden blocks and enter the early pipe. Without that detour, continue right to the later pipe.
Both reach the underwater section, but at different positions. Explore left for the bonus room containing a Frog Suit; the right-hand route reaches the goal pipe. Watch the Cheep-Cheeps while changing height and do not mistake the bonus entrance for the exit. Back on the map, clear any desired remaining branches before boarding Wendy’s airship.
Airship — Wendy O. Koopa
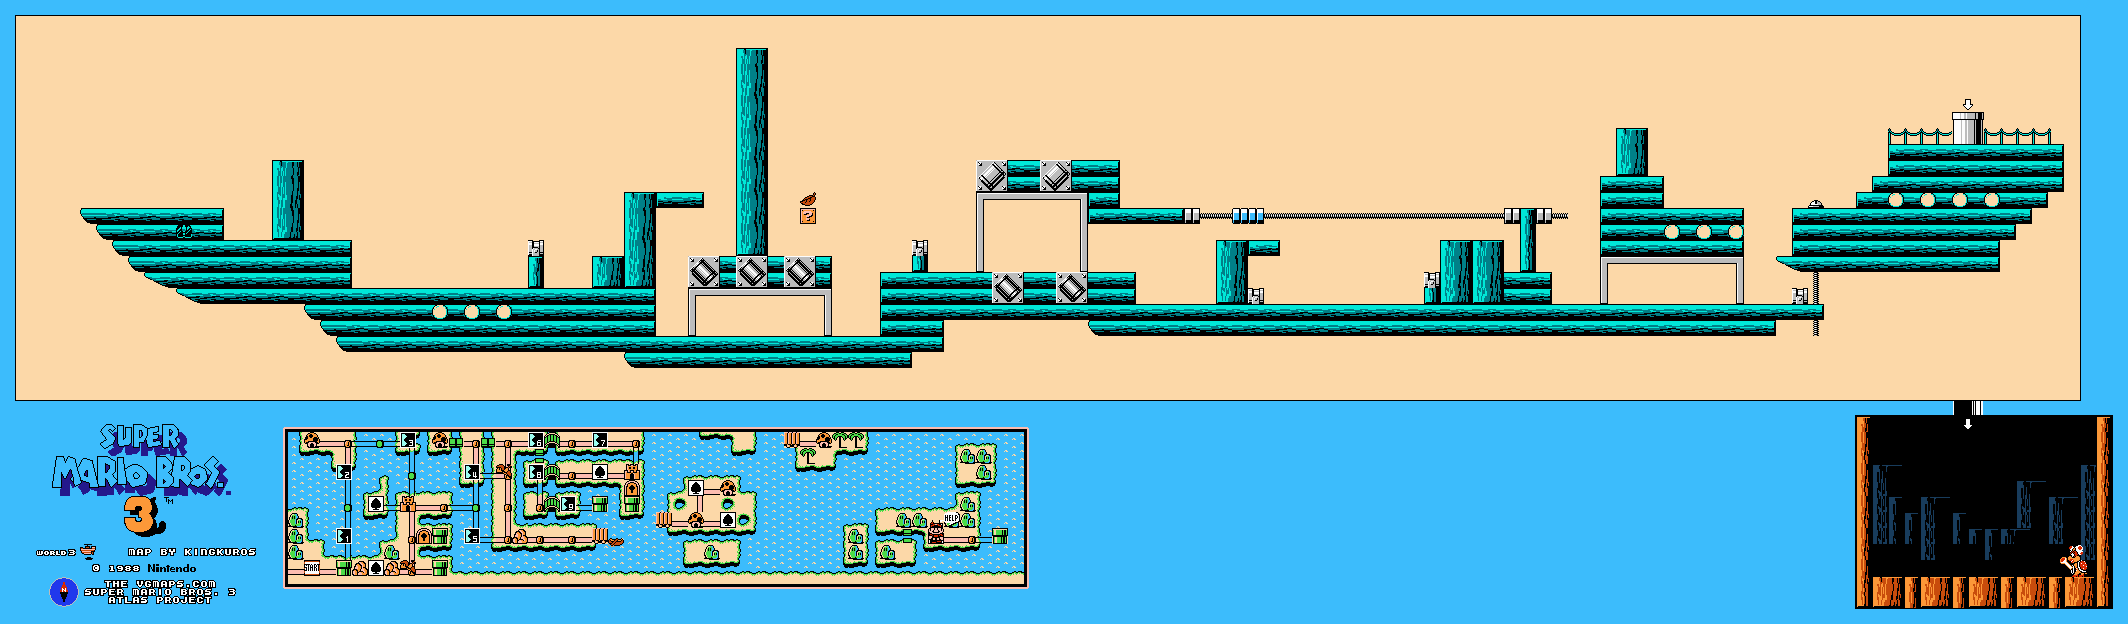
Cross the first cannon groups and Rocky Wrenches, taking the early power-up when the deck is clear. Use the Bolt Lift to travel over the pair of downward-route engines. Keep away from their flame tips and continue across the next deck to another power-up and the boss pipe.
Wendy’s rings bounce around the arena instead of disappearing at the wall. Keep track of the older rings before jumping over a new one. Stomp her, avoid the protected shell interval and repeat until the third hit. Move only as far as needed to line up a safe landing; uncontrolled jumps can carry Mario into a returning ring. Take the wand to open Giant Land.
World-map notes
Drawbridges change which branches are connected after a course. Clear 3-7 and the second fortress for the full route even if a lowered bridge lets you bypass them. A map Hammer can open the rock-blocked boat route to the small islands and extra Toad Houses. Use a Frog Suit on the intended underwater detours before spending it elsewhere.
Continue the walkthrough
Previous world: Desert Land · Walkthrough overview · Next world: Giant Land
Warp Whistles · White Mushroom Houses · Items and bonus games