

World 6 — Ice Land. Control momentum on the ice and keep the appropriate power-up for each puzzle. The shell-flight exit in 6-5 and frozen coins in 6-7 need different preparations.
Courses in this world
- World 6-1
- World 6-2
- World 6-3
- Fortress 1
- World 6-4
- World 6-5
- World 6-6
- World 6-7
- Fortress 2
- World 6-8
- World 6-9
- World 6-10
- Fortress 3
- Airship — Lemmy Koopa
World 6-1
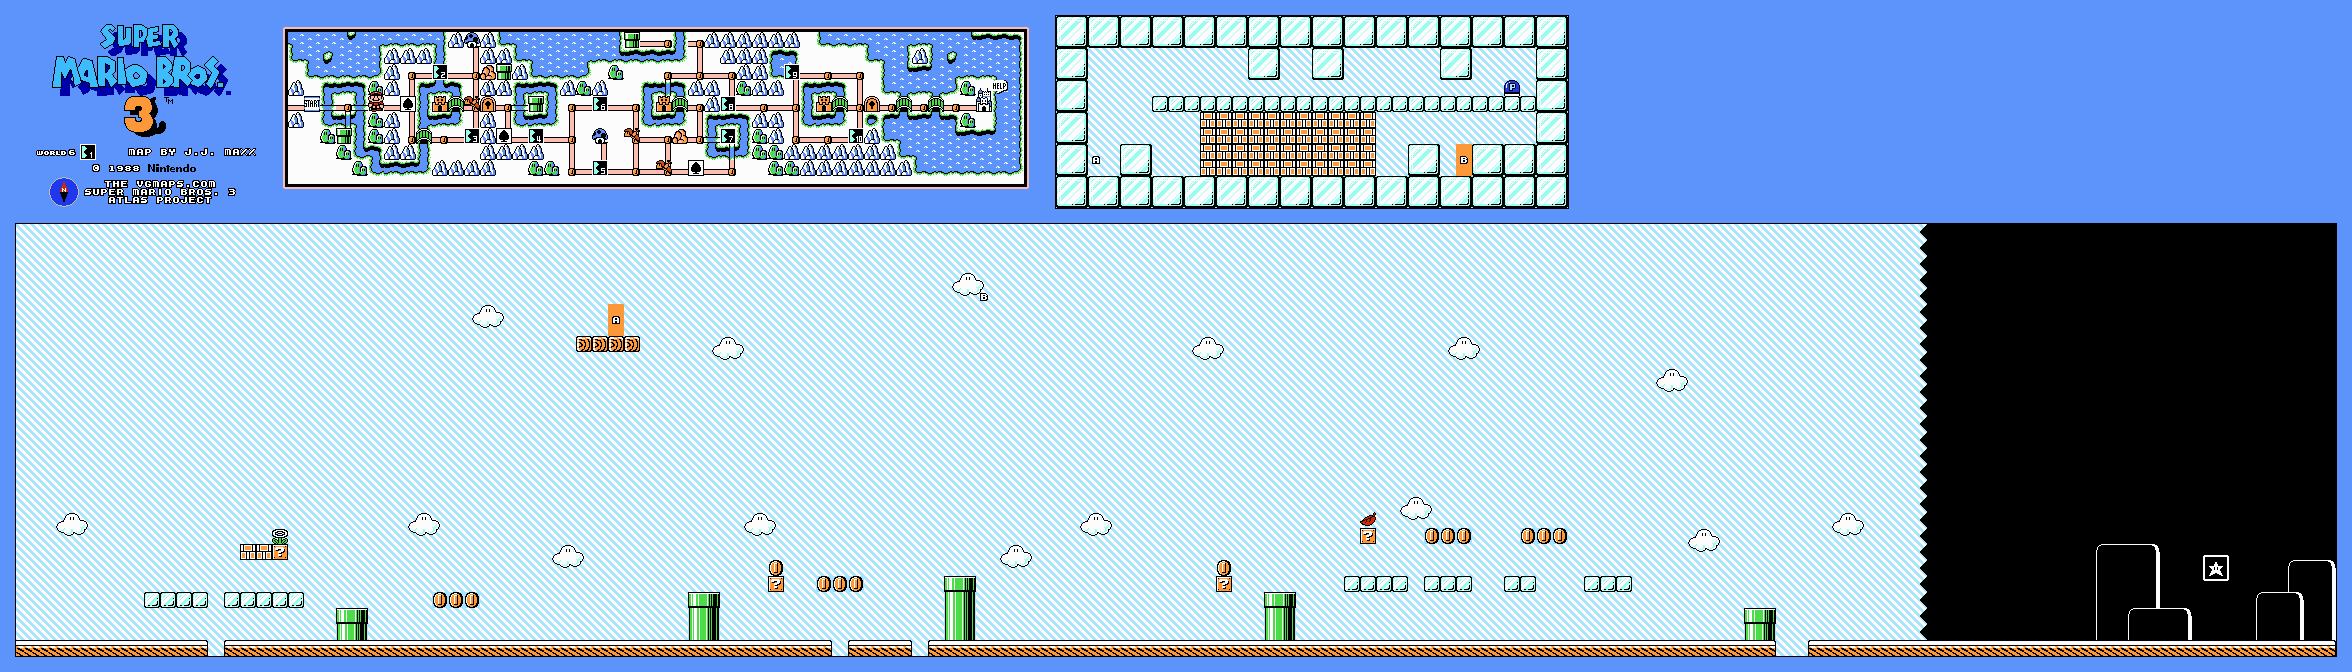
The opening power-up offers Fire Mario for clearing Ptooies, but their spiked balls remain a reason to give them space. Brake before each icy edge and wait for the ball to rise before passing its owner. Keep the high ice platforms available as a route around the ground enemies.
With a tail, fly to the door above the opening pair of pipes. Its ice room contains a P-Switch that changes the blocking bricks and opens the coin route to the other door. Return below and continue through the remaining Ptooies and Para-Goomba. The late Leaf block can restore flight for the next stages. Do not slide at full speed into a plant simply because the floor looks continuous.
World 6-2
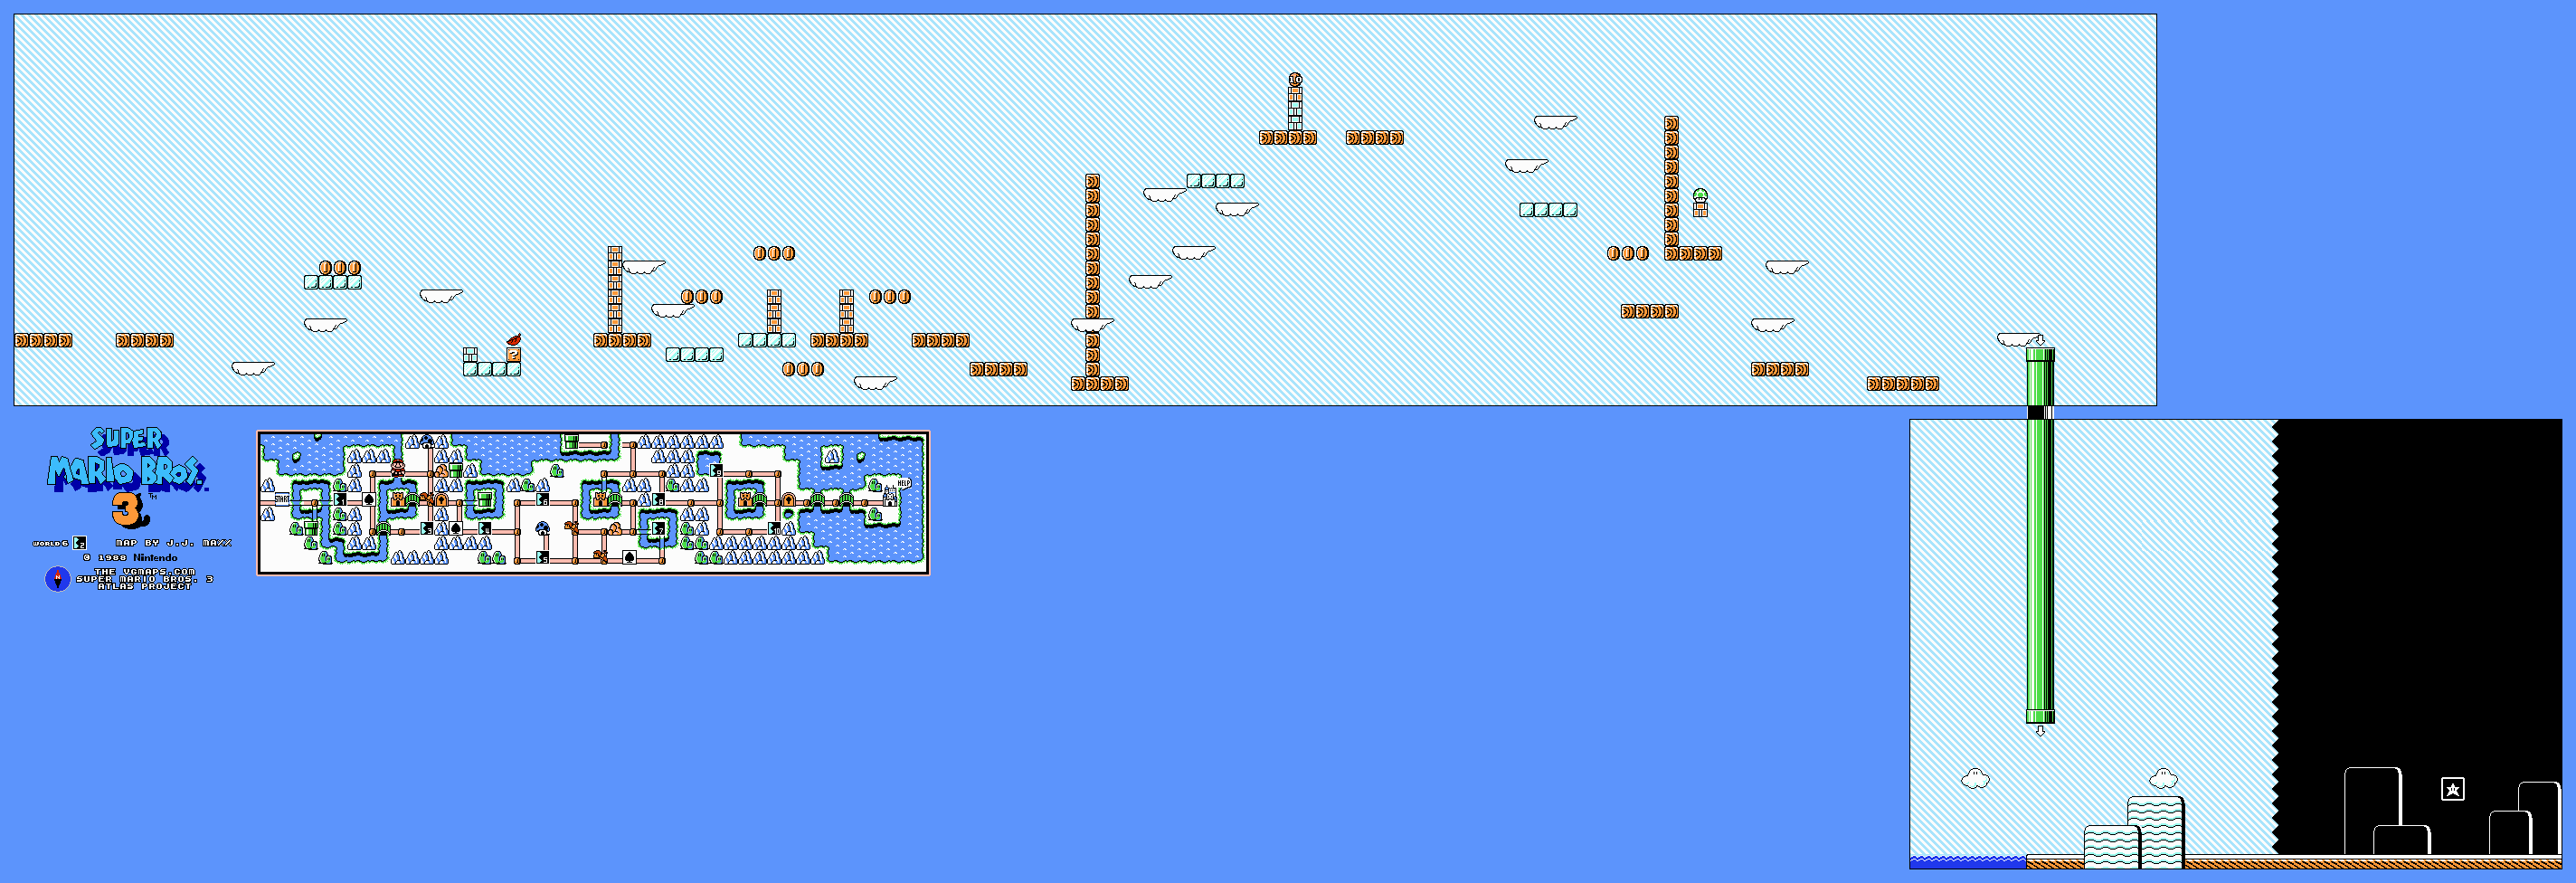
This autoscroller relies on moving cloud platforms. Step from the first ice islands onto a cloud and ride high enough to pass the brick column. Keep the white block and early power-up area behind you only after the next cloud is ready.
Use the rising cloud route to clear the tall solid wall, then land on the ice platform beyond. Hit the multi-coin block between the later white blocks while the scrolling leaves room, and collect the 1-Up in the brick near the exit if the landing is safe. Take the final pipe. The extra hidden stepping block and two additional end-area 1-Ups in the GBA remake are not part of this NES map.
World 6-3
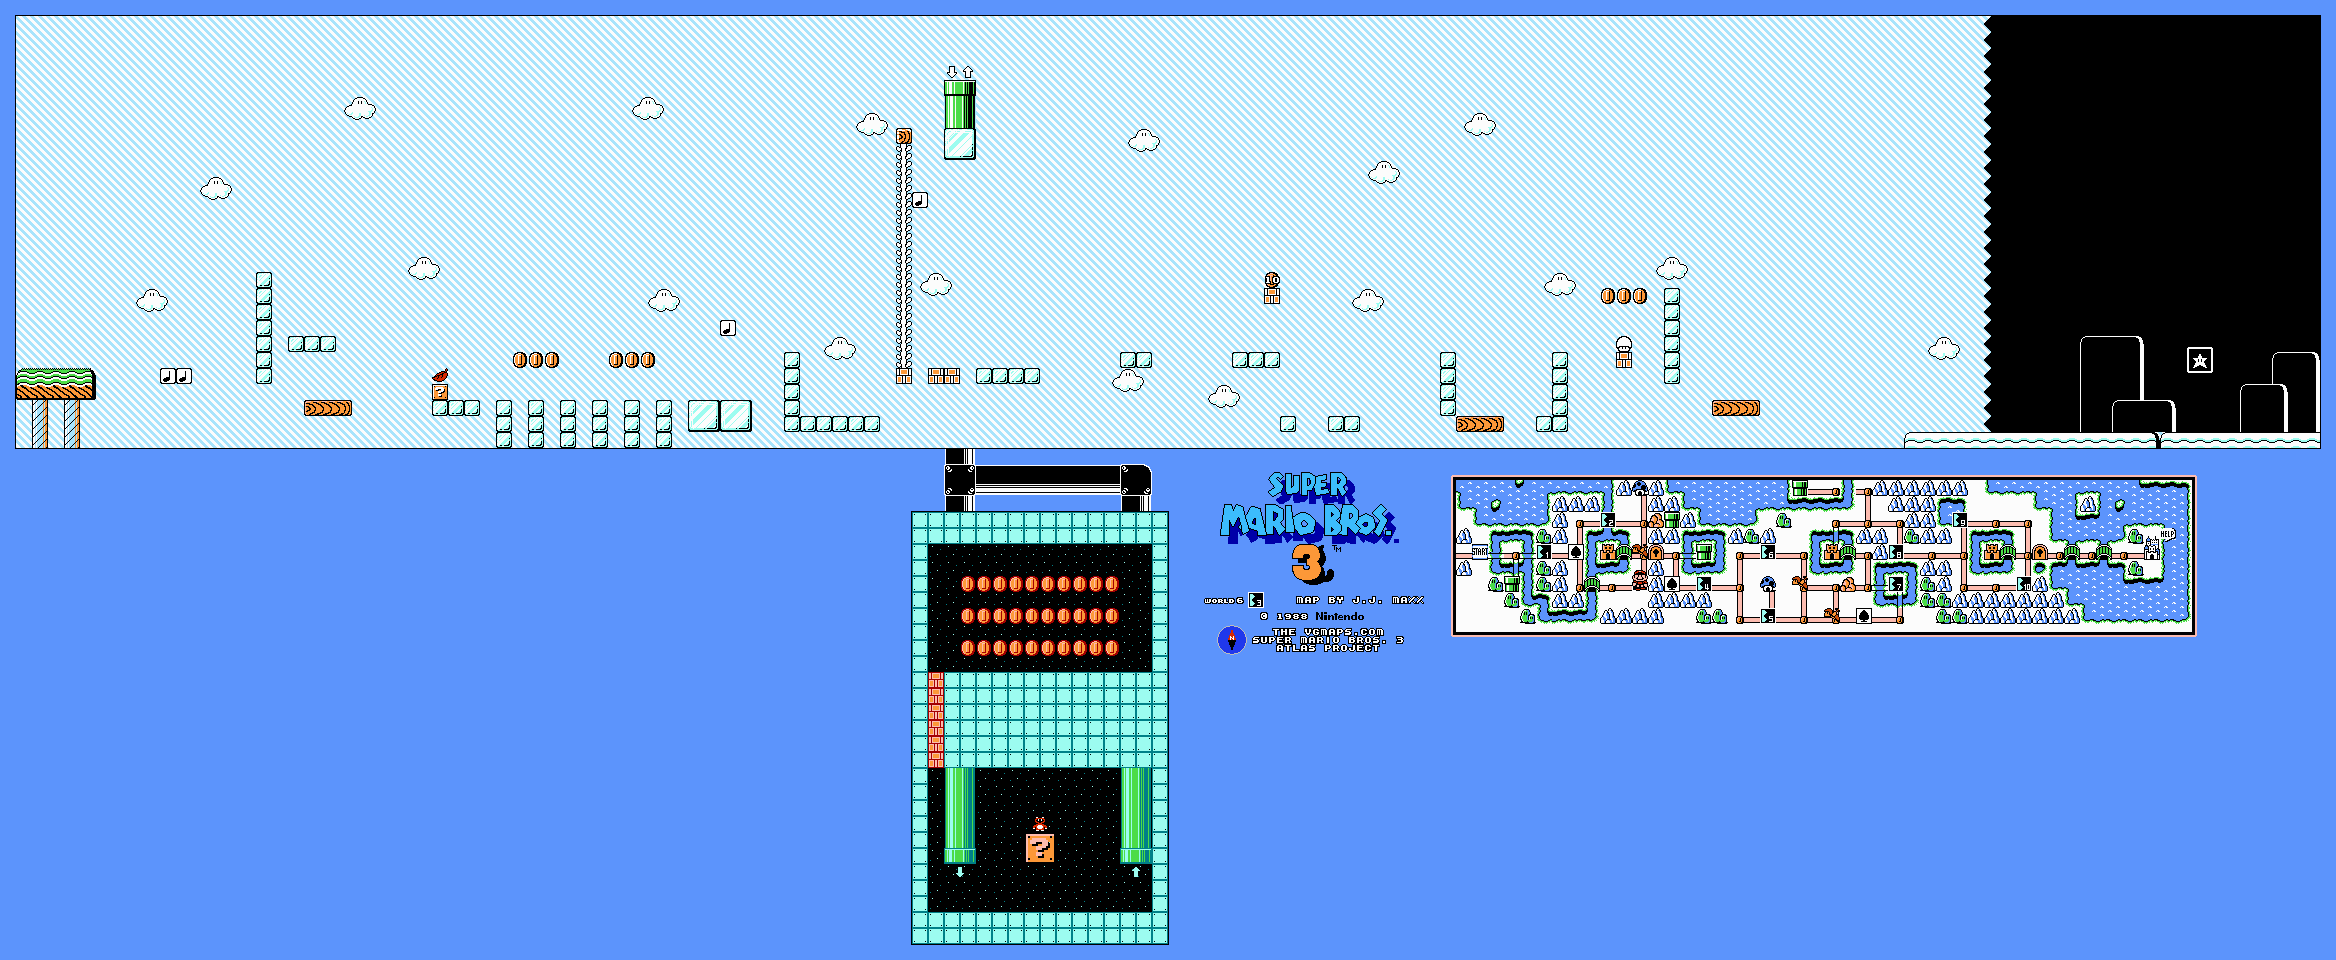
Bounce from the opening Note Blocks to the moving lift and take the Super Leaf. Cross the separated ice rows while controlling Mario’s sliding momentum. The brick group beyond the first stretch contains a vine to a secret room with coins and a Tanooki Suit.
Back on the main route, watch the Paratroopas over the gaps and reveal the hidden 1-Up above the later platform section. A tail helps collect it without losing the moving lift underneath. Transfer to the last lift and cross to the goal. Keep in mind that Tanooki Mario can turn into a statue, while ordinary Raccoon Mario only has the tail and flight abilities.
Fortress 1
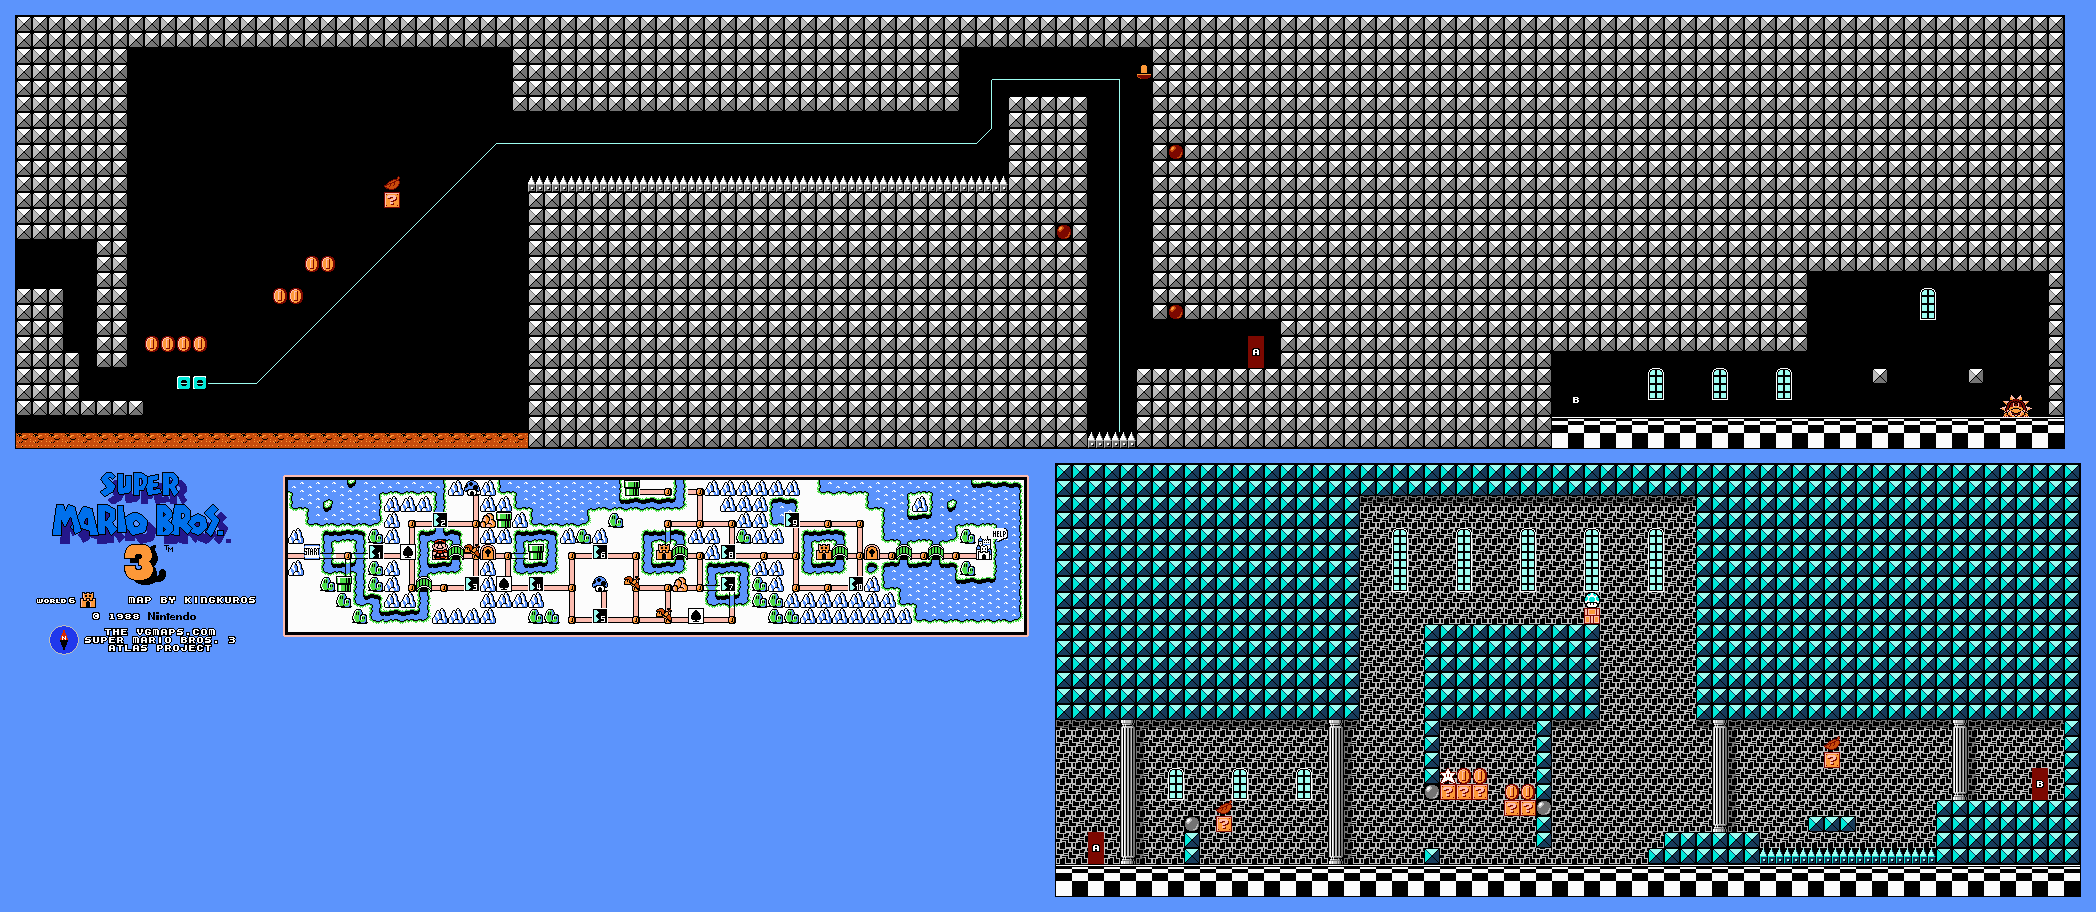
Stay with the opening lift and collect the Super Leaf quickly enough to keep your transport. Pass the Roto-Discs and lava bubbles before entering the first door. The next room supplies another Leaf and a Super Star among its rotating hazards.
If you retain flight, build speed and rise toward the ceiling for the brick containing a 1-Up. Otherwise follow the floor route, waiting for a safe gap between the Roto-Discs. Reach the second door and defeat Boom Boom. A Tanooki statue can provide a temporary defensive option against some hazards, but the standard route does not require arriving with that rare suit.
World 6-4
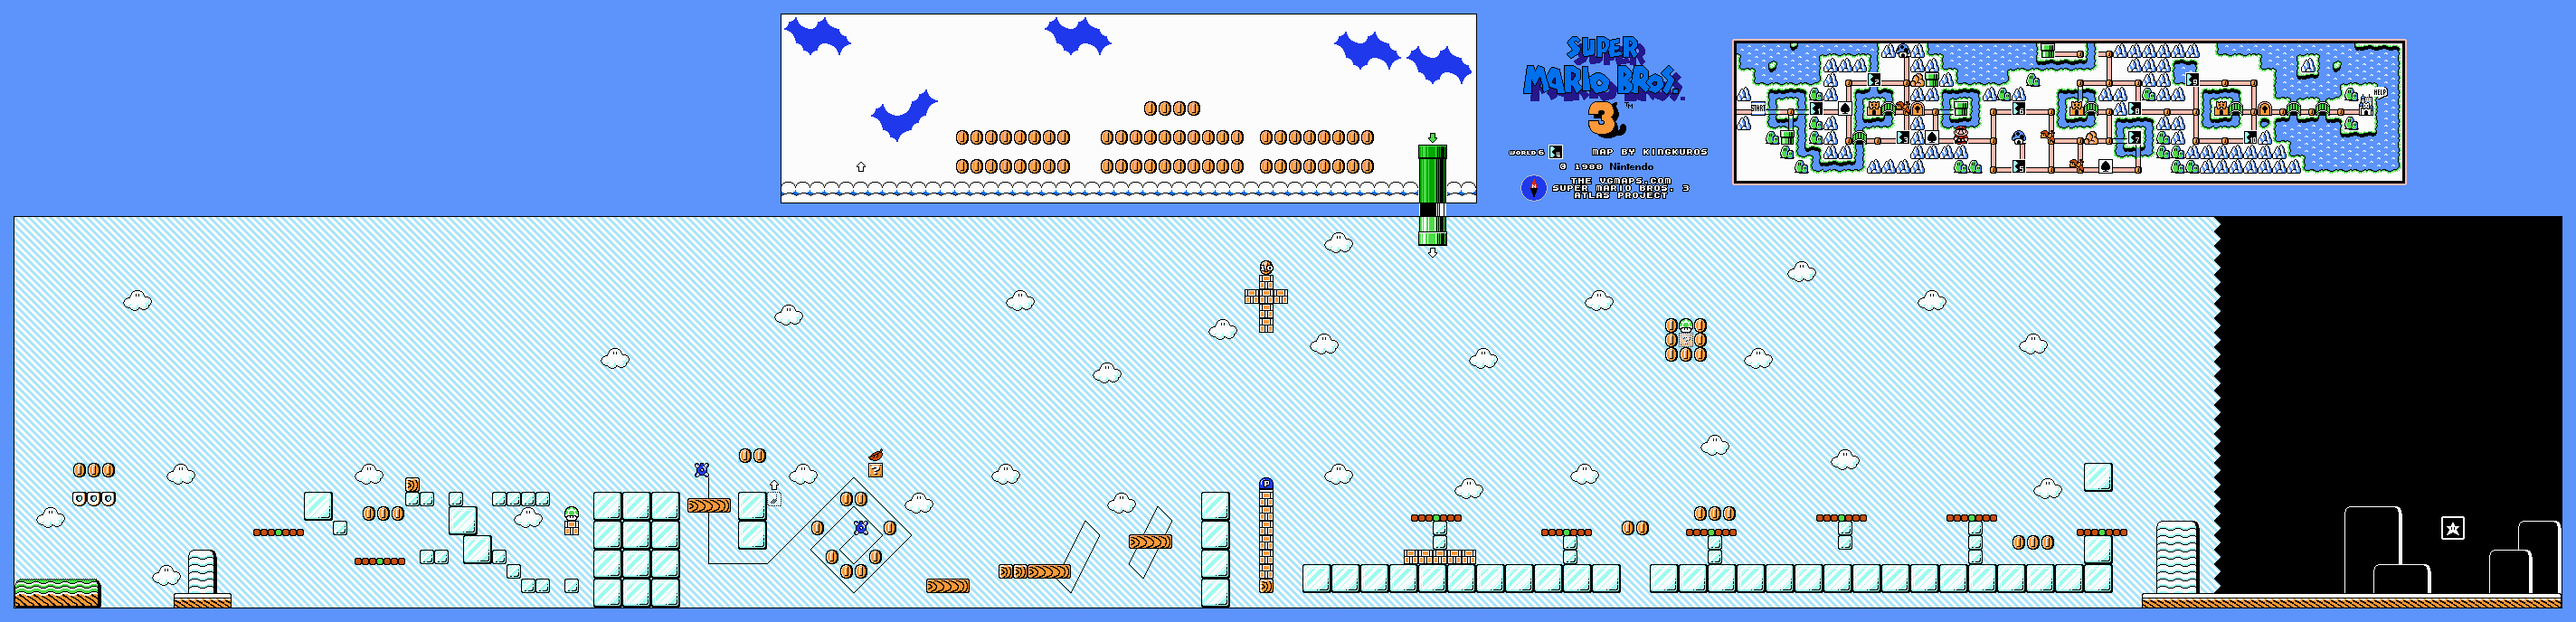
Jump from the initial Donut Lifts and ice blocks to the Rotary Lifts. The first larger ice structure contains Goombas and a brick with a 1-Up. Cross the next moving lifts and take the Leaf block before searching for the hidden pink Note Block and its Coin Heaven detour.
The later P-Switch stands above a brick column. Take its coin opportunity only after confirming the next landing. Continue across the ice pillars and rotary platforms while the Fire Chomp follows you. A second hidden 1-Up lies high above the late platform route. Glide down toward a safe block rather than landing on a rotating bar’s low end, then reach the goal.
World 6-5
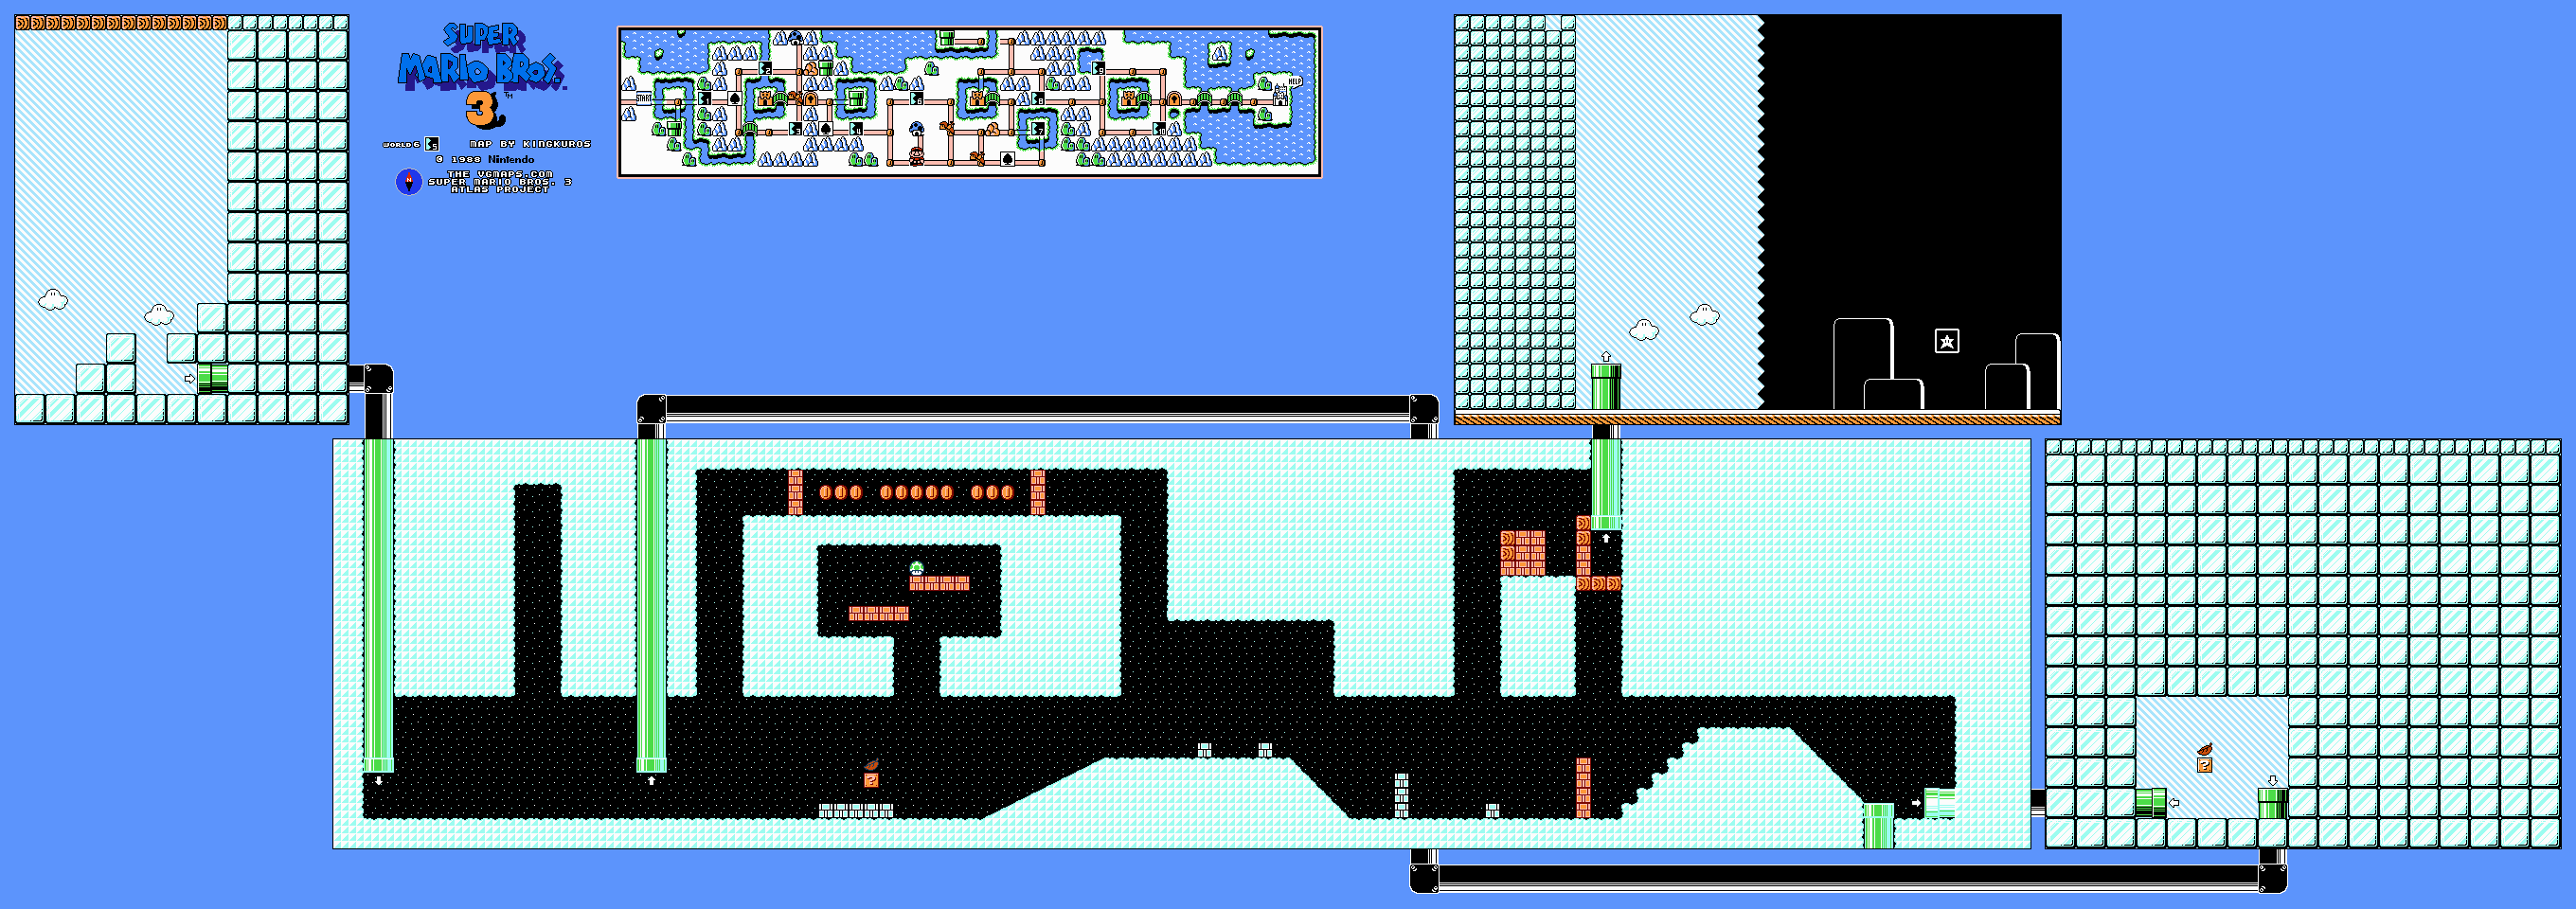
The pipes initially loop through the same cave and Leaf supply room. Do not keep taking the obvious ground-level exit expecting it to finish the course. You need a flight power-up to reach the high exit shaft.
Stomp a Koopa, hold its shell and clear a runway on the cave floor. Run until the P-Meter fills, then fly upward while carrying the shell. At the high chamber blocked by Nipper Plants and bricks, release the shell to clear the obstruction. Enter the exposed pipe for the goal. If the shell is lost, return to the lower route and prepare another attempt. The side ceiling openings contain optional coins and extra lives, while the plant-and-brick exit is the route that actually ends the loop.
World 6-6
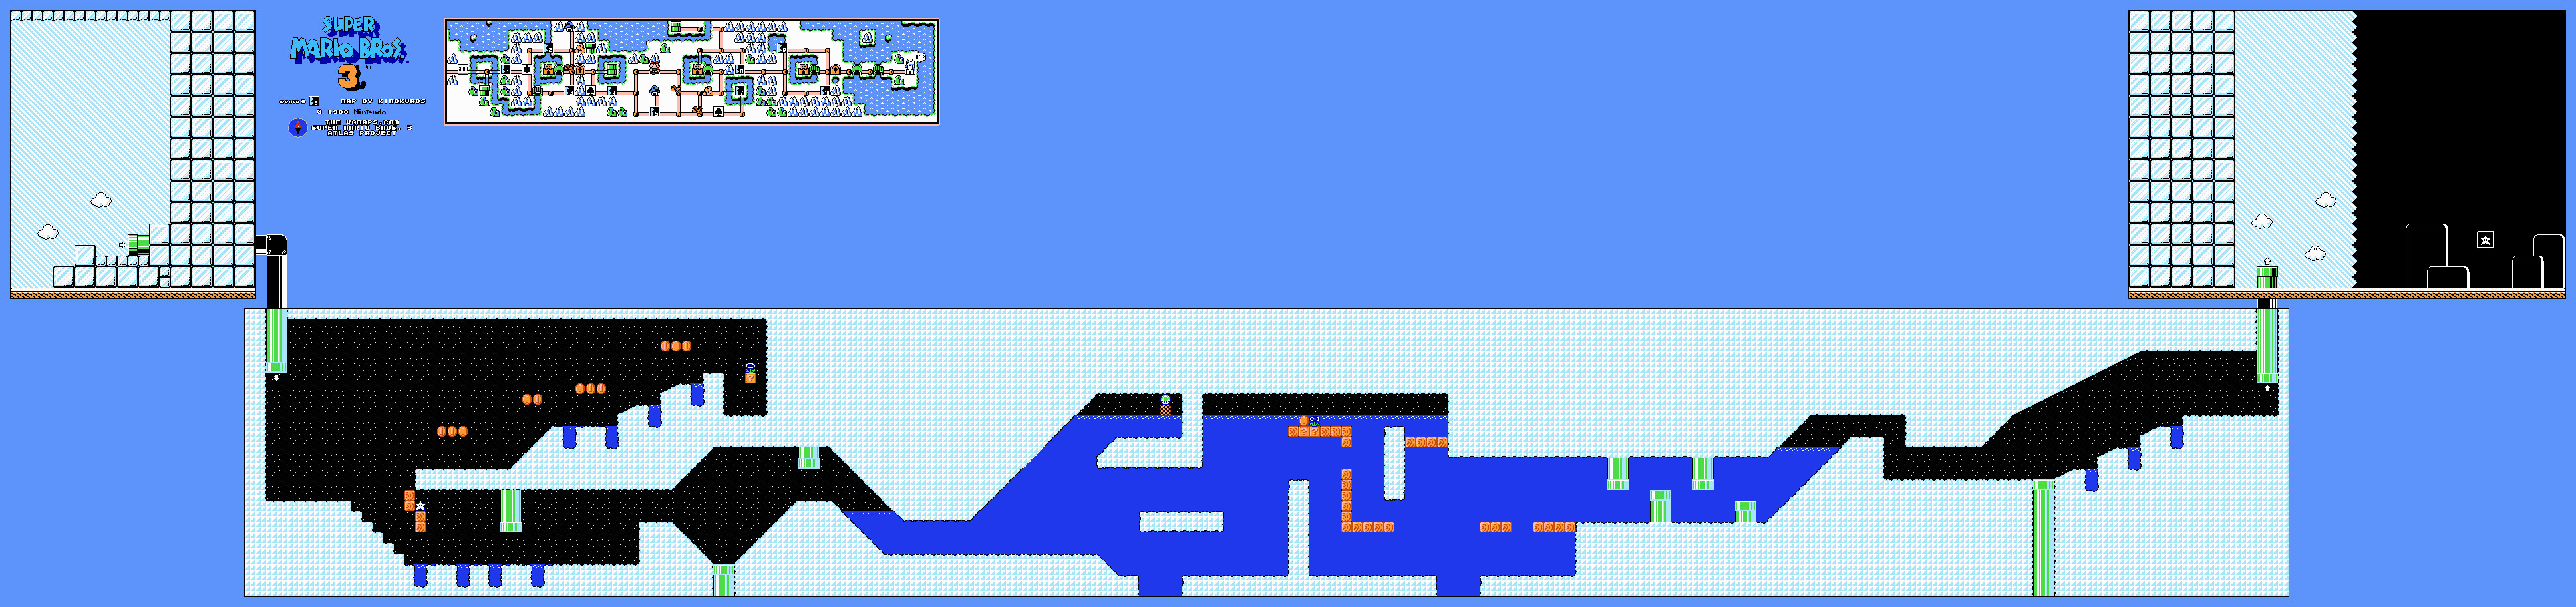
Enter the cave and check the raised opening route for its Fire Flower. The wooden block nearby can provide a Super Star. Watch the Spikes on dry land and the fish jumping between water pockets before descending into the long submerged area.
Search the underwater branches for the 1-Up and another Fire Flower. Use fireballs to remove the plants near the narrow transition, but keep clear of fish while lining up shots. After leaving the water, pass the remaining Spikes and enter the far pipe. This is a conventional course route; a Frog Suit is helpful for swimming but does not replace watching the shore enemies when returning to land.
World 6-7
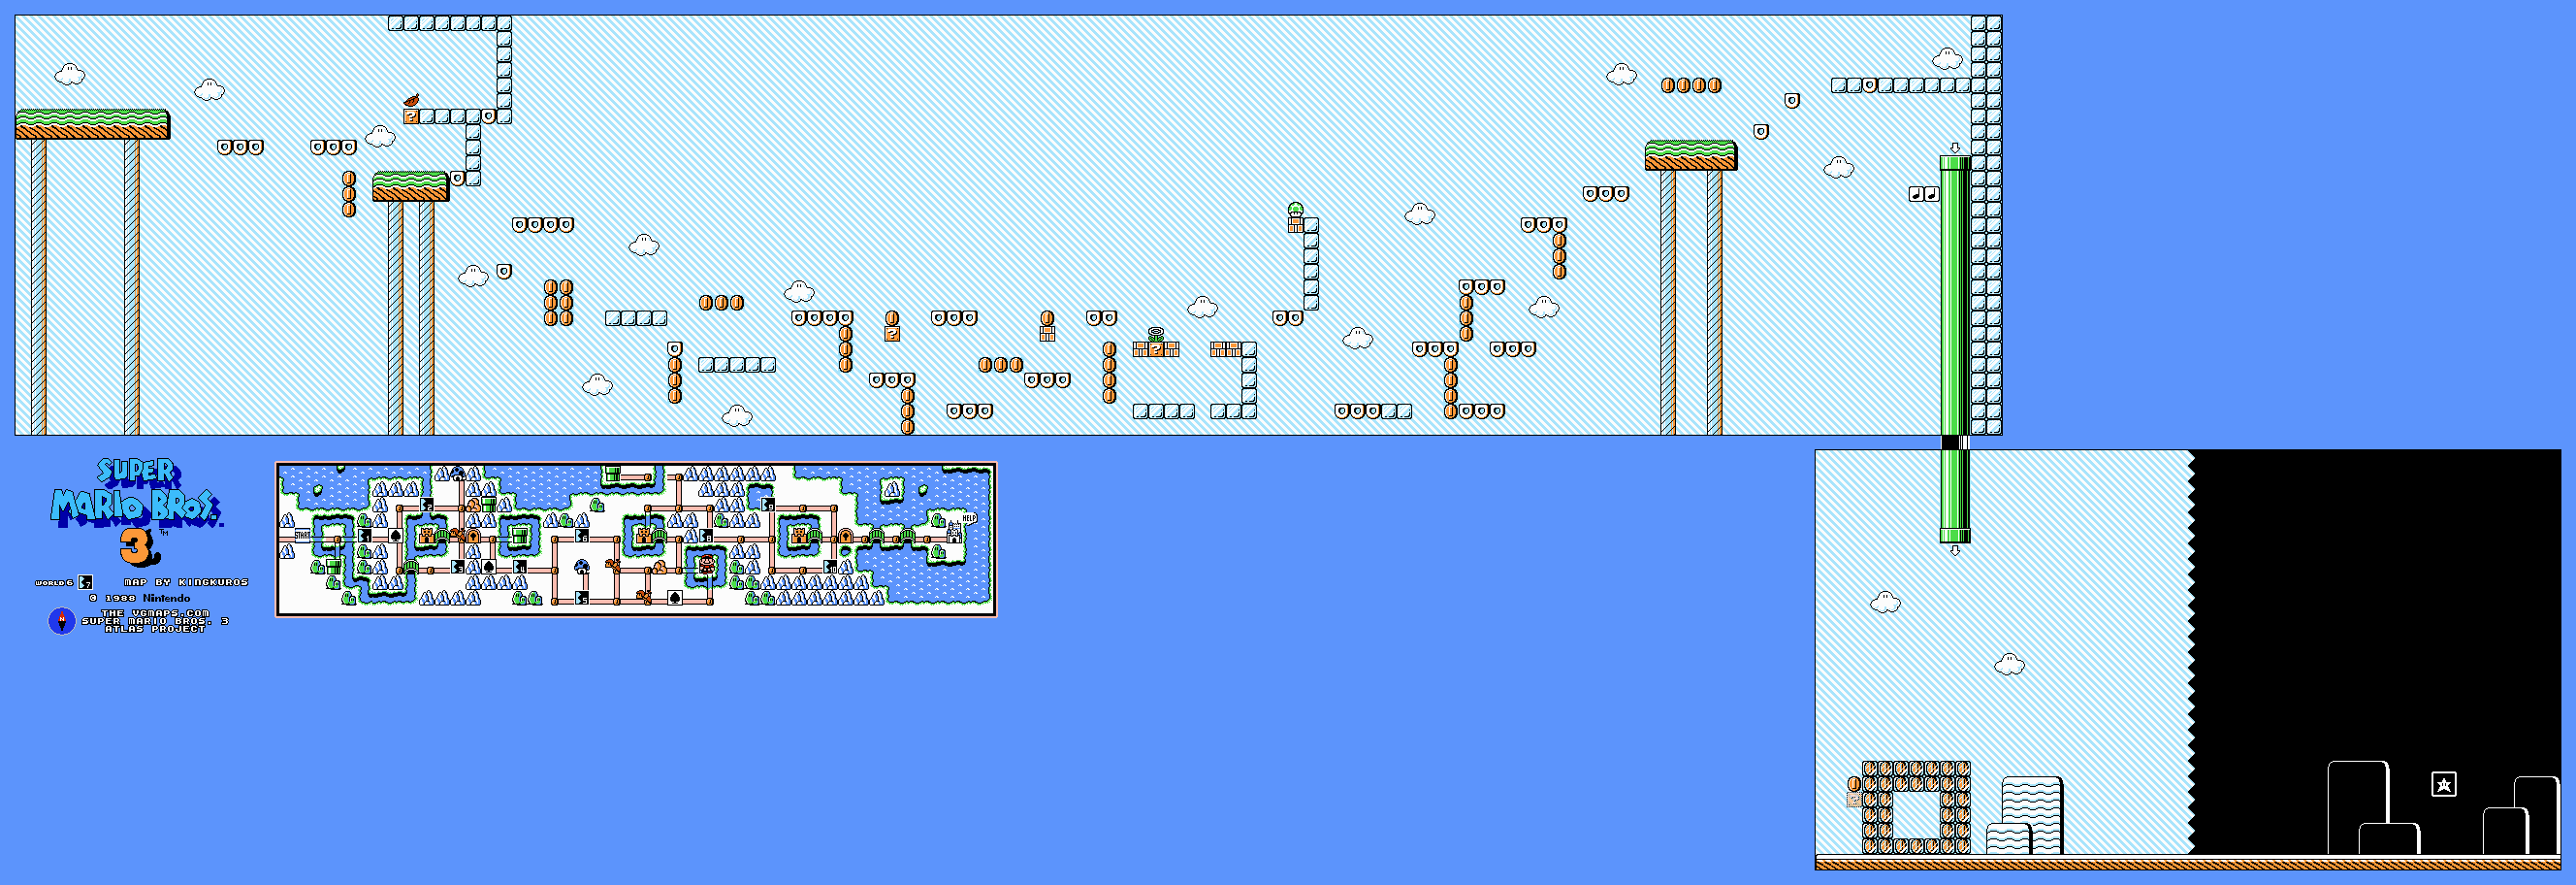
The diagonal scroll passes ice platforms and Donut Lifts. Let a Donut Lift fall just enough to collect a low coin, then jump to the next safe surface before sinking below it. Fire Chomps follow the later climb, so leave room to avoid their fireballs.
For the White Mushroom House, you need all seventy-eight coins. The final coin group is frozen beyond the exit pipe, making a Fire Flower important for the complete challenge. Melt the frozen coins and gather them before the goal. At the end of the scrolling section, lower the final Donut Lift slightly so Mario can jump to the two Note Blocks beneath the pipe. A P-Wing does not by itself melt the last coins. Finish with the full target for an Anchor house.
Fortress 2

Slide only when the next gap is visible: this icy fortress places horizontally moving Thwomps directly across the route. Bait the first one, wait for it to withdraw and cross the cleared space. Keep the Boo facing you while taking the first Leaf block.
Repeat through the next Thwomp group, using the second Leaf if needed. The final section combines Roto-Discs with more sliding Thwomps. Wait for both hazards to leave a single safe opening before committing. Enter the door and defeat Boom Boom. Holding the run button through every corridor makes it harder to stop on the ice before a Thwomp crosses.
World 6-8
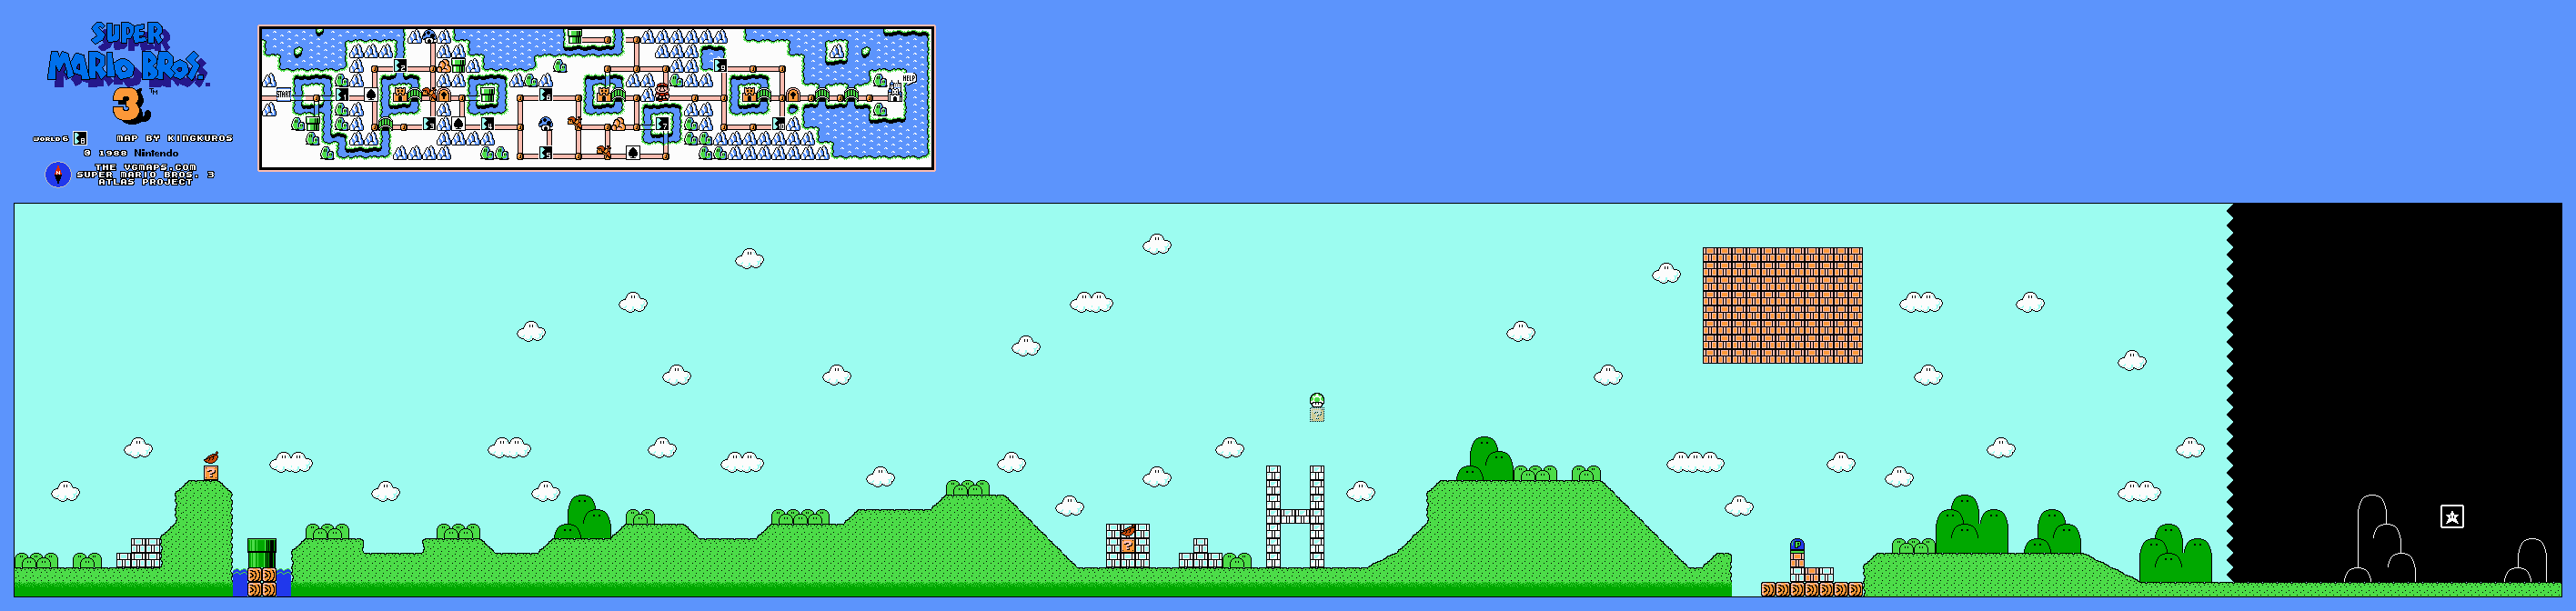
This course has grass rather than an uninterrupted ice floor. Use the early Leaf blocks and remove Buster Beetles before they throw the white blocks across your path. Give Ptooies and Spikes room to finish an attack before jumping past them.
The H-shaped white-block formation has an invisible 1-Up above it. Farther right, a question block holds a P-Switch beneath a large brick collection. Plan the route before pressing it, then collect the converted coins while the switch lasts. Keep a solid landing for the return to the ground and continue to the goal.
World 6-9
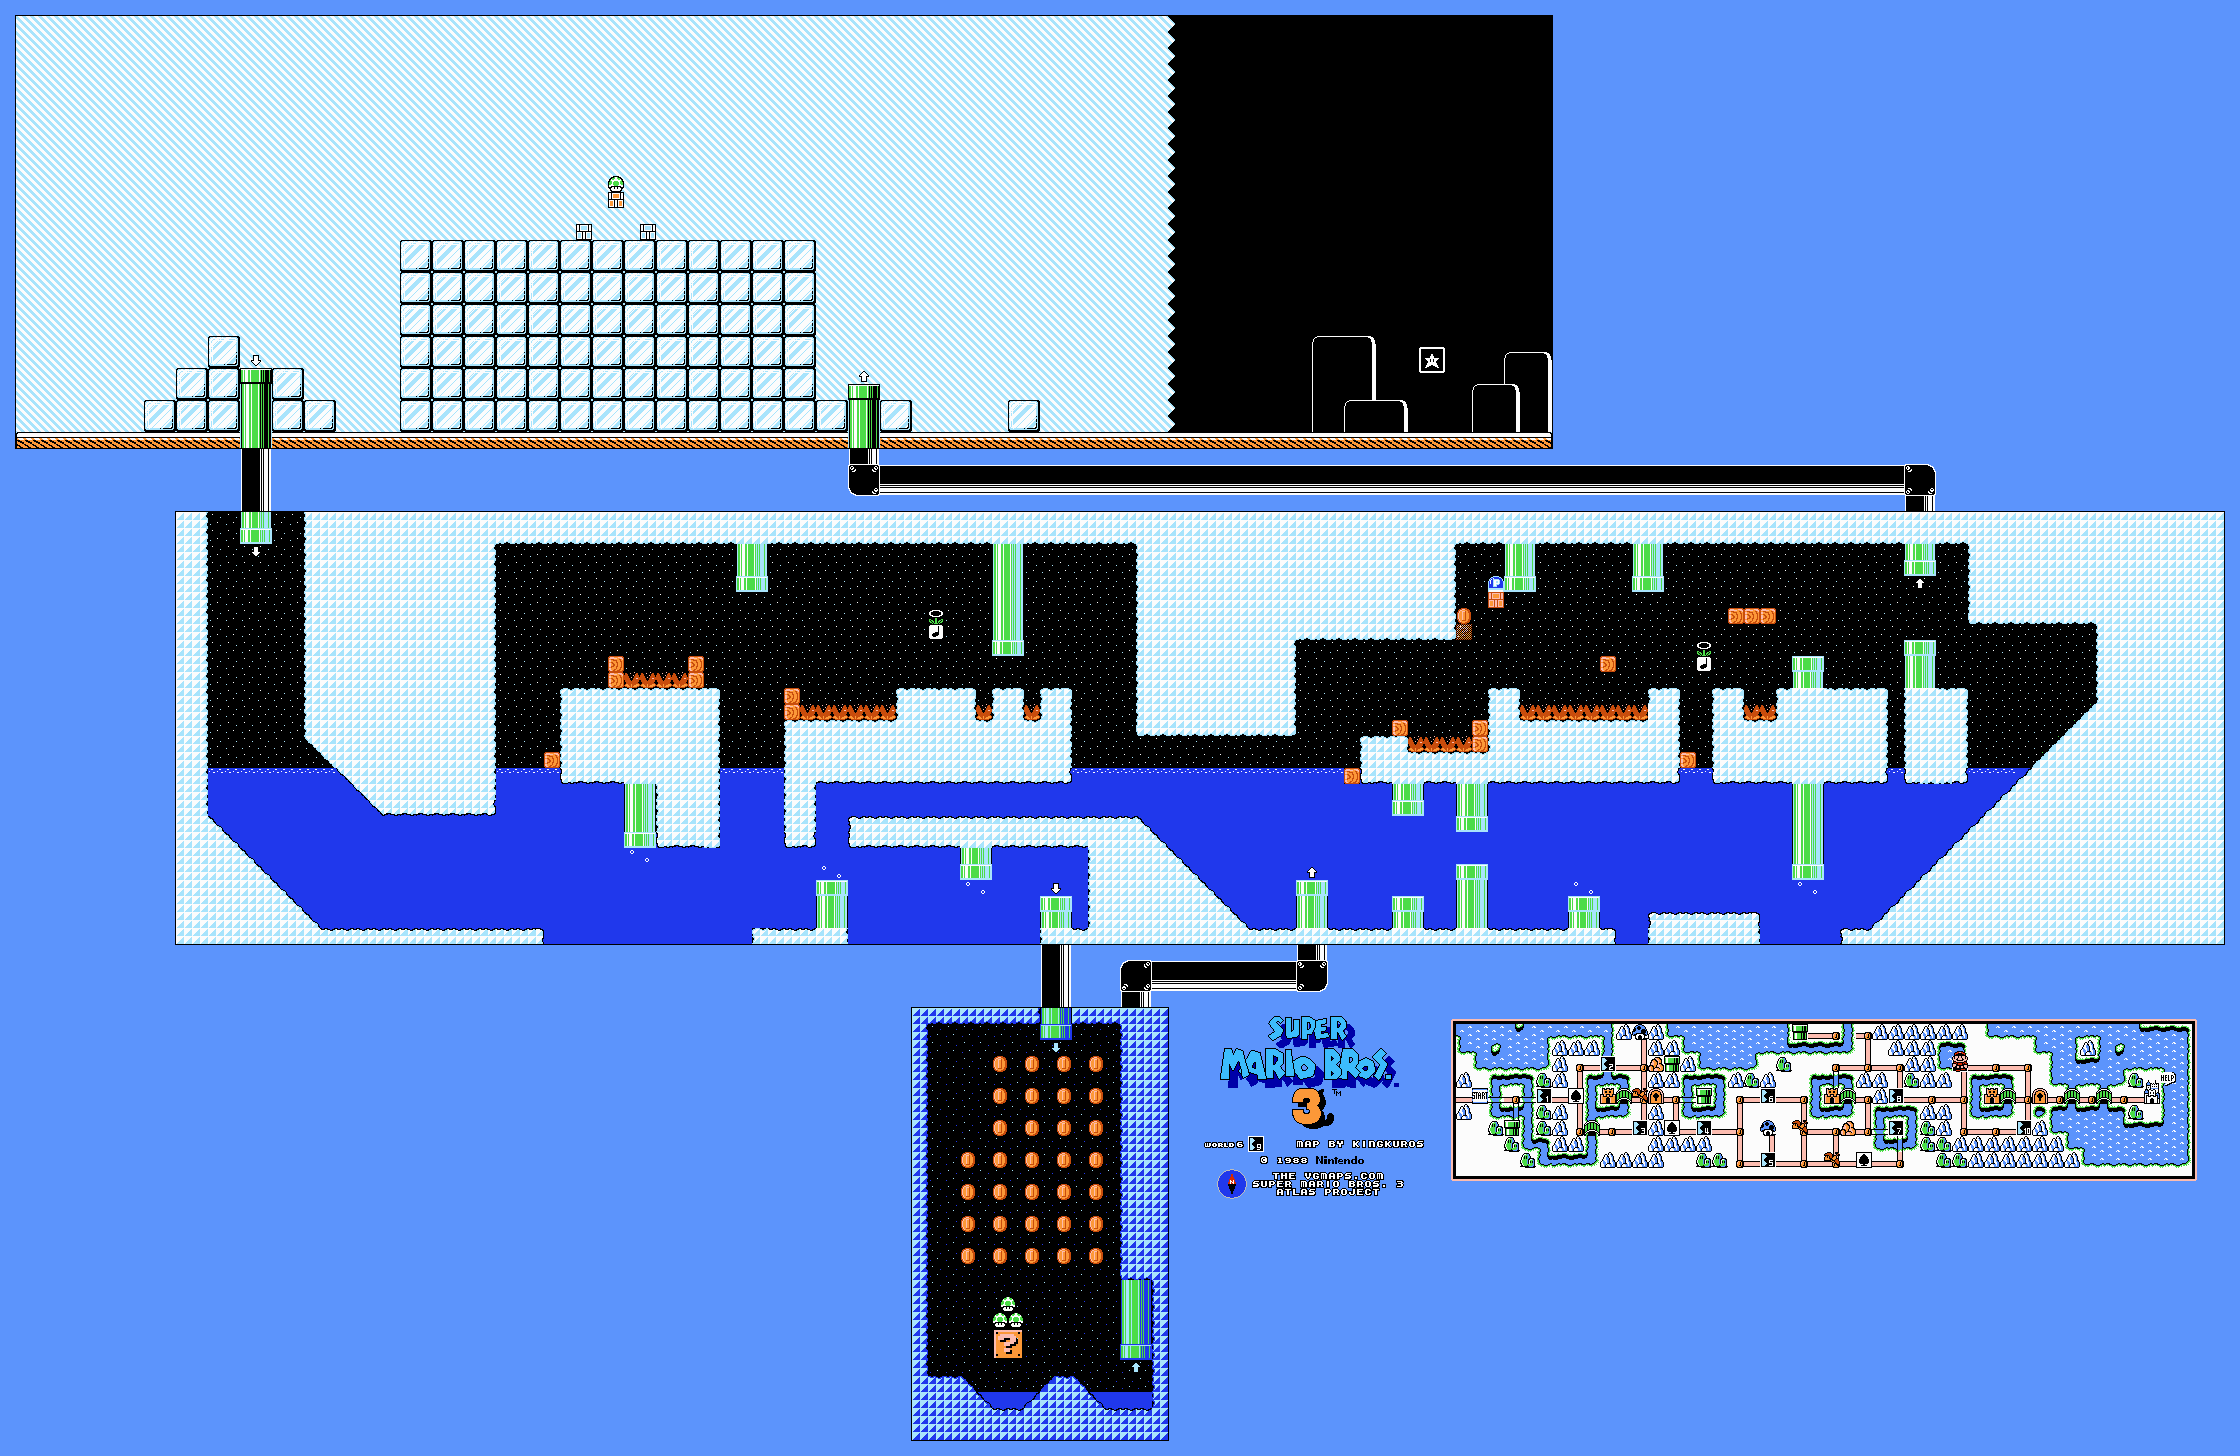
With a tail or P-Wing, fly over the high ice structure at the beginning for the short upper route. It has a Koopa, white blocks and a brick with a 1-Up before the goal. Without flight, enter the pipe and cross the flooded cave.
The cave has high Muncher paths and lower underwater routes. Take its Note Block power-ups and watch the fish when changing height. A secret pipe near the end of the first underwater section reaches three 1-Ups; the Frog Suit or small Mario can fit the available approach. In the second section, a high P-Switch changes the Munchers into coins. Take the final upper pipe above the Venus Fire Trap to reach the goal.
World 6-10
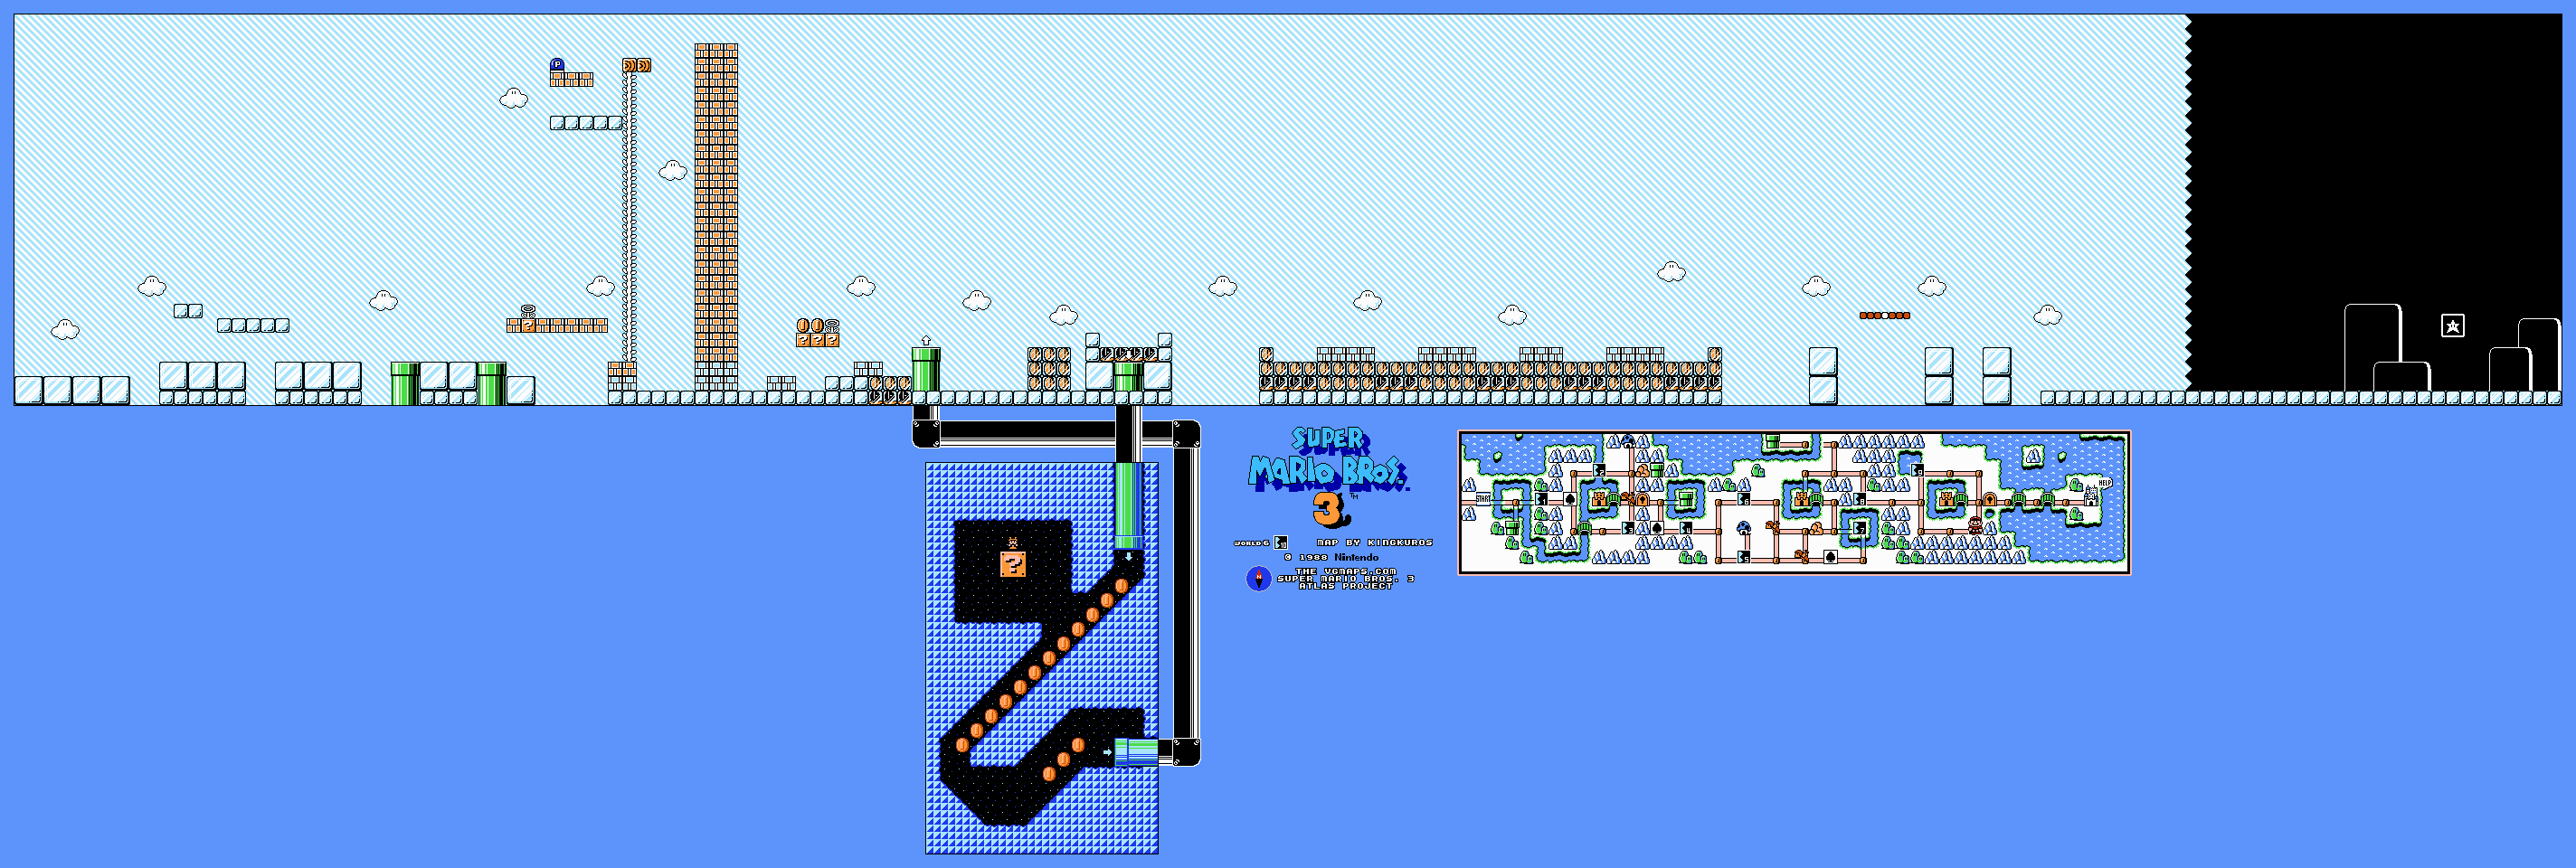
Use the opening Fire Flower or Leaf according to the route you want, then clear the Buster Beetles around the tall block column. A brick in the smaller group to its left contains a vine to the P-Switch. The switch converts the tall brick structure and the Munchers into coins while it lasts.
For the Hammer Suit room, prepare as Fire Mario. Activate the P-Switch, hurry right and melt the frozen coins blocking the pipe beneath the Muncher area. Collect the thawed coins and enter before the route closes. The secret room contains the Hammer Suit. Continue afterward through the remaining frozen coins, Munchers and moving platforms to the goal. A tail alone cannot thaw this entrance.
Fortress 3
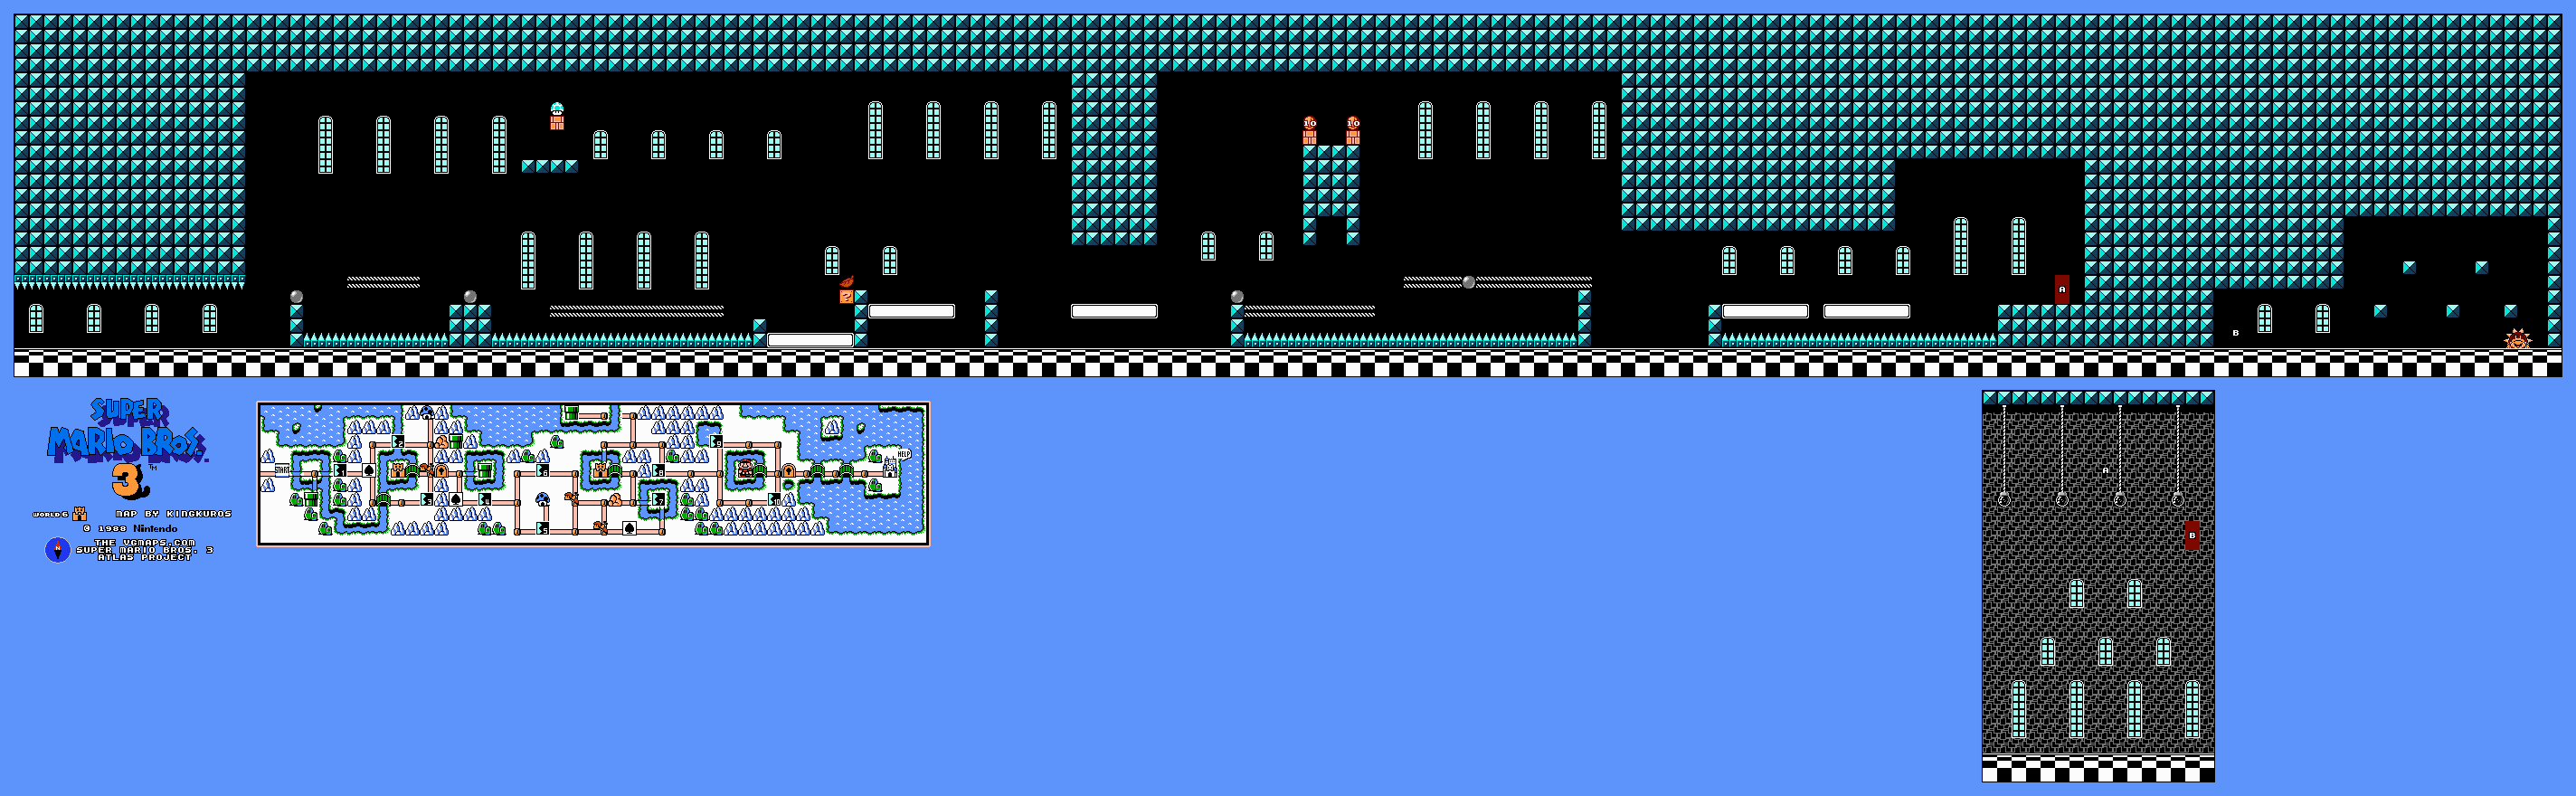
Cross the conveyors while watching the Roto-Discs over the spikes. If you start with a tail, the opening runway reaches a high 1-Up above the second rotating hazard. Keep the Stretches’ rising and lowering cycles in mind before taking either power-up along the middle route.
After the next conveyor and Thwomp, pass the paired Roto-Discs between the Stretch platforms. The final door drops Mario into a room with three Boos and a rising floor. Turn to hold the nearest Boo back while waiting to reach the door on the right. Boom Boom uses raised blocks in his arena, so judge your landing from the correct height before each stomp.
Airship — Lemmy Koopa
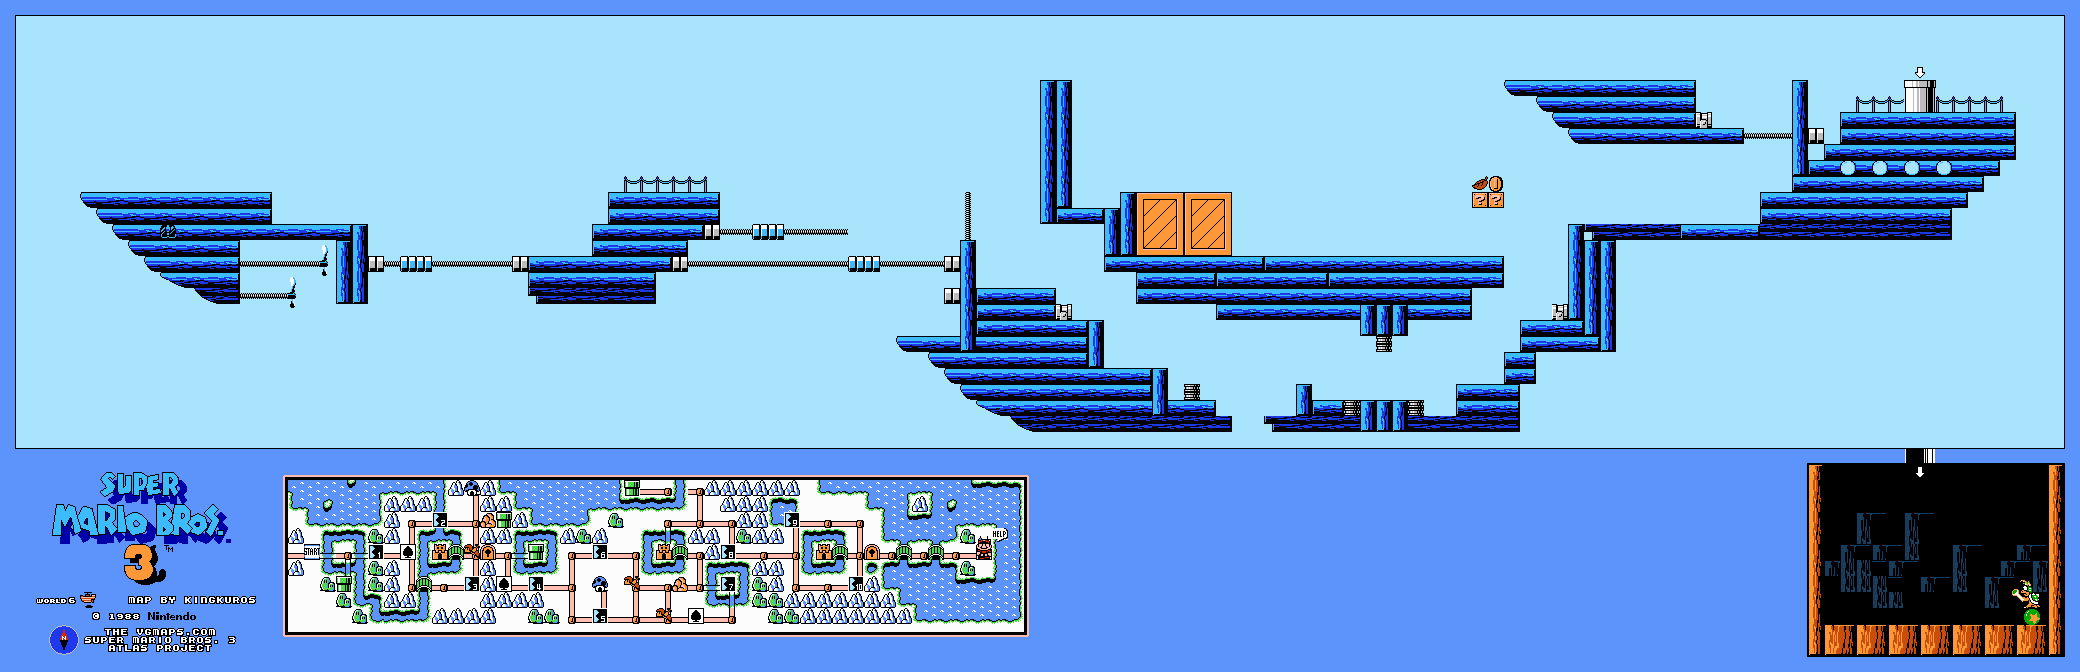
Ride the Bolt Lifts across the opening gaps and leave each one when it reaches the next hull. In the engine corridor, wait for the horizontal and vertical flame bursts to clear a connected passage. Jump to the ledge with two question blocks; one contains a Mushroom or Leaf. The route then turns left past another engine to the boss pipe.
Lemmy balances on a ball and sends more bouncing balls through the room. The balls can help Mario reach him, but their movement makes a careless approach risky. Aim for Lemmy’s head and stay clear during his protected intervals. Three stomps win the wand and open Pipe Land.
World-map notes
The map offers several branches, but all ten numbered courses and three fortresses are covered here. Collect missing map-house rewards before leaving with Lemmy’s wand. Use Fire Mario for the frozen-coin task and keep a Leaf available for the shell-flight puzzle rather than expecting one transformation to solve every stage.
Continue the walkthrough
Previous world: Sky Land · Walkthrough overview · Next world: Pipe Land
Warp Whistles · White Mushroom Houses · Items and bonus games