

World 2 — Desert Land. Cross the desert courses and pyramid, recover the map Hammer and use the northeastern rock passage for the third Warp Whistle. World 2-2 supplies the thirty-coin Anchor challenge.
Courses in this world
- World 2-1
- World 2-2
- Fortress
- World 2-3
- Desert — Angry Sun
- World 2-4
- World 2-5
- Pyramid
- Airship — Morton Koopa Jr.
World 2-1
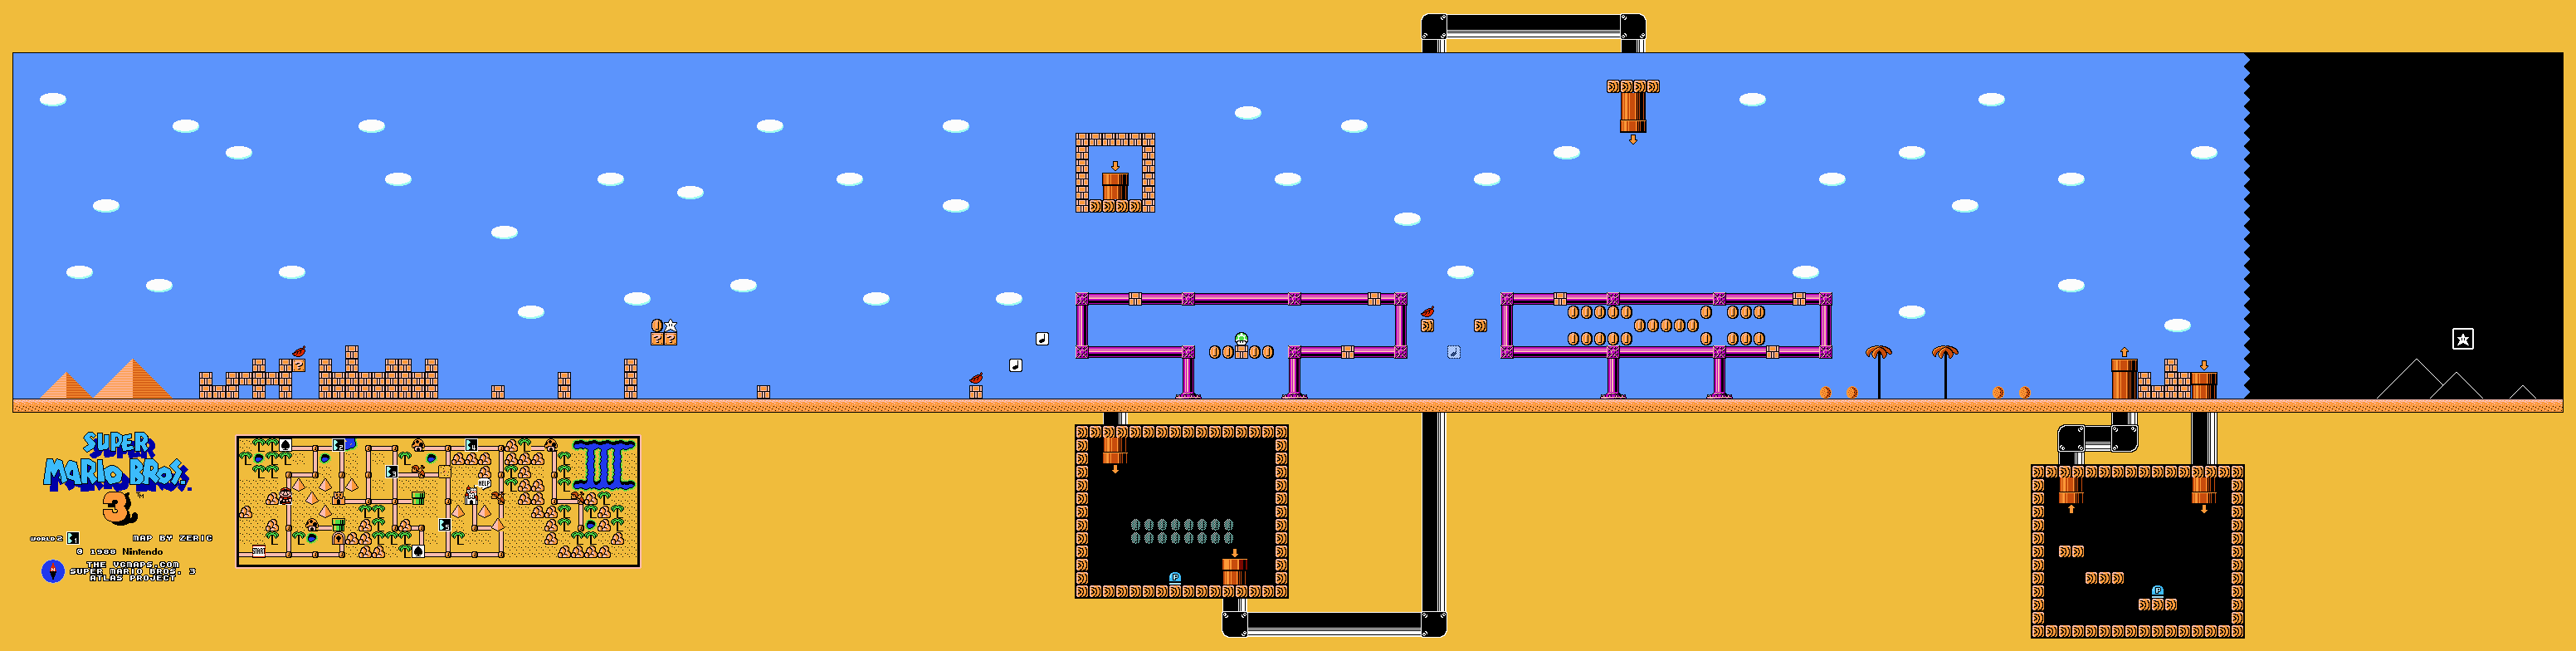
Move over the brick piles while watching for Pile Driver Micro-Goombas disguised among them. Take the early Super Star and pass the Firesnakes only when they leave the next landing clear. The small pipe platforms enclose coins and extra-life hiding places; they are not all entrances.
With a tail, fly up-left from the first pipe-platform stretch to the high bonus pipe. Its P-Switch gives blue coins and opens parts of the outside block structure. Near the goal, enter the usable pipe for another switch room. Pressing that P-Switch changes the outside brick pile into coins. Return, collect the temporary coins and avoid the final plants before taking the goal.
World 2-2

Cross the hills and quicksand, jumping clear of the Venus Fire Traps rather than standing in their sand pits. Bump the wooden block from the side for a power-up, then reach the oasis. Ride the platform across the water while watching the Cheep-Cheeps and Paratroopas.
The White Mushroom House needs thirty coins collected during this stage. Take the ordinary coins first, reveal the P-Switch in the brick above the oasis and collect the converted bricks before it expires. The moving platform helps reach the elevated coins. Return to the exit pipe and finish the course. The house’s reward is an Anchor for the map inventory, not a flying item.
Fortress
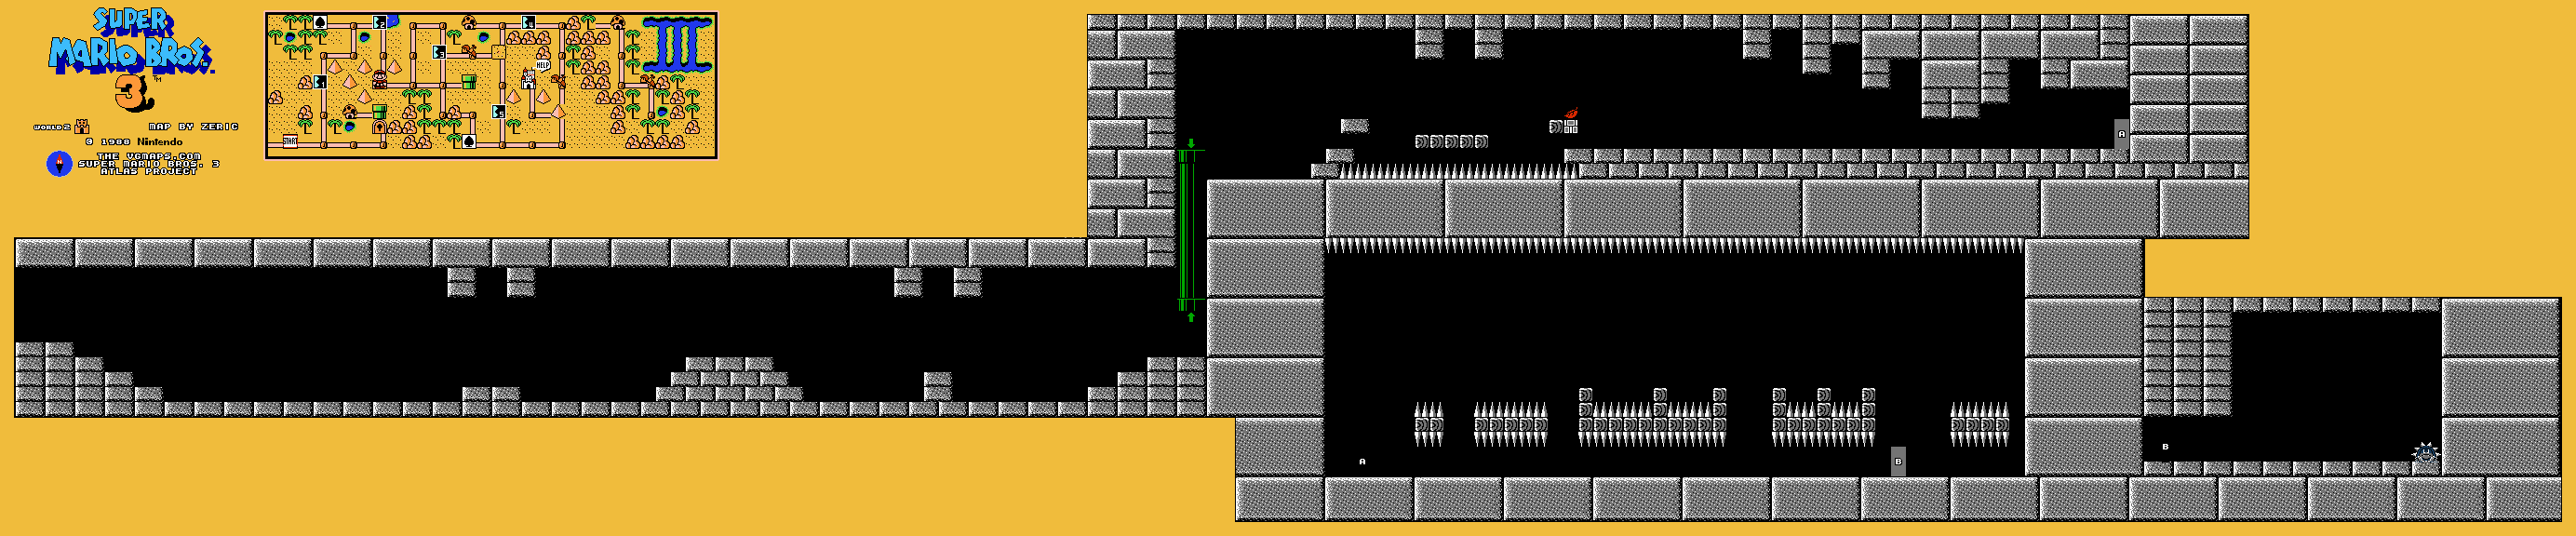
Bait each Thwomp from a safe distance and run beneath it after it slams down and begins rising. Dry Bones gets up again, while Boos stop approaching when Mario looks at them. Use the pipe to the upper floor and time the jumps past the spike bed and next Thwomps.
In the second room, the spiked platforms rise and lower. Wait for enough headroom before crossing and keep the Boos behind your line of sight when possible. The final door moves with its platform, so enter when it is exposed. Stomp Boom Boom three times and collect the magic ball. This opens the nearby locked map route to the pipe and Toad House.
World 2-3
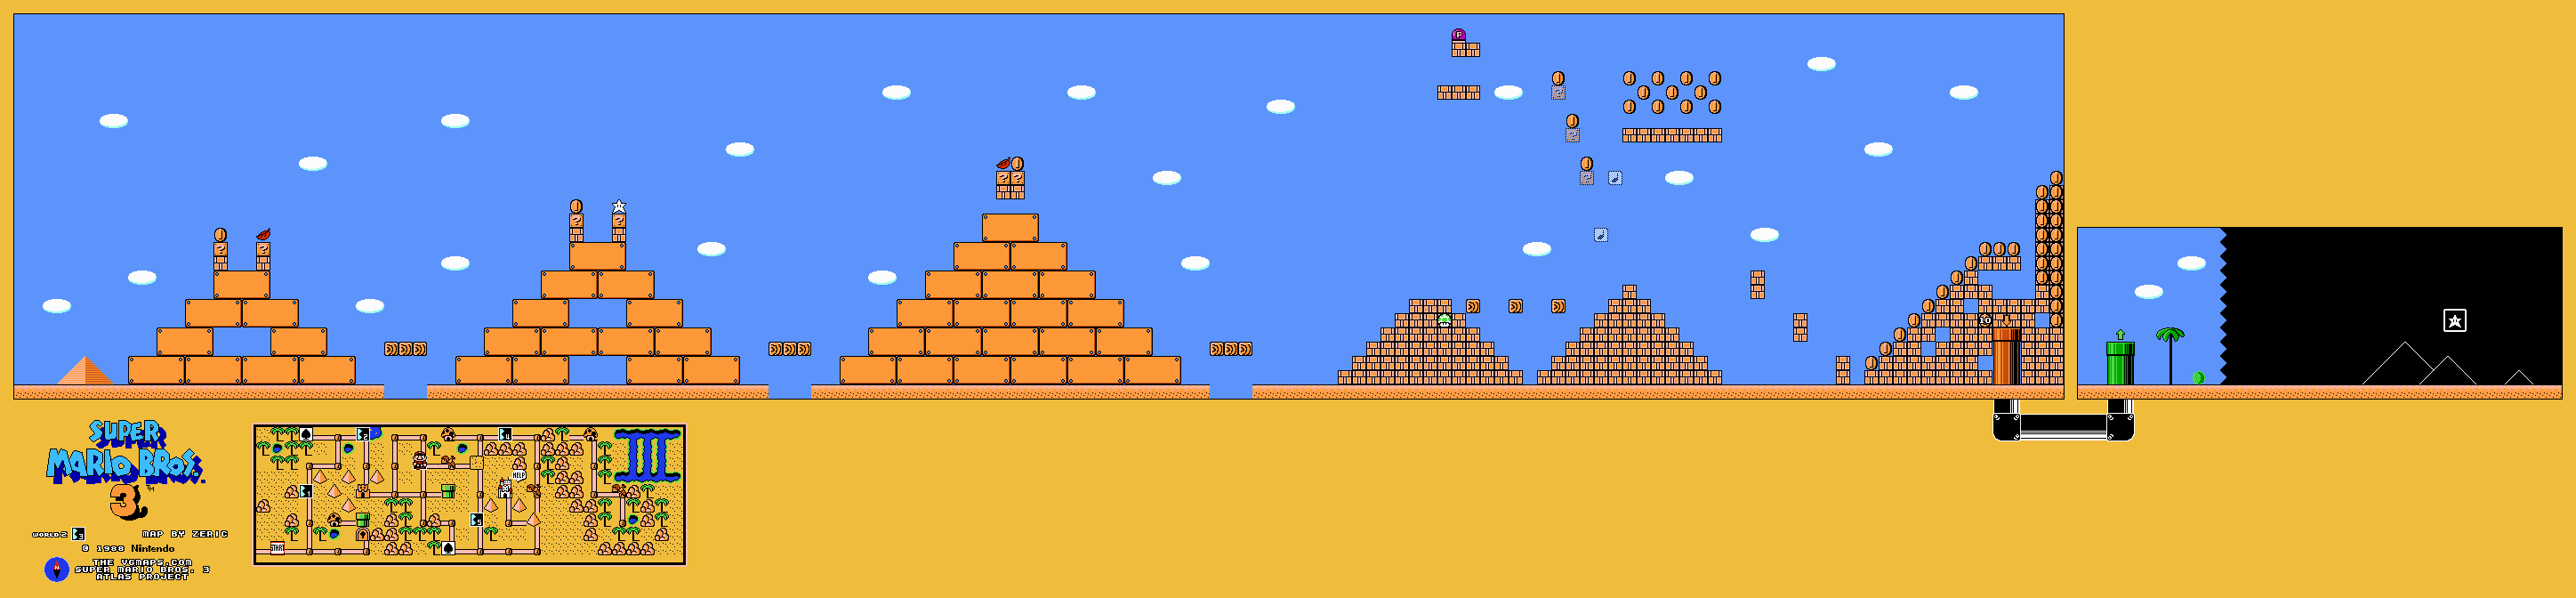
Climb the first three pyramids and watch the Firesnakes circling their slopes. The early question blocks supply a power-up, a Super Star and another power-up. Use the wooden blocks to cross the gaps between pyramids without falling down their sides.
In the brick-built second half, look for the invisible stepping blocks above the pyramids. They reach the high coin area and hidden P-Switch. Press it to change the brick pyramids into coins and expose the 1-Up route. If you stay below, watch for disguised Micro-Goombas. At the last half-pyramid, use a Koopa shell to break the bricks blocking the exit pipe, then continue to the goal.
Desert — Angry Sun

Keep jumping through the quicksand instead of letting Mario sink beside a plant. This short course has no power-up supply, so bring the transformation you want from the map. Build the P-Meter before the tornado and use a running jump to cross it; walking into the wind pushes you back.
Beyond the tornado, the Angry Sun begins diving toward Mario. Watch its curved approach and move underneath or away from the dive before crossing the next pit. A Koopa shell can remove it, but fighting is optional. Continue past the remaining plants and dunes to the goal. Do not wait for a nonexistent coin room or checkpoint here.
World 2-4
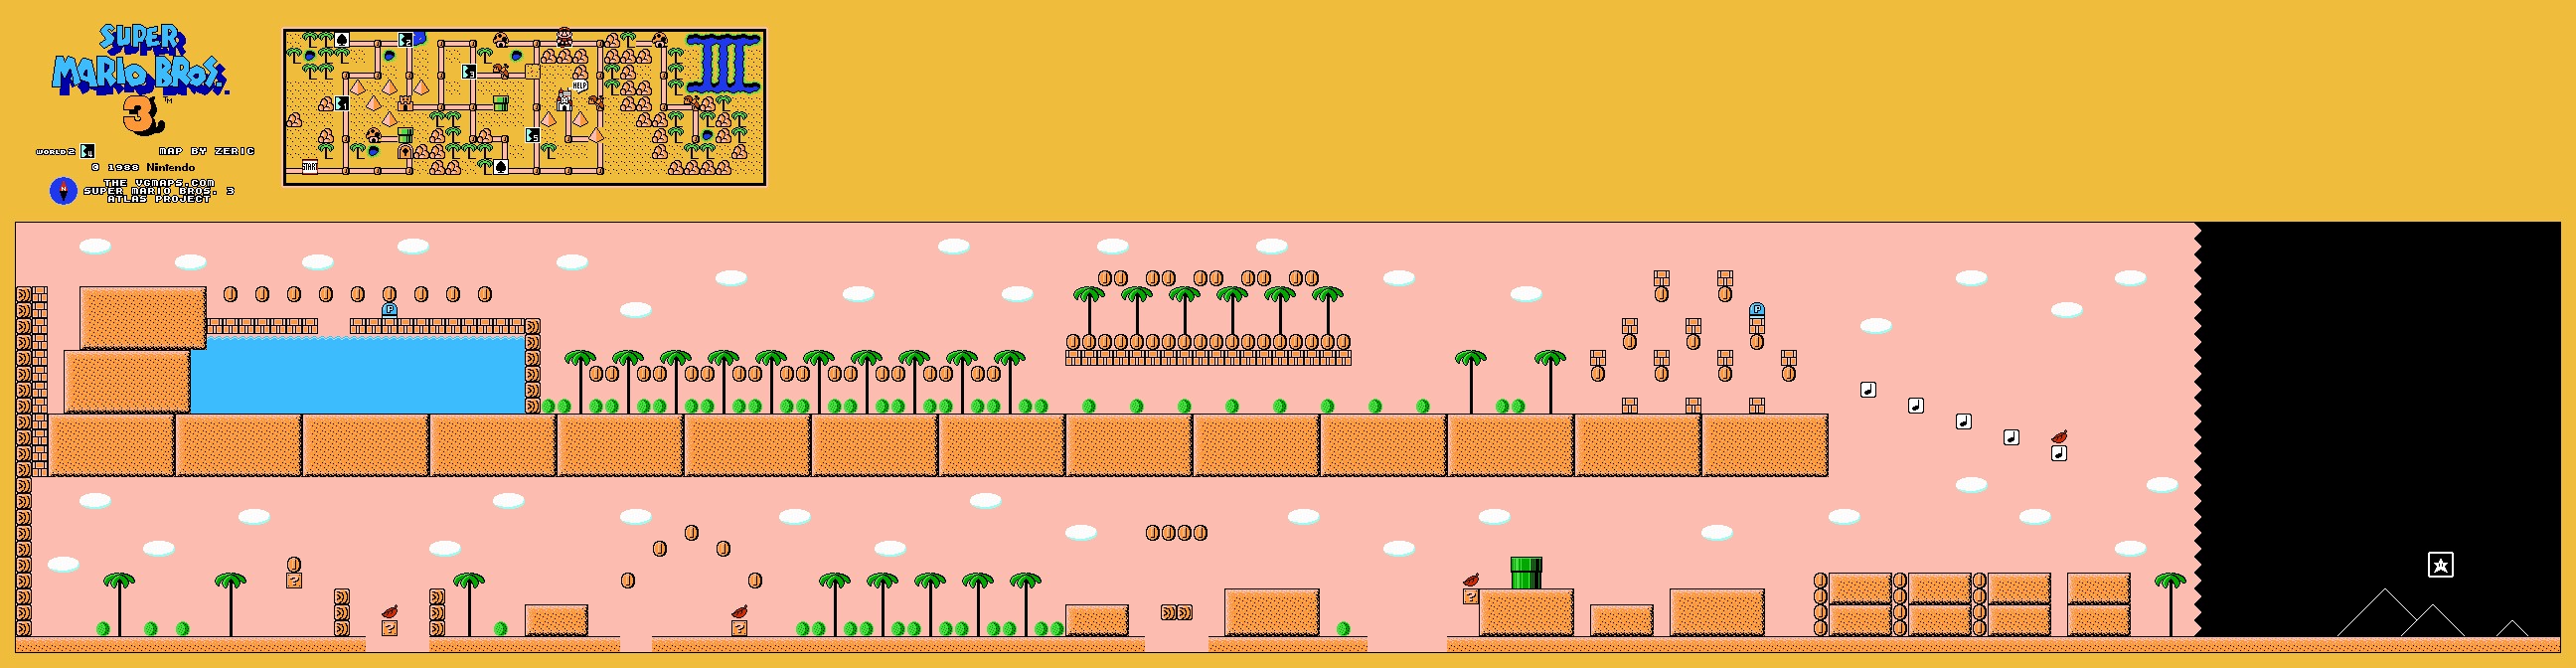
The lower route uses narrow ledges, Koopa shells and several Boomerang Bros. Throw a shell into the low or gap-hung question block for a Super Leaf, then either continue below or return to the beginning for the upper route. Avoid boomerangs on both their outward and return flights.
To reach the upper route, fill the P-Meter and fly into the high bricks above the starting area. Explore the oasis and uncover its P-Switch, then follow the high coin path. A second switch lies near the far brick formation. Take the accessible coins before activating it so you can collect the temporary ones efficiently. Descend along the Note Blocks, using the final power-up block, and reach the goal.
World 2-5
Give each Chain Chomp enough room for its full lunge before crossing its post. Use the early power-up and move over the colored platforms and Koopas. A shell or tail can hit low side-access blocks, but avoid kicking a shell into a wall where it will immediately rebound into Mario.
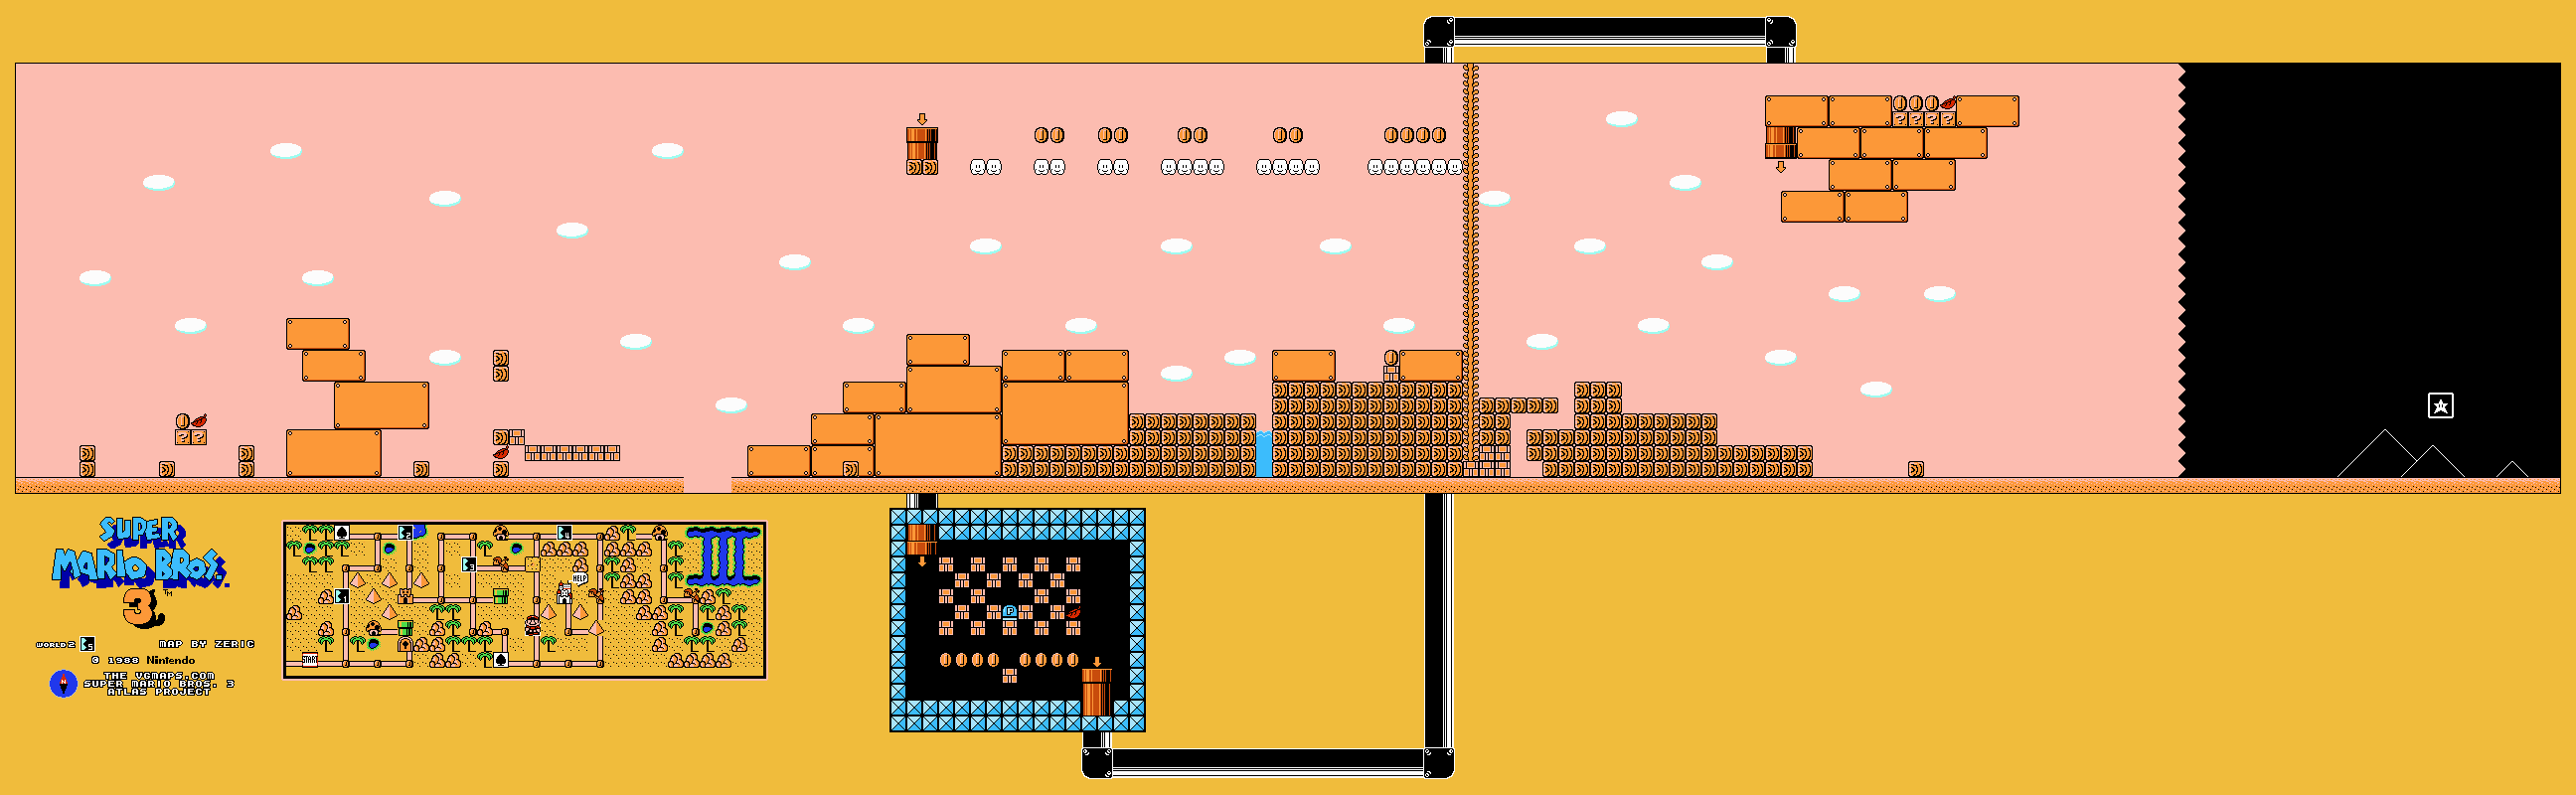
The main secret is the shallow brick-lined enclosure after the middle platforms. Kick the nearby Koopa shell into its lower bricks to reveal a vine. Climb into the cloud route and enter the high pipe for coins and a P-Switch. Break only the blocks you need before converting the rest. The exit places Mario on elevated platforms near the end. Drop carefully and cross the last Chain Chomp’s range to the goal.
Pyramid
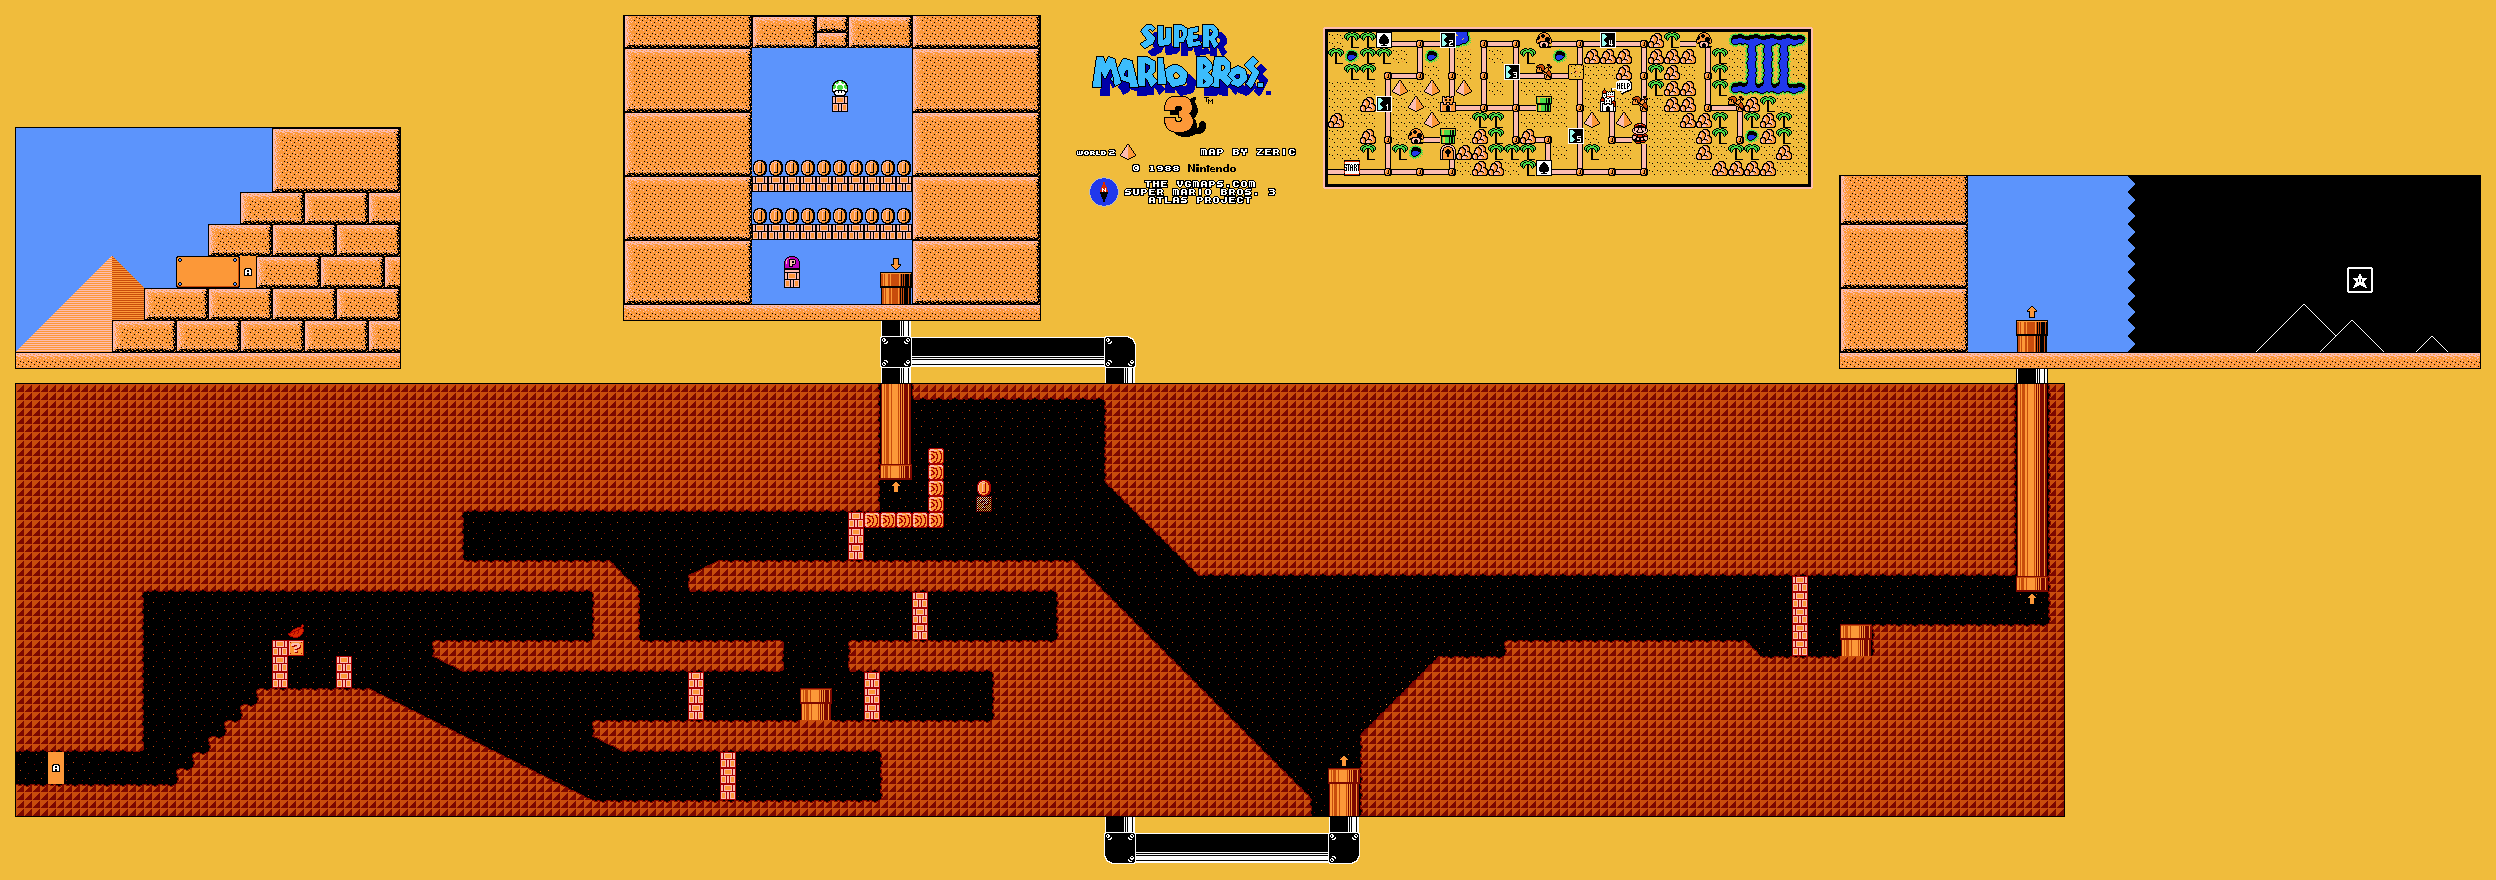
Enter the pyramid and take the power-up at the first stair top. Use a Buzzy Beetle shell or the raccoon tail to open the brick barrier on the middle branch. Continue right, climb from the Piranha Plant pipe toward the upper-left passage, then break the next barrier to progress through the upper tunnel.
Near the overhead pipe, reveal the invisible stepping block to reach its entrance. The bonus room contains bricks, coins, a hidden 1-Up and a P-Switch; preserve a walkable route before converting the bricks. Back in the pyramid, watch for ceiling Beetles that drop when approached. Use their shells on the final brick wall, take the exit pipe and pass the Boomerang Bro. The blue-coin switch added outside in Super Mario Advance 4 is not part of this NES route.
Airship — Morton Koopa Jr.
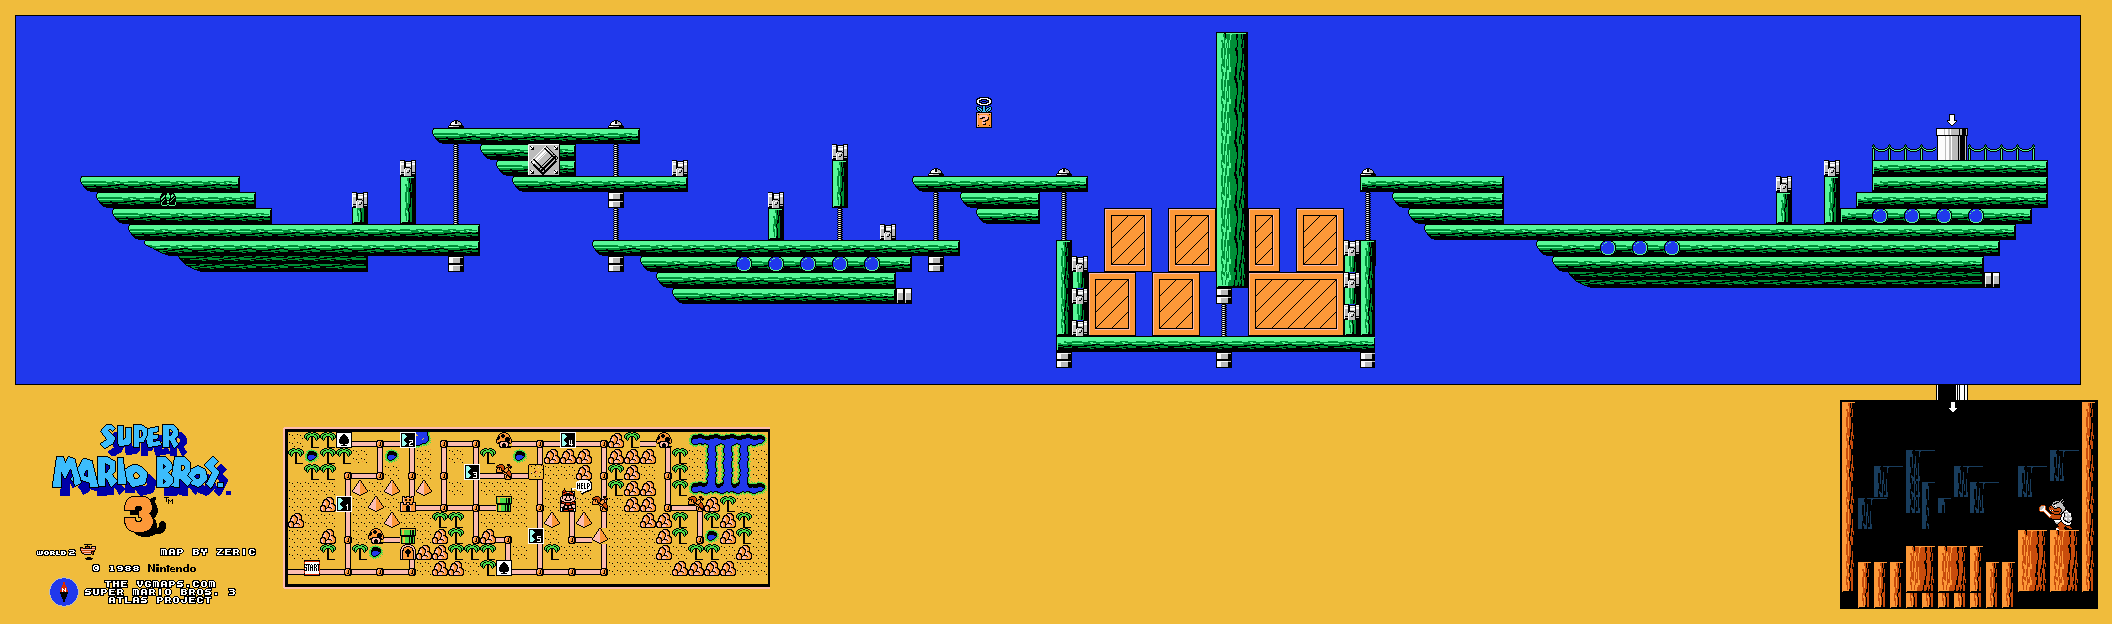
Stay with the scroll and alternate between the raised crates and lower deck to avoid the cannons. Collect the middle power-up if the firing pattern gives you time. Rocky Wrenches throw along the deck and reappear, so a defeated one is not a reason to stop moving. Enter the silver pipe at the far end.
Morton fires more often than Larry but moves more slowly. Jump the wand shots, stomp his head and stay clear of the shell between hits. Three stomps return the wand. The tall wall-climbing fight from other Mario games does not occur here. After restoring the king, Water Land becomes available.
World-map notes
Defeat the wandering Boomerang Bros. to obtain their map rewards, including the Hammer. Save that Hammer for the rock in the far northeast. Break it to reach the hidden Frog Suit house and two Fire Bros. Defeating that pair supplies the third Warp Whistle. A map Hammer breaks rocks; it is not the throwing attack supplied by a Hammer Suit.
Continue the walkthrough
Previous world: Grass Land · Walkthrough overview · Next world: Water Land
Warp Whistles · White Mushroom Houses · Items and bonus games