

World 4 — Giant Land. Giant enemies fill the first courses, while 4-6 switches between two sizes. Explore the waterfall room, Tanooki Suit detour and second fortress’s extra-life route before Iggy’s airship.
Courses in this world
- World 4-1
- World 4-2
- World 4-3
- Fortress 1
- World 4-4
- World 4-5
- World 4-6
- Fortress 2
- Airship — Iggy Koopa
World 4-1
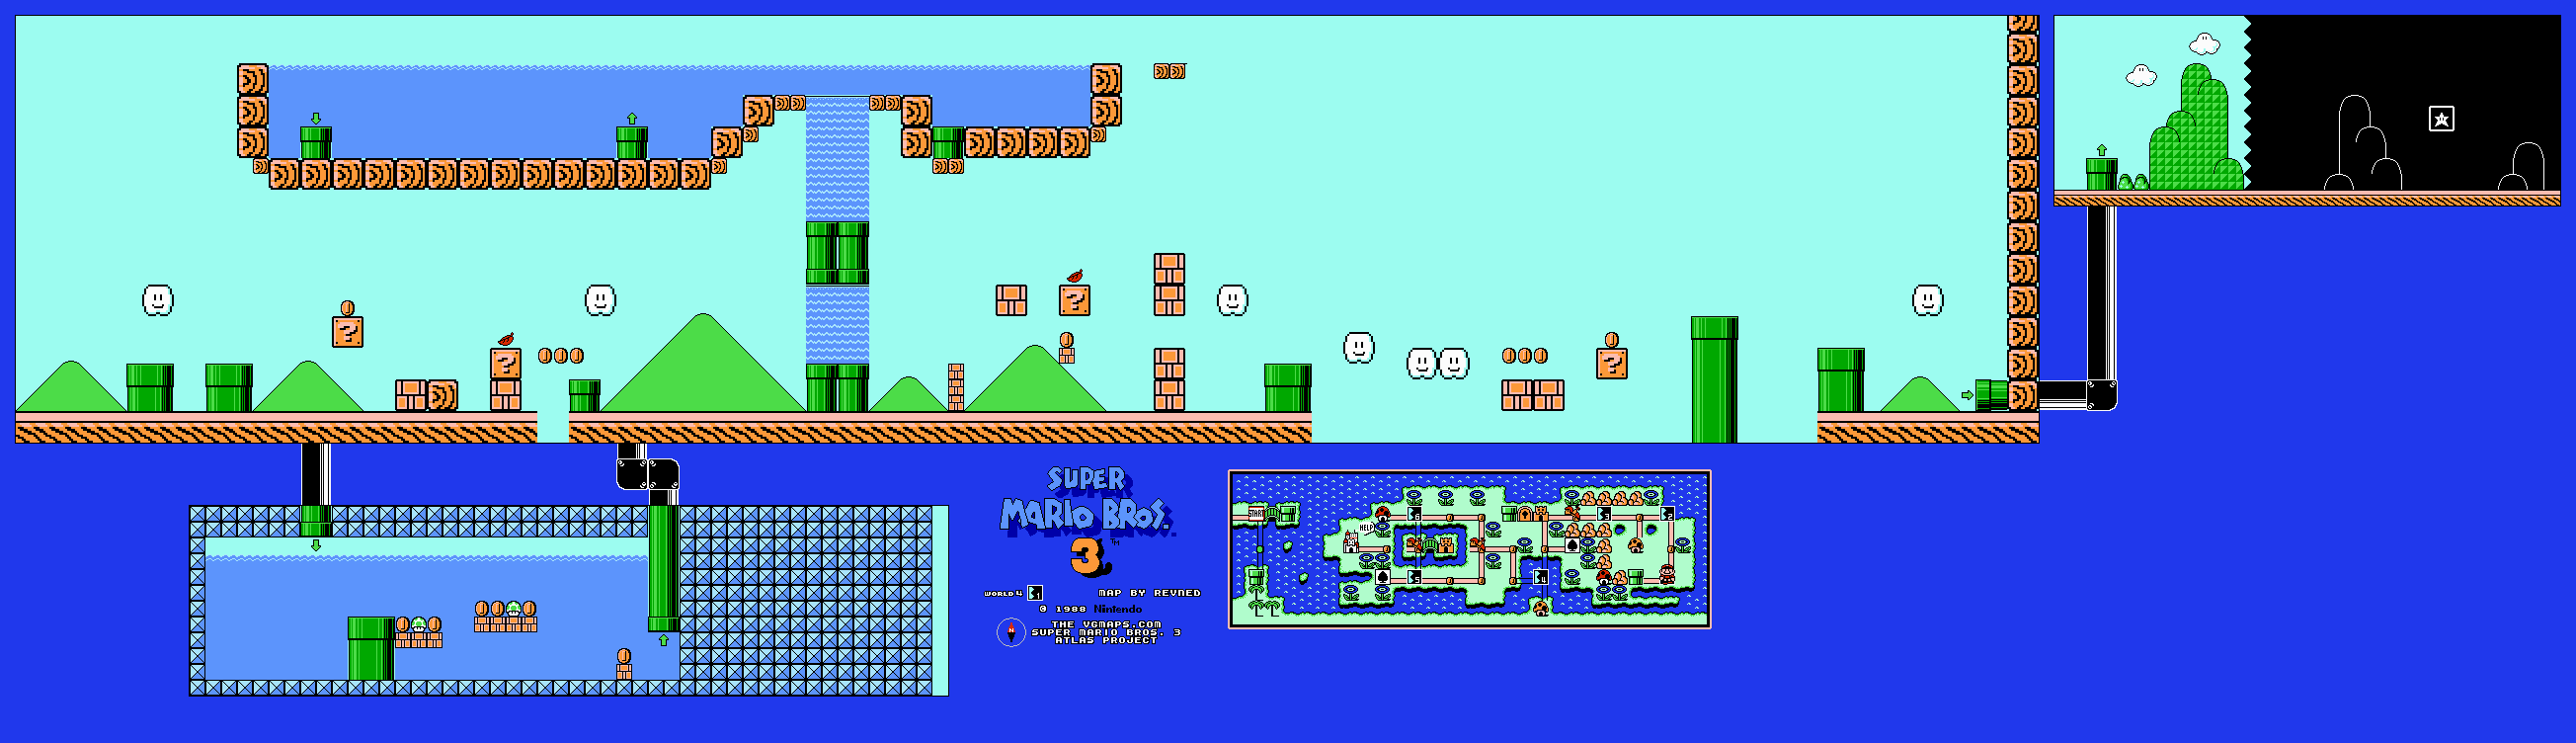
Giant Koopas still yield carryable shells after a stomp. Use one to hit the giant question block that cannot be reached normally. Giant Piranha Plants can emerge even when Mario is close, so wait for a clear cycle before crossing their pipes.
In the waterfall stretch, swim upward and enter the far-right pipe for the secret room containing two 1-Ups. Watch the Big Berthas while collecting them. Back on the main route, cross the giant platforms and clouds, use the later power-up block if needed and enter the goal pipe. The enemies’ large size changes the space required for jumps, not the basic shell controls.
World 4-2

The platforms rise and fall above water while fish jump through the gaps. Throw a white block into the giant question block for its power-up. Keep the large plants’ full reach in mind before landing on a pipe.
For the White Mushroom House, aim to collect all twenty-four coins. Take the regular coins ahead of the P-Switch first, return and activate it while the terrain is high enough to reach the converted coin column. Use the nearby Super Star to cross the fish-heavy section while gathering the rest. Finish through the exit pipe for the Anchor reward. Take the complete coin route before leaving the stage.
World 4-3

The opening Sledge Bros. stun Mario if he is grounded when they land. Jump before their impact, then stomp or attack while their hammer arc leaves an opening. An inventory Super Star is useful for this opening pair.
Enter the cave and keep clear of ceiling Buzzy Beetles and Spinies. Use the Paratroopas only when their bounce will reach the next platform. With a tail, fly into the high coin pocket beyond the power-up. The brick at the far-left beginning of the later narrow passage holds a 1-Up that travels above the route. Pass the small sloped islands carefully: their wooden blocks can bounce Mario backward into a pit. Enter the far pipe to finish.
Fortress 1
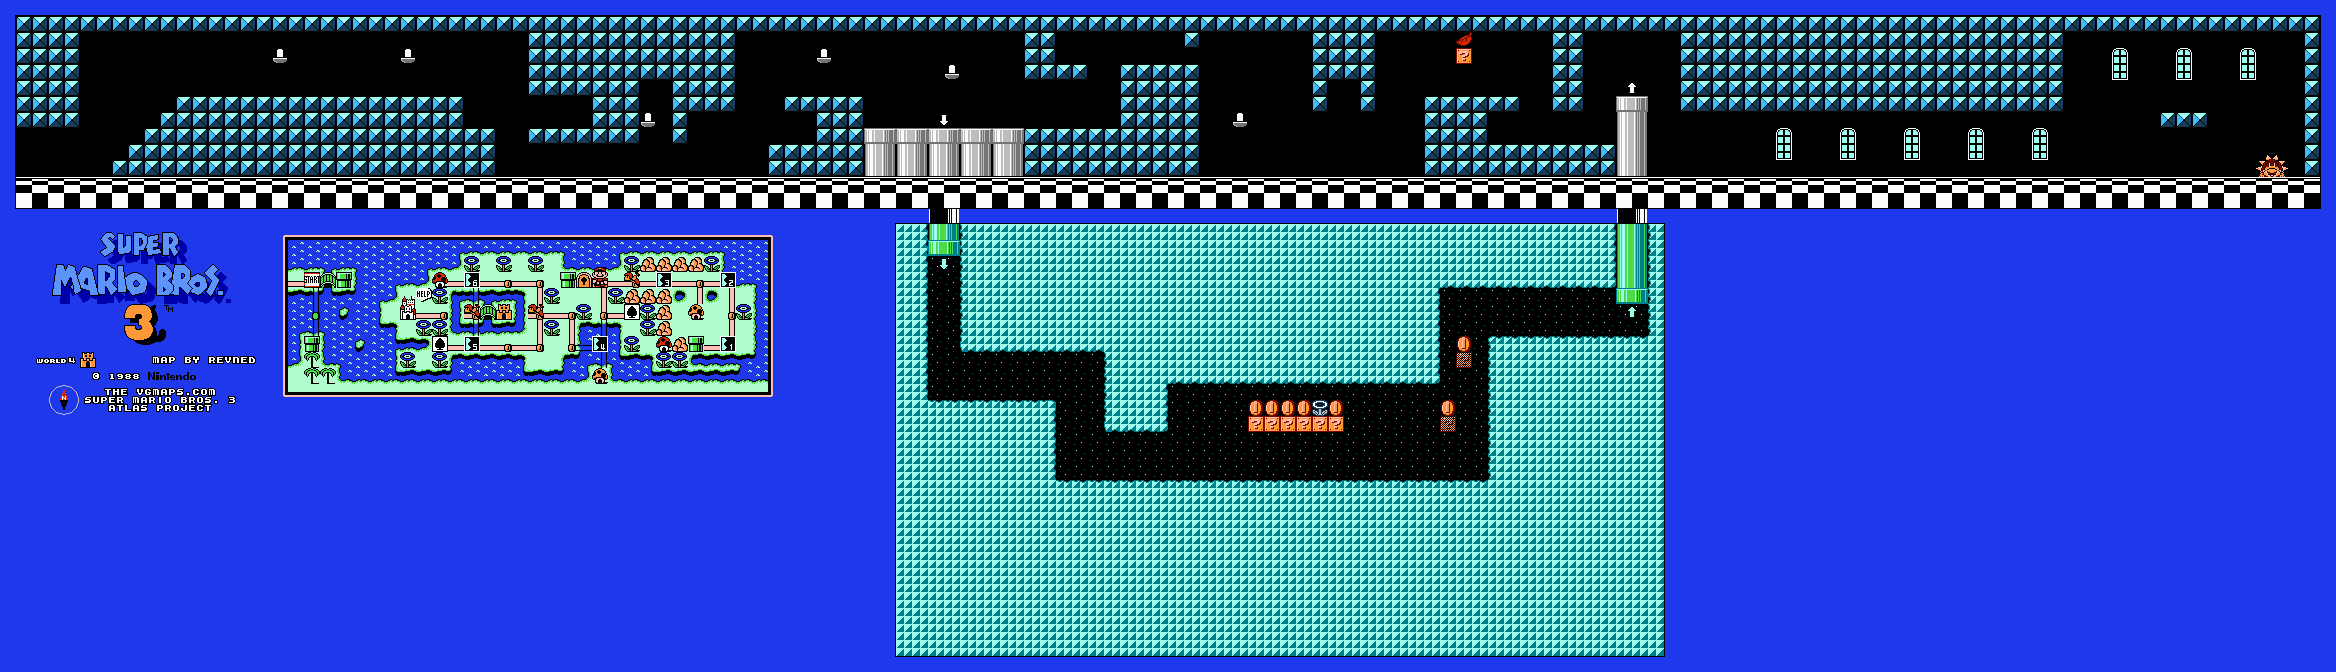
Climb the first stairs and continue past the Hot Feet. A Hot Foot follows when Mario turns away, so look back while preparing your next jump. Bait the sliding Thwomps and move through the gap after they withdraw.
The middle pipe in the pipe group leads to an underground detour with a Fire Flower. Reveal two invisible stepping blocks to climb over the right-hand ledge and rejoin the fortress. Staying above instead means passing more Thwomps. In the last hall, keep the pursuing Hot Feet behind you and reach Boom Boom. Stomp him three times, respecting his high jumps and protected intervals, then take the magic ball.
World 4-4
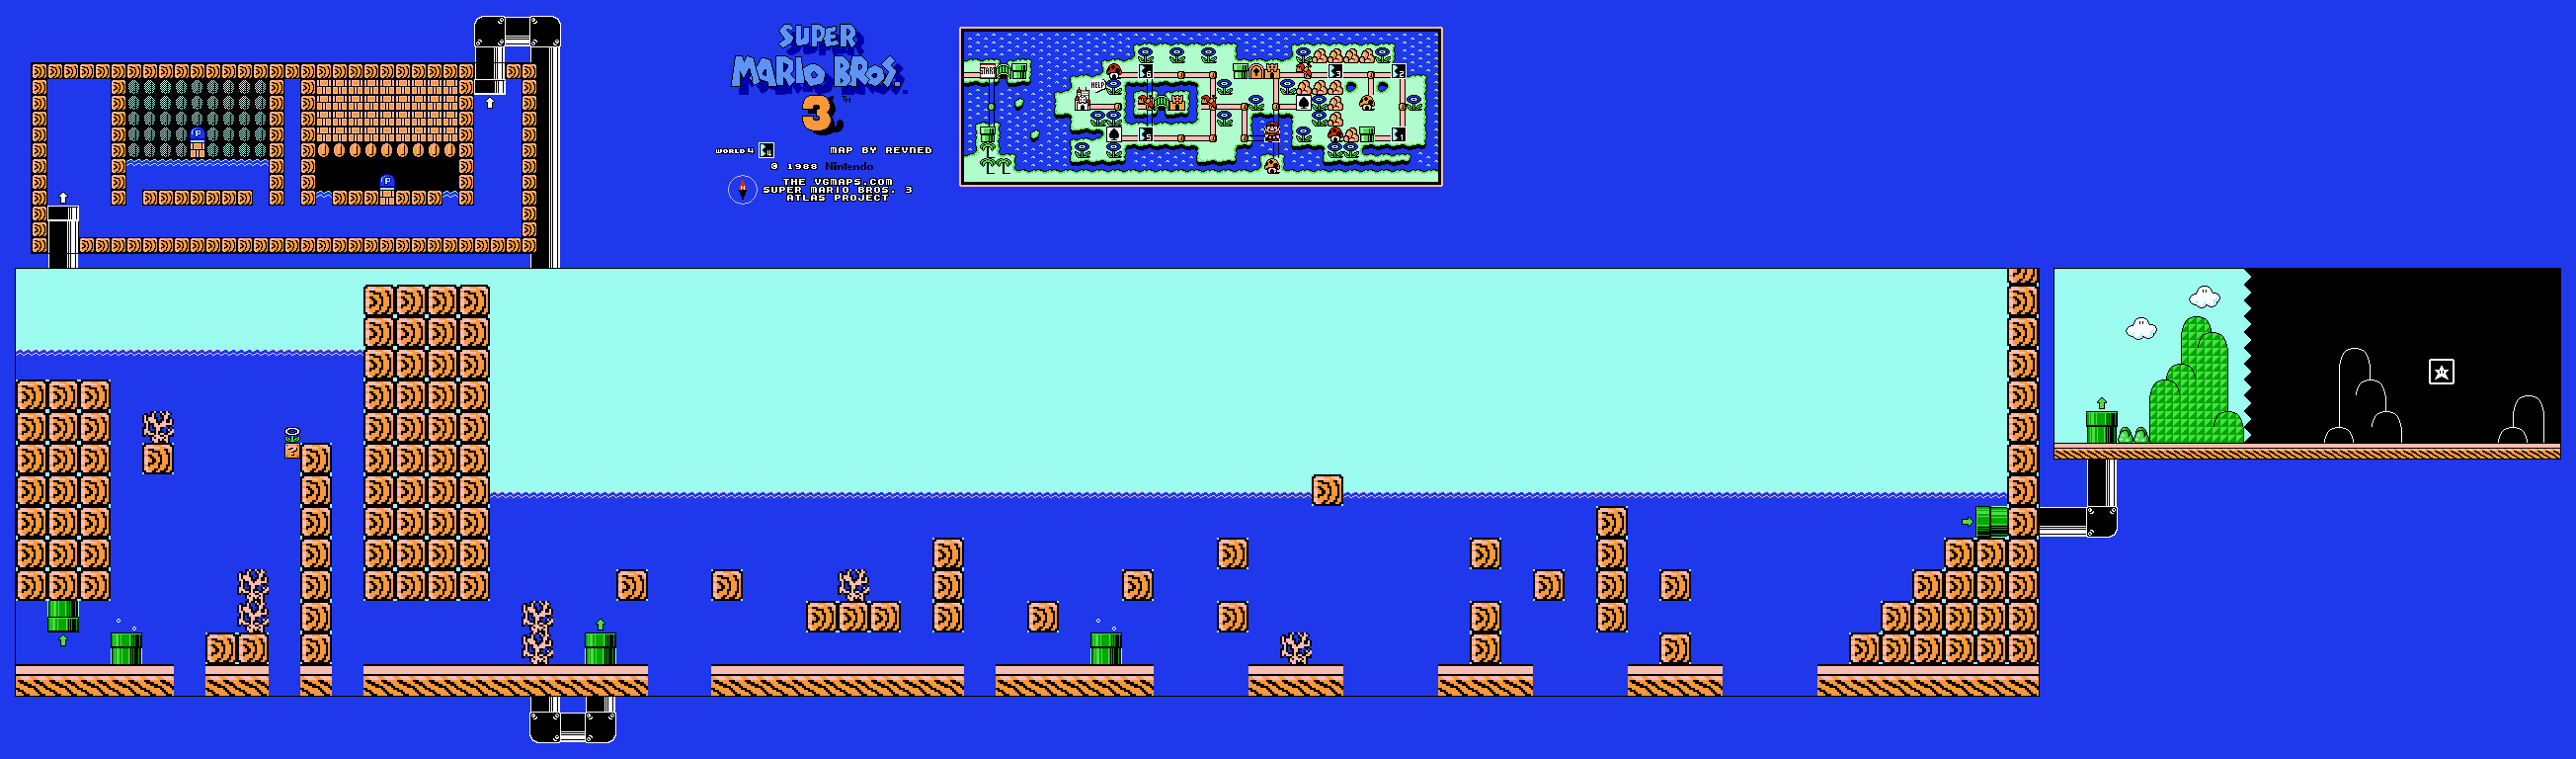
Lakitu follows above this water course and throws eggs into your route. Keep moving, using the larger wooden blocks to shelter or change height. The early question block contains the course’s only conventional power-up.
Directly below the start is a current-blocked pipe to a coin room. Use the Frog Suit to swim into it; ordinary Mario is pushed away by the bubble jet. Return and follow the water passage to the right, choosing gaps between the falling eggs rather than rushing to the surface beneath Lakitu. The final pipe reaches the goal.
World 4-5
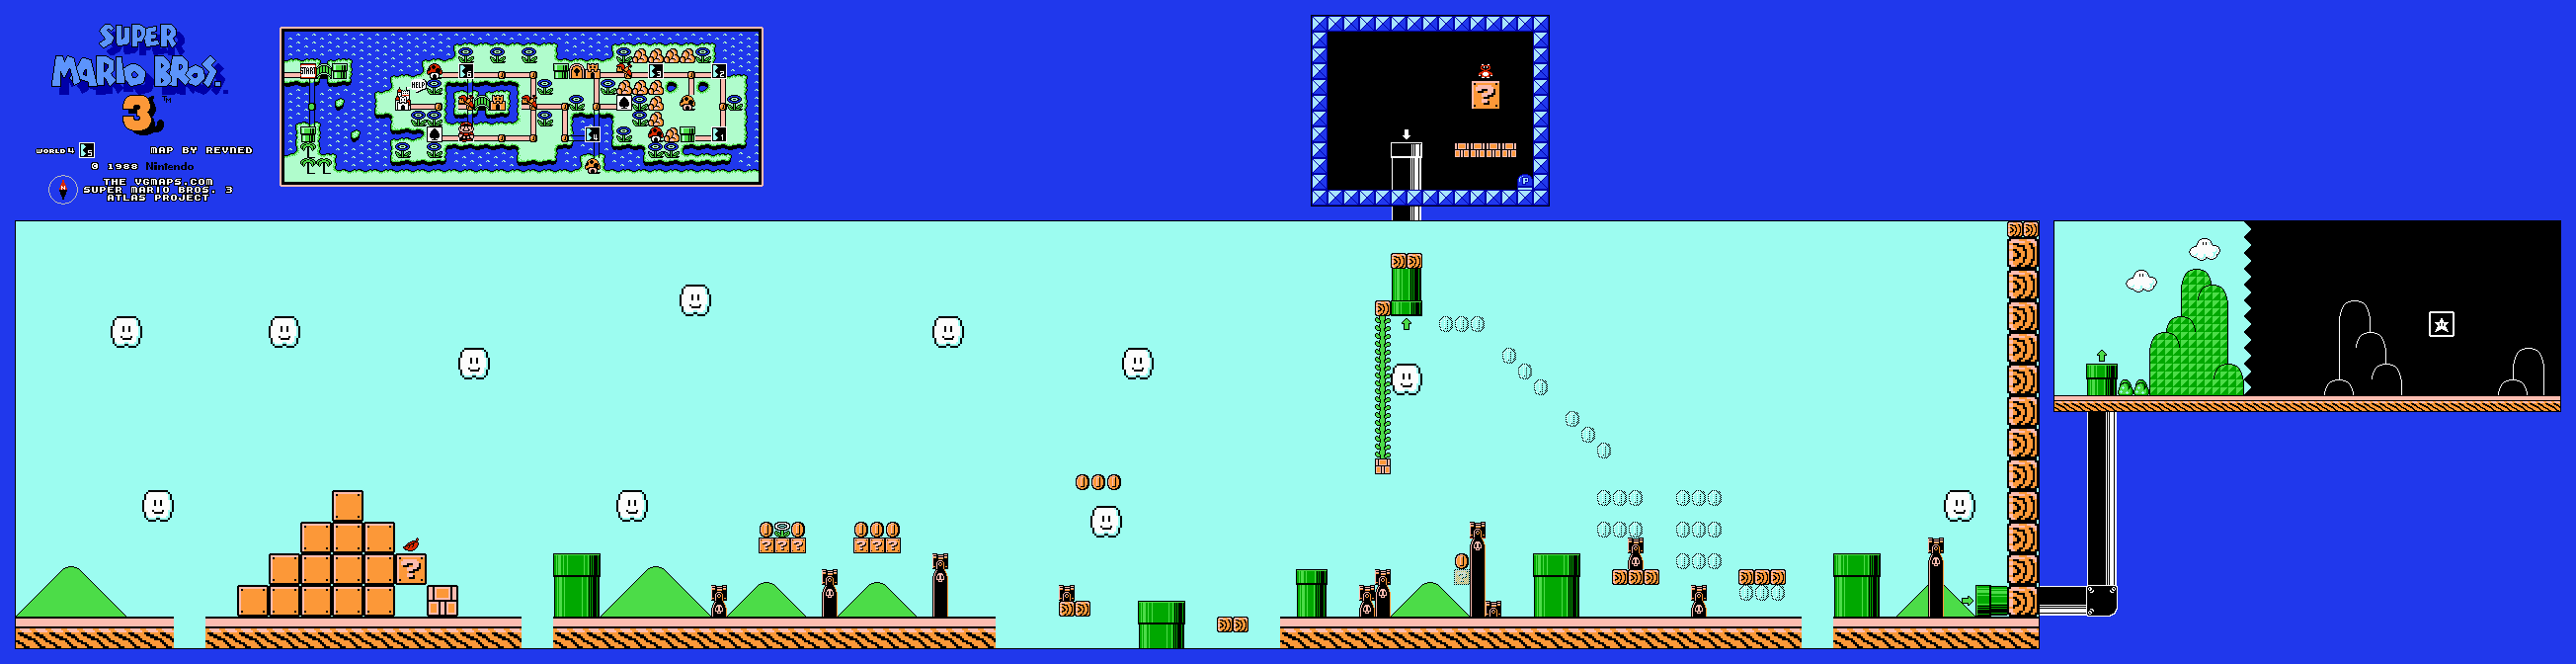
Stomp a Giant Koopa and use its shell on the first giant power-up block. Past the large plant, the cannons introduce Missile Bills that can turn back toward Mario. Watch behind you after passing one, and do not assume every Bullet Bill travels straight off the screen.
Above the later cannon pair, a brick hides a vine to a high pipe. Enter it for a secret room with a Tanooki Suit and P-Switch. The suit gives flight and a temporary statue form; an ordinary Super Leaf has no statue ability. Return to the cannon route, wait for the final plant opening and take the pipe to the goal.
World 4-6
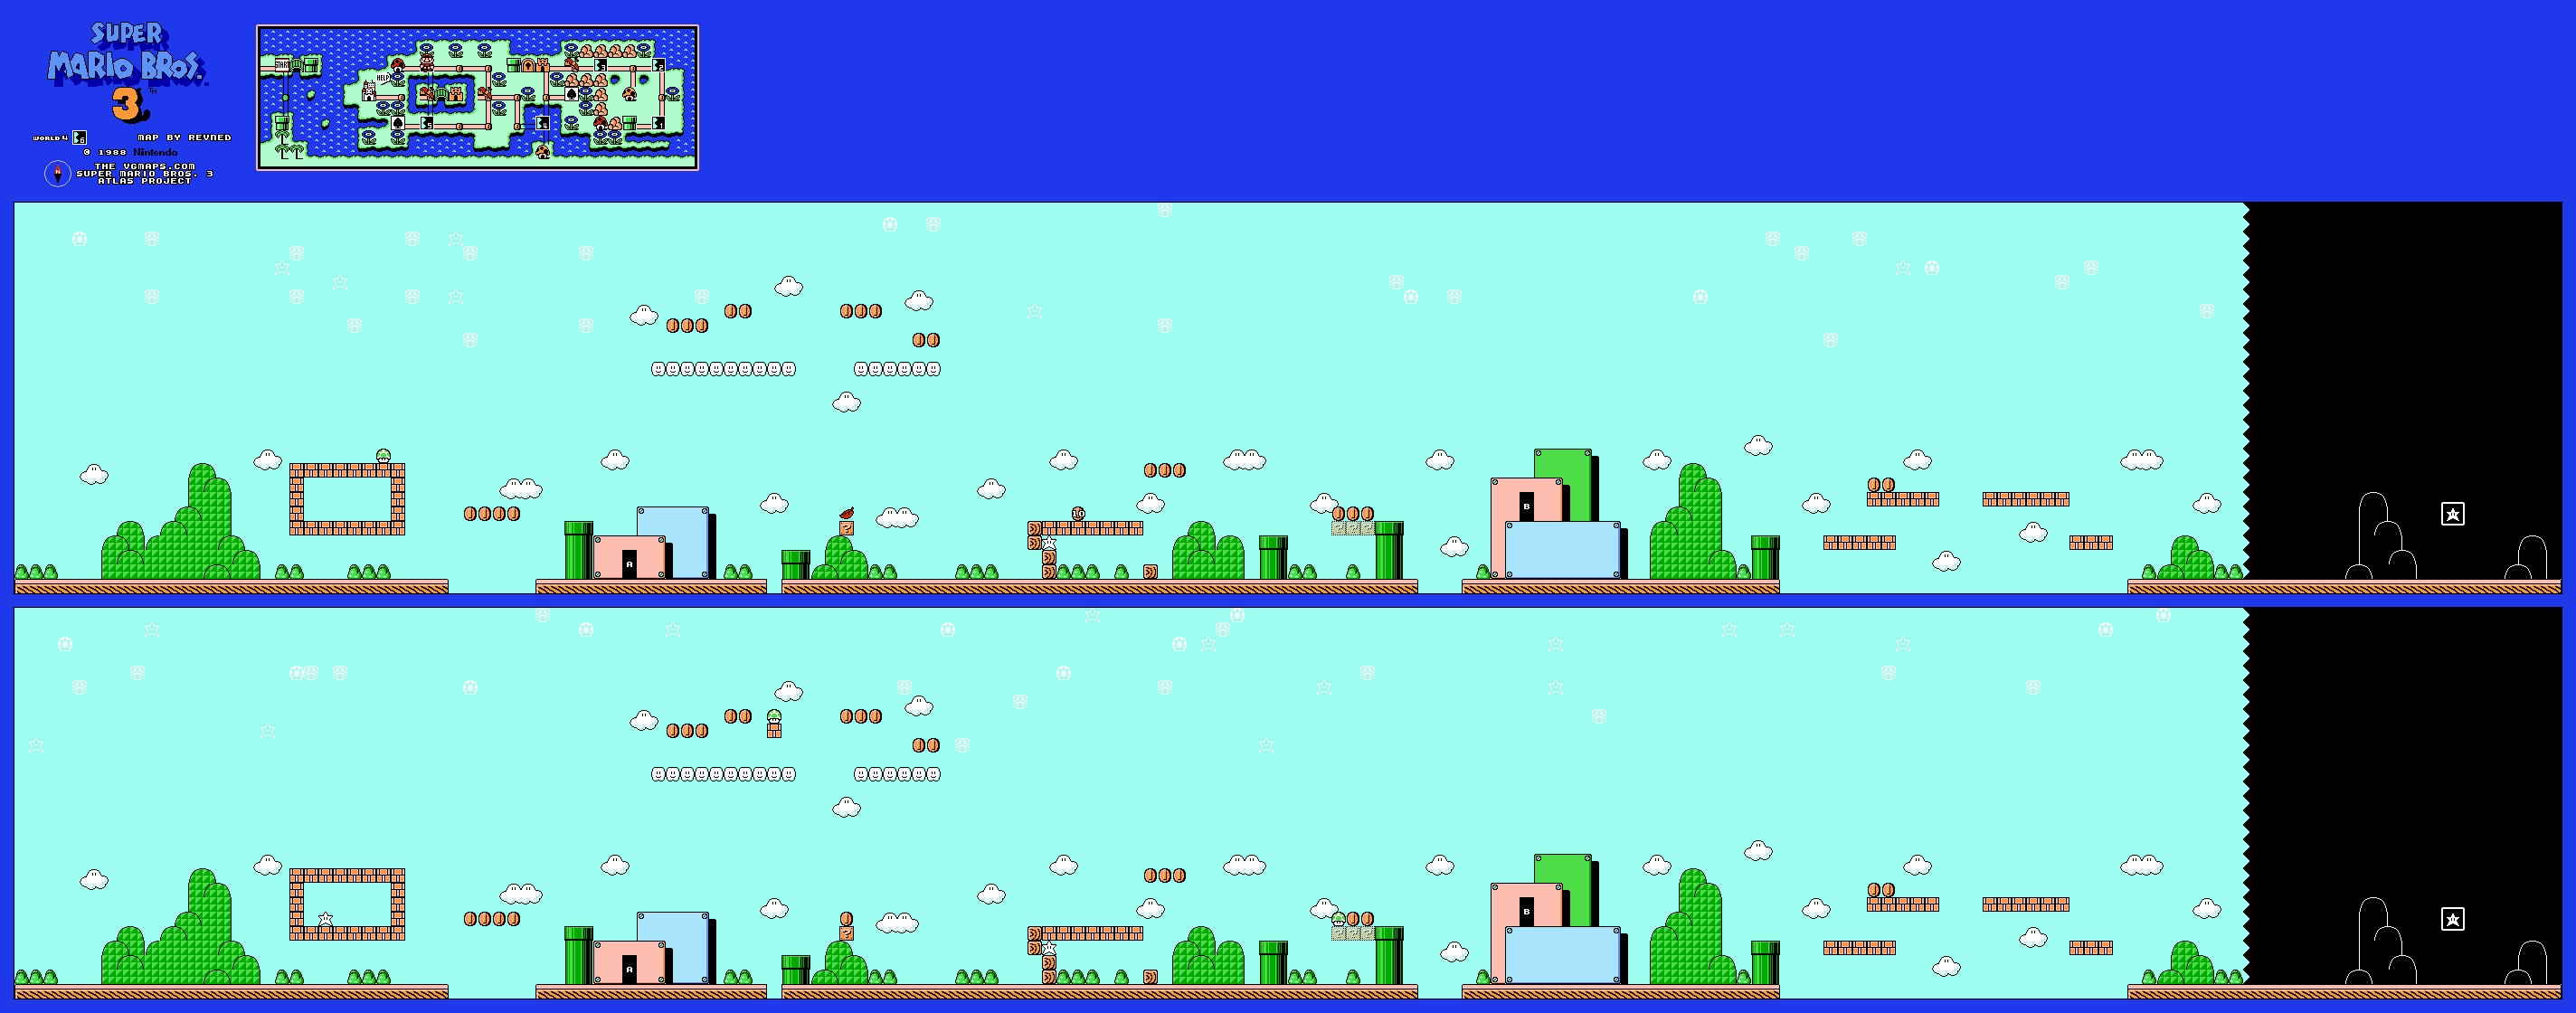
The two Magic Doors switch between giant and normal versions of the same landscape. Items can change between the versions, so inspect both sides before leaving an area. In the first brick ring, the giant version holds a 1-Up where the smaller version has a Super Star.
Use a tail to reach the high clouds for coins. Between the later two pipes, reveal the invisible blocks beside the right pipe; the giant side includes a 1-Up. Cross the final raised brick path by judging each Koopa’s or Giant Koopa’s space. The doors change this course’s local layout; they do not transport Mario to a different world.
Fortress 2
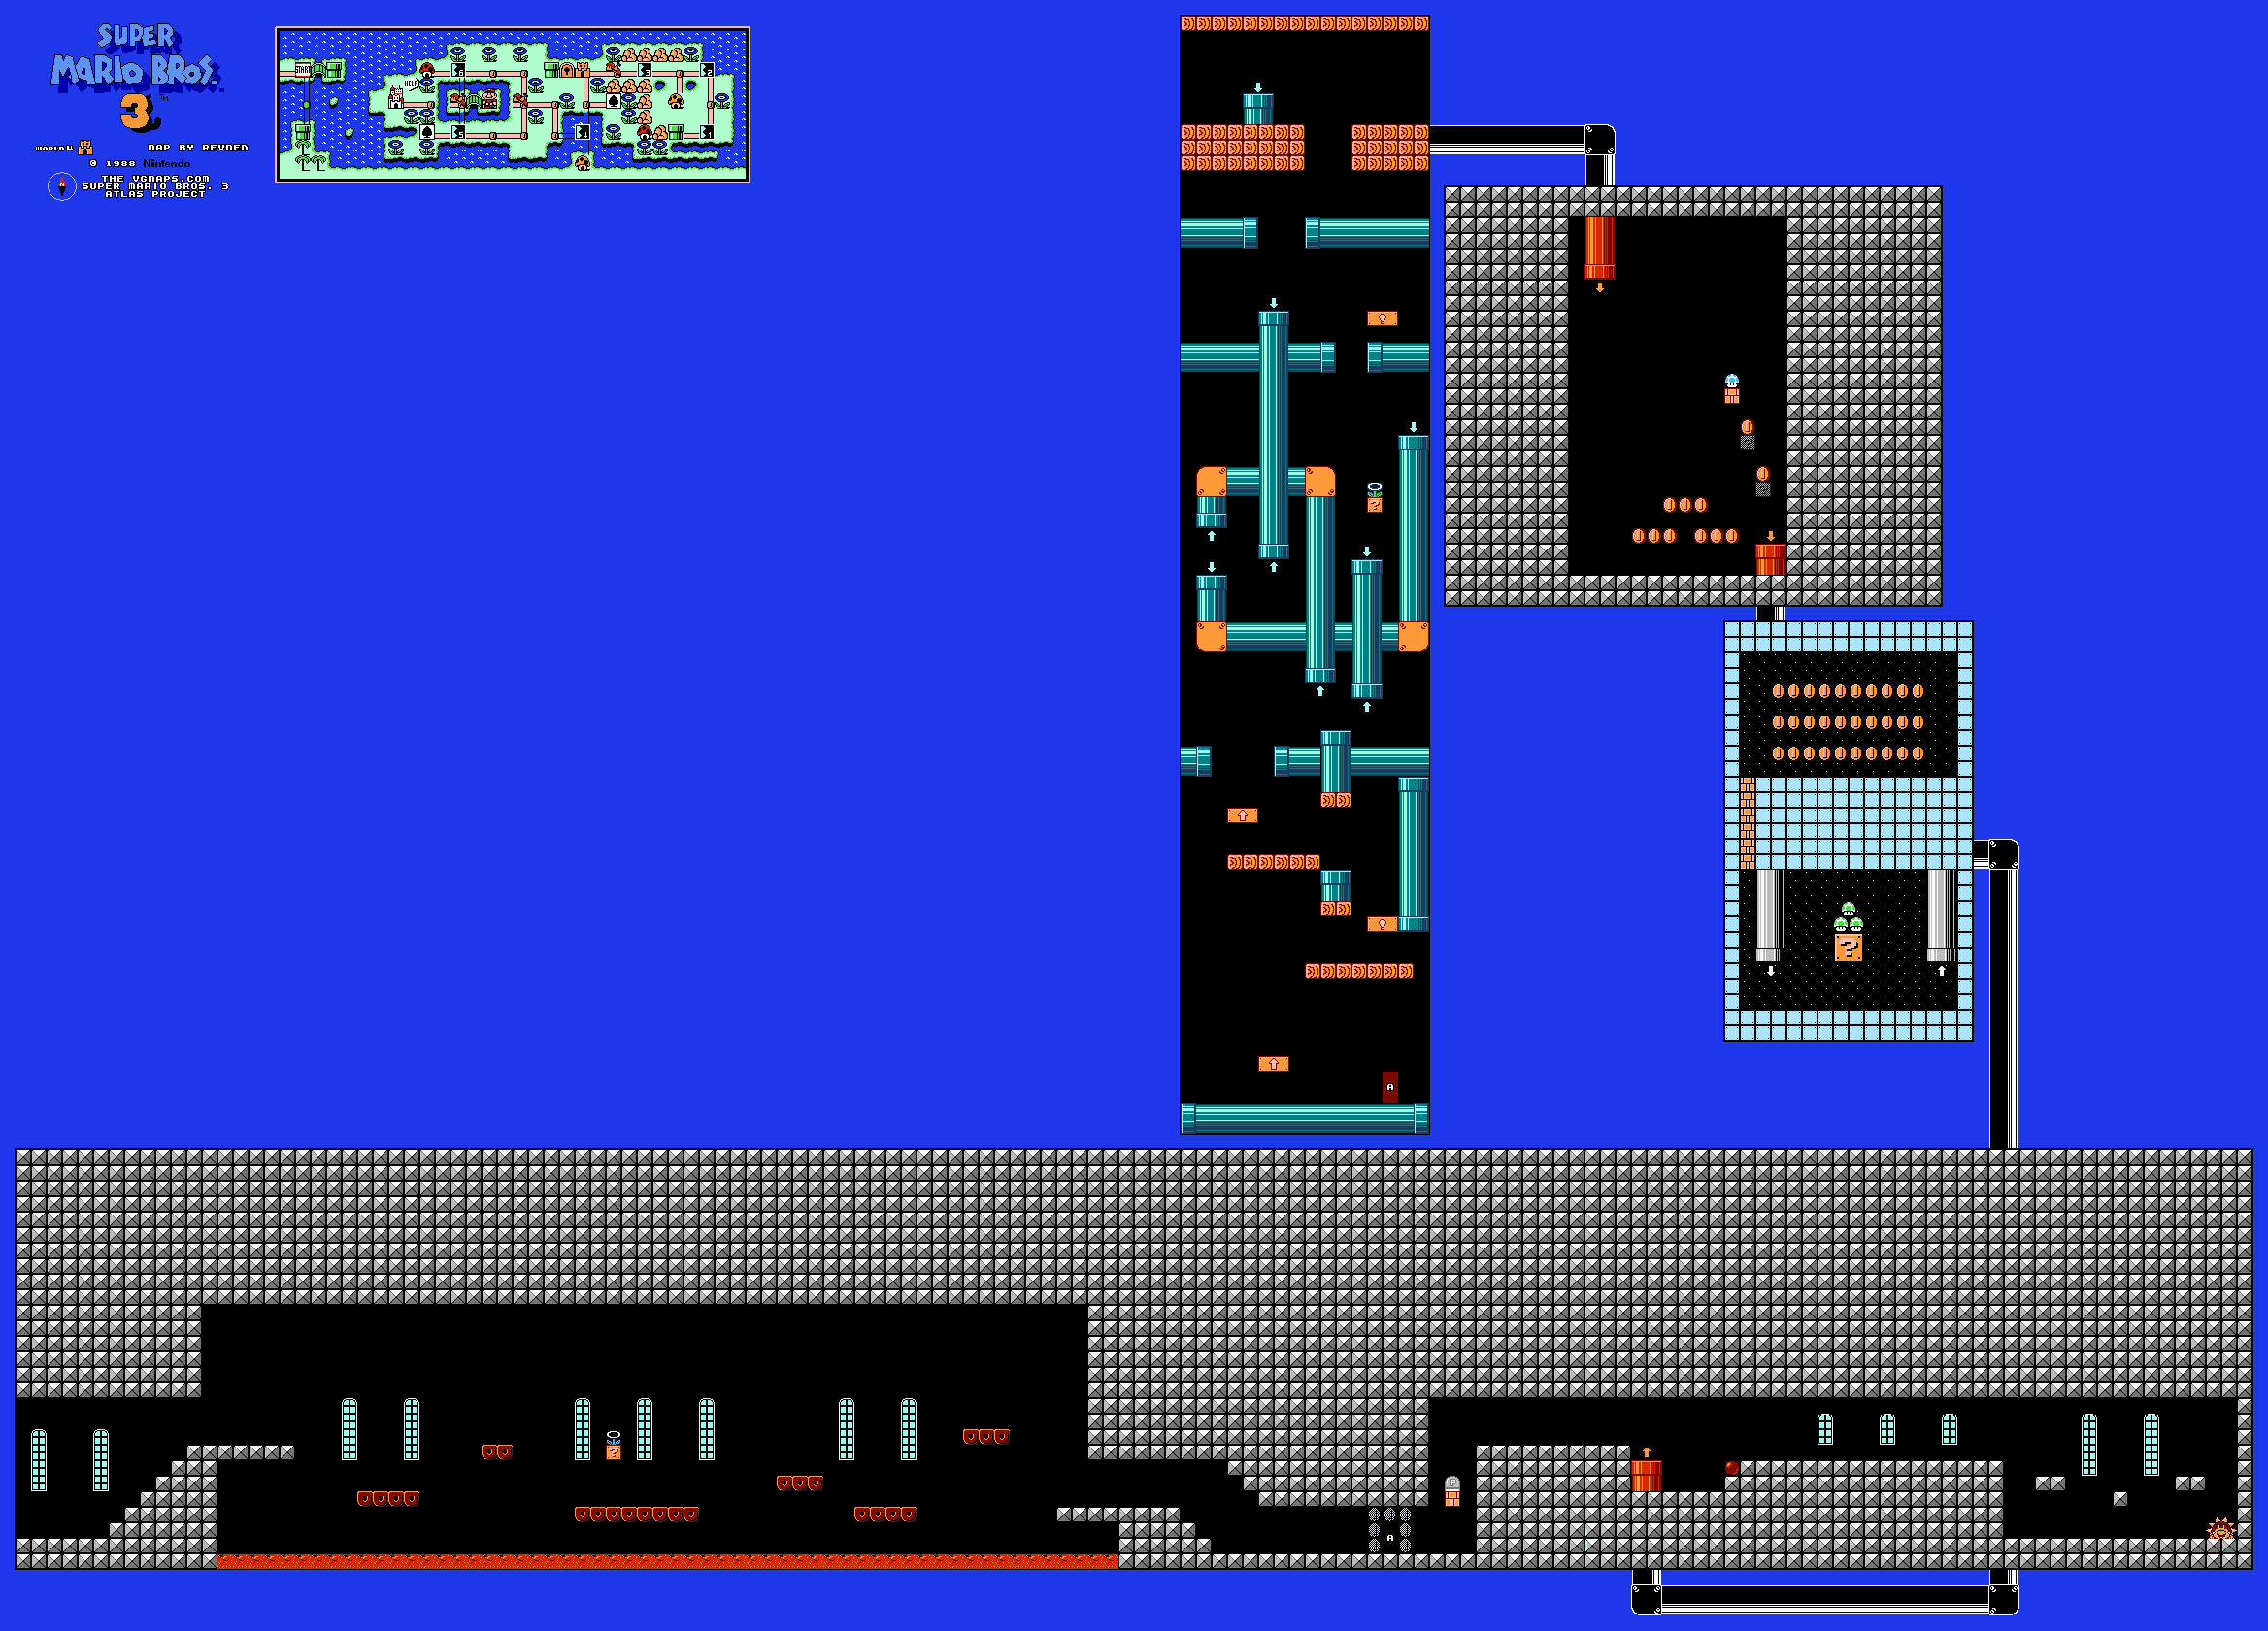
Cross the Donut Lifts above lava, taking the middle power-up without lingering on a sinking platform. Beyond the Dry Bones, a brick holds a P-Switch. The normal upper hallway continues toward Boom Boom; pressing the switch reveals a secret doorway.
Through that doorway, climb the pipe-and-arrow-lift room. Its screen wraps at the sides. Use the pipes and directional lifts to reach the upper exit, then reveal the stepping blocks toward a brick with a 1-Up. The next room has a giant question block containing three more 1-Ups. A tail also reaches the high coin section. Take the final pipe back near Boom Boom and complete the three-hit fight.
Airship — Iggy Koopa
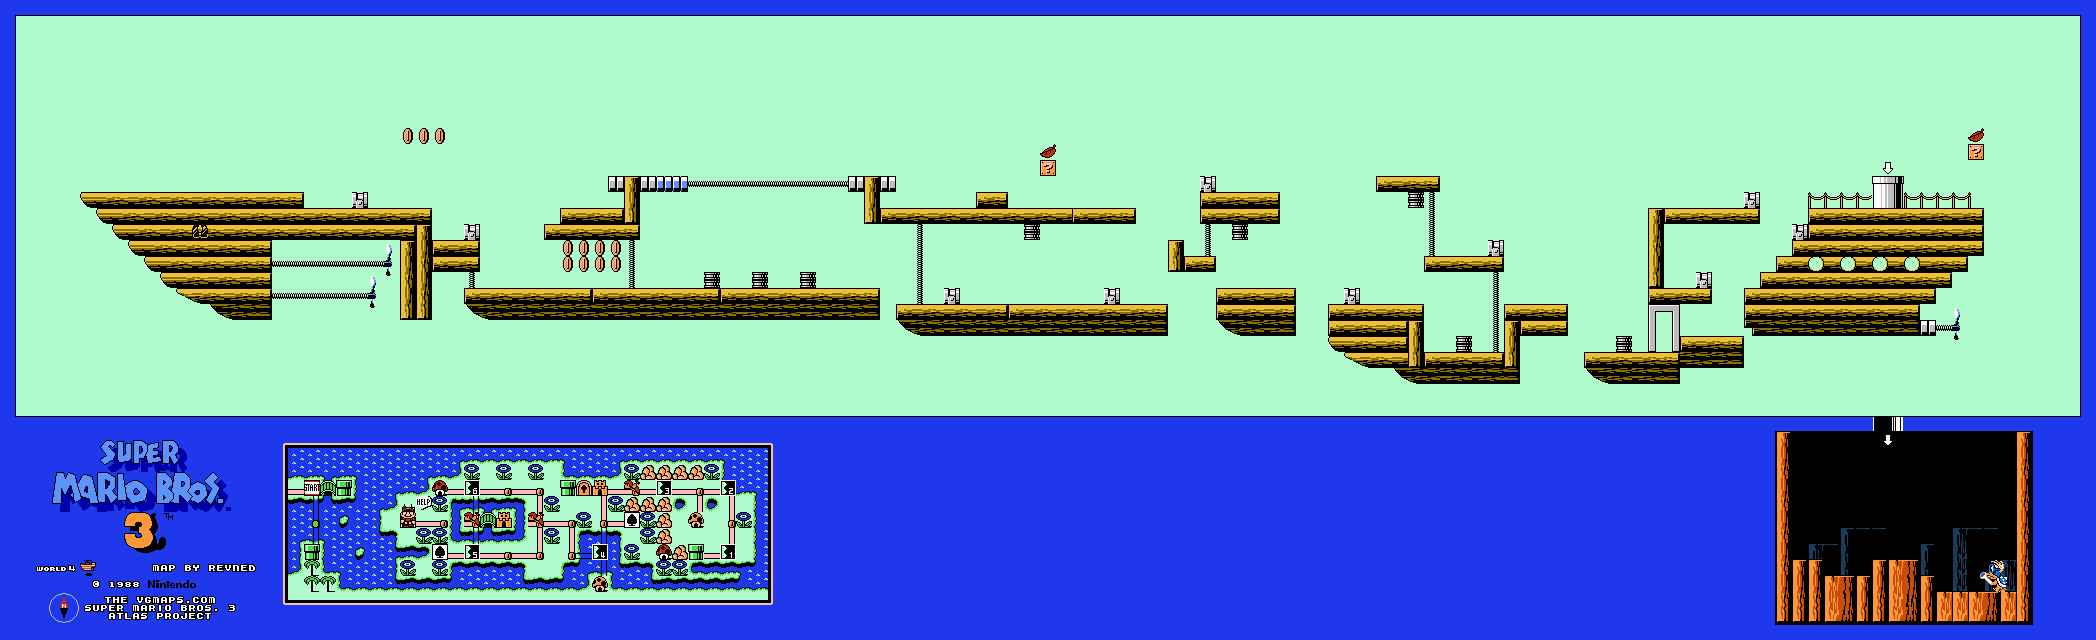
Choose between the lower engine-lined deck and the more open upper route. The ship scrolls slowly, so use that time to wait out each flame before moving. The upper Bolt Lift bridges the first wide gap. Watch Rocky Wrenches near the later platforms and collect the power-up beyond the boss pipe if you need it before entering.
Iggy moves quickly and fires wand shots over an uneven floor. Jump from a position that keeps Mario above his head rather than beside a raised ledge. After a stomp, avoid the shell and wait for him to expose his head again. Three stomps return the wand and open Sky Land.
World-map notes
A Hammer used on the rock left of 4-1 opens a special Tanooki Suit house. The main map also offers the 4-5 or 4-6 branch before the second fortress; both courses are included above. Save an Anchor for an airship attempt if its movement would otherwise force more map travel.
Continue the walkthrough
Previous world: Water Land · Walkthrough overview · Next world: Sky Land
Warp Whistles · White Mushroom Houses · Items and bonus games