

World 5 — Sky Land. The lower map leads through the Spiral Tower to the clouds. Visit the Goomba Shoe course and lower fortress before climbing if you want every stage; both routes can open the tower.
Courses in this world
- World 5-1
- World 5-2
- World 5-3
- Fortress 1
- Spiral Tower
- World 5-4
- World 5-5
- World 5-6
- World 5-7
- Fortress 2
- World 5-8
- World 5-9
- Airship — Roy Koopa
World 5-1
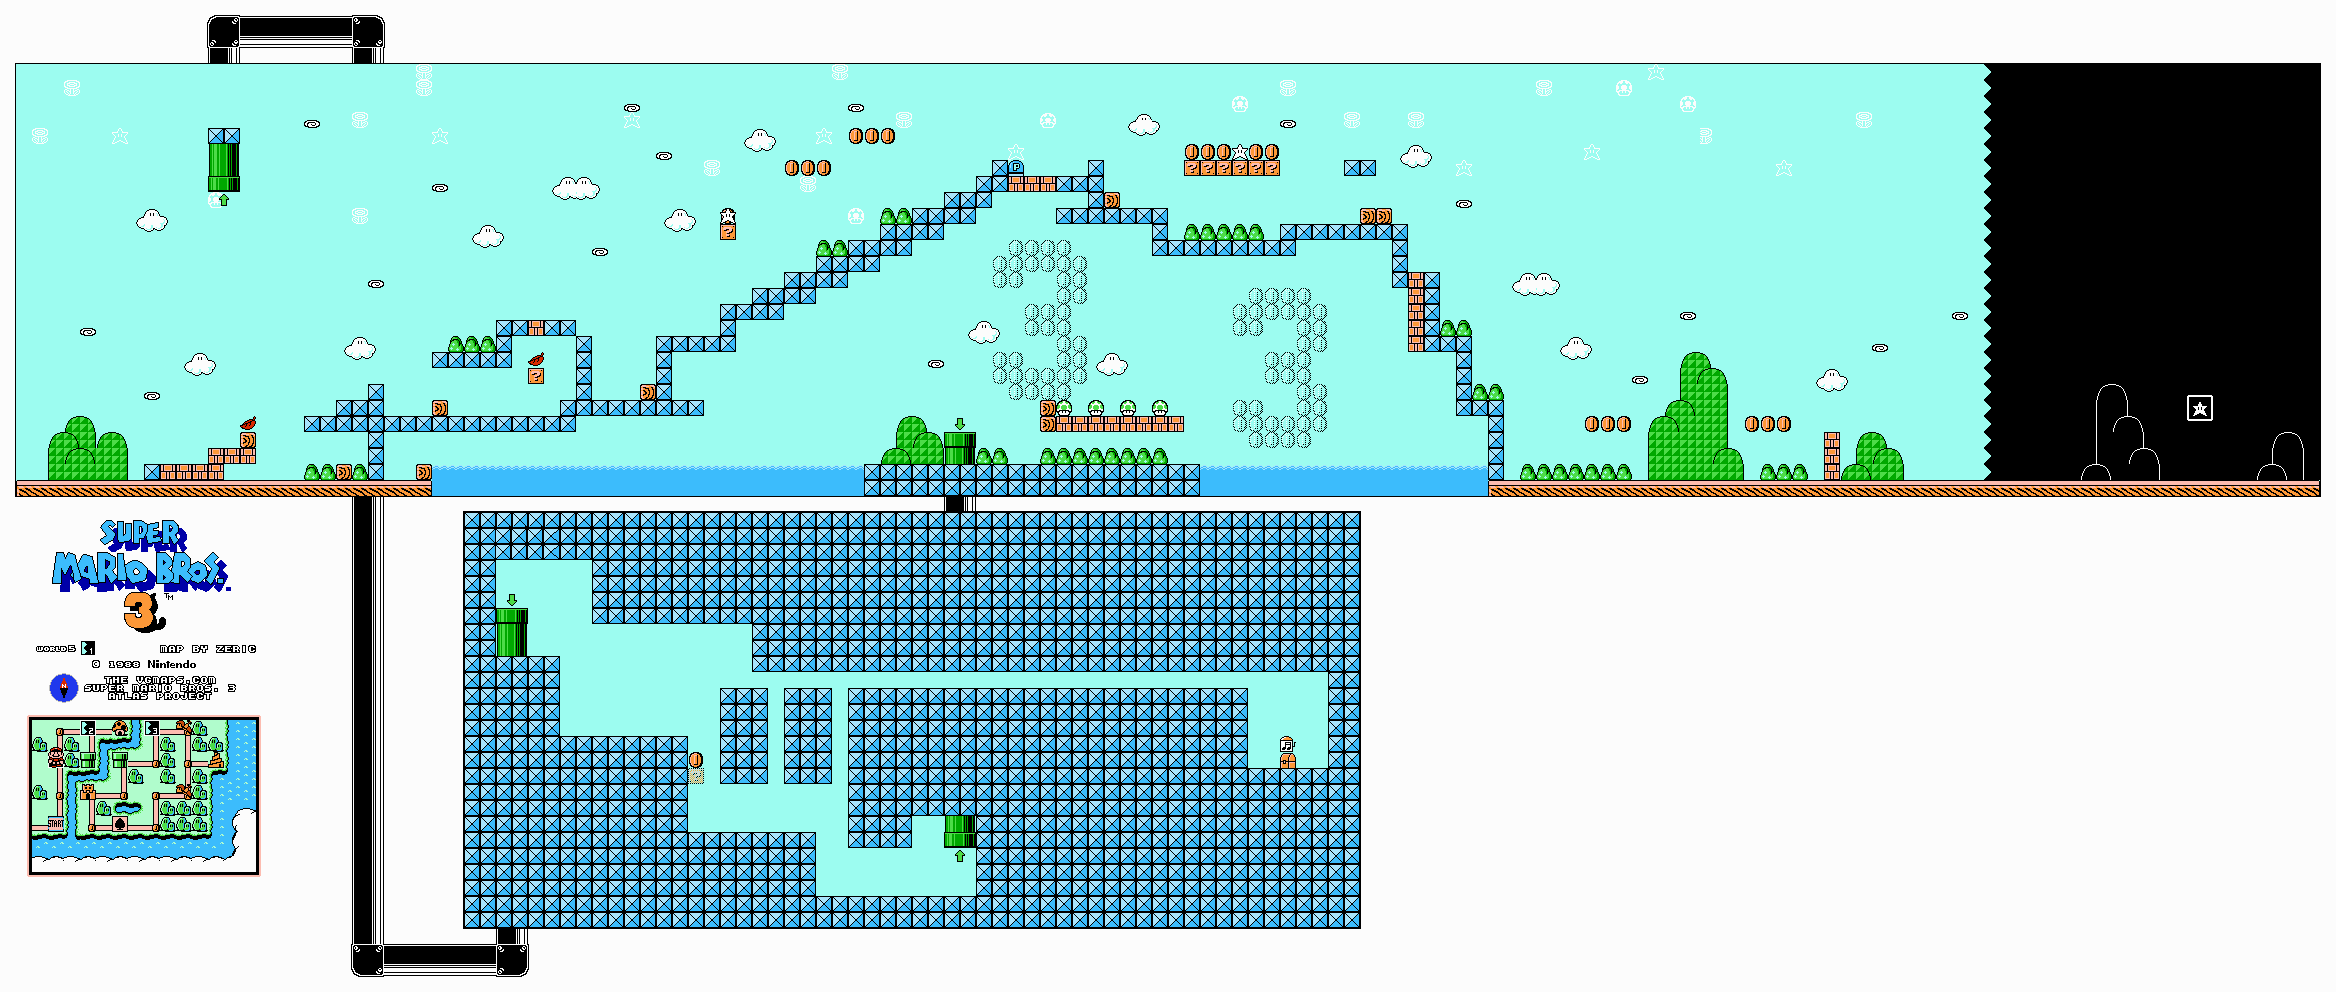
Buster Beetles throw the loose white blocks, so do not pause directly in their firing line. Use the early wooden-block power-up and cross the brick formations above the Chain Chomps. The normal route passes more Chomps and Nipper Plants before the goal.
With a flight power-up, reach the high pipe near the beginning. In its secret section, a low opening on the right reaches a Music Box chest; use small Mario or a controlled crouching flight to fit through. The other pipe reaches the lower bonus route with four 1-Ups. The high P-Switch produces coins shaped like two threes in the NES version. The Music Box chest is a special-item finish, while the normal path ends at the goal card.
World 5-2
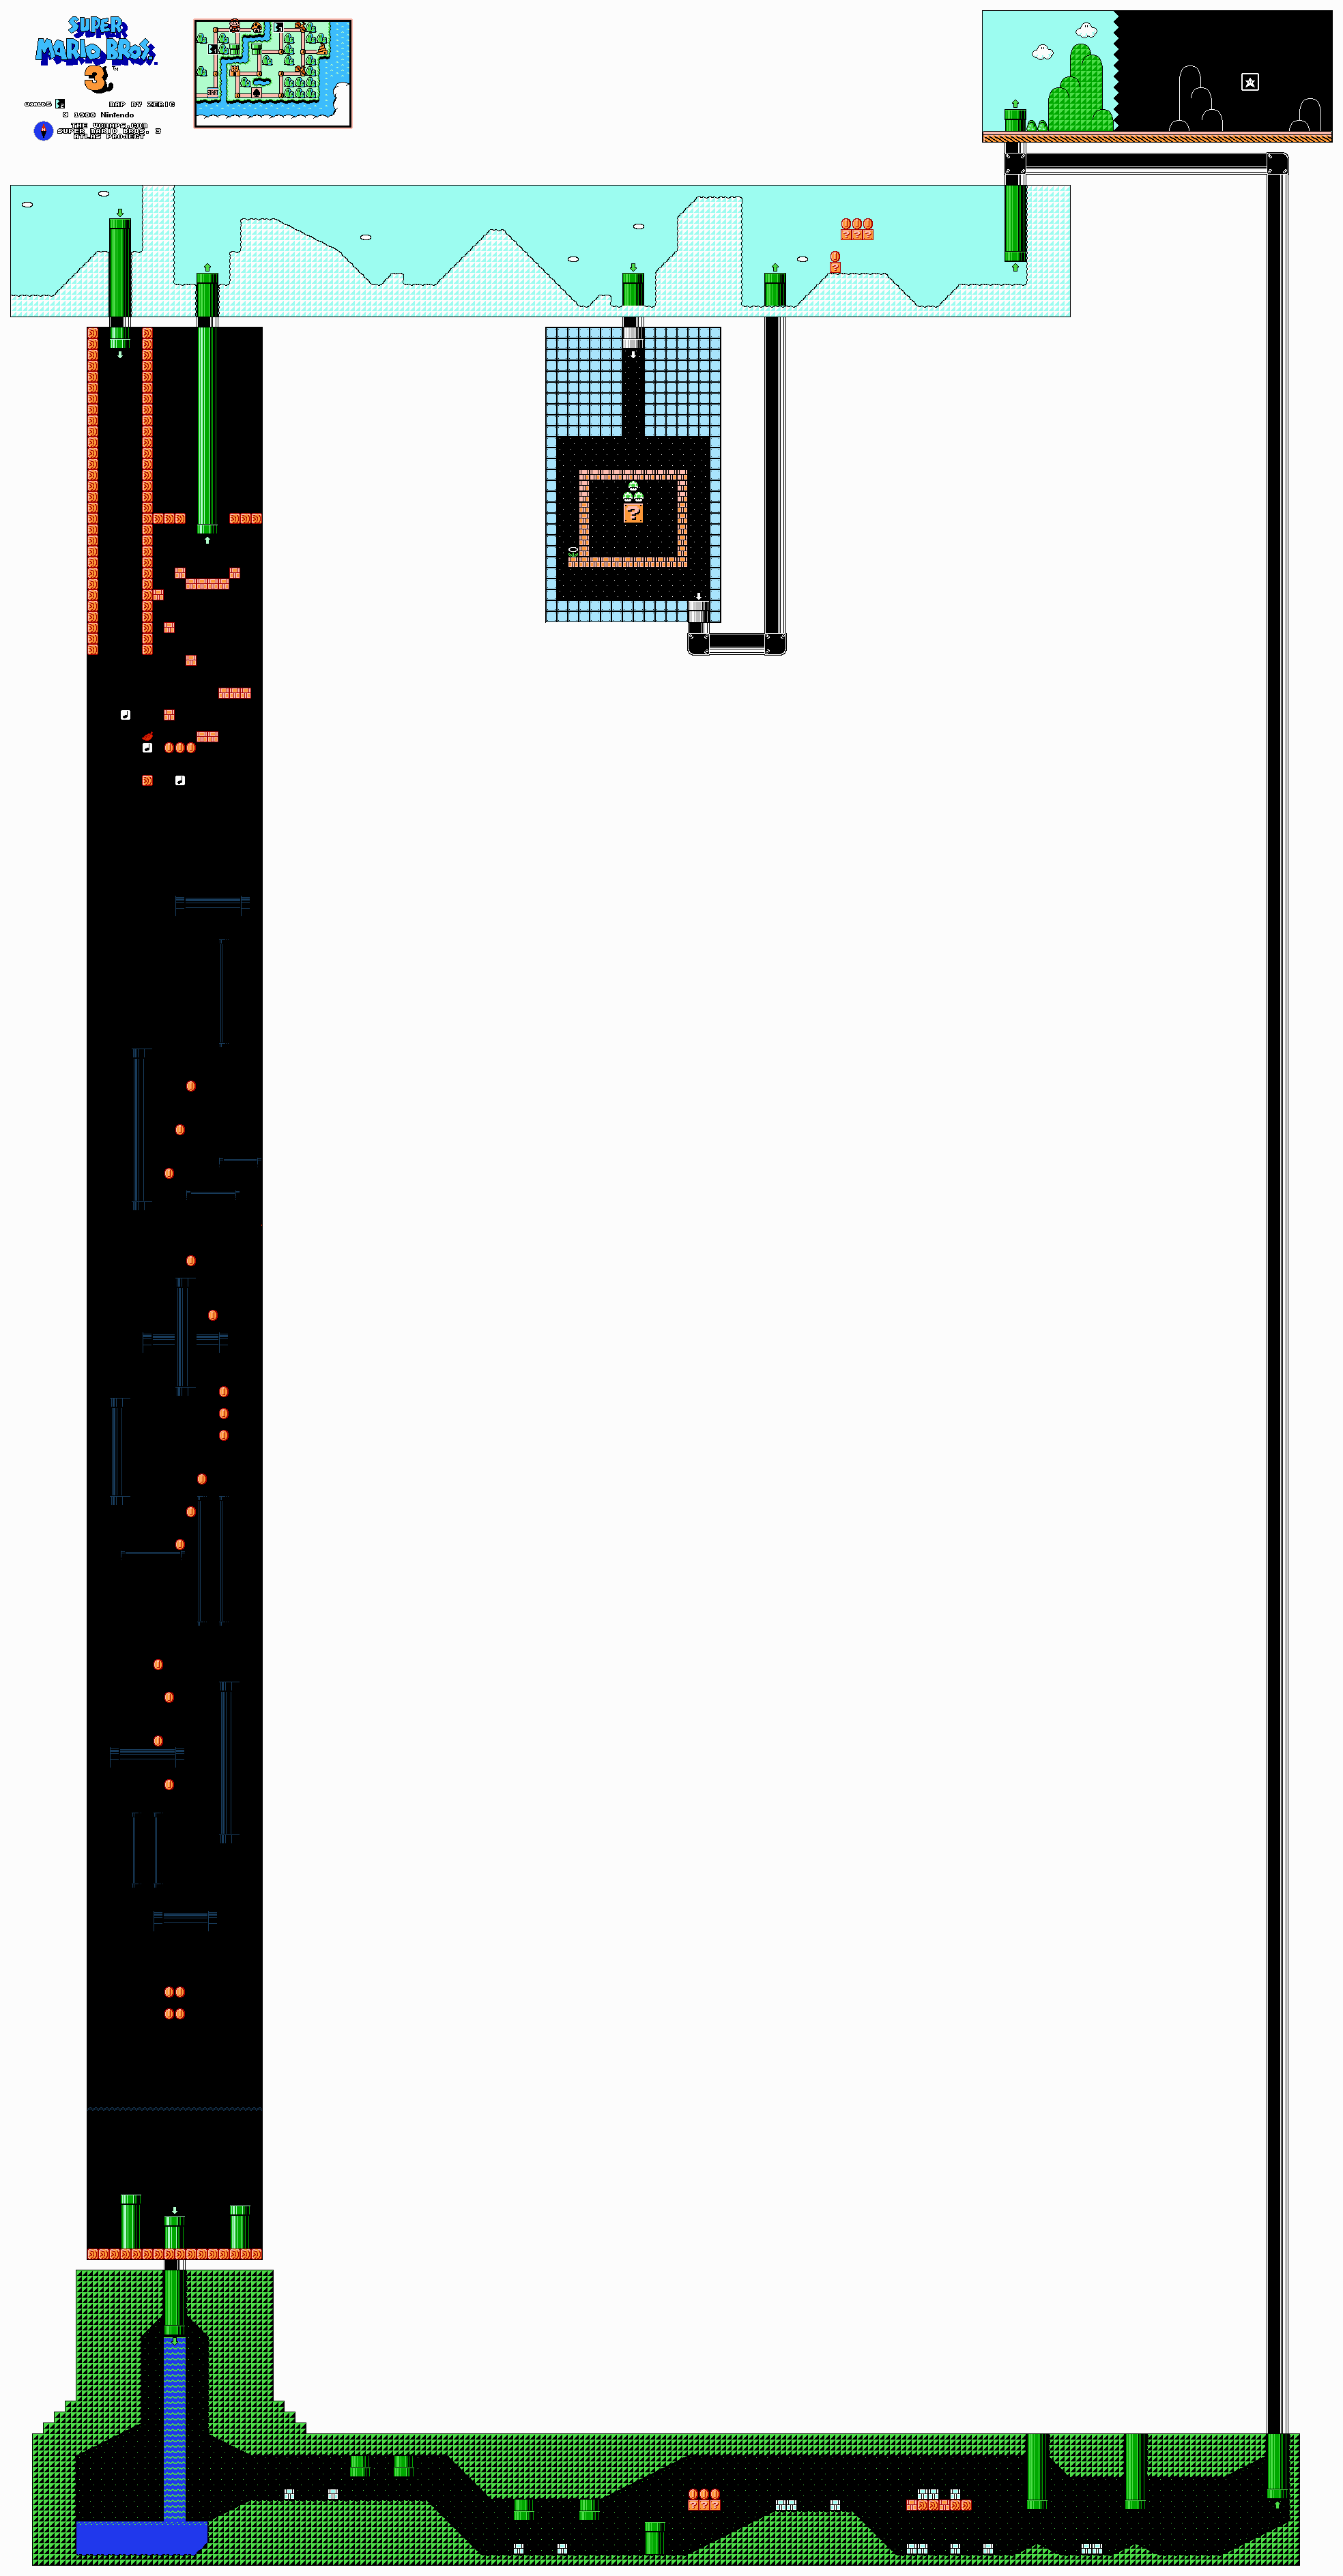
After entering the pipe, stop the fall by landing on the Note Block. Bounce onto the upper brick path for the safer high route. Its later pipe reaches the room with a giant question block: break the supporting bricks and hit the big block for three 1-Ups. Return to the upper course and take the final pipe.
Letting Mario fall instead sends him into water. Only the middle of the three pipes continues. This lower cave has Buster Beetles throwing white blocks beneath hanging Piranha Plants. Remove a Beetle before it picks up its ammunition, or jump its throw from a clear landing. Follow the rising slopes and exit by the far pipe. Both routes reach the same goal.
World 5-3
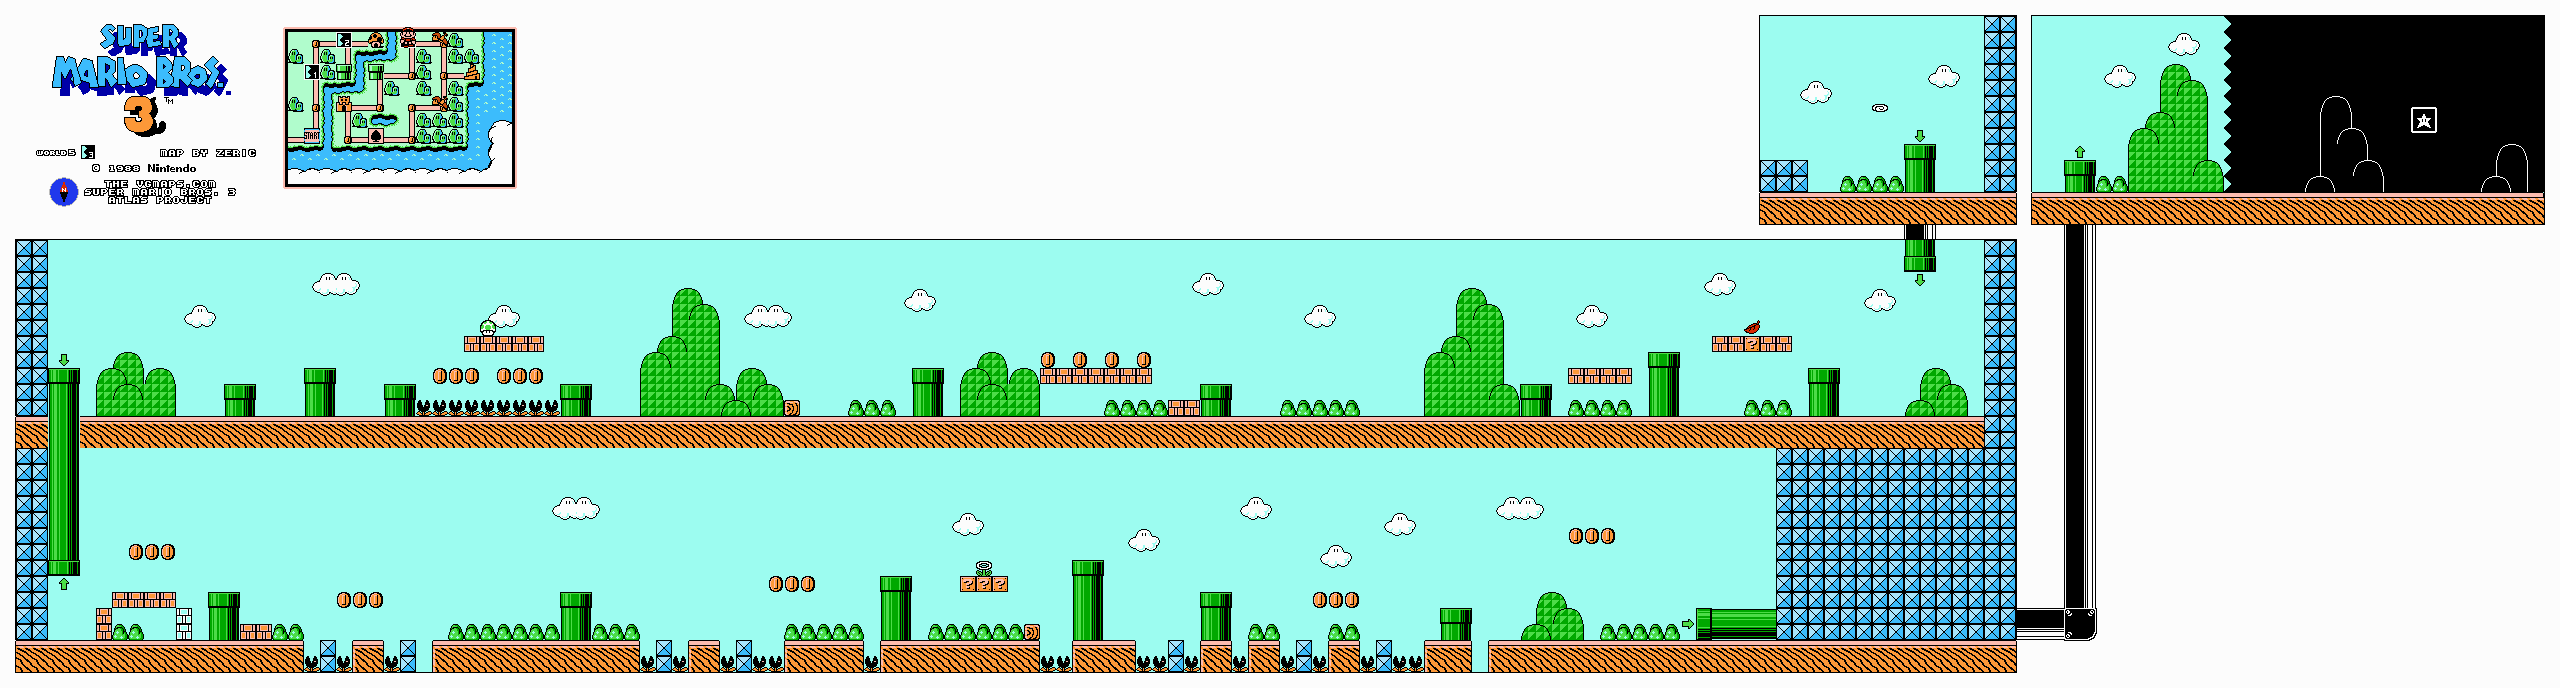
Take the hidden 1-Up near the start before entering the first pipe. The Goombas inside green shoes supply the course’s special movement item. Hit the supporting block from below to knock the Goomba out while leaving its shoe, then jump inside. Stomping directly on the rider defeats it without giving you the same opportunity to keep the shoe.
The shoe lets Mario cross Munchers and stomp enemies that would normally hurt his feet. Use it for the Muncher-lined gaps and optional extra-life block. The second area supplies another shoe if needed. Cross the Spinies, plants and Bob-ombs to the last pipe. The shoe belongs to this course and disappears on leaving; it is not added to the world-map inventory.
Fortress 1
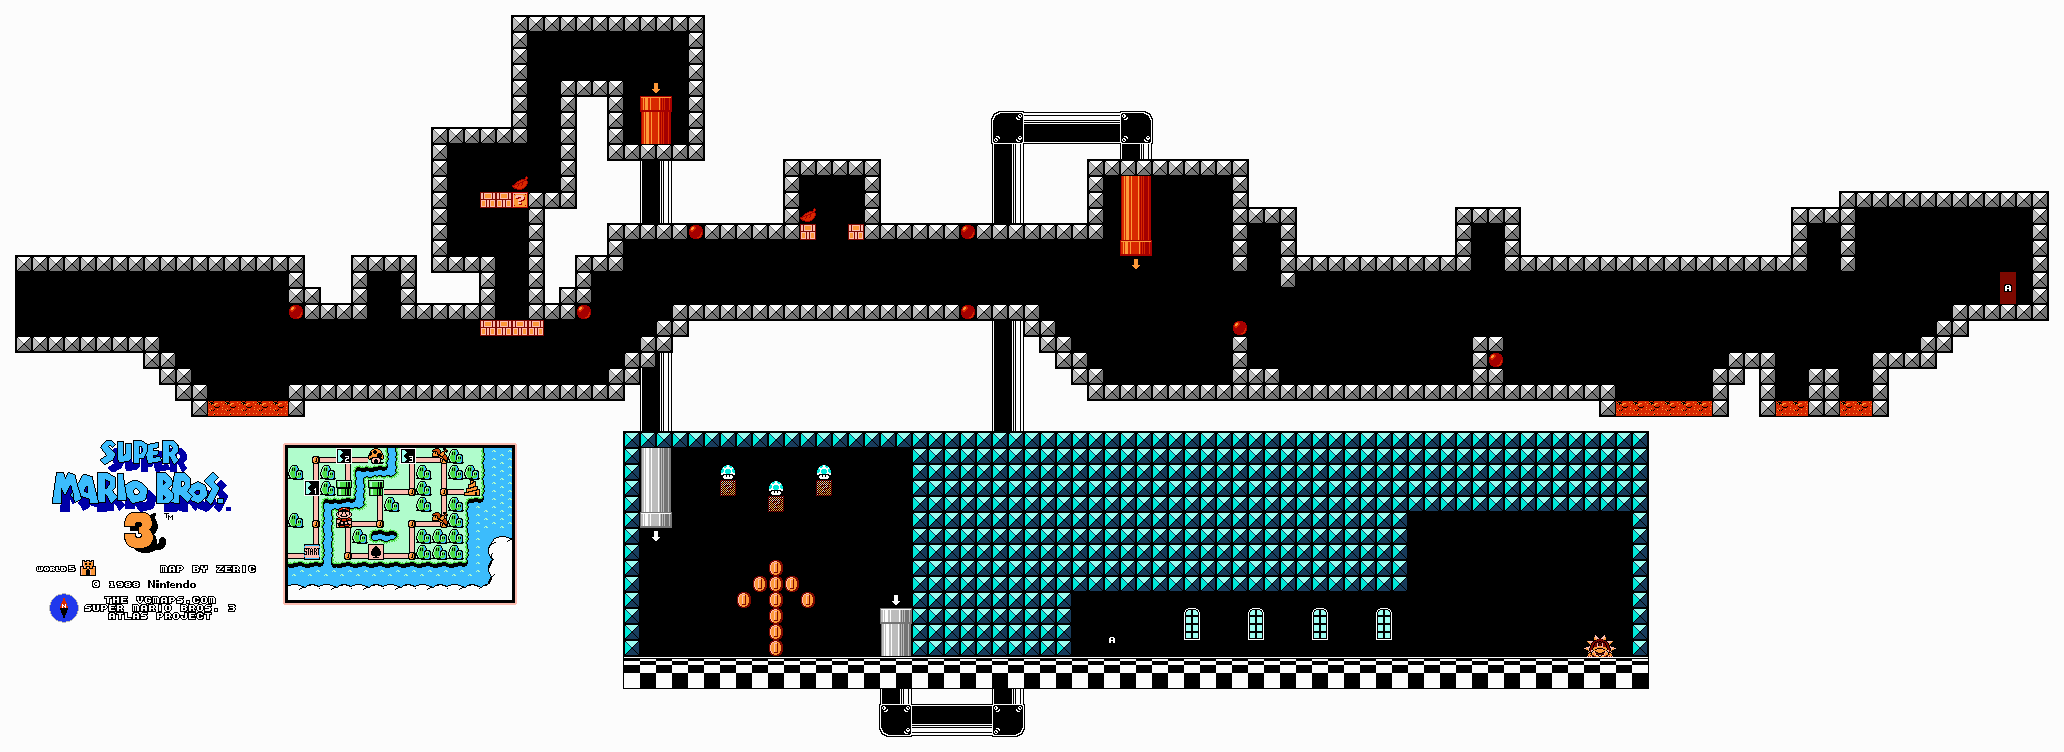
Cross the opening lava and Roto-Disc, then bait the Thwomp. Break the middle bricks in the next group to open a flight shaft. A Super Leaf is supplied below the high red pipe. Fly into that pipe, follow the upward coin arrow and reveal three invisible 1-Up blocks above the bonus room. Take the other red pipe back to the main route.
Without the detour, continue past the stairway Roto-Discs and the next Thwomp. Use solid landings to wait for the moving obstacles rather than jumping into the orb’s path. Cross the final lava gaps, reach the door and stomp Boom Boom three times. The map also allows 5-3 as the route toward the tower, but this fortress is included for a full course tour.
Spiral Tower
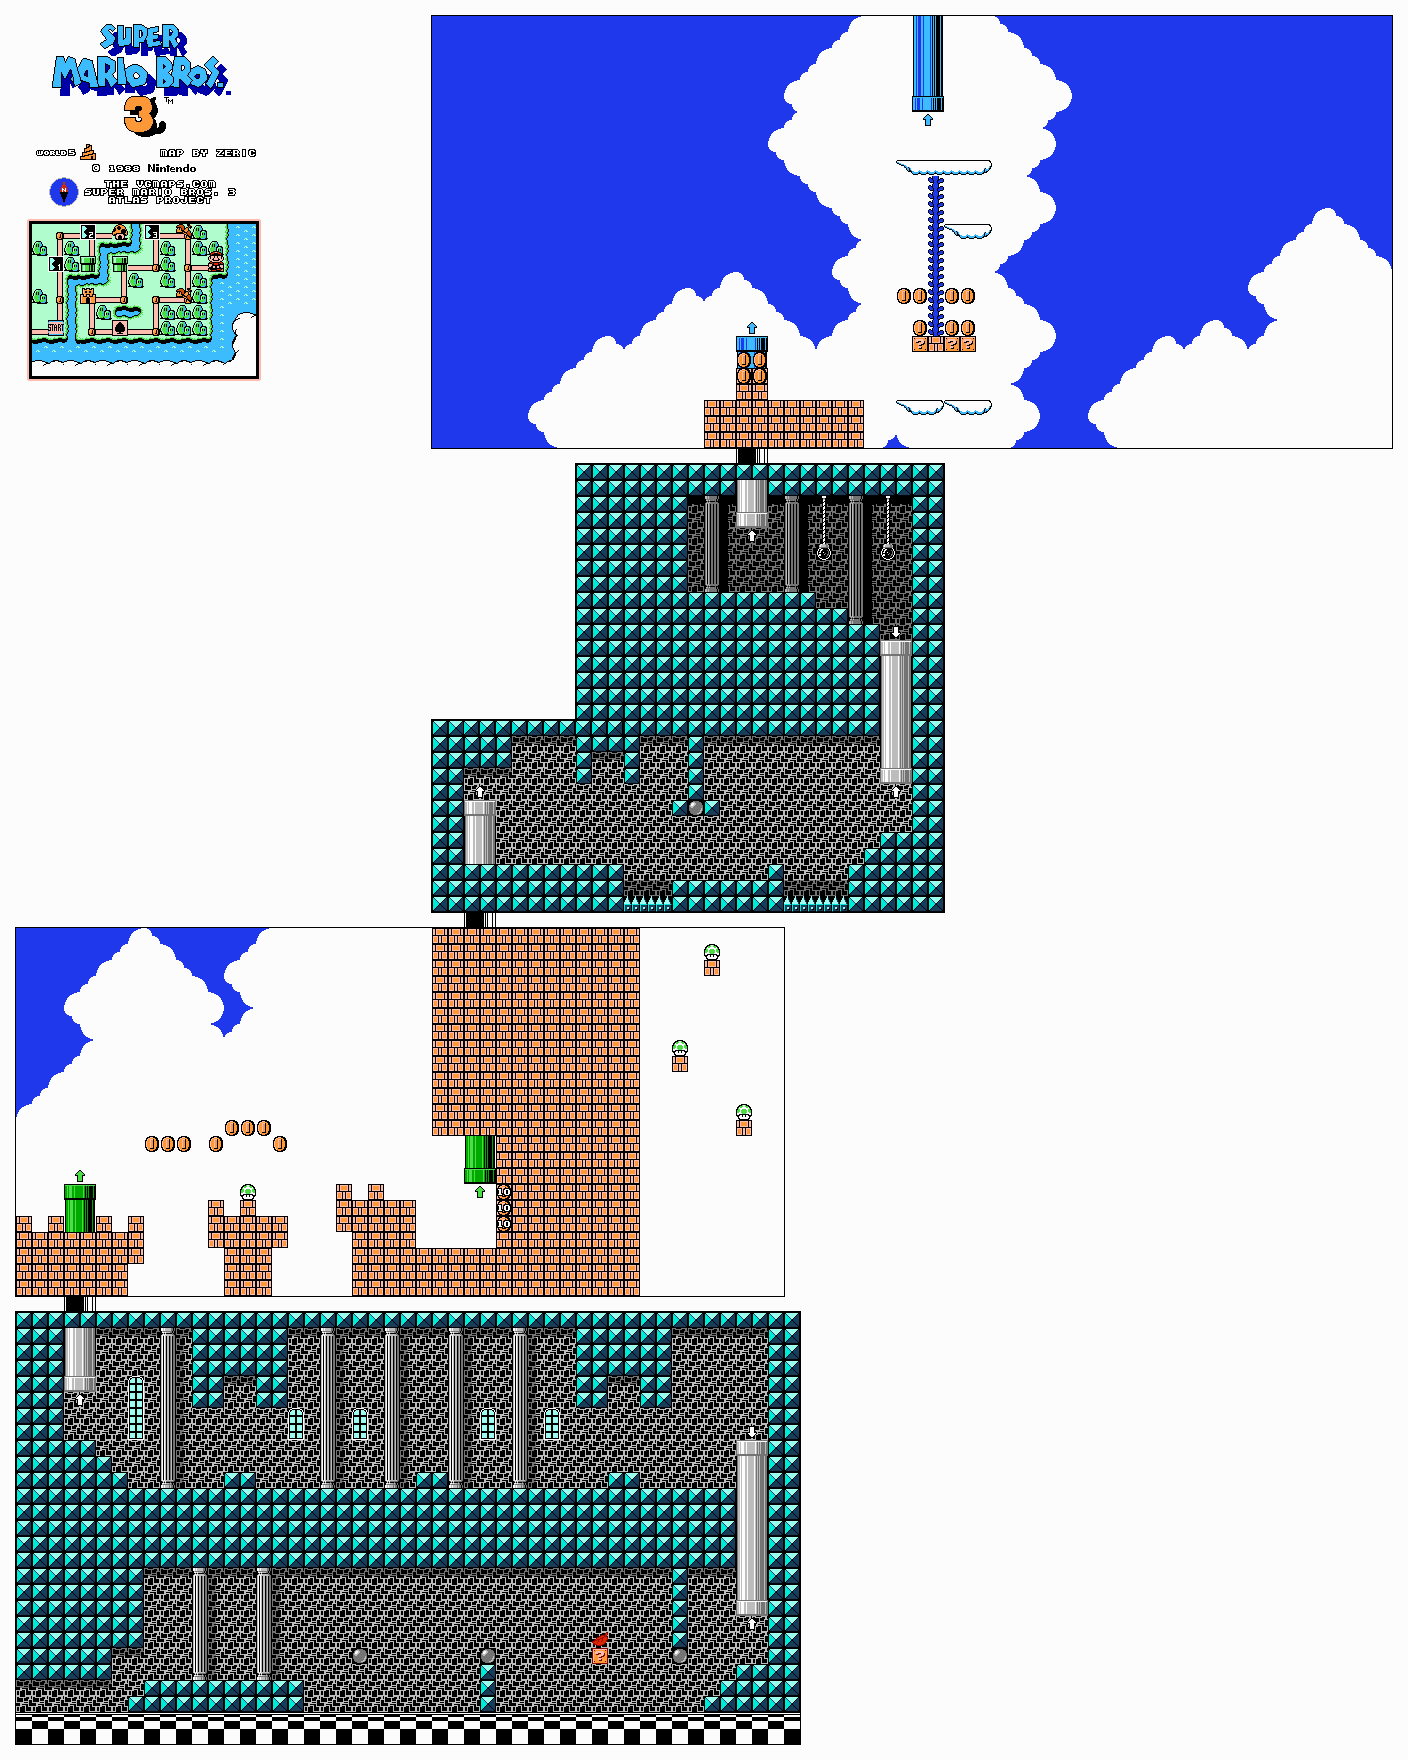
Climb through the Roto-Disc hall, taking the power-up between the middle orbits. The first pipe leads upward to a room where the route runs left past Thwomps. Continue outside onto the brick battlements. Watch for Micro-Goombas disguised as part of the tower; a brick in the center of the exterior formation contains a 1-Up accessible with the tail.
Use the next pipe for the higher indoor rooms. Cross the Thwomp, Roto-Disc and spike-trap passages, then take the ceiling pipe outside again. On the cloud to the right, hit the brick among the question blocks for a vine. Climb to the final pipe and enter the sky map. Returning down the tower later means climbing it again to reach the clouds, so finish any intended ground-map visits first.
World 5-4

Use the first cloud’s Leaf to reach the high coin route if you have room to fill the P-Meter. The ordinary path uses Rotary Lifts: some spin continuously, some pause and some tilt under Mario’s weight. Land only when the far edge can support the next jump, then leave before rotation carries you downward.
The pair of floating waterfalls can pull Mario away from the high route. Use the wooden blocks at their sides as the intended stepping stones. Continue through the remaining lifts and Paratroopas to the exit pipe. A Lakitu appears in the short goal area, so collect the card without waiting underneath its falling eggs.
World 5-5
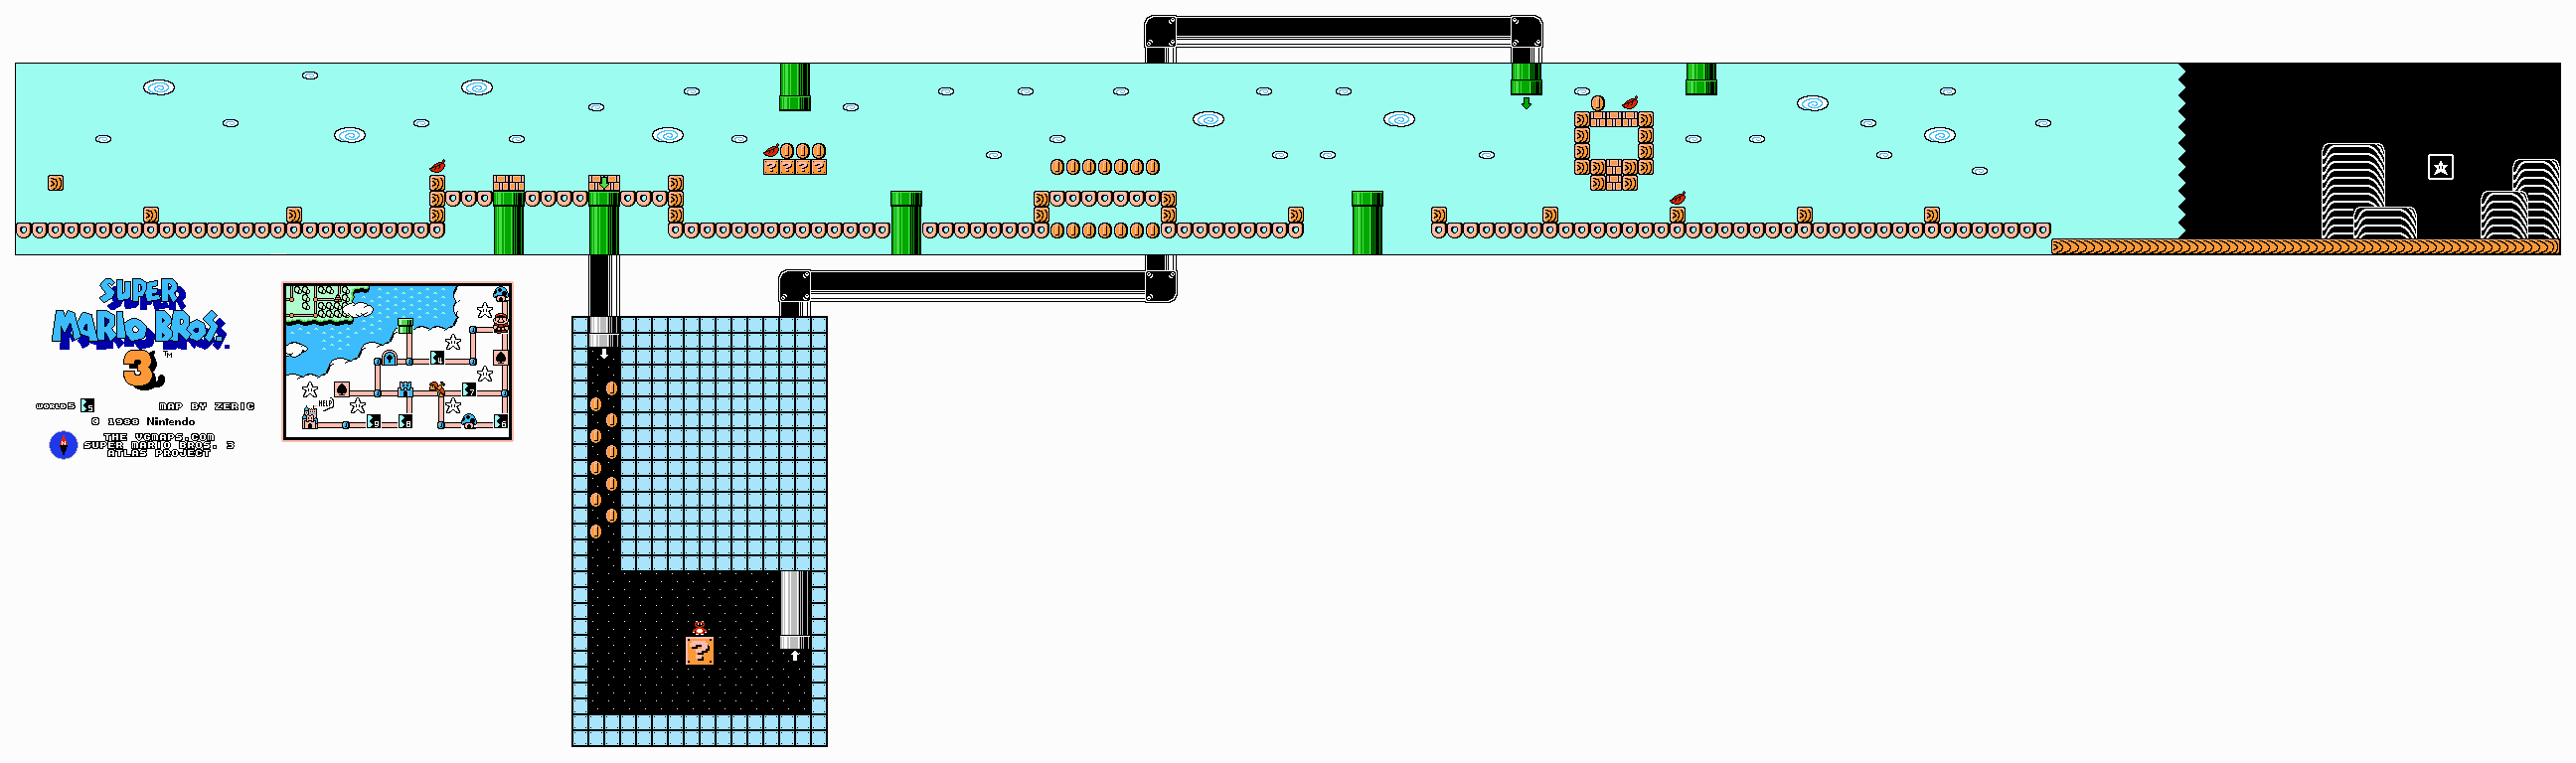
The Donut Lift paths collapse quickly. Take the early power-up and break into the second pipe for a bonus room with coins and a Tanooki Suit. Plan your return onto a stable block rather than landing on a lift already sinking out of reach.
Collect twenty-eight coins for the White Mushroom House. The route includes coins above and below the Donut Lift bridge, so let a lift descend just far enough to take a lower coin, then jump onward immediately. Keep the Fire Chomp’s projectiles away from the next landing. Search the ordinary coin blocks as well as the open trail before the goal. Reaching the target and finishing opens a P-Wing house; merely visiting the Tanooki room does not satisfy the coin challenge.
World 5-6

Ride the Para-Beetles as the screen scrolls. Landing on one makes it rise, letting you transfer to the next shell or cloud. Keep the middle of the screen available so you can react to the next gap instead of being forced off its left edge.
After the power-up, use the Note Blocks when the Beetles stop appearing. A brick near the later coin row contains a P-Switch; pressing it turns the horizontal coins into temporary footing. Cross before it expires and keep away from the Fire Chomp following the route. Enter the exit pipe, then pass the Lakitu in the goal area. The Beetles are moving platforms here, not ordinary enemies to eliminate before proceeding.
World 5-7
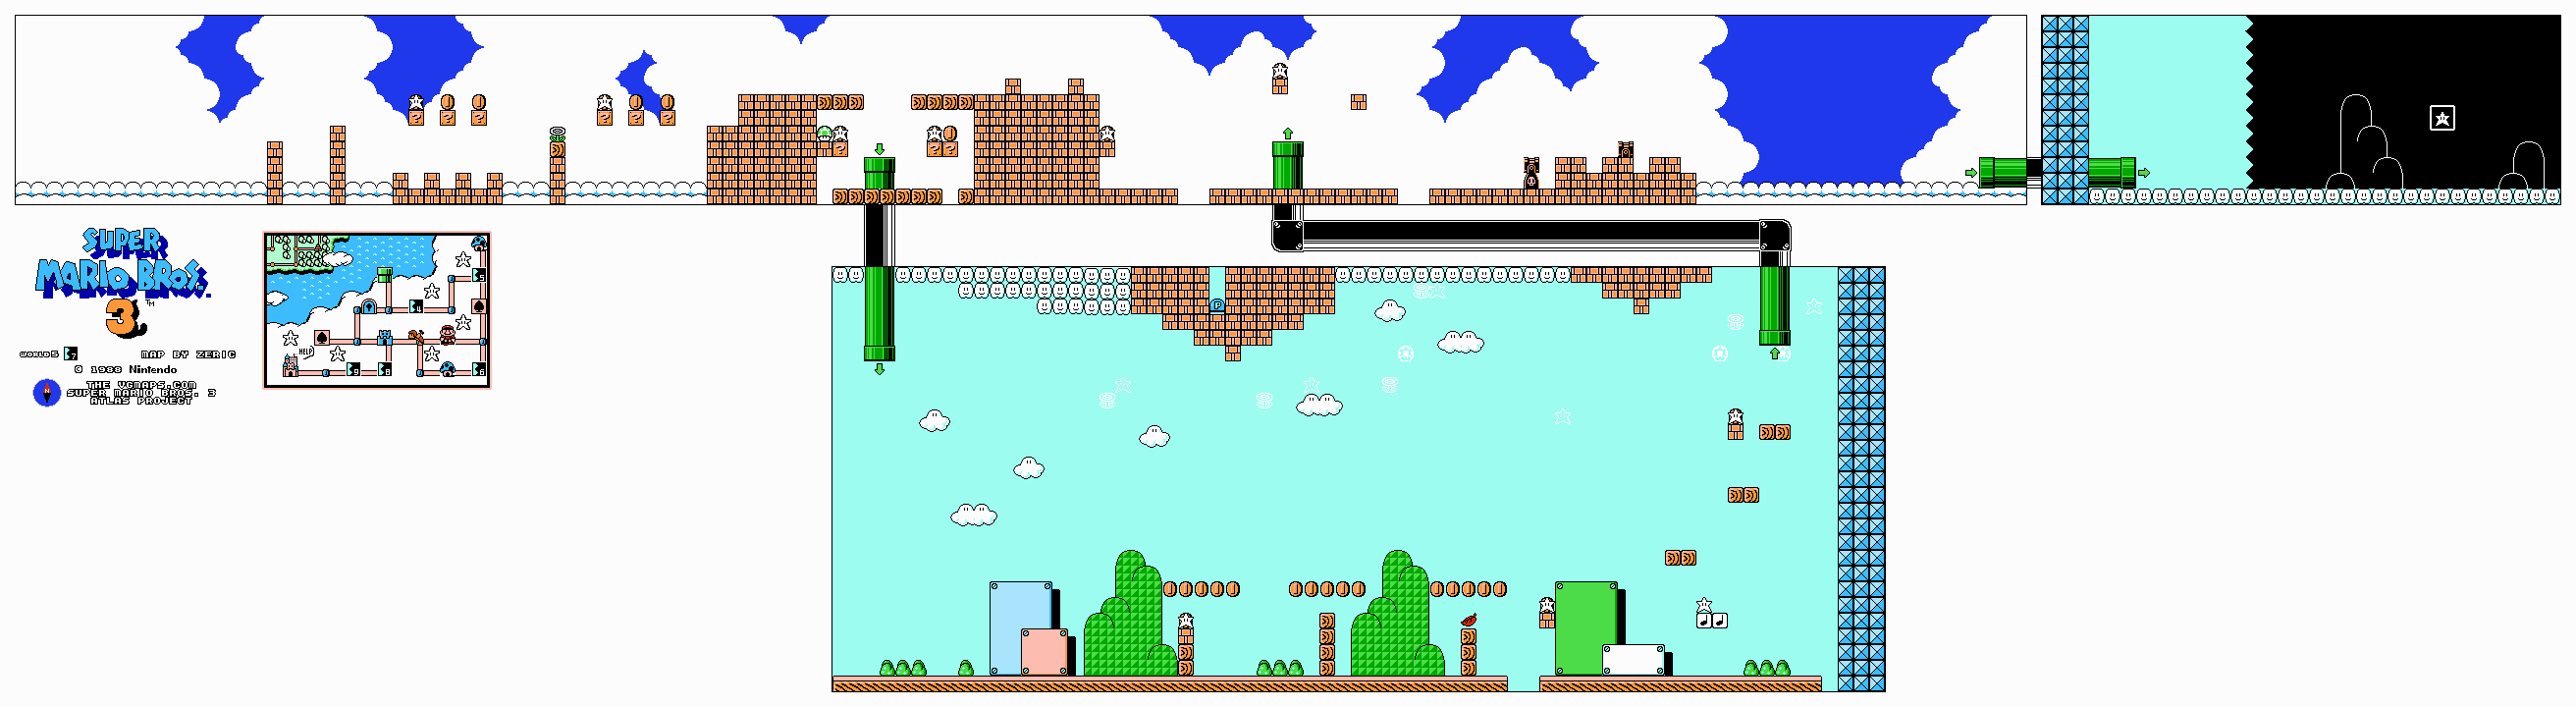
Treat the isolated brick shapes carefully: some conceal jumping Micro-Goombas. Take the wooden-block power-up and cross the larger brick construction. The plant pipe in that structure leads to the optional lower room; use its power-ups and switch route before rejoining the main course.
The later section adds Lakitu and Bullet Bill cannons above the uneven bricks. Wait for a clean firing gap before crossing the cannon top, and watch for disguised jumping blocks on your landing. A tail gives access over parts of the main obstruction, but do not glide so slowly that Lakitu’s eggs surround the last platform. Enter the final pipe to the goal.
Fortress 2
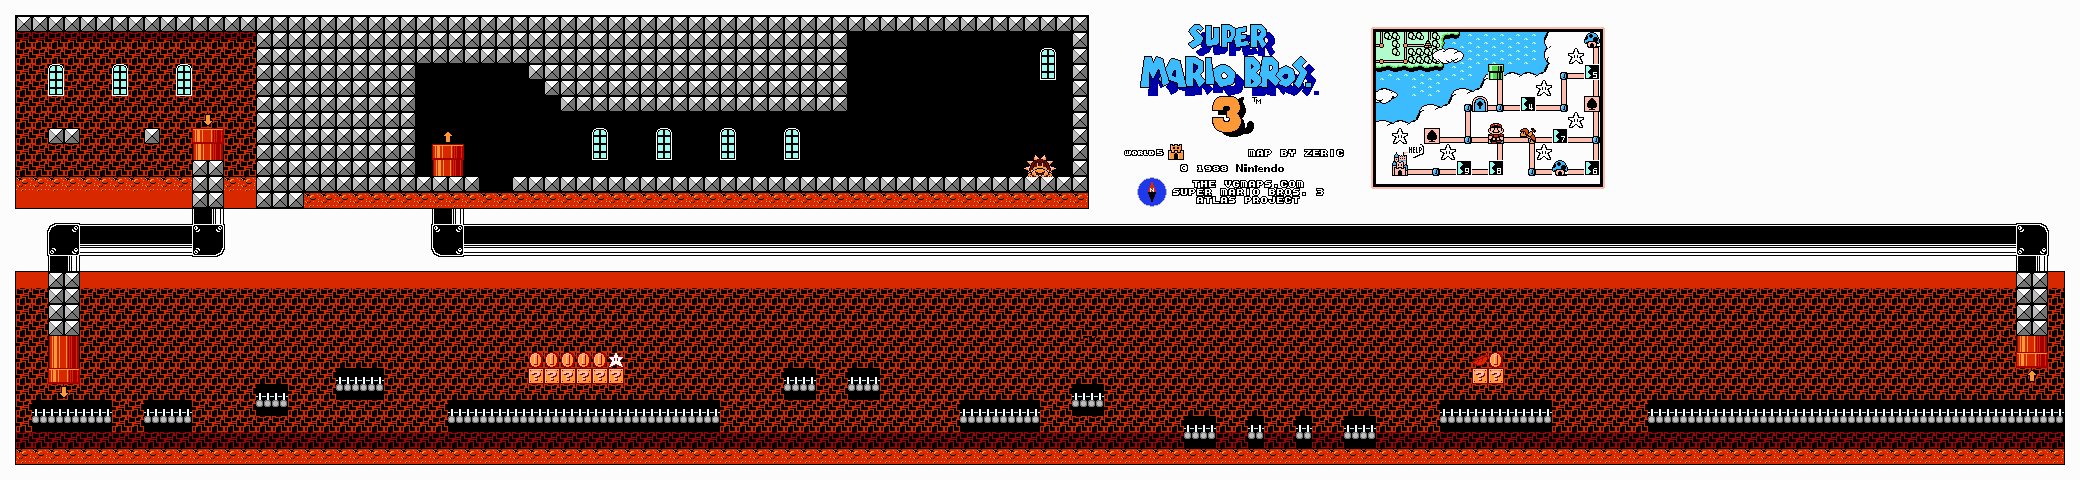
Enter the pipe from the small starting platforms. The main hall has lava above and below, with Podoboos appearing from both directions. Judge their paths before each gap; a wide-looking platform is unsafe if a fireball is already heading through it.
The last of the six connected question blocks holds a Super Star. Take it for the following Dry Bones and tight jumps, then use the later Leaf block if needed. Cross the one-block stepping stones without stopping between them and reach the pipe above the last Dry Bones. The next floor has one more lava gap before the boss door. Defeat Boom Boom and collect the magic ball to open 5-8.
World 5-8

Collect the Leaf from the third opening question block and cross the first clouds. Lakitu begins following soon afterward. Move forward deliberately and land on the near side of a cloud when its farther side is about to receive a Spiny Egg.
Past the red Koopas, another Leaf block offers a recovery chance. Watch the red Paratroopas’ vertical movement before crossing the last gaps. Enter the far pipe. A second Lakitu appears by the goal, so the threat continues after the pipe transition. Keep the tail for slow-descent corrections if possible; hovering in one place makes it easier for Lakitu to box you in.
World 5-9
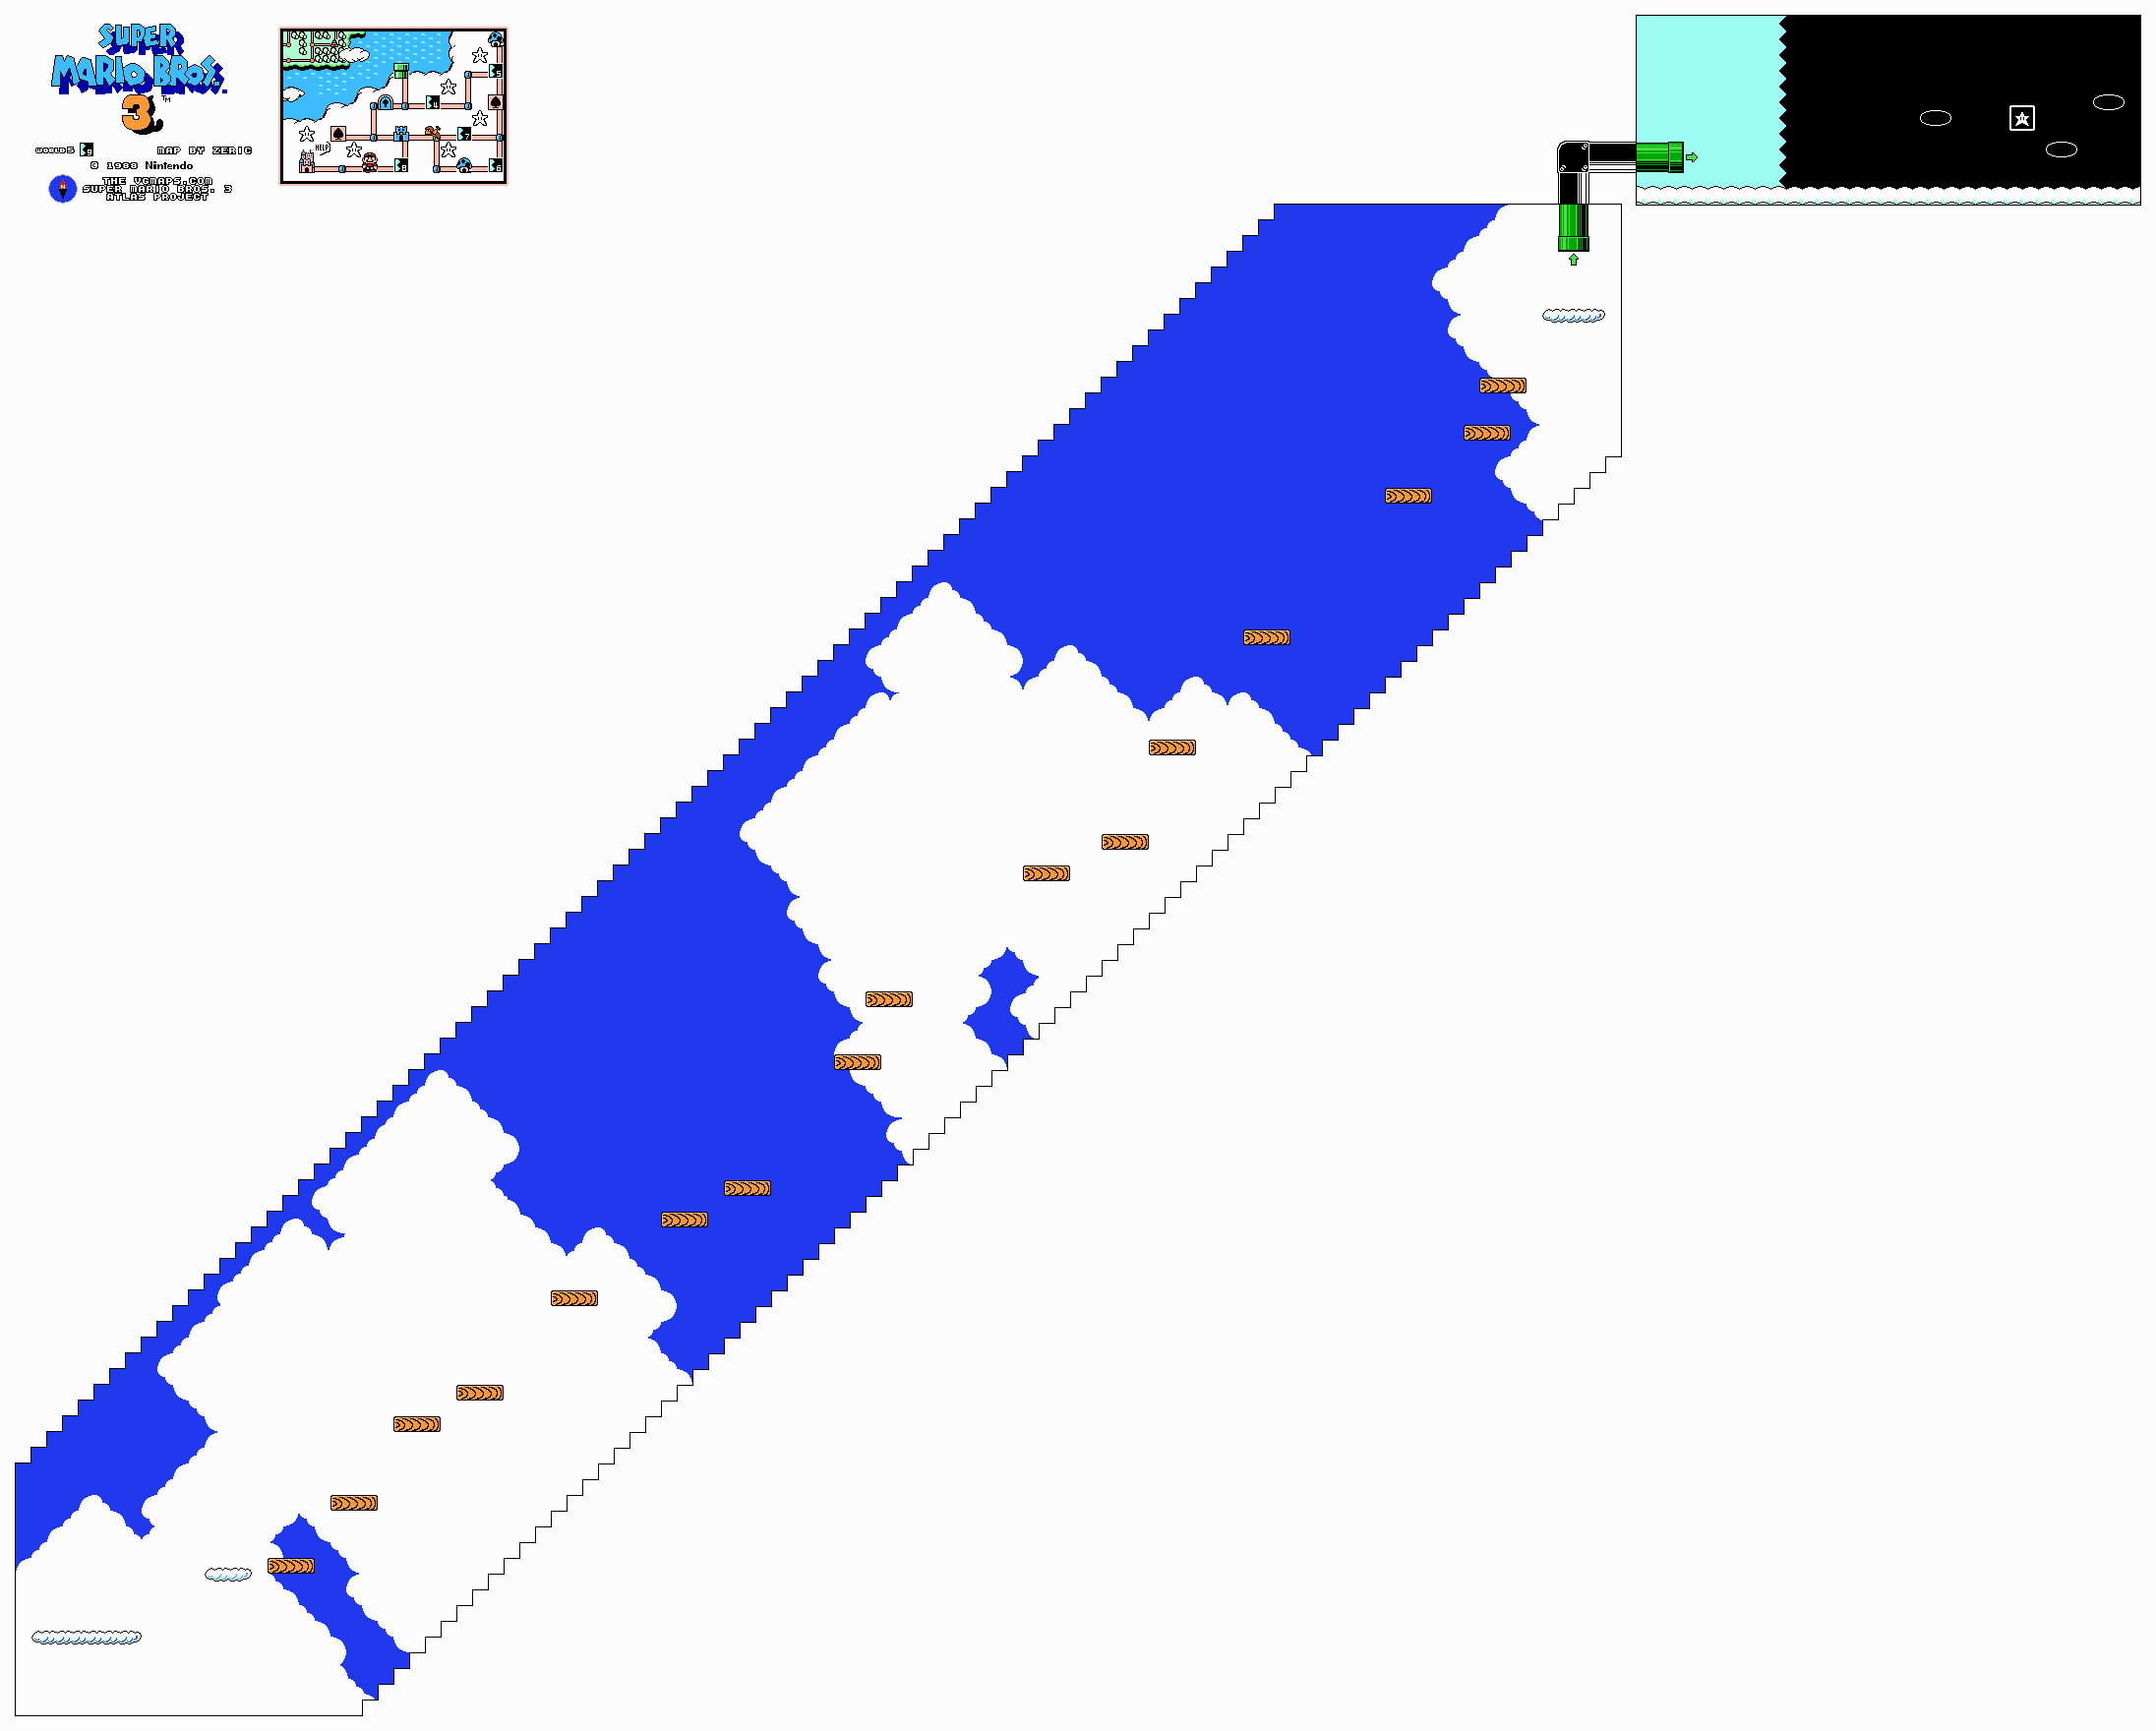
The screen scrolls diagonally upward. Transfer between the vertical lifts as each approaches the height of the next platform, then use the horizontal lifts to cross to the next column. Keep Mario high enough to follow the camera while avoiding a jump that carries him beyond the next landing.
A Fire Chomp starts following in the upper half. Watch its last fireballs and move away before it explodes. Continue through the remaining vertical and horizontal lifts to the cloud and ceiling pipe. The goal section still has Lakitu. On the NES, crowded sprite activity can interfere with the last lift appearing, so avoid leaving an unnecessary cluster of enemies alive beside that final transition.
Airship — Roy Koopa
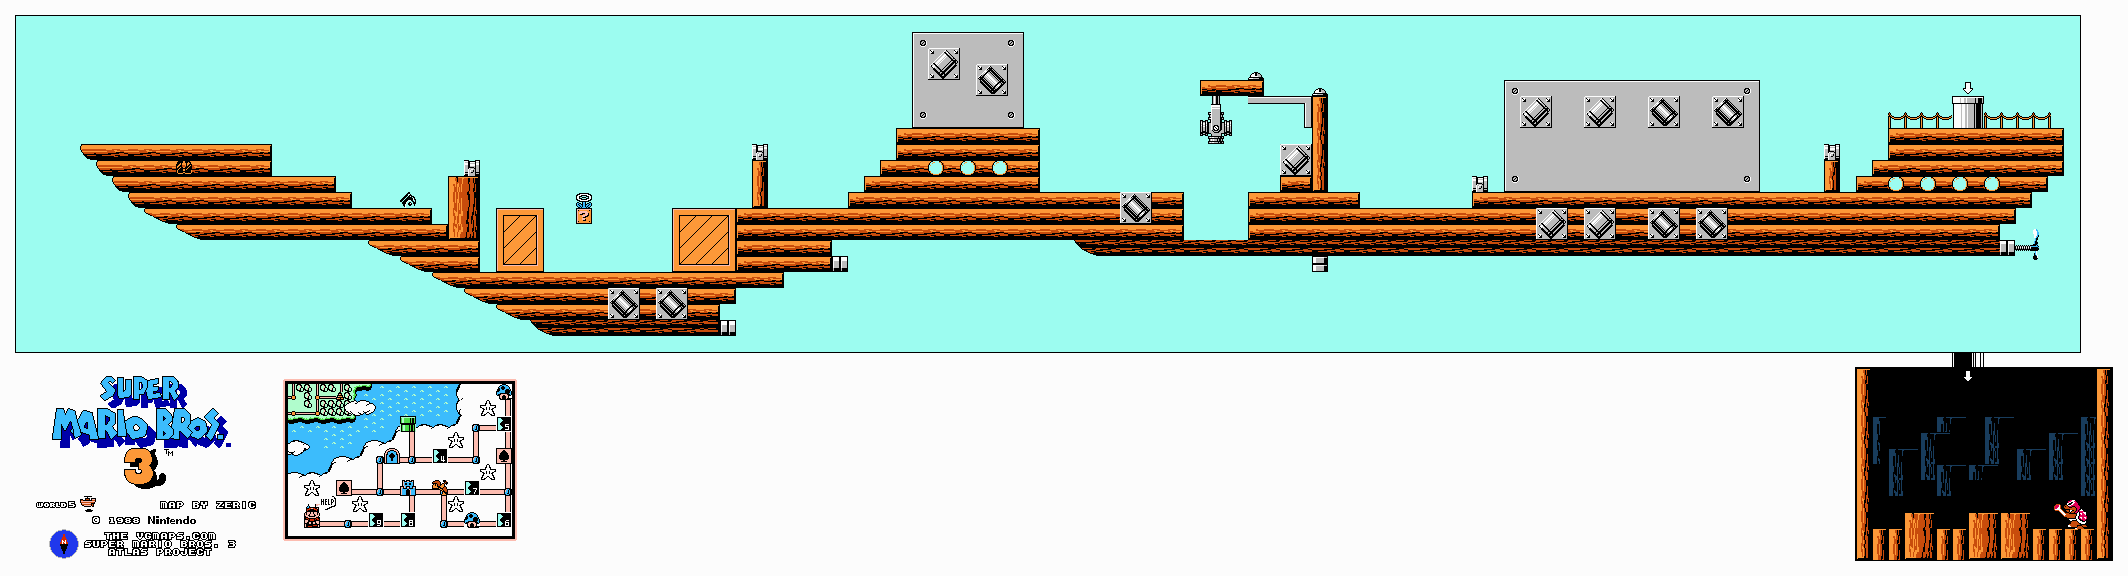
Cross Roy’s cannon-heavy deck using the lower recesses to wait out the rotating cannon’s shots. Take the first power-up under the raised platform, then step across each cannon top only when the next projectile has passed. The final broad section fires from both the upper and lower hull, so keep a visible landing ready before jumping.
Roy fights on an uneven floor. When he jumps, jump yourself just before he lands: Mario is stunned if grounded during the impact. Avoid the wand shots and stomp his head when a safe opening appears. Move clear of his protected shell and repeat for three hits. Returning the wand opens Ice Land.
World-map notes
The tower connects the lower and upper maps. Returning down before finishing your sky visits means climbing the tower again. Both 5-3 and the first fortress can provide access upward, but the shoe, fortress bonus room and tower extras are distinct visits. The 5-5 coin challenge creates a P-Wing house on the map.
Continue the walkthrough
Previous world: Giant Land · Walkthrough overview · Next world: Ice Land
Warp Whistles · White Mushroom Houses · Items and bonus games