

World 7 — Pipe Land. Pipe Land requires returning through connected rooms, building invisible-block bridges and retaining flight or invincibility for specific sections. The two plant encounters are short courses, not single-enemy boss battles.
Courses in this world
- World 7-1
- World 7-2
- World 7-3
- World 7-4
- World 7-5
- Piranha Plant course 1
- Fortress 1
- World 7-6
- World 7-7
- World 7-8
- World 7-9
- Fortress 2
- Piranha Plant course 2
- Airship — Ludwig von Koopa
World 7-1
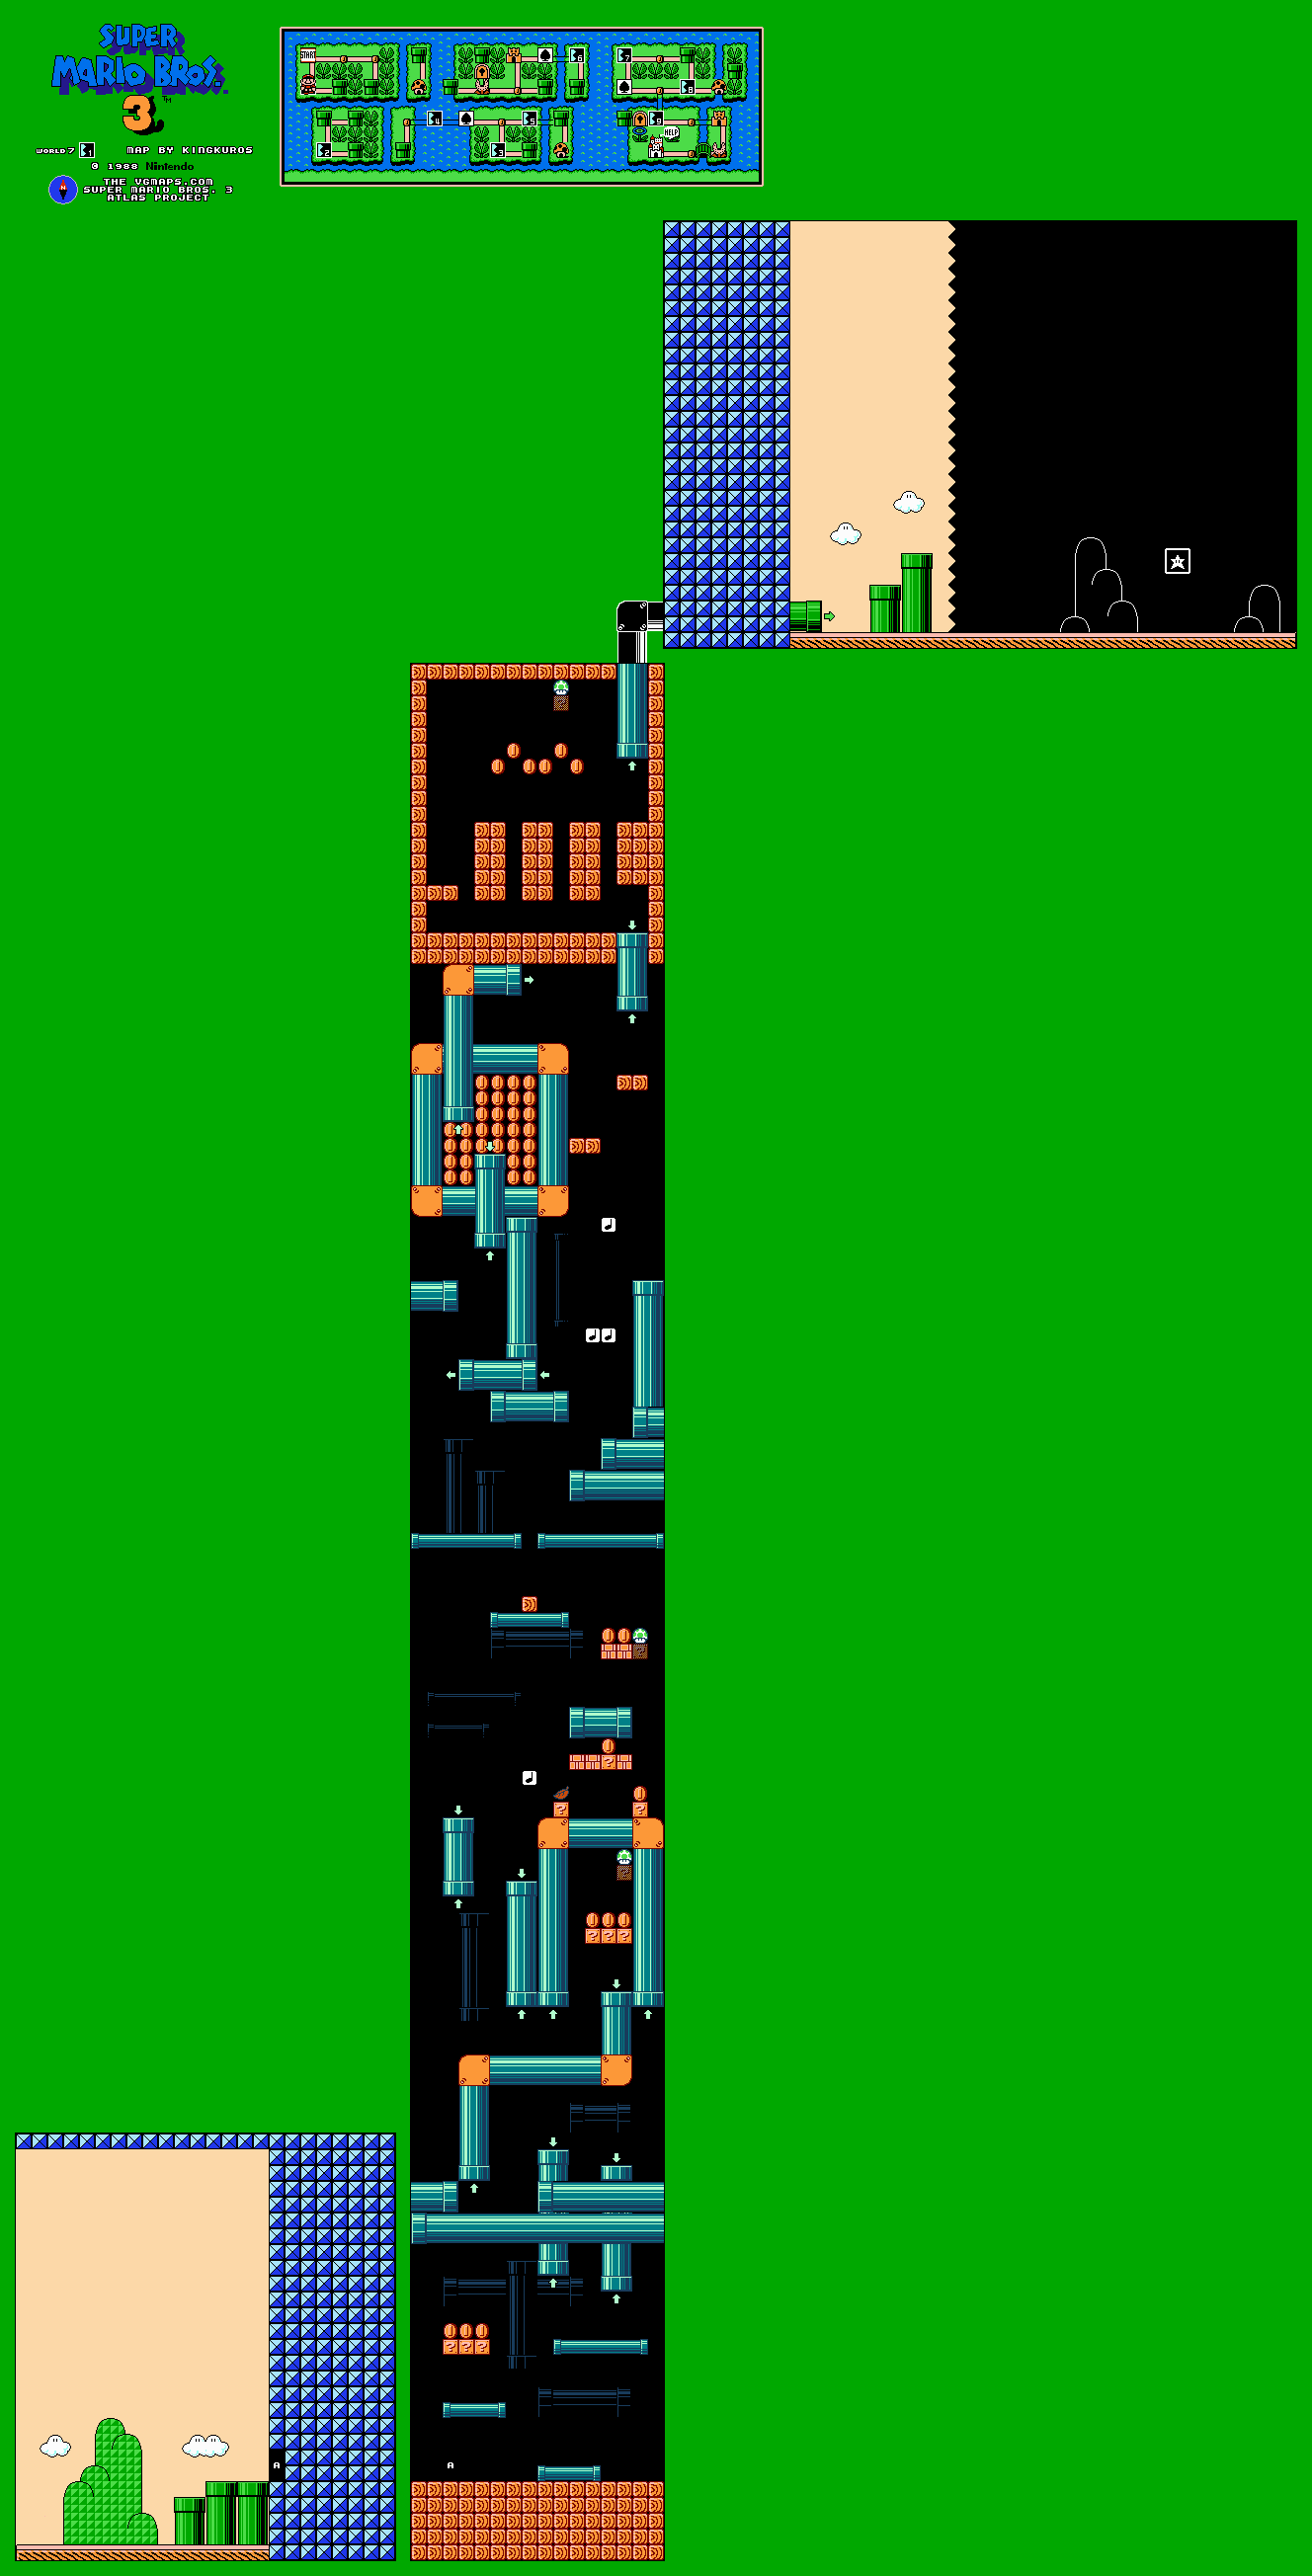
Enter the door and climb the vertical pipe room. Its left and right edges connect, so walking off one side brings Mario in from the other. Use the hanging pipes to move upward. Where the route offers two pipes, the left one continues the climb and the right returns lower down.
Use a Koopa shell on the low question blocks for a Leaf, then bounce from the Note Blocks to the next hanging pipe. With flight, use the long wraparound pipe as a runway to reach the high bonus pipe and its coins. Without flight, take the right-side pipes and Note Blocks. In the last room, bounce from the red Paratroopa if you want the hidden 1-Up near the ceiling, then use the pipe to the goal.
World 7-2
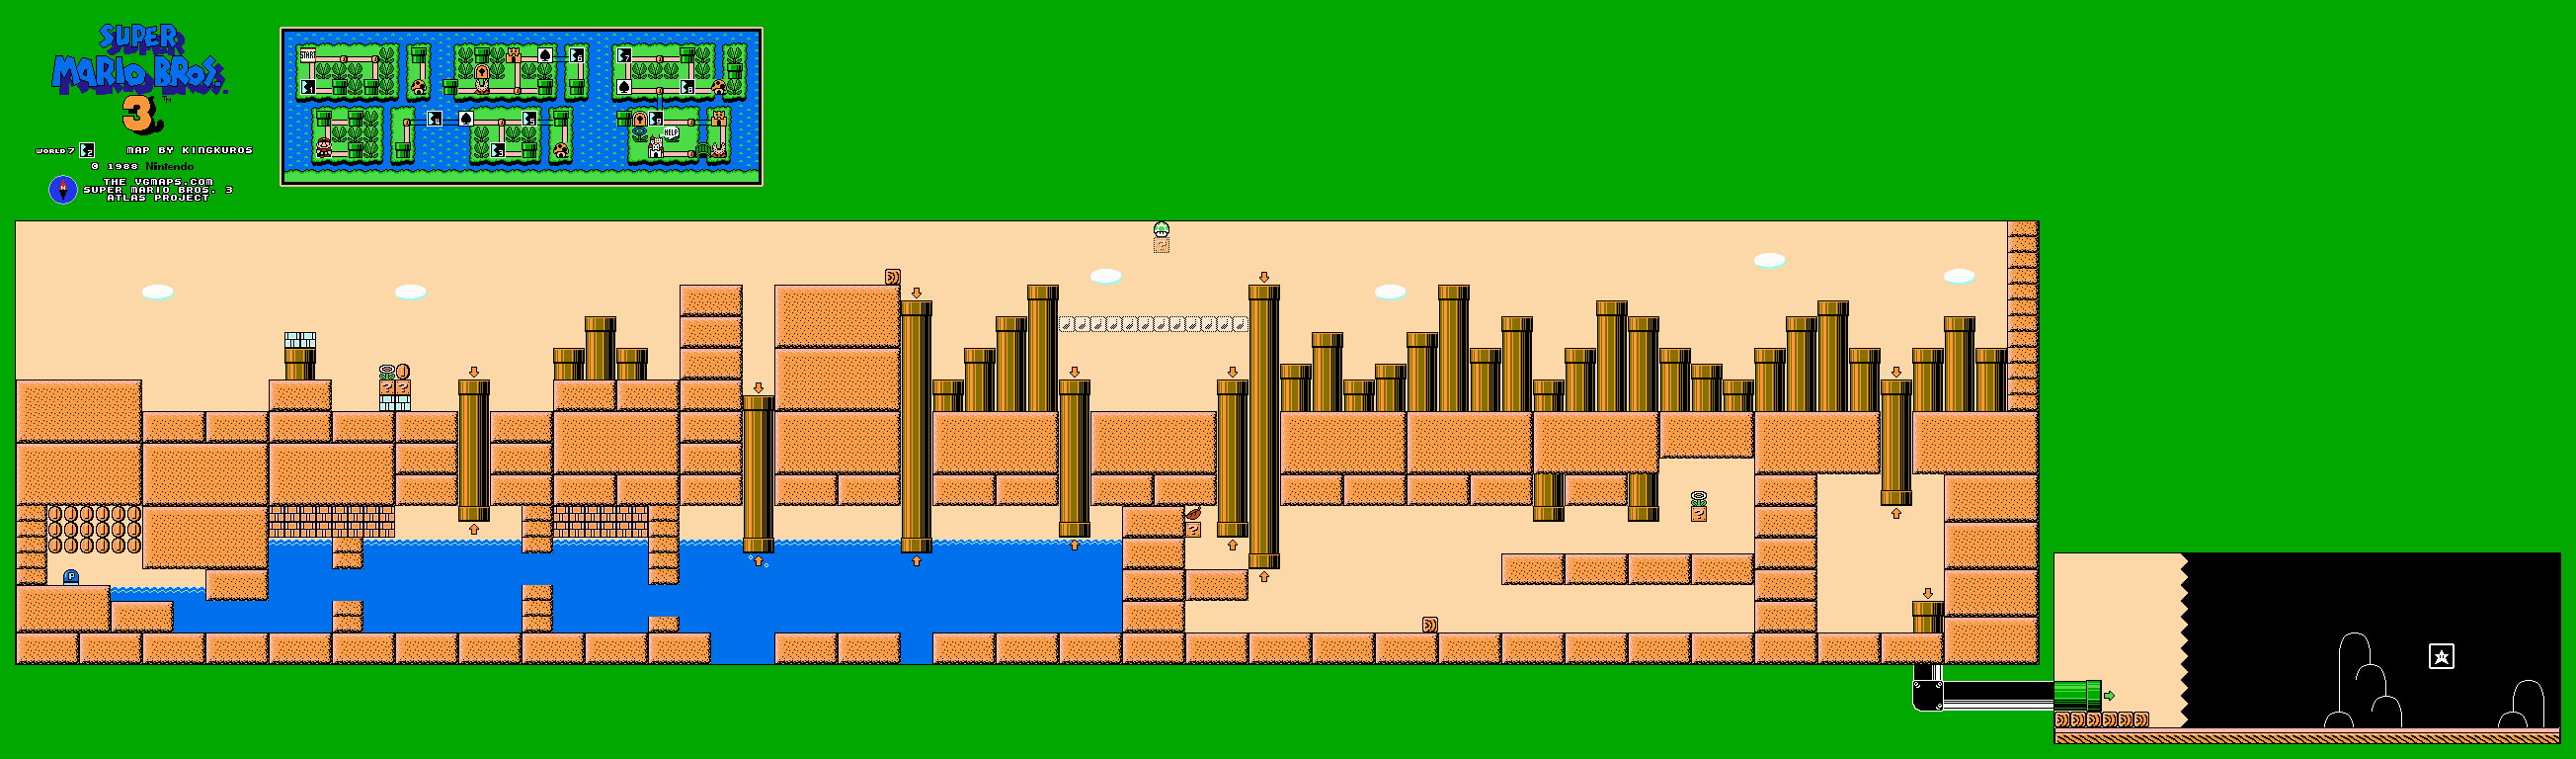
Take the second pipe into the underground reservoir. The P-Switch and coins on the left are the White Mushroom House challenge: a Frog Suit is required to collect the complete forty-six-coin route efficiently. Finish the stage afterward for a P-Wing house.
For progression, swim right and take the far pipe to the room with a Paratroopa and invisible Note Blocks. Hit the blocks from below to build the bridge. Return down the pipe, enter the pipe immediately to its left and use the bridge from above. Back outside, pass the remaining plants and enter the fourth pipe from the right to reach the goal. Creating the bridge and returning through the neighboring pipe is the essential puzzle.
World 7-3

Start the six-Super-Star chain and run toward the next star block before the current effect ends. In the first two question-block groups, hit the lower-left block while still invincible. If the effect has expired, that block gives a coin instead and the uninterrupted chain is lost.
After the second Spiny-covered hill, watch for Lakitu. The next star is in the brick beneath the power-up block. Two more star bricks surround the later Goomba-producing pipe. Use the block tops to cross the larger hills and gaps rather than stopping on the slopes. Keeping the chain active makes the enemy-filled course much safer, but invincibility never prevents falling into a bottomless pit.
World 7-4
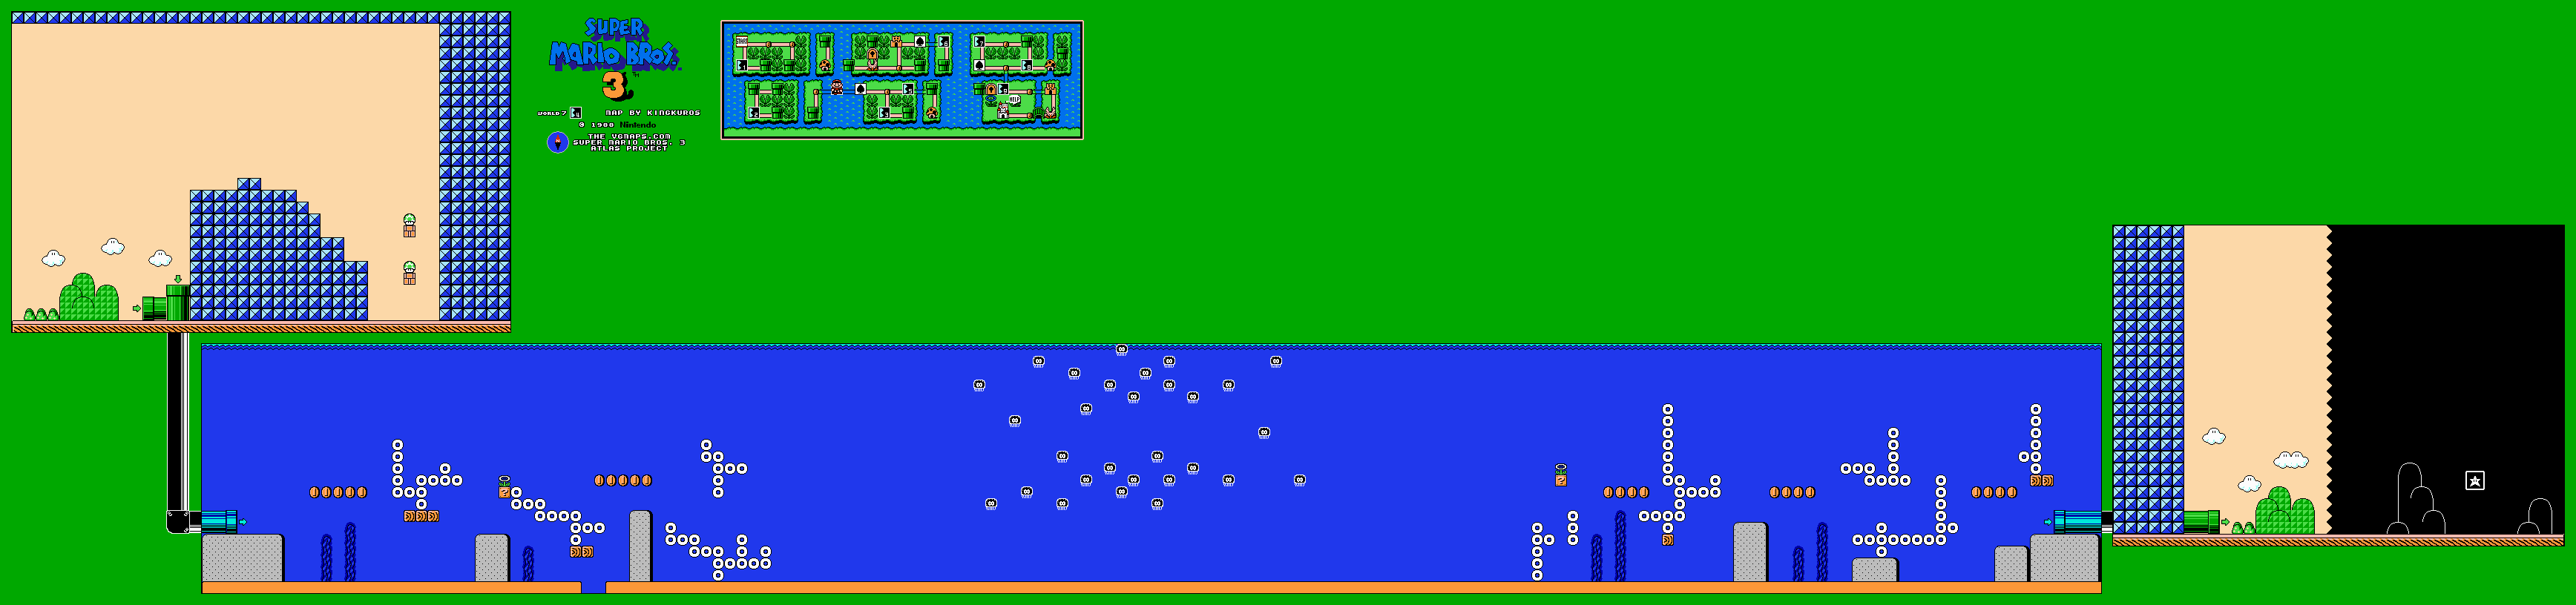
Before entering the water route, flight reaches a small area behind the blue starting wall with two 1-Ups. Otherwise take the pipe directly. The underwater section scrolls automatically, so do not get trapped against its barriers while avoiding the Spiny Cheep-Cheeps.
Move around the Lava Lotuses and give Big Bertha space in the narrow channels. The scrolling later rises through the Jelectro field. Use its open lanes, making small height adjustments rather than sweeping across the stationary electric enemies. A Frog Suit improves control; Fire Mario can remove some moving enemies, but neither allows contact with Jelectros. Pass the final fish and Lotus to the exit pipe.
World 7-5
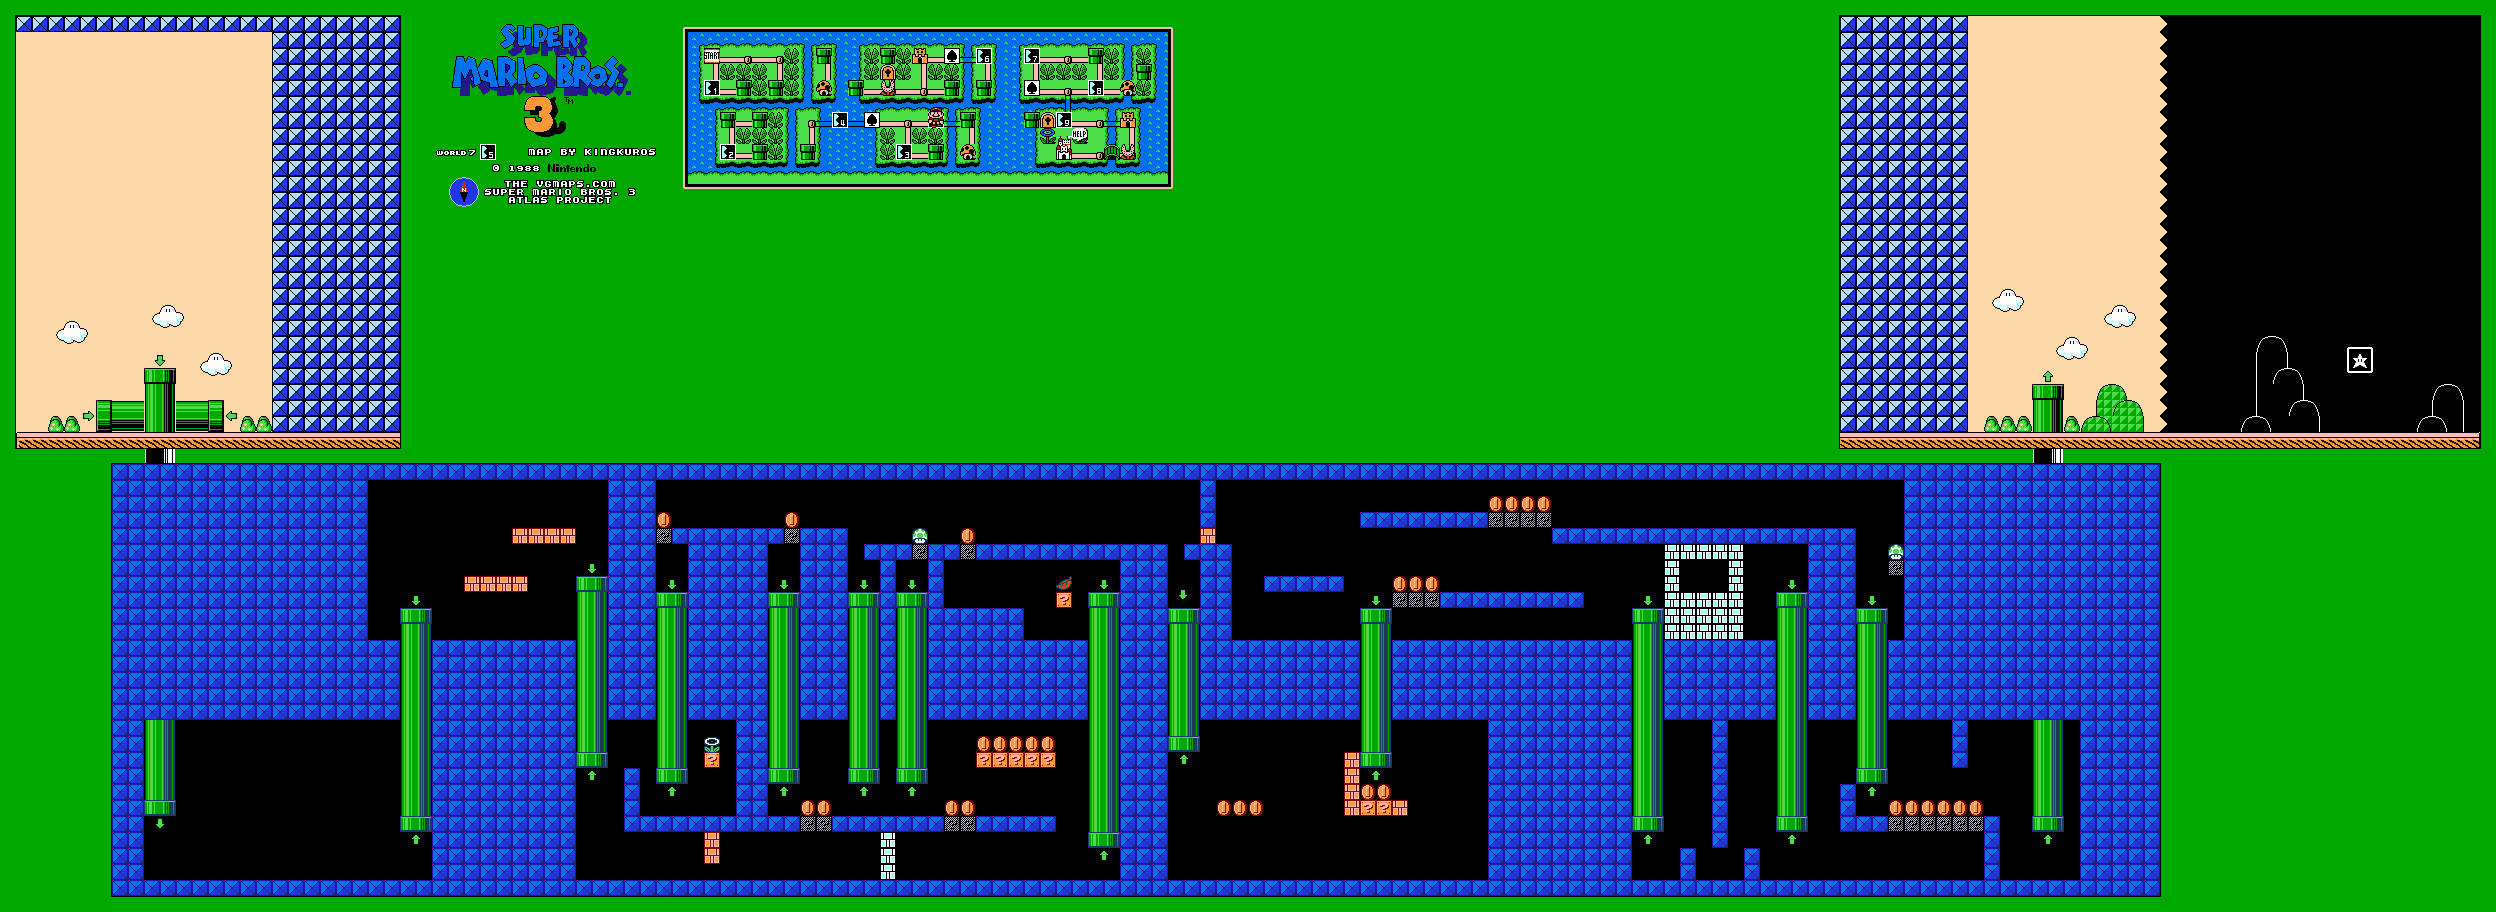
Enter the pipe maze and use a shell or Bob-omb to clear the first brick obstruction. In the main junction, reveal the hidden blocks beneath the second overhead gap. Take the third pipe from the right and jump from its upper end onto the ledge. The neighboring pipes provide optional items but do not put Mario high enough for that jump.
Continue right. Break the single wall brick with a tail or shell, or use the lower pipe detour if you cannot break it. In the last connected rooms, reveal the hidden blocks to the right of the upper platform, then take the lower pipe and reveal the far-right set as well. Return above, cross the first bridge, take the next pipe and use the second bridge to reach the exit. Leave the needed bridges intact rather than repeatedly dropping through the same loop.
Piranha Plant course 1
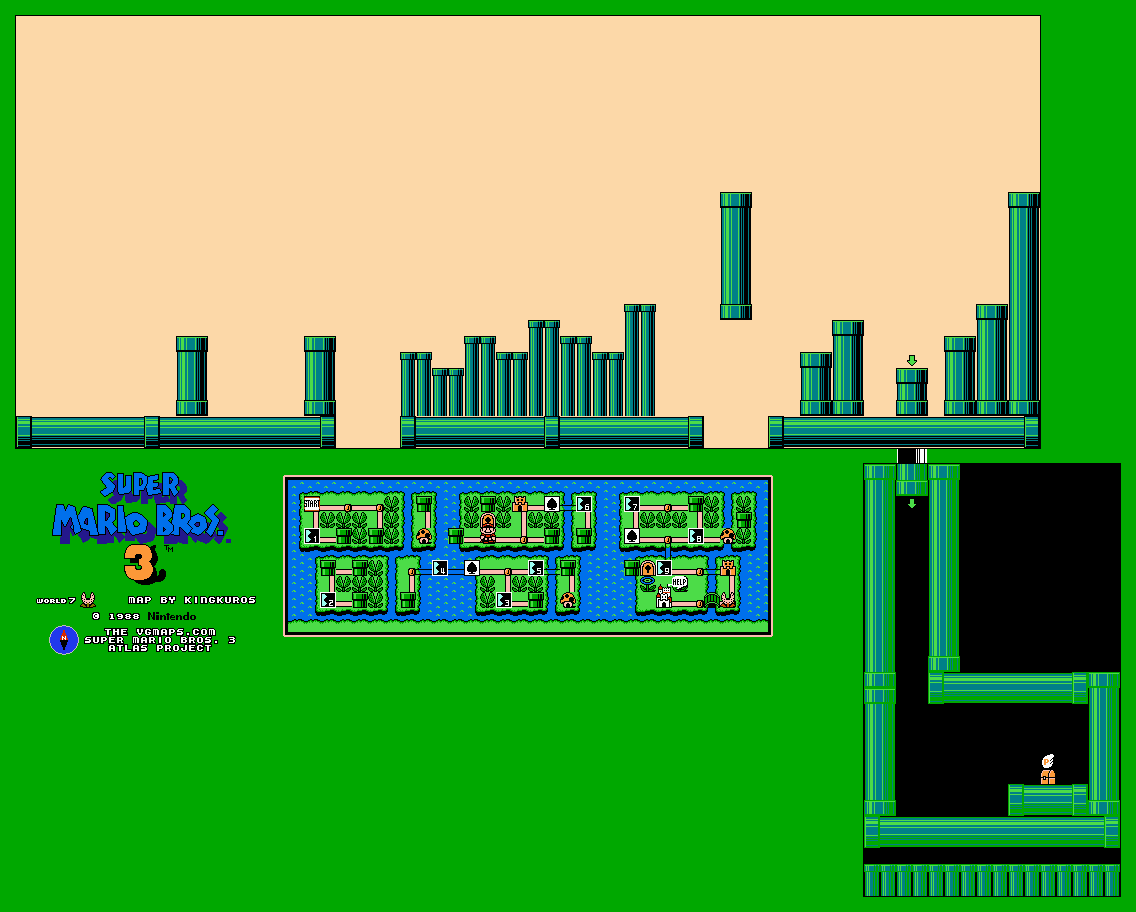
This optional map encounter is a short obstacle course, not a single plant boss. Cross the first pipe after its plant retreats, then wait for the fire-shooting plant’s shot before jumping the gap. The Munchers rise and lower in a rhythm across the smaller pipes.
Use the clear pipe tops as waiting points. Before the next long jump, check the hanging plant above your landing. Enter the third pipe from the right to reach the reward chamber. The P-Wing ends the stage when collected. Clearing the first fortress opens the locked bypass nearby, but completing this encounter is useful if you want the extra flight item.
Fortress 1
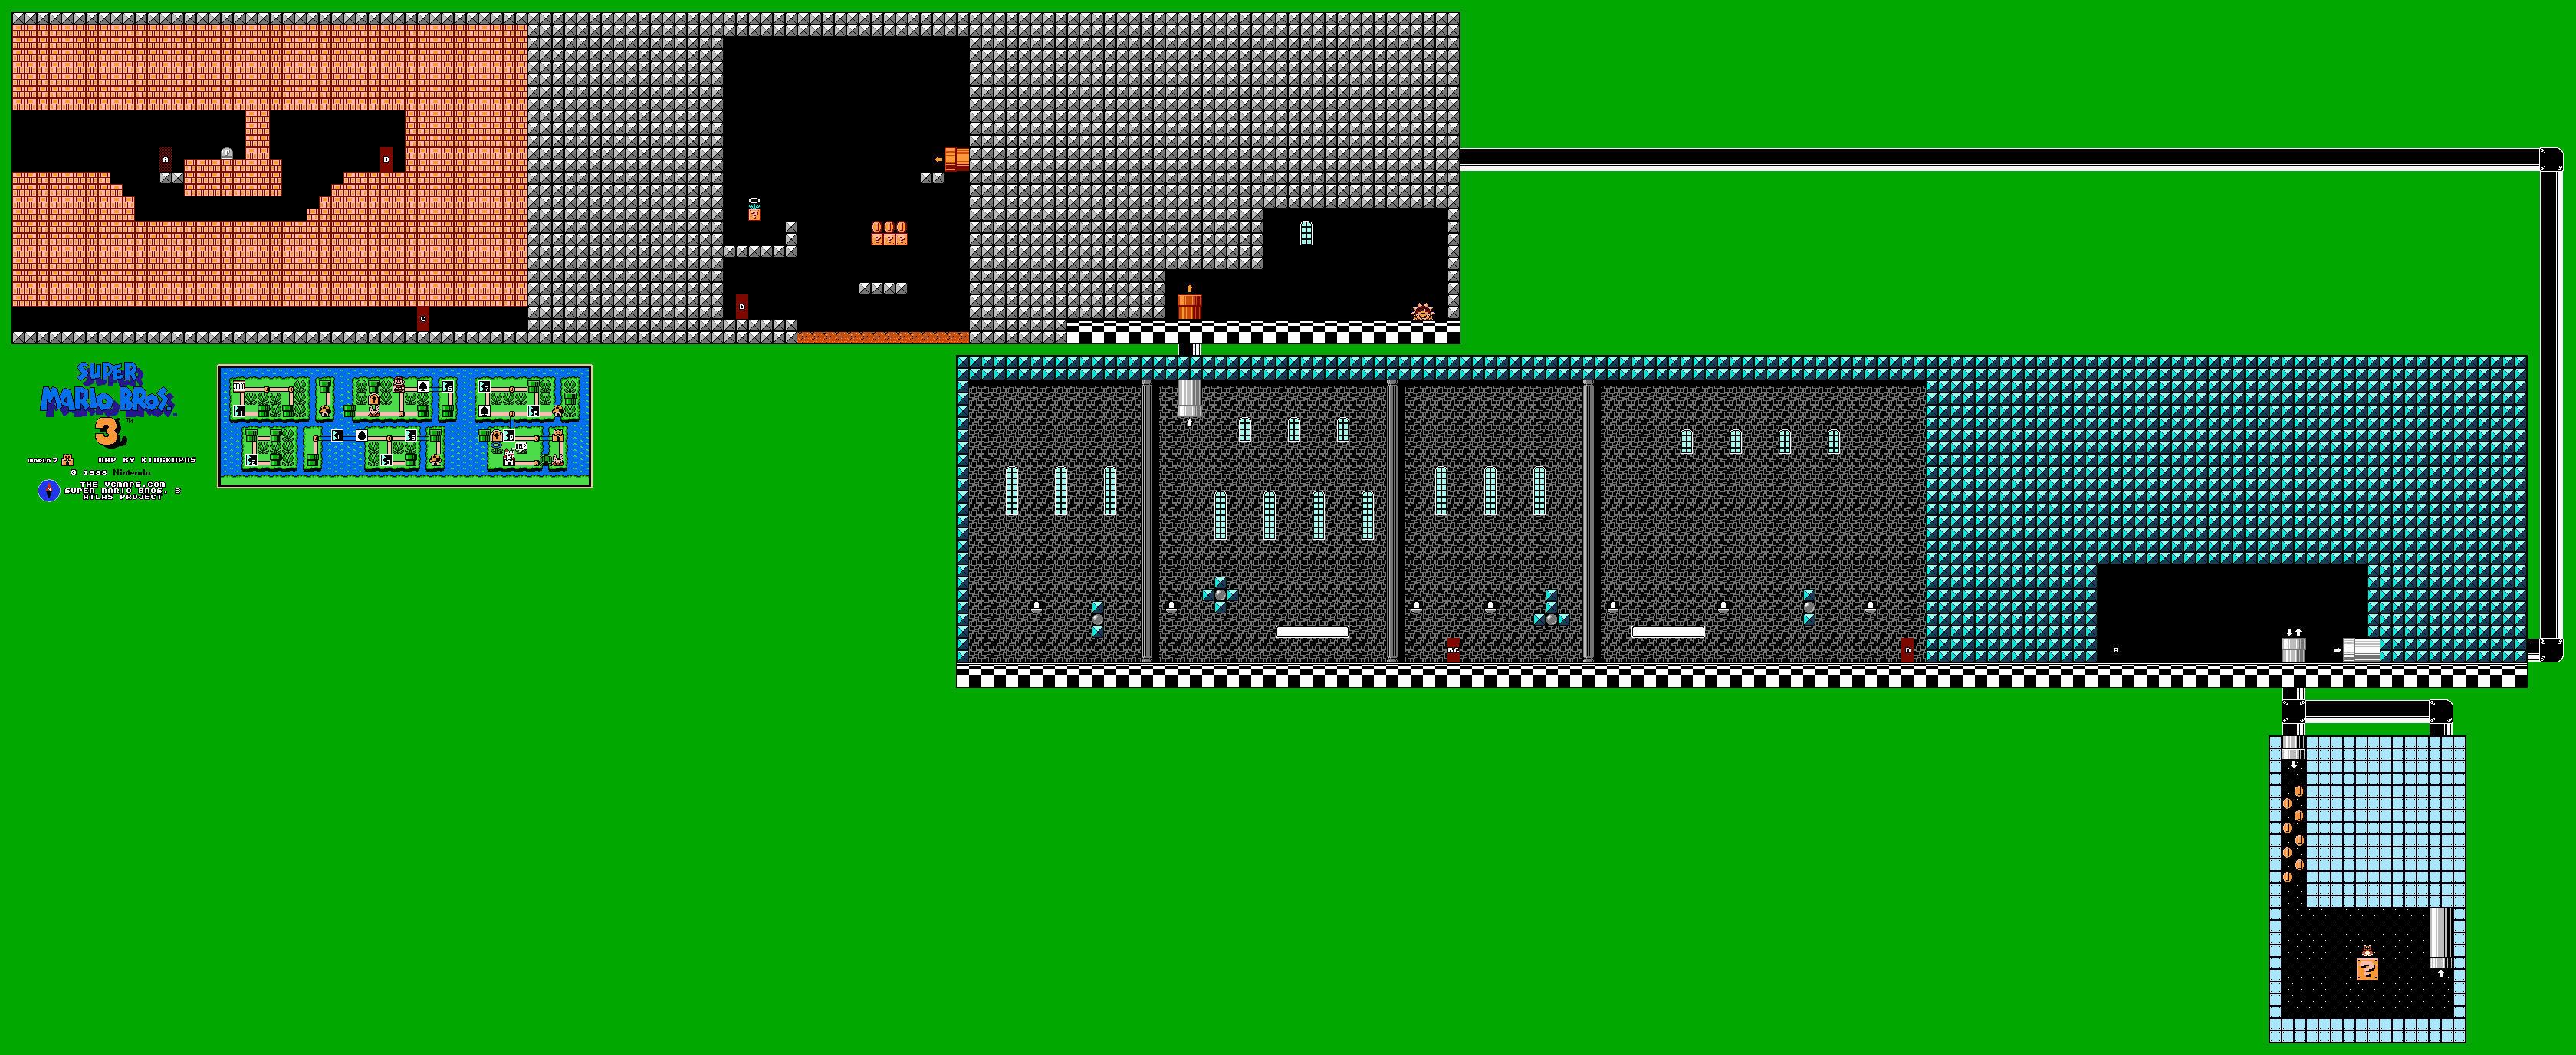
The opening room is filled with bricks and contains no normal ghost or firebar gauntlet. Uncover the P-Switch in the upper brick group beside the stone platform. Press it to turn the bricks into coins and reveal the doorway on that platform.
Through the hidden door, enter the floor pipe for the giant question block containing a Tanooki Suit. Return to the long empty hall. Build the P-Meter and fly to the ceiling pipe above the second Roto-Disc base from the left. That pipe is the route to Boom Boom; merely running to the hall’s far end will not finish the fortress. Dodge the flying boss after the first stomp and complete three hits. The lower door loop can reset the opening bricks if you want to gather more coins before the finish.
World 7-6
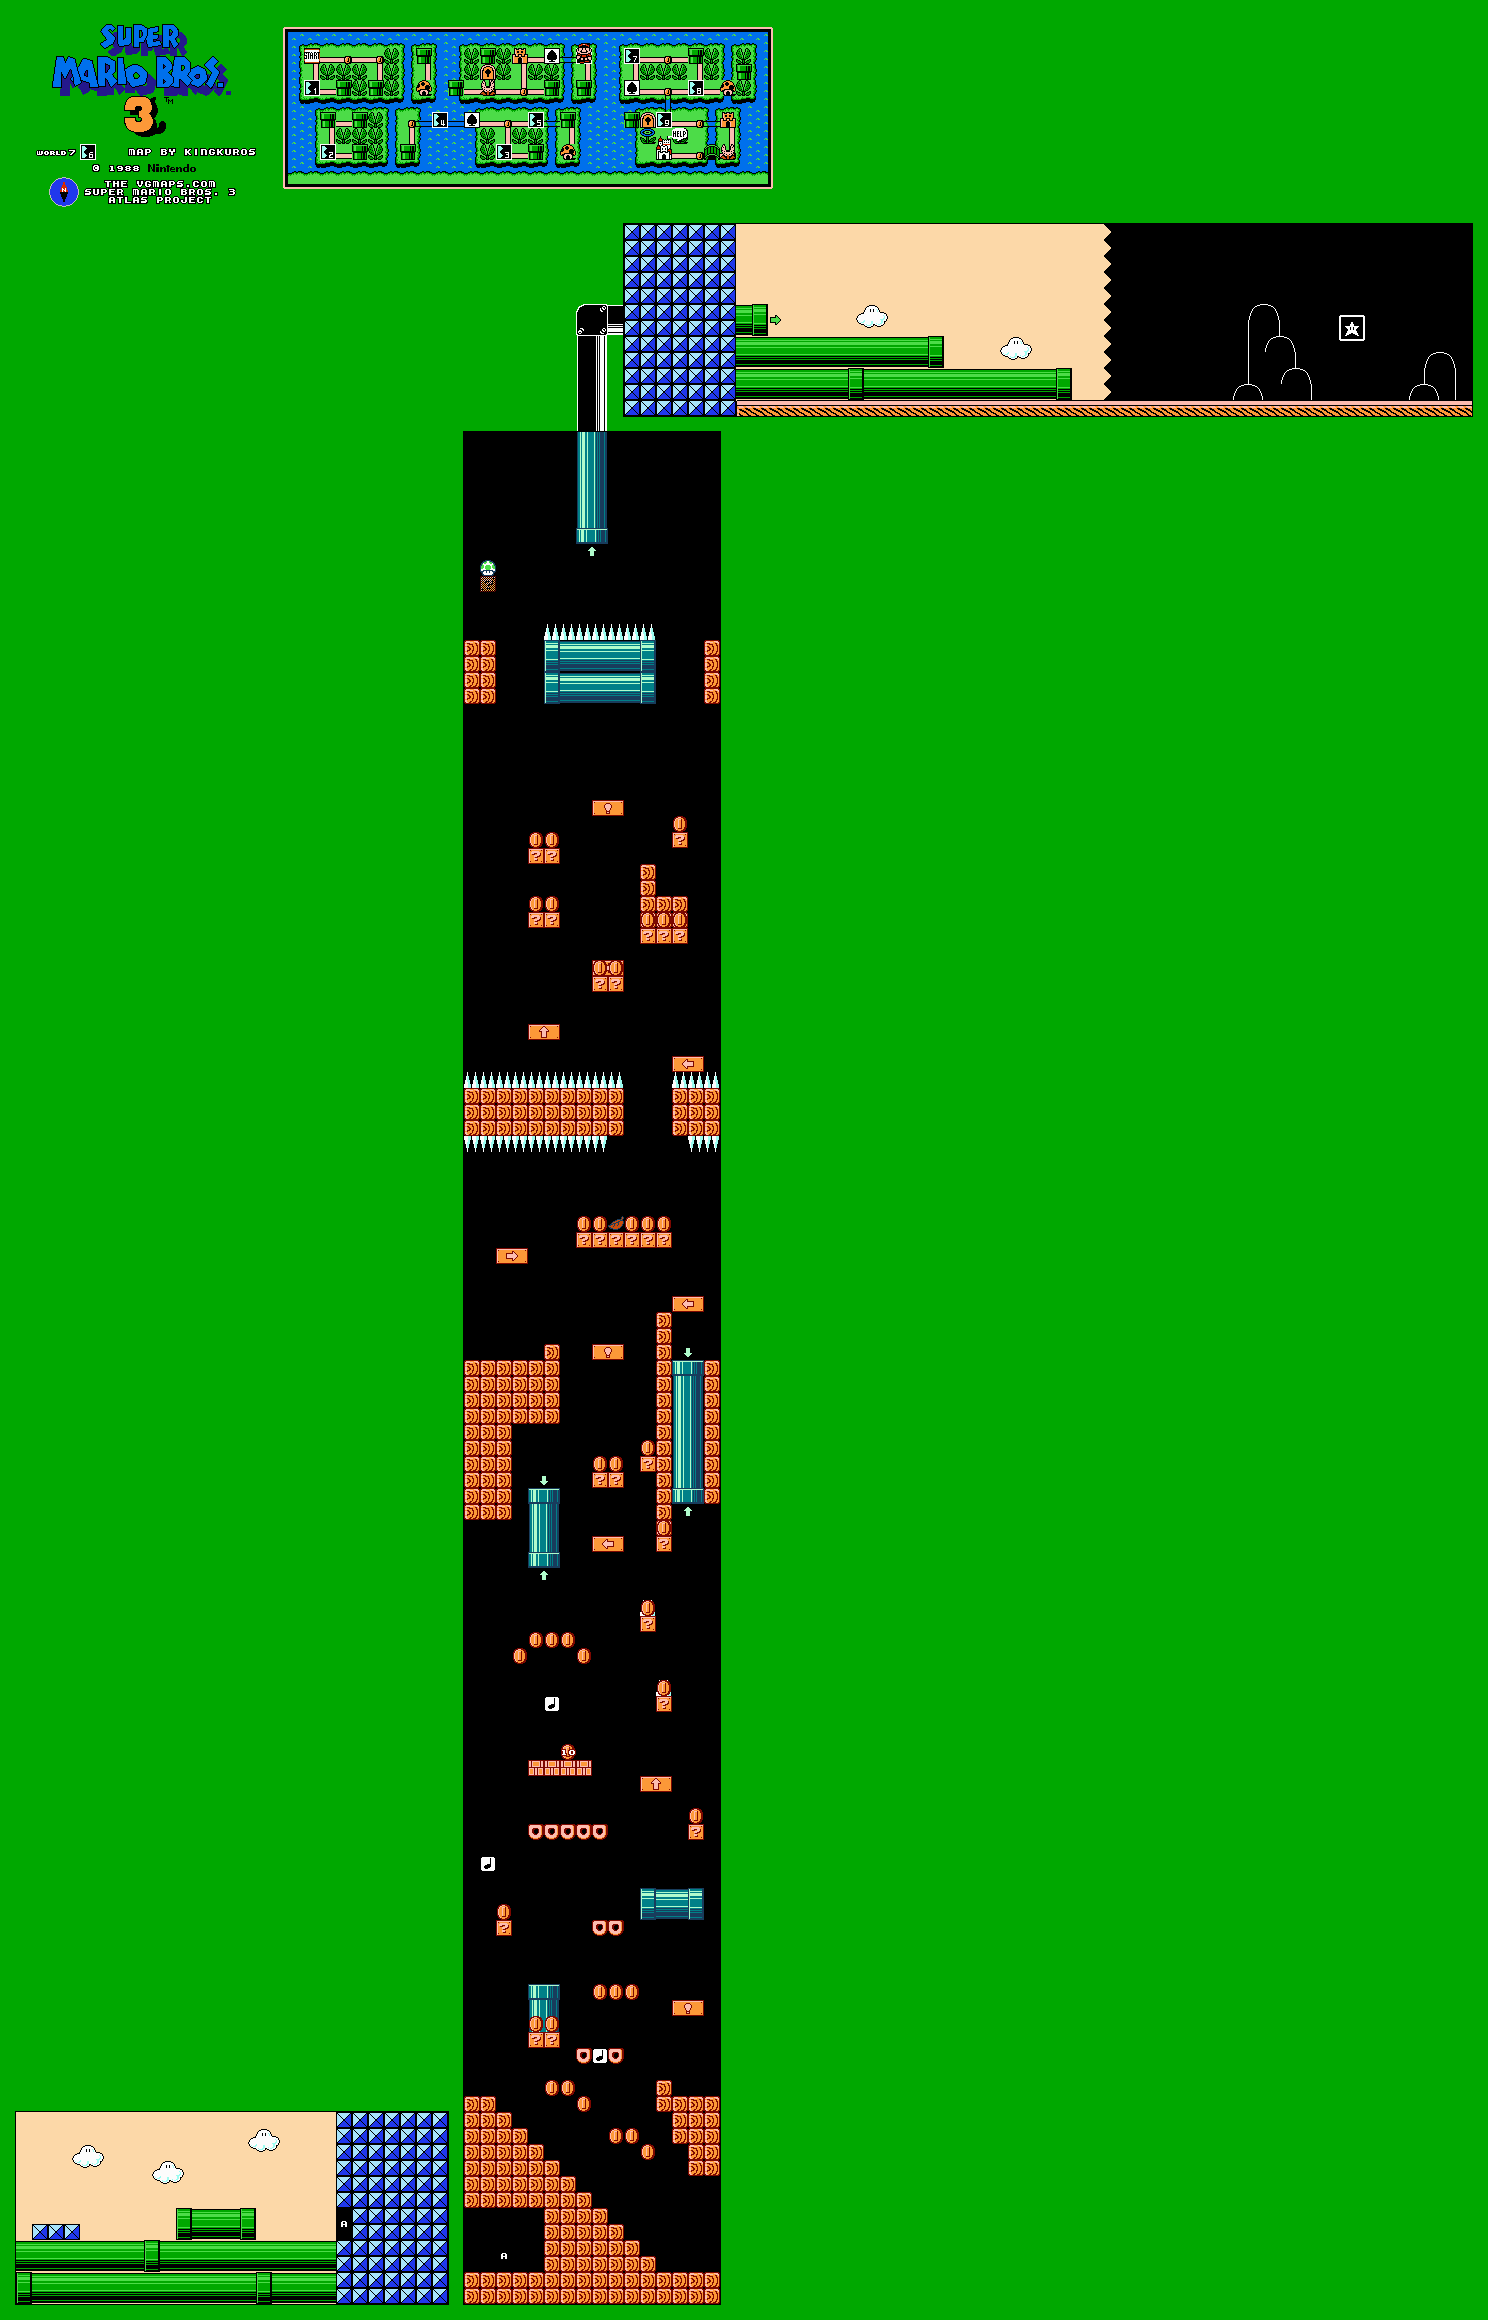
Enter the door and use the room’s wraparound edges to climb the Koopa staircase. Bounce onto the directional lift, then jump and choose its direction to travel upward around the plant pipes and Donut Lifts. Avoid jumping into the spiked blocks above a lift.
The leftward lift carries Mario through a pipe and beneath a low wall; crouch before reaching the obstruction. Take the hanging pipe to the next section and use its three directional lifts to reach the upper passage. The later lifts thread between spikes and alternating plant pipes. Keep a safe stopping point in mind before changing direction. Flight over the outside starting wall is a separate shortcut to the end; the lift route covers the course itself.
World 7-7

Take the starting pipe into the Muncher corridor and collect the first Super Star. Four stars carry the route. Renew the effect at each marked block before the previous invincibility expires, because the floor is otherwise unsafe.
Powered-up Mario must run and crouch-slide beneath the low second star block, then collect it and continue. Jump the three raised pipe groups, hit the next star block behind the block pillar and slide beneath the later low ceiling. Keep running to the final pipe once the last obstruction is clear. The ceiling prevents an easy P-Wing flight over the whole course. A missed star requires getting back to safe footing; standing on Munchers while searching the block ends the attempt.
World 7-8
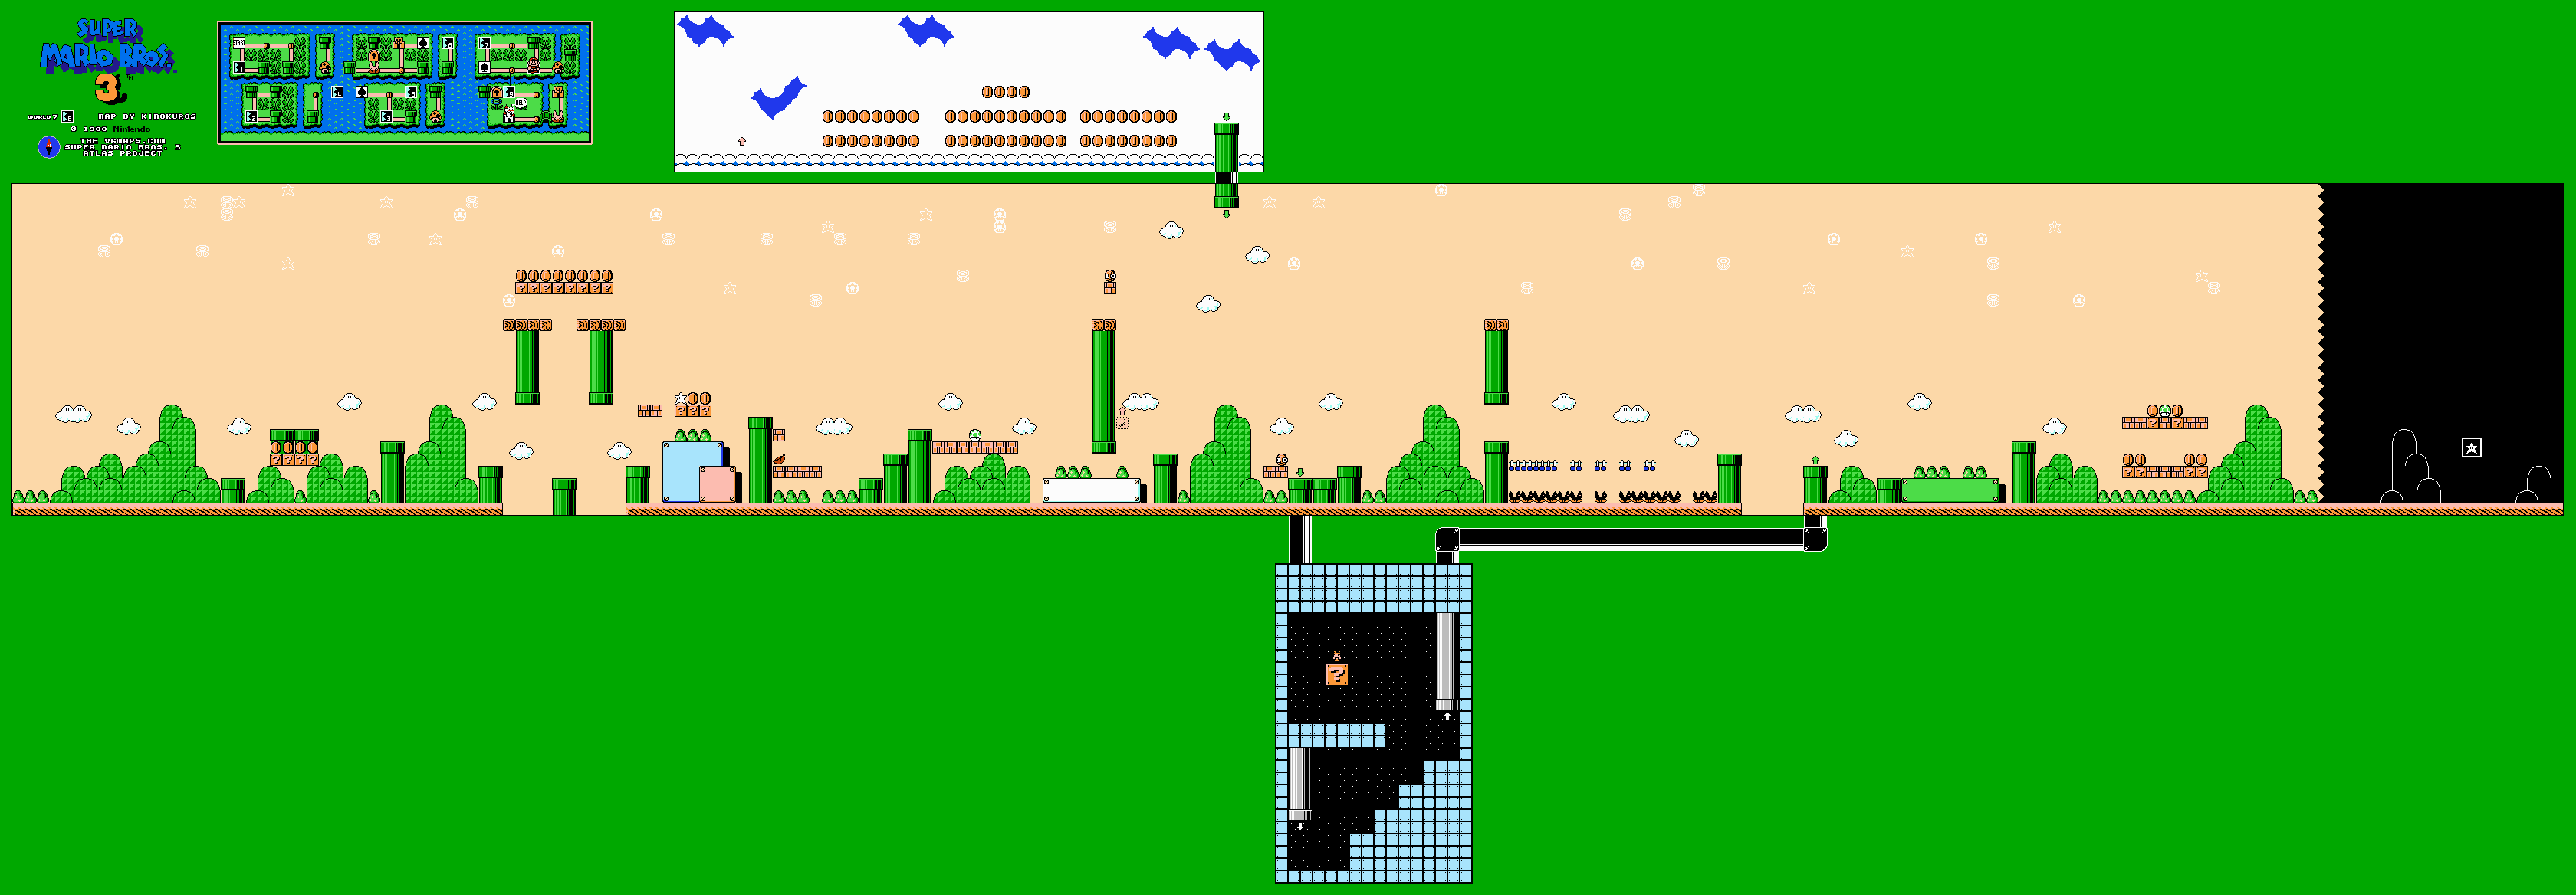
Time jumps through the first hanging plants and take the Super Star in the early question-block group. The brick formation afterward has a power-up, followed by a 1-Up guarded by a Walking Piranha. Near the Ptooie, reveal the pink Note Block just right of the hanging pipe for Coin Heaven.
In the next pipe group, the leftmost usable pipe leads to the bonus room containing a Hammer Suit. Hammers remove plant enemies that ordinary stomps cannot. Return and cross the broken bridge over the Munchers, then pass the stationary and walking Ptooies. The final block rows hold Walking Piranhas and a fire-shooting variant. Clear them from a safe distance or jump past during their attack gap, then take the goal card.
World 7-9
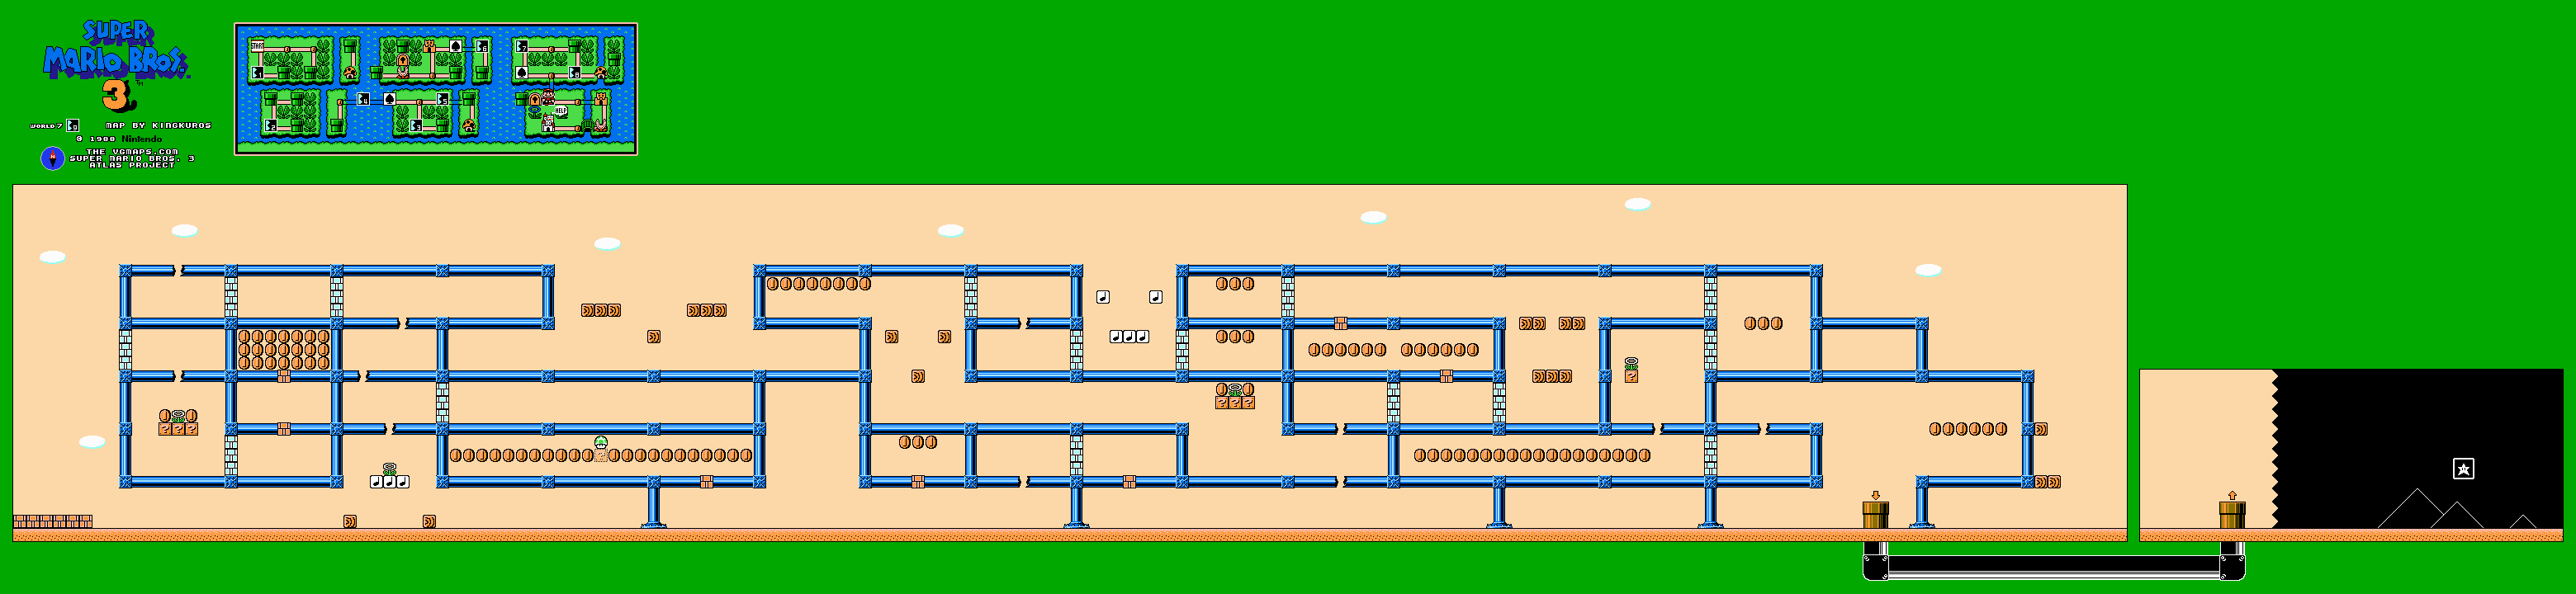
This is a maze between cracked pipes. Start by moving right to the Note Blocks and bounce through the opening overhead. Climb the next cracks and remove the throwable white blocks to open the route. Continue right over the wooden stepping blocks rather than falling back to the starting floor.
Drop below the later Note Blocks on the left, remove the white-block obstruction and move right to the power-up group. Jump through the next crack and clear the following blocked passages. The final wooden blocks lead toward the exit pipe. Use the map to distinguish a wall from a traversable pipe crack, and avoid throwing away a white block before it has opened the nearby barrier.
Fortress 2
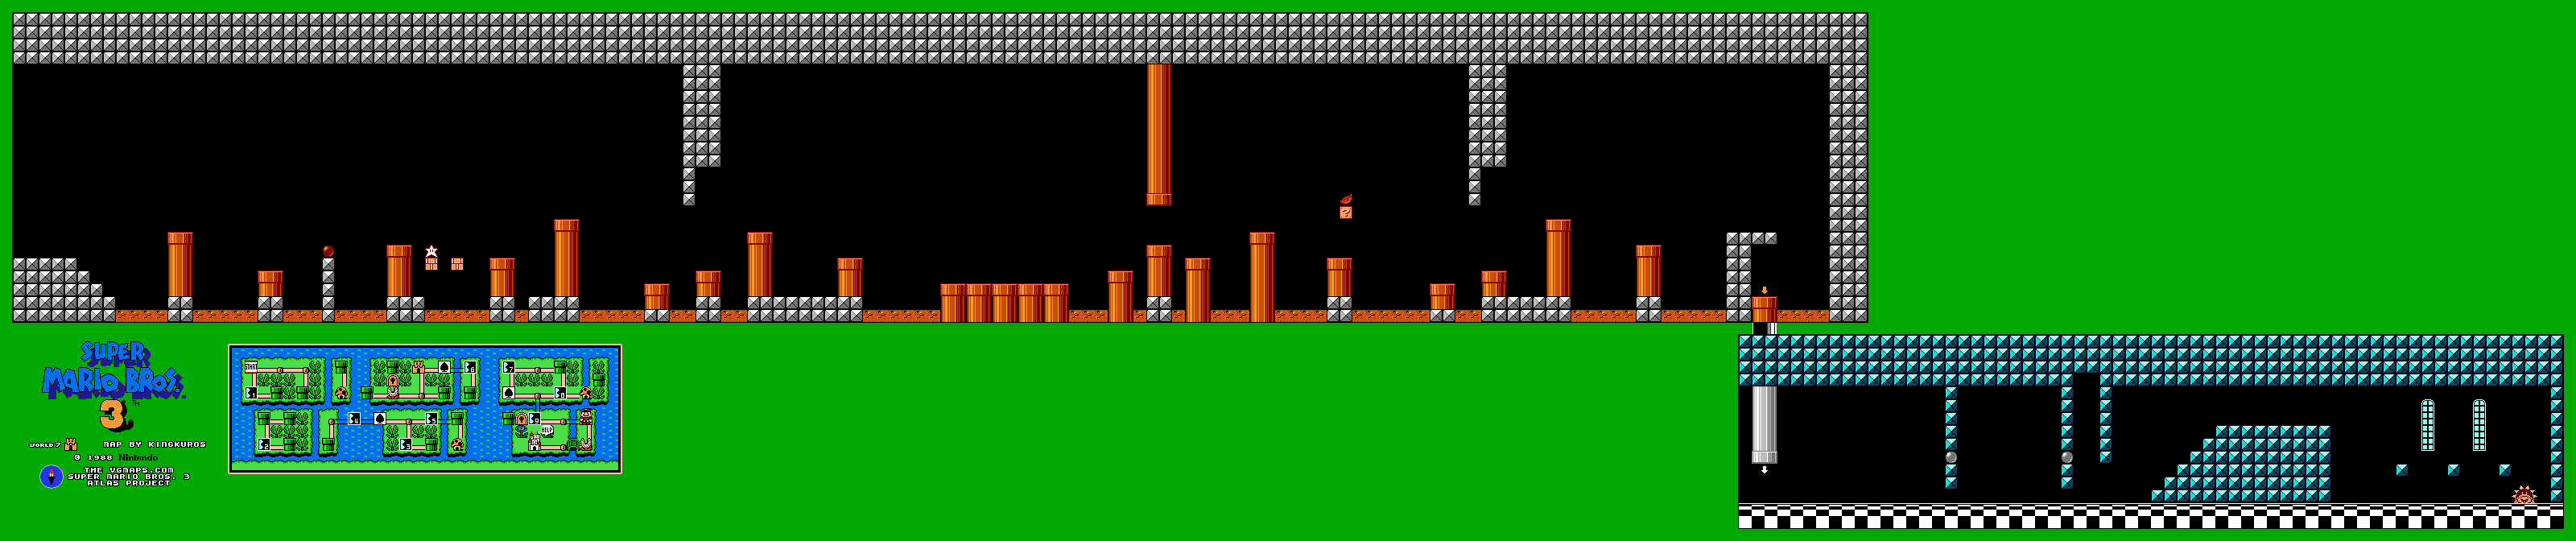
Cross the plant-filled pipe tops over lava. Turn toward a Boo when you need it to stop approaching while you wait for a Piranha Plant to withdraw. A Super Star is in the first brick; the middle question block supplies a conventional power-up.
At the first hall’s far end, drop from the upper platform while holding left to land on the pipe instead of in lava. The second hall combines Roto-Discs and Thwomps. Bait a Thwomp, wait for the rotating opening and crouch-slide under the low wall if Mario is large. Reach Boom Boom, complete the three stomps and collect the magic ball. This fortress opens the way to the second plant encounter and Ludwig’s airship.
Piranha Plant course 2
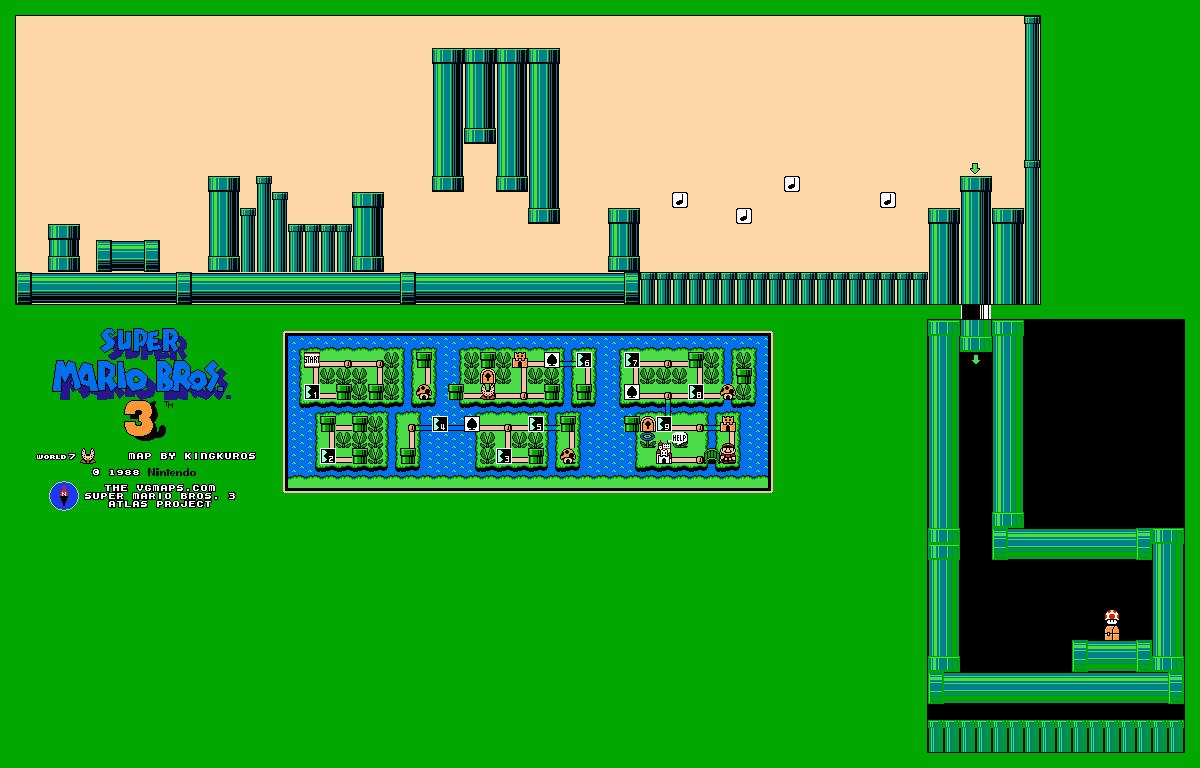
Wait for the first Muncher line to sink into its pipes before moving across. Watch the fireball from the Venus Fire Trap, then use the safe pipe tops to prepare for the hanging plants. Do not jump directly beneath a plant while it extends.
The later Note Blocks and red Paratroopa provide the height needed above the last Muncher section. Enter the middle pipe in the final group of three for the reward chamber. Collecting its Super Mushroom ends the stage. This is the required plant obstacle course before the airship; there is no separate plant health bar or multi-hit boss fight.
Airship — Ludwig von Koopa

Use the Bolt Lifts to bridge the separated hull sections. Jump repeatedly on a lift to move it along its screw, then leave when it reaches the next safe deck. Watch the Rocket Engines and Rocky Wrenches while taking the two available power-ups. Crouch beneath the low wall after the long second lift. The final three lifts move backward when stepped on, so transfer promptly rather than waiting for them to carry you forward.
Ludwig fires wand shots rapidly and shakes the ground when he lands. Jump just before his landing so Mario is not stunned, then attack his head when the firing gap permits. After a hit he charges in his shell. Three stomps defeat him. Ludwig does not teleport or create decoy copies in this game.
World-map notes
The first plant course is optional once its map bypass opens; the second guards the airship route. The 7-2 house reward is a P-Wing, while the first fortress supplies a Tanooki Suit in its hidden room. Flight is required inside that fortress’s intended exit route. An Anchor remains useful for Ludwig’s airship but has no corresponding roaming airship target in Dark Land.
Continue the walkthrough
Previous world: Ice Land · Walkthrough overview · Next world: Dark Land
Warp Whistles · White Mushroom Houses · Items and bonus games