

World 8 — Dark Land. Cross the tank column, battleships and three Hand Traps, then survive the fast fleet and final fortress. The existing World 8 maps are from Super Mario All-Stars on SNES; the text below follows the NES game.
Courses in this world
- Big Tanks
- Battleships
- Hand Trap — enemy brothers
- Hand Trap — lava platforms
- Hand Trap — jumping fish
- Fast Airship Fleet
- World 8-1
- World 8-2
- Fortress
- Super Tank
- Bowser’s Castle — Bowser
Big Tanks

Stay with the moving tank column and use the cannon tops only after checking their firing direction. The ground does not carry Mario along with the vehicles, so standing still lets the screen leave him behind. Avoid the Bob-ombs’ blast area and pass the front-facing flame engine while it is off.
The later tanks add Rocky Wrenches and the large cannon before the final pipe. Jump over the giant cannonball from a clear landing; do not rush toward it at ground height. The pipe reaches a lone Boomerang Bro, not Boom Boom. Defeat him and take the reward to open the battleship route. The NES tank column is longer than the version shortened for Super Mario Advance 4.
Battleships

Cross the three ships while watching Rocky Wrenches and cannons firing from different heights. The first ship contains the only power-up. Large Mario can crouch-jump into it beneath the low structure. Continue onto the raised deck before the scrolling makes the approach cramped.
Swimming underneath the ships is possible, but the hull pushes Mario downward. Keep swimming upward and return behind the last ship without sinking below the level boundary. The deck route avoids that particular risk. Enter the final pipe and defeat Boom Boom to open the Hand Traps section. This stage’s water is usable; it is different from the lava beneath the later hand-trap bridges.
Hand Trap — enemy brothers
The rightmost active trap contains the enemy-brother gauntlet. Face the Fire Bro first, then the Hammer Bros. on the brick formations. Attack from a block’s underside or use a ranged power-up rather than jumping blindly into the hammer arc. A conventional power-up is available in the lower block row.
Pass the Boomerang Bro while accounting for the returning projectile, then avoid being grounded when the Sledge Bro lands. Defeat or safely cross the last obstruction and enter the pipe. Collect the Super Leaf in the reward room to finish. The hand can pull Mario in when crossing its map tile, and you can also enter voluntarily for a full tour.
Hand Trap — lava platforms
The middle active trap crosses a lava pool using seven small platforms. Watch the Podoboos between jumps and wait on a platform when the next fireball is already rising through your planned landing. Keep jumps compact enough to land on the center of the next block.
Follow the coin-marked sequence across the pool and enter the far pipe. Take the Super Leaf to finish. Unlike the previous tank and ship stages, this course is not a long automatic-scroll chase, so controlled pauses are useful. Invincibility from an inventory star does not make the lava safe.
Hand Trap — jumping fish
The leftmost active trap is a longer broken bridge with Cheep-Cheeps jumping from below. Keep moving, but look for the next bridge gap and wooden-block pillar before committing to a running jump. The fish can cross the same landing from either side.
Take the question-block power-up above the later platform if safe. At the low pillar afterward, small Mario can pass underneath; large Mario can crouch-slide or use the question block to go above. Continue over the last breaks in the bridge to the exit pipe and Super Leaf reward. These three hand courses fill the missing encounters between the battleships and the fast airship fleet.
Fast Airship Fleet

This fleet scrolls faster than the earlier airships. Jump from one small hull to the next before the camera makes the gap awkward. Most platforms have an engine behind them and a Rocky Wrench on top, so aim for the clear front portion rather than landing on a flame.
No power-up is supplied during this stage. Bring a tail or inventory P-Wing if you want help correcting the large jumps. A P-Wing still requires staying above a safe landing and avoiding the engines. Reach the last pipe and fight the flying Boom Boom. Wait for his dive to leave his head exposed, then complete the remaining stomps and take the magic ball.
World 8-1
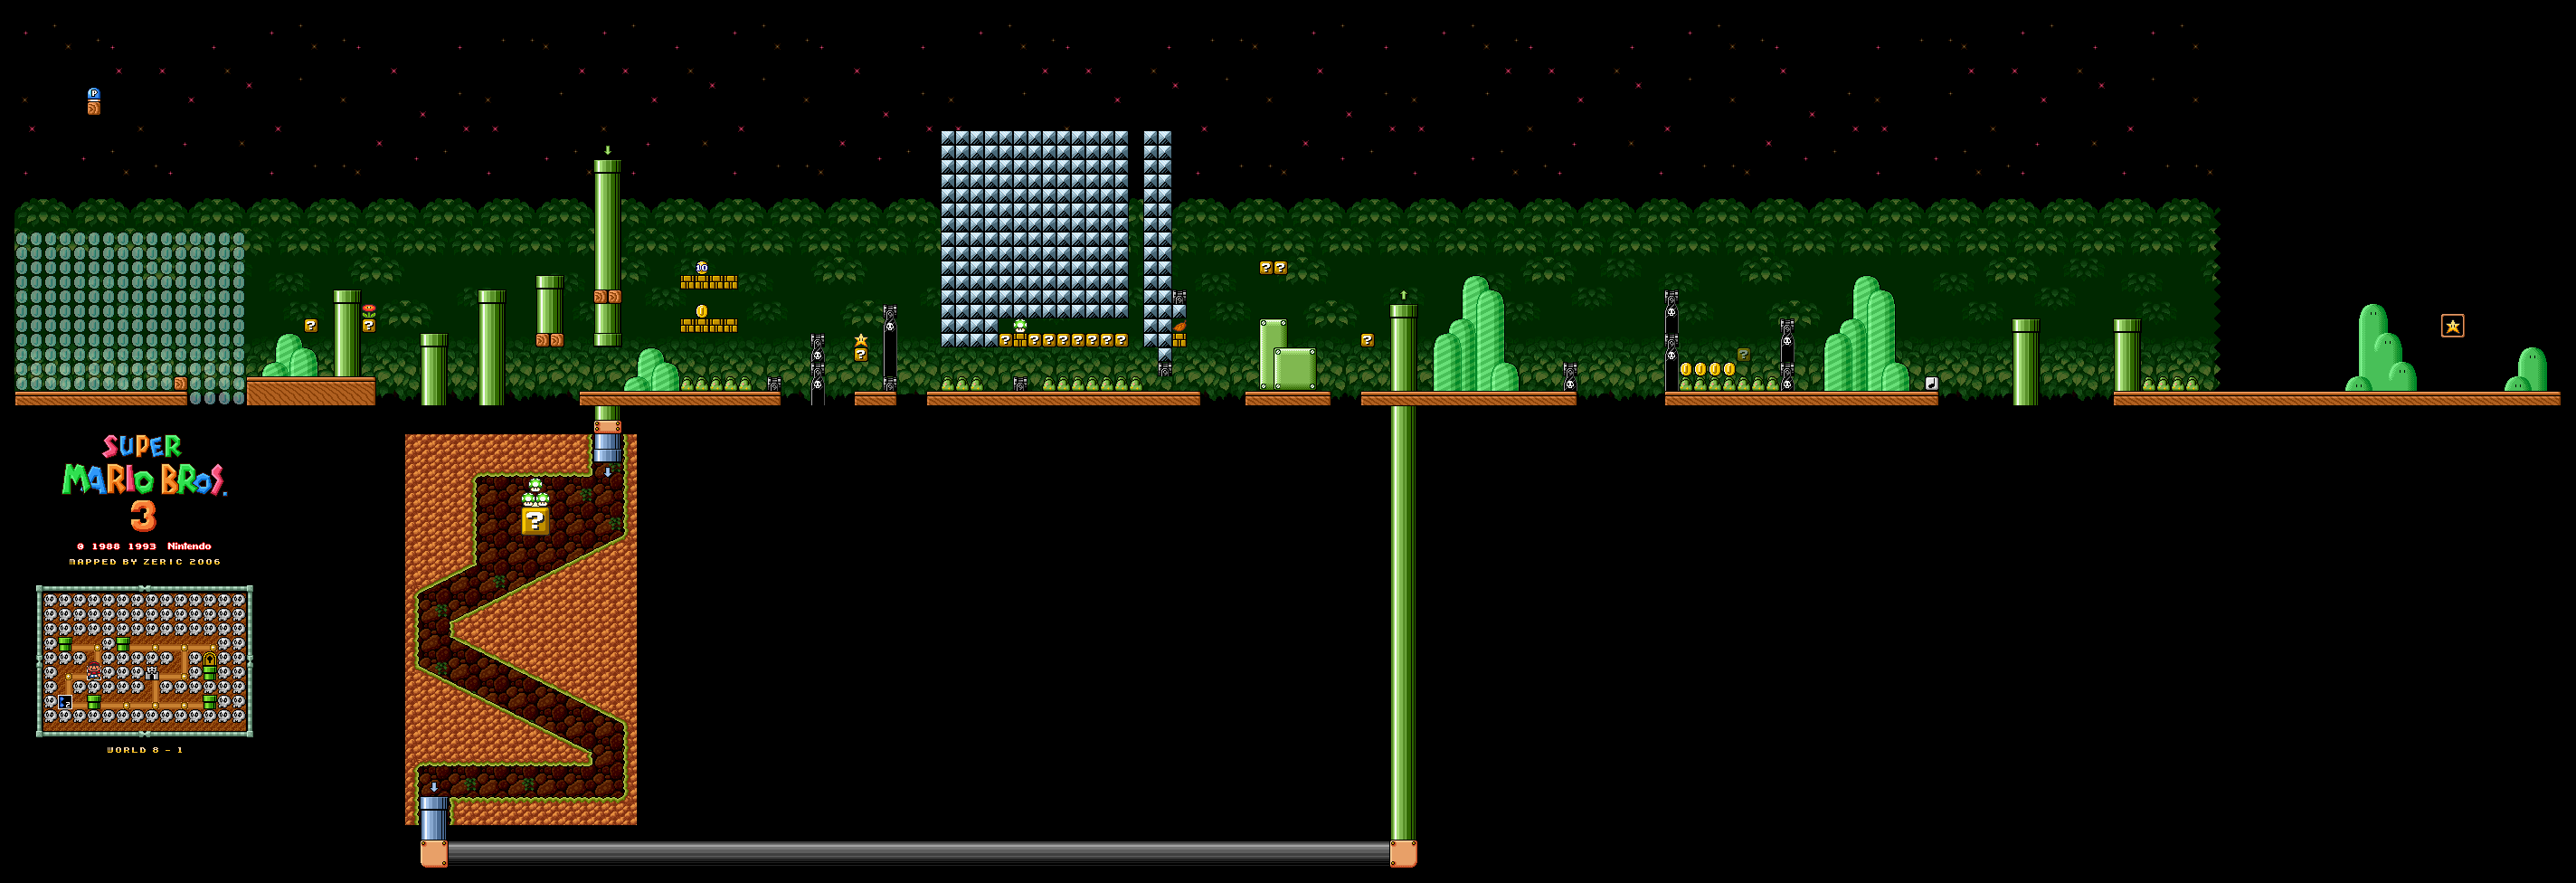
Take the second question block’s power-up and work through the tall Bullet Bill cannons. With a tail, fly above the opening area for the P-Switch and blue coins. The high pipe farther right leads to a room with three 1-Ups; the ground route continues through the cannon corridors.
Use the Super Star between the cannons when the route is clear enough to keep moving. The later brick between the question blocks holds another 1-Up, and the brick near the Boo supplies a Leaf. Time the Paratroopa bounces over the last large gaps, then use the Note Block and pipe tops to reach the goal. The NES background is dark; the existing map illustrates the same route with the SNES remake’s scenery.
World 8-2
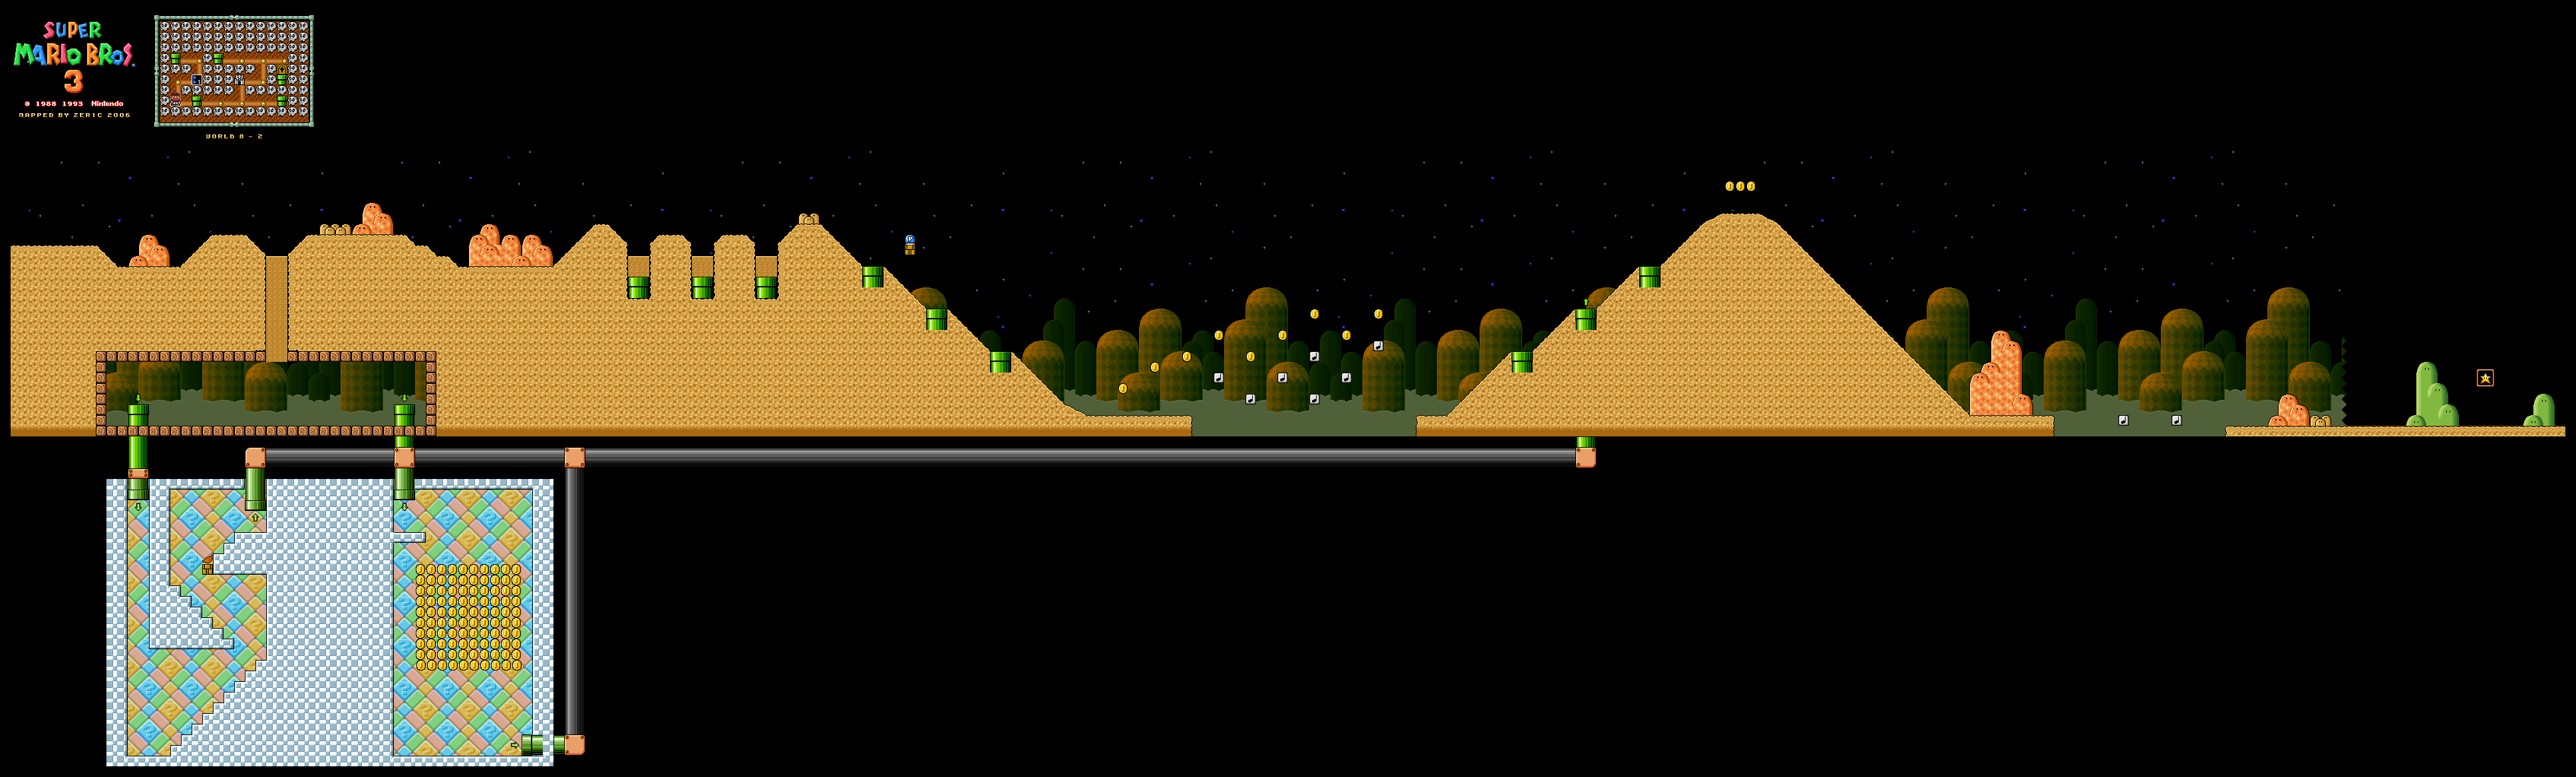
For the safe shortcut, let the first sandfall carry Mario down to the hidden chamber. Its two pipes lead either through a power-up room or into the large coin room. Both rejoin the main course beyond the first big gap, and taking this route avoids triggering the Angry Sun.
On the surface route, pass the Para-Goomba and plant pipes, reveal the P-Switch above one pipe and use the converted coins for extra footing. The Angry Sun begins attacking as you cross the first long gap. Keep its dive behind you while using the Note Blocks, then cross the last gap by the Paratroopa to reach the goal. Do not assume every sand pit in the game is a shortcut; this instruction refers to the first sandfall in 8-2.
Fortress

Move through the first Roto-Disc hall and use its doors to switch between the upper route and conveyor corridor over lava. Several doors loop between the same rooms; optional branches contain power-ups and 1-Ups. Keep the map open to identify the door you just used instead of repeatedly re-entering its return route.
After the later door pair, crouch under the spikes over the conveyor and climb the steps. At the far right, drop past the sliding Thwomp and turn left. Hit the block nearest the conveyor to uncover the P-Switch. Press it, then return to the newly exposed white door on the far-right ledge for Boom Boom. The other revealed door supplies a Fire Flower. Stomp the boss while accounting for the conveyor beneath both characters, then take the magic ball.
Super Tank

The Super Tank adds overhead airship cannons to the long ground vehicles. Keep checking above Mario before jumping onto a cannon barrel. On the ground between tanks, move with the screen because the terrain itself will not carry you forward.
Cross the long Rocky Wrench tank without stopping in a wrench’s horizontal path. The last tank fires from barrels around mid-screen height; wait below or above the shot before transferring to the far end. No new power-up appears in this stage. Enter the last pipe, defeat the final flying Boom Boom and take the magic ball. The map door opens to Bowser’s Castle.
Bowser’s Castle
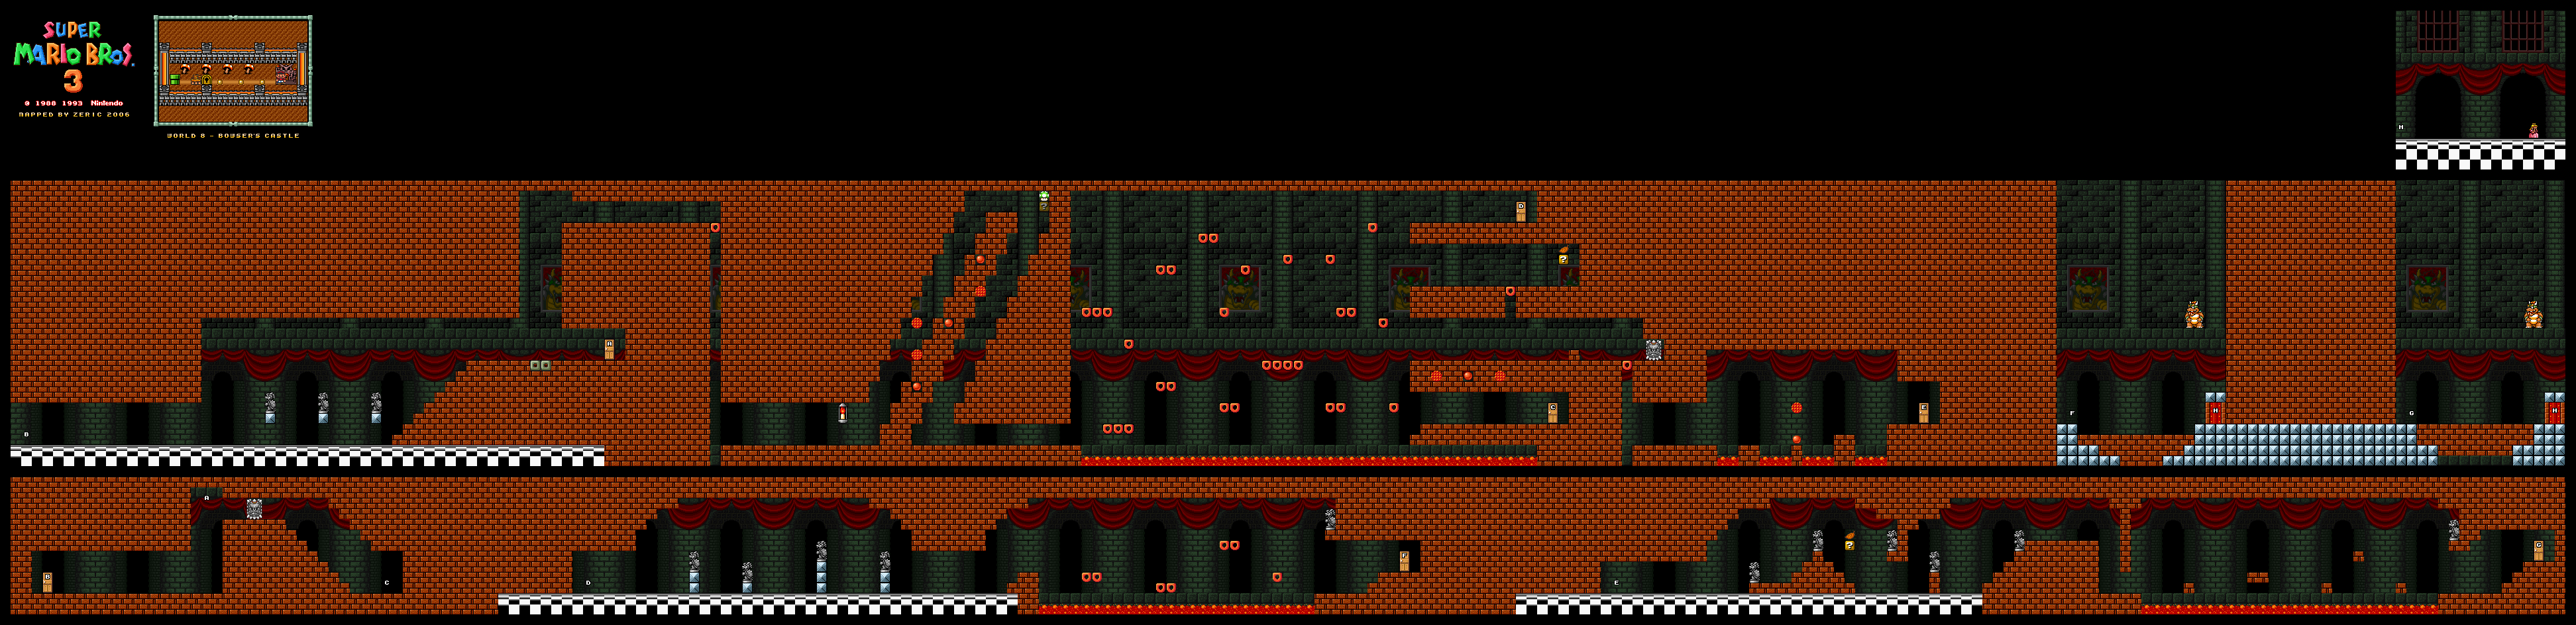
Avoid the laser-firing Bowser statues and climb to the invisible rising lift. Step onto its position at the stair top and ride upward; if you miss it, use the nearby door loop to retry. Drop on the Donut Lift and jump right before it falls into the abyss. Cross the Roto-Disc staircase and next lava platforms.
At the four-way split, the lowest route loops to the beginning. The top route reaches Bowser past more statues. The second-from-bottom route passes a sliding Thwomp and another lava section, then reaches a boss room with fewer breakable floor layers. The second-from-top branch supplies a power-up.
In the arena, dodge or crouch beneath Bowser’s fireballs. Let him jump toward your position, then move aside so his ground-pound breaks the same patch of bricks repeatedly. When the floor opens, he falls through and is defeated. You do not hit him with falling debris or stomp him three times. Fire Mario can instead win with thirty-five fireballs, or Hammer Mario with at least three hammers, but the floor-breaking method works without either rare preparation.
World-map notes
Three active hand tiles can pull Mario into their courses; the remaining bridge graphics do not each represent another stage. The trap can also be entered voluntarily. There are no normal Toad Houses or White Mushroom House coin challenge here, so use the inventory you brought. The first tank stage ends with a Boomerang Bro; later vehicle stages generally end with Boom Boom.
Continue the walkthrough
Previous world: Pipe Land · Walkthrough overview
Warp Whistles · White Mushroom Houses · Items and bonus games