
Follow World 4 in the original SNES version of Super Mario World 2: Yoshi’s Island. Finish each course with thirty stars, twenty red coins and five flowers for one hundred points. Collect all three requirements in the same clear; separate attempts do not combine their counts.
The full-size maps below show the course branches and collectible positions. Open a map to inspect a narrow passage, and open the accompanying video when you need to see a timed jump in motion.
World 4-1 — GO! GO! MARIO!!
Sweep the opening hills and the gap between them for the first flower. After clearing the two Piranhas that block the pipes, enter the pipe beside the Wild Ptooie Piranha. Its cave contains a separate coin trail and a star crate; return through the far pipe before continuing.
Drop to the Bullet Bill section for the low flower and watermelon cloud, then follow the route through the Fuzzies. The next flower sits left of the small platforms, so collect it before entering the final pipe.
Break the blocks containing the Super Star and follow Baby Mario through the wall-and-ceiling course. Take the side pocket on the right for a flower before gliding through the Flying Wigglers. Collect the high flower and coin trail during that glide, then reunite with Yoshi at the goal.
Stage map: open to enlarge.

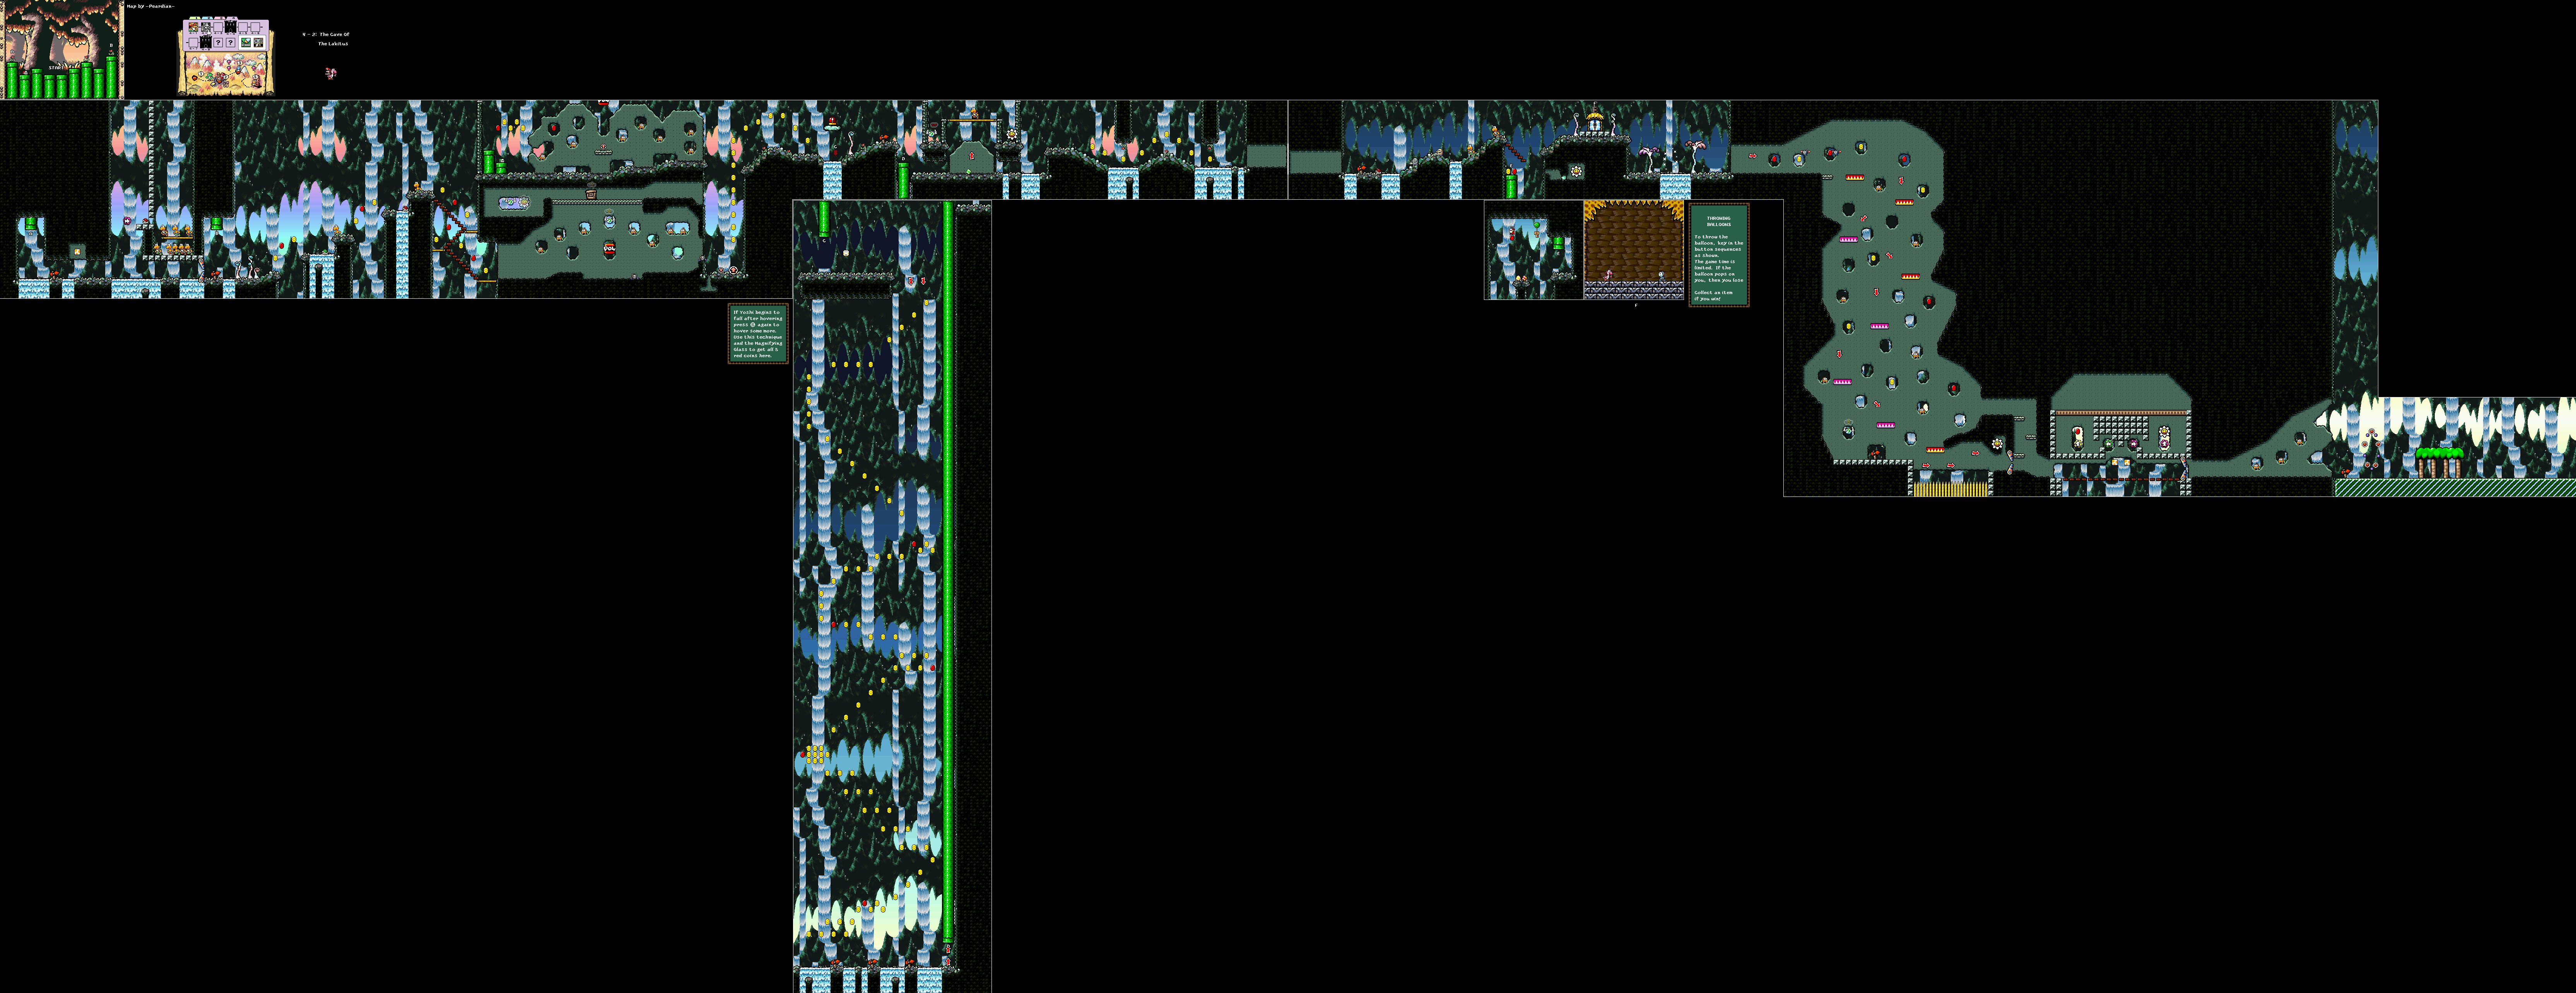
World 4-2 — The Cave Of The Lakitus
Enter the first pipe and use the arrow-cloud setup to clear the Koopas below. After the flippers, search the coins around the waterfalls and stairs. Wall Lakitus throw from holes in the rock; the nearby POW Block can clear a crowded stretch before you jump through it.
Find the switch above the waterfall near the Piranhas, then enter the concealed opening marked by a red arrow. Control the descent through its coin shaft rather than falling past the red coins. Back in the main cave, use a Koopa shell to reach the flower across the narrow gap.
The side pipe by the pit contains a red-coin Fly Guy and the mini-battle key. After the Middle Ring, ride the ferries down through the Lakitu attacks. At the bottom, collect the flower over spikes with an egg where possible, then use the arrow clouds to reach the other flower before crossing the final flippers.
Stage map: open to enlarge.
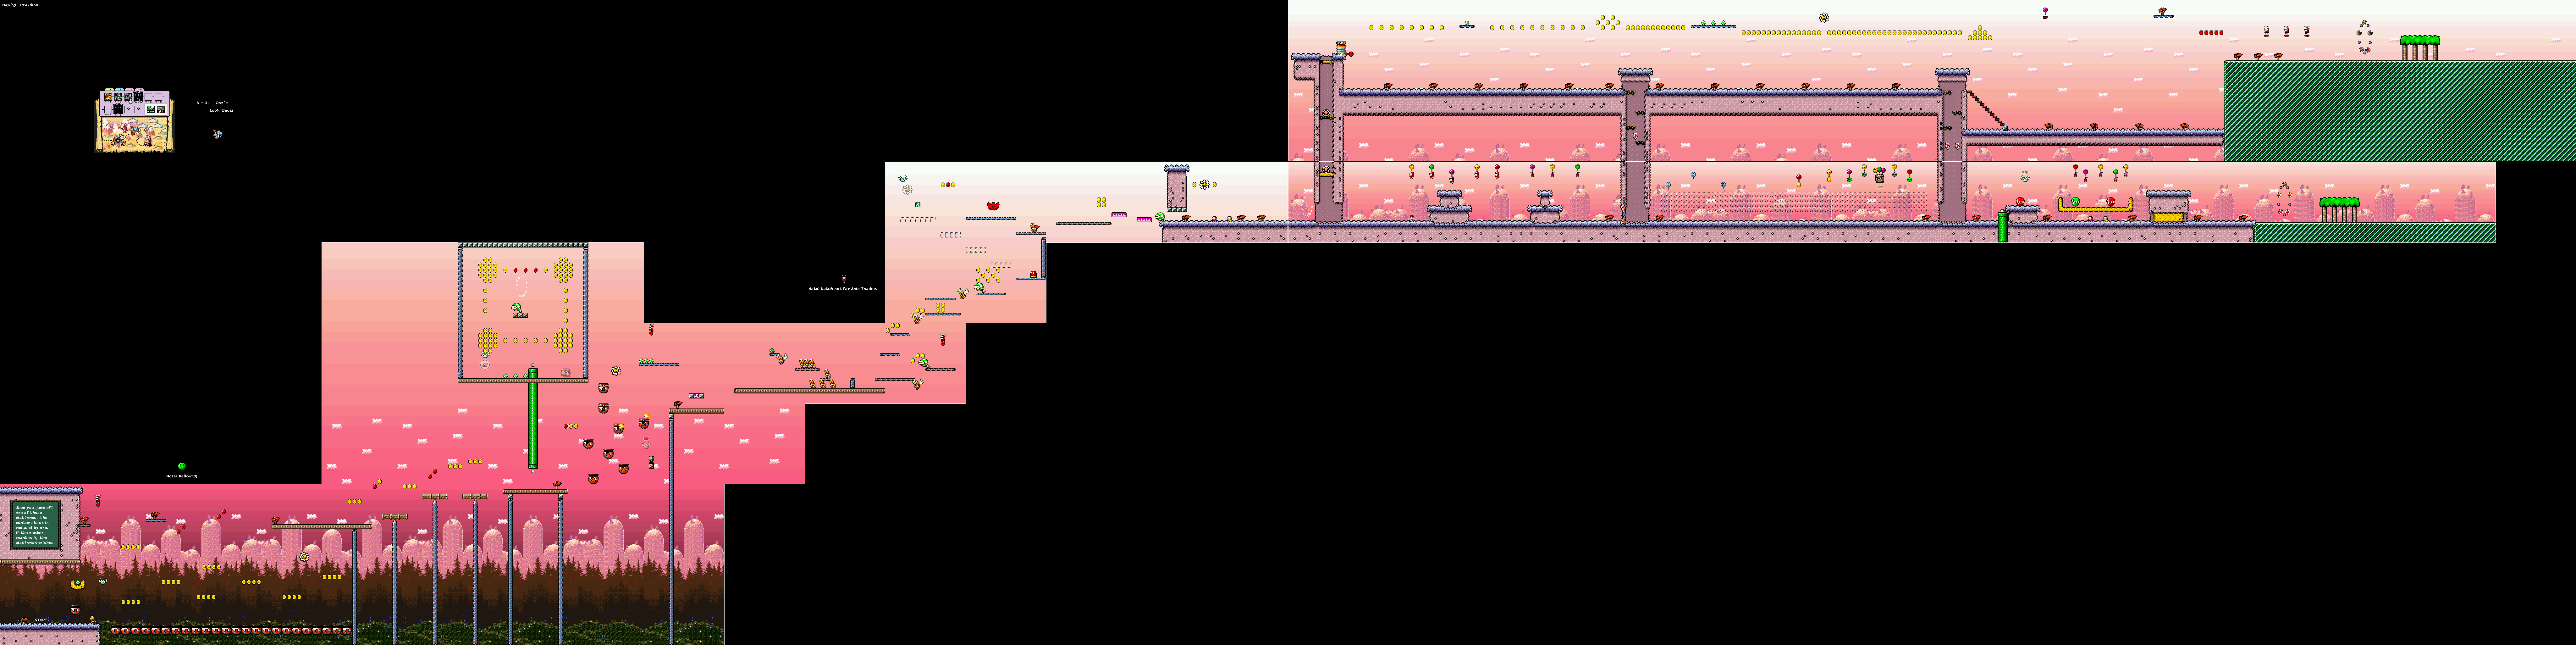
World 4-3 — Don’t Look Back!
Countdown Platforms disappear after you leave them. Use the balloons to climb away from the early dead-end bridge and collect the high coins, including the Fly Guy on the far left. Do not consume your return platforms before searching that side.
Enter the bonus pipe for the helicopter route and sweep its high and low coin groups before touching the Yoshi Block. Back outside, cross the Countdown Platforms around the Bullet Bill cannon, shooting the red-coin Fly Guys before they escape.
Press the switch to reveal the block route near the tulip, clear the Piranha and enter the last area. Ride the large red balloon through the aerial coin trail, adjusting your position to collect the low and high groups before it moves beyond them. Jump from it to the safe ground by the Goal Ring.
Stage map: open to enlarge.
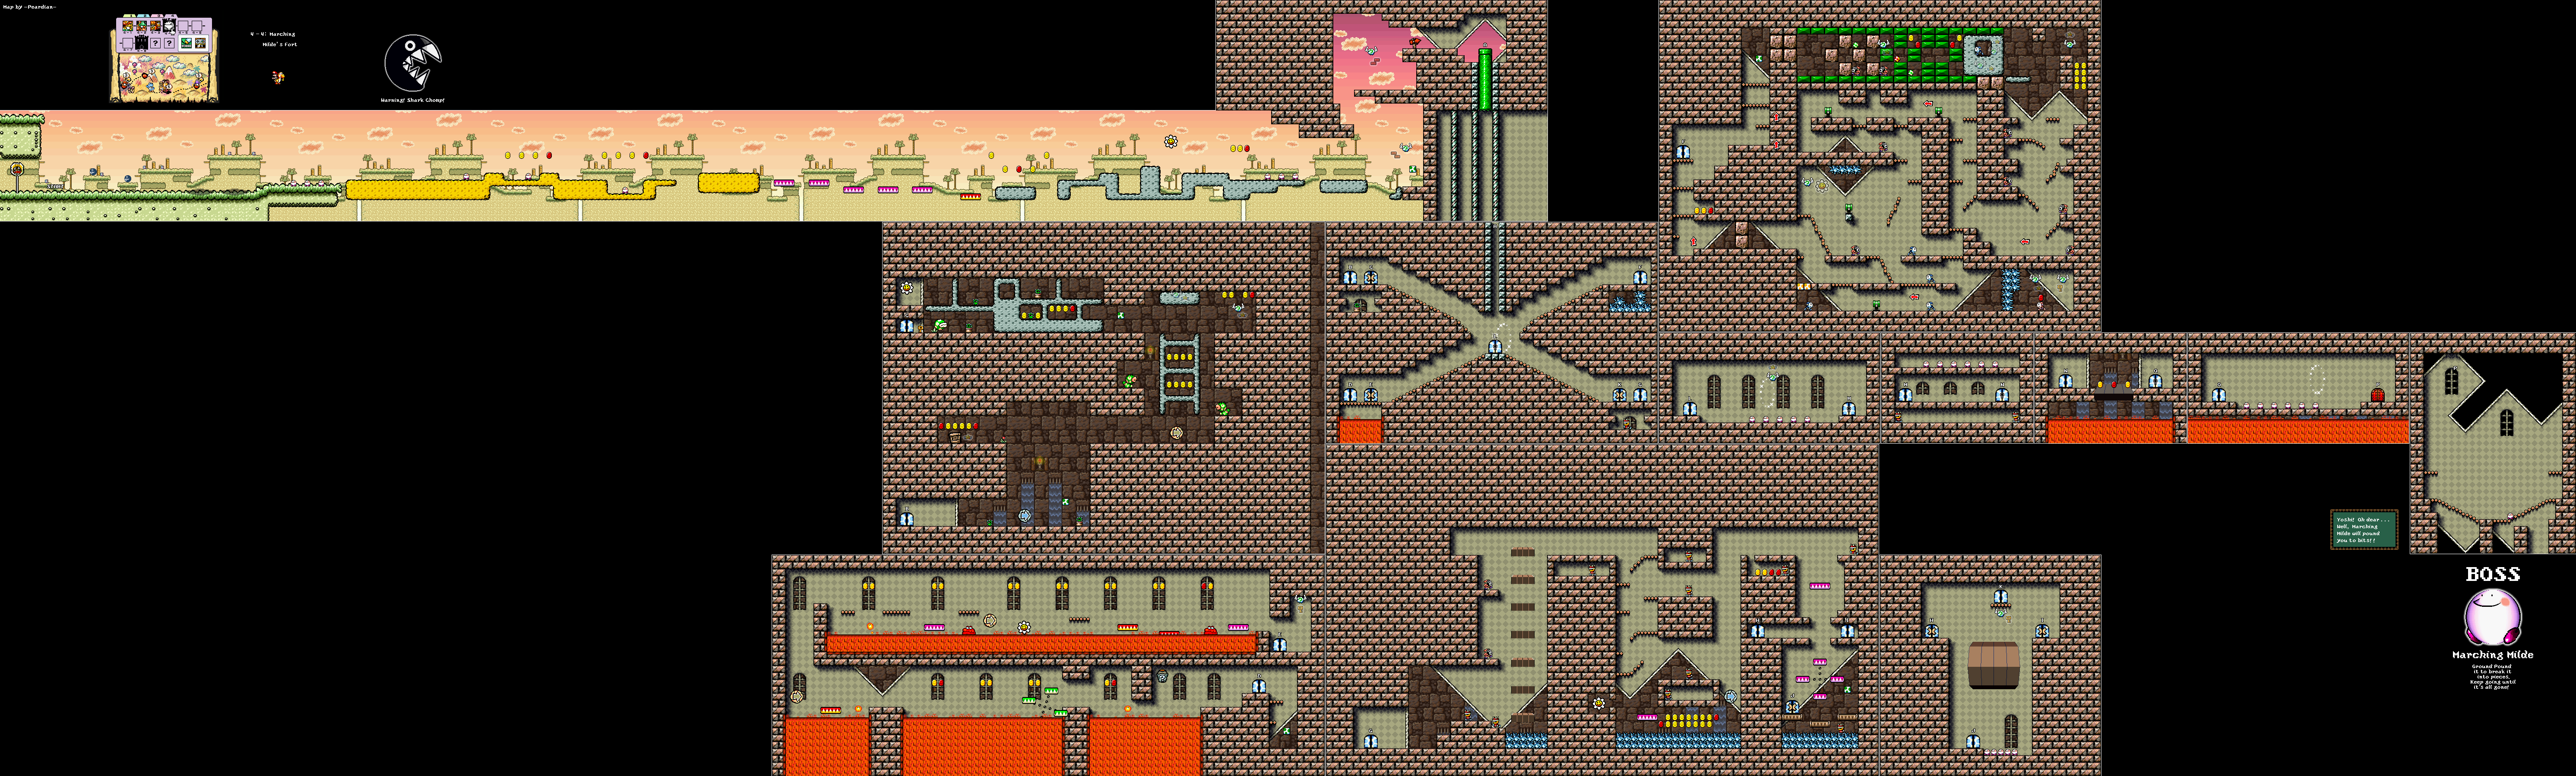
World 4-4 — Marching Milde’s Fort
Pass the Chomps outside and enter the fort’s X-shaped hub. The four corner doors lead to four keys. Complete all four branches before opening the central locked route, which requires those keys in succession.
One branch crosses lava and Hot Lips, one runs through Bandits and Bullet Bills, another uses spinning wheels around thorns, and the last is guarded by plant enemies. Search the coin and flower pockets while collecting each key; returning with only the first key does not complete the hub. After unlocking the central route, sweep the Milde rooms and the lava seesaw for the remaining items.
Marching Milde splits when ground-pounded. Pound the large halves, then the smaller divisions, until only ordinary Mildes remain. Finish those with stomps, eggs or swallowing. A normal jump merely bounces from the large forms; the ground pound is the attack that divides them.
Stage map: open to enlarge.
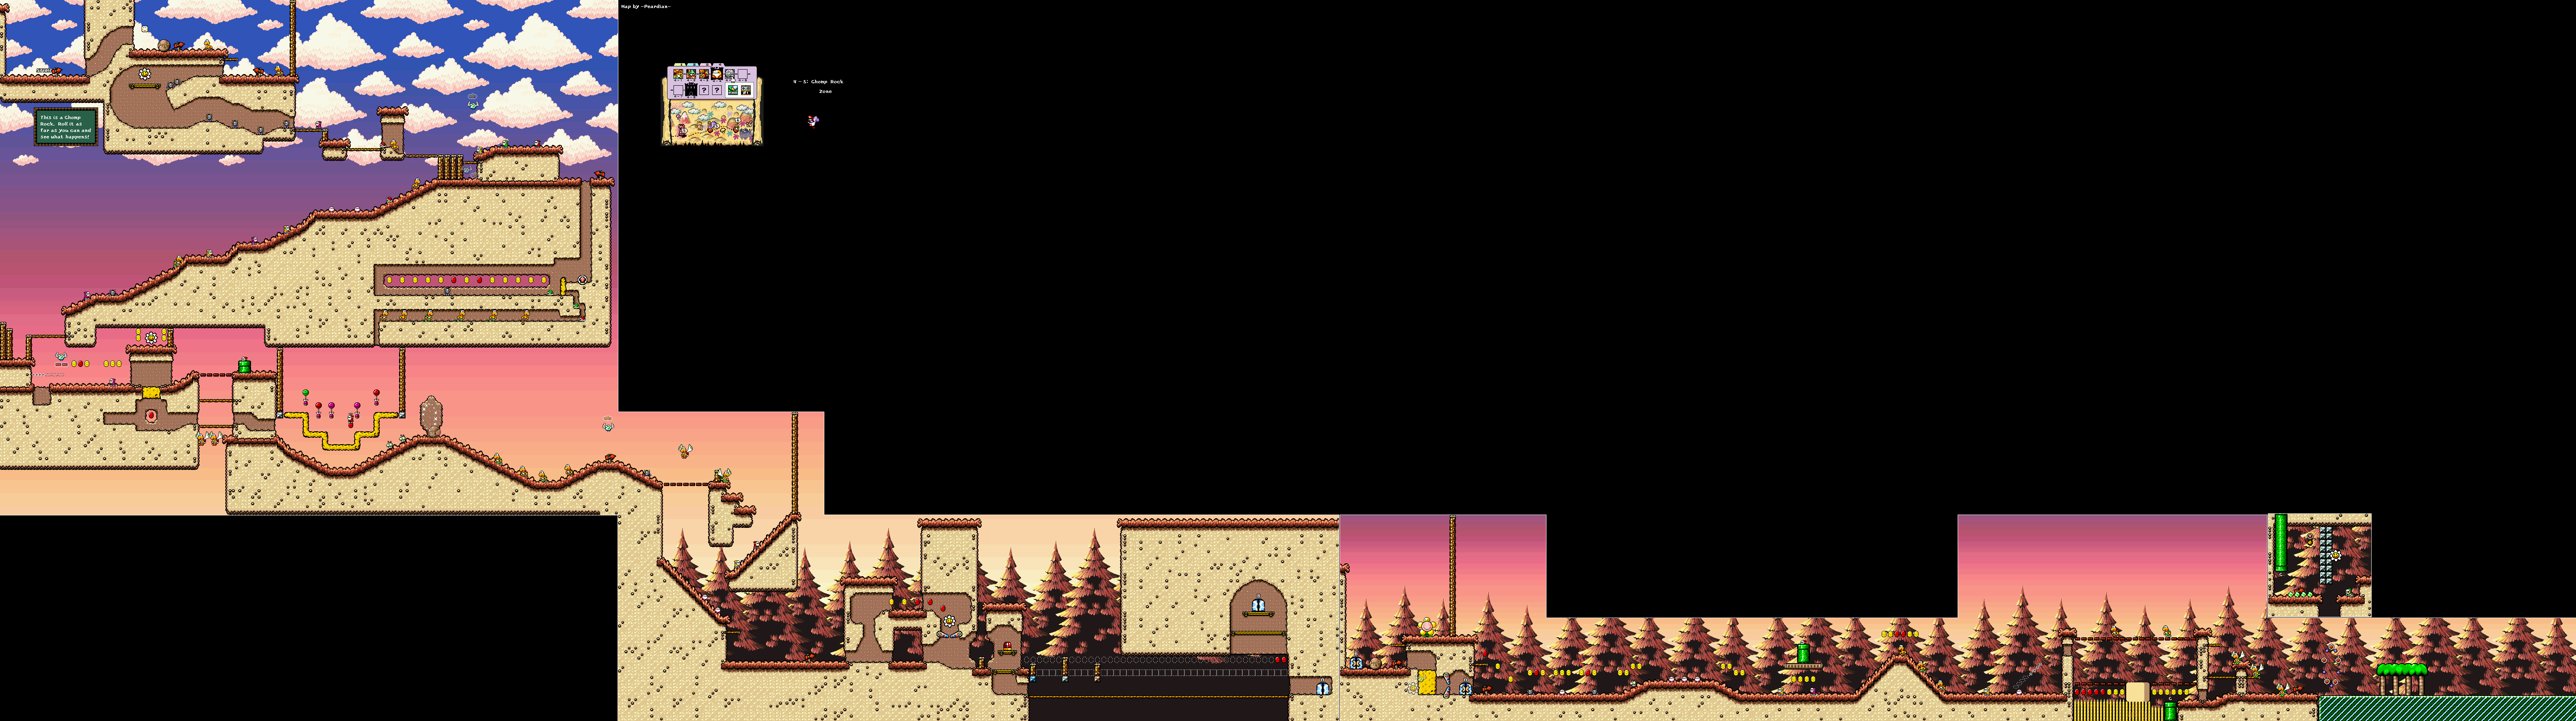
World 4-5 — Chomp Rock Zone
Keep the Chomp Rock with you throughout the first hills. Pound the posts in its way and shoot the platform cloud so the rock can cross the gap. Use its top to reach the high flower, then push it through the orange blocks while watching the bomb carriers above.
After the Middle Ring, clear the next posts and activate the switch bridge before rolling across it. Search the low flower and red coins before entering the door. In the second area, push the next Chomp Rock through the enemies and build the cloud staircase.
Ground-pound the beige squashy platform above the spikes until it flattens; this gives access to the red coins on the left. Enter the nearby bonus pipe and throw an egg to the Green Glove. Jump to position its return throw through the flower. Continue to the goal only after checking both the flattened-platform pocket and this room.
Stage map: open to enlarge.
World 4-6 — Lake Shore Paradise
At the start, jump into the water while holding Down, then swim left while Yoshi is briefly submerged. This gets beneath the low wall to the hidden red coin. Continue right, shooting bridge clouds and checking beneath the floating platforms before entering the cave.
The crate at the far right contains a key for the optional mini-battle above. In the cave, take the low branch first; the room around the spinning wheel and spikes contains red coins missed by the direct upper route. Use the wheel’s rotation to approach them without fluttering blindly into the thorns.
Return to the main cave, pass through the small Flopsy Fish room and search the platforms around the Woozy Guys and Clawdaddies. The upper door leads outside. Check the last flower and coin groups around the shore before jumping through the Goal Ring.
Stage map: open to enlarge.

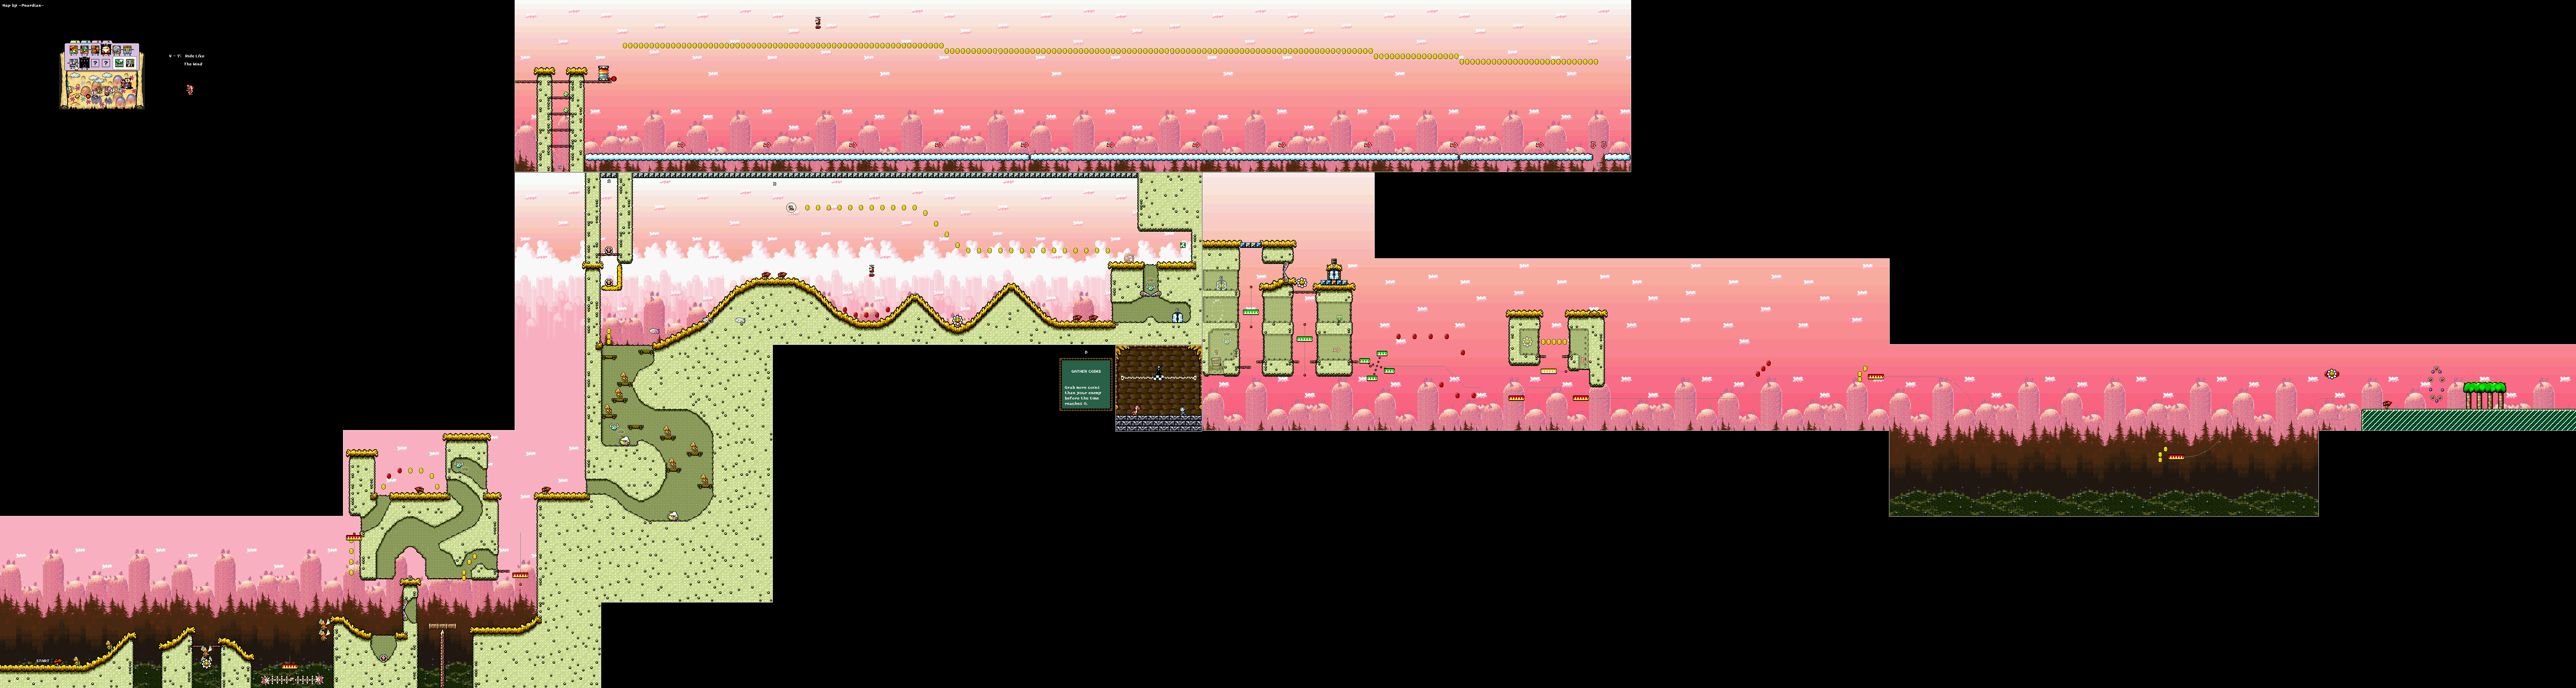
World 4-7 — Ride Like The Wind
Ride the first red ferry and use the Spring Ball to climb beside the Piranha. Search the tall ledge and the coins around the next ferry before moving into the Huffin Puffin section.
At the vertical row of three coins, shoot an egg along the row to reveal a Spring Ball. Bounce into the balloon bonus room and sweep its coin trail. On returning, search the ground route for red coins and a flower; flying straight over it in helicopter form misses them.
After the Middle Ring, check the hidden crate and use a Bullet Bill bounce to reach the high flower. The key opens a mini-battle hut. Ride the paddle wheel across the next pit, then transfer between the red ferries for the remaining flowers, including the one tucked into the wall. Keep enough height to collect the flower by the final goal.
Stage map: open to enlarge.
World 4-8 — Hookbill The Koopa’s Castle
Use Koopa shells to collect the flowers above the opening lava pools without jumping into the Hot Lips. Break the later blocks with eggs and search the staircase room, including the flower beyond the flippers.
At the crossed-out locked door, take a Koopa shell down the right-hand passage. Spit it through the narrow corridor to hit the cloud and build stairs to a side door. Inside, pound the key crate, then return to the locked route. Ride the spinning wheel through the thorn chamber and check the ceiling bonus room: defeating its two large Mildes gives a red coin. Search the breakable blocks in the last climb for two flowers before entering the boss door.
Hookbill falls onto his back after repeated egg hits to his head or arms: four while on all fours, or three while standing. Ground-pound his exposed belly, then dodge the bouncing shell. Repeat for three belly hits. Jumping on his head or shell makes him cough up replacement eggs; it does not replace the belly attack.
Stage map: open to enlarge.

Eight scores of one hundred give World 4 a total of eight hundred and unlock Extra 4 and the world’s Bonus game.