The Pit of 100 Trials (Pit of 100 Trials) is a huge cave area that leads deep into the earth’s interior and consists of a total of 100 floors. They are located in the Rogueport underground under Rogueport. The Pit of 100 Trials serve as an ancient prison of various beings whose strength corresponds to the depth of their story. In the last dungeons are so incredibly strong opponents to be found. This is only surpassed by Bonetail, an undead, cruel dragon skeleton locked in the final basement.
Furthermore, the Pit of 100 Trials are the main story of two Trouble Center orders, the first of which is acceptable once the second chapter has been mastered, the second only after the Shadow Queen has been defeated. The client of the first job is T. Dibe who asks for someone to be his father, Pine T., freed from the Pit of 100 Trials. After a short time this is on the 18th. The basement of the dungeons is unconscious on the ground. After being approached, he is willing to leave the Pit of 100 Trials as soon as possible, whereupon the heroes take him to the next tube room (The 20th). basement) must be guided. Once there, T leaves. Rottel the Pit of 100 Trials and waits with Pine T. Jr. at the entrance to thank the heroes and give them the reward of a Silver Card for the Pianta Parlor.
The client of the second order is Swob from Fahr Outpost, who has the concern that someone has a smear that is on the 50th. The basement of the Pit of 100 Trials is located. By accepting the order, the goal is to reach this basement and blow away the smear with the help of Bobbery. Afterwards, Swob rewards the heroes with an ice cream bun.
Level 100 – Fight against Bonetail
This is probably the toughest fight in Paper Mario: The Thousand-Year Door, she has an extremely high CP and quite high attack and defense power. In addition, all their attacks damage 8 points, their flame shocks even ensure conditions!
- White flame blast: 8 points damage and ensures sleep
- Blue flame blast: 8 points of damage and iced
- Green flame blast: 8 points damage and dizziness or poison
- Lilan flame blast: 8 points damage and reduces attack strength
The only thing that really applies here is to do as much damage as possible and try to block their attacks as much as possible. Then the boss gives up the spoon after a hard fight. Every now and then you should use an Ultra-Gelee to regain strength. After the glorious victory over Bonetail, she spits a rather large treasure chest out of her stomach on the aftermath of the fight – which is quite incomprehensible, since she is only a skeleton and therefore has no stomach from which the chest can be conveyed. By opening the chest you get the strongest badges in the game, the return postage.
| Name |
Max. HP |
Attack |
Defense |
| Bonetail |
200 |
8 |
2 |
Watch the video walkthrough on YouTube
Rewards:
- Sleepy Stomp Badges – 10. UG
- Fire Drive Badges 20. UG
- Zap Tap Badges – 30. UG
- Pity Flower-Badges – 40. UG
- Strange Sack – 50. UG
- Double Dip Badges – 60. UG
- Double Dip P-Badges – 70. UG
- Bump Attack Badges – 80. UG
- Lucky Day-Badges – 90. UG
- Return Postage Badges – After the victory over Bonetail
Level 1-10
| Picture |
Name |
Force points |
Attack power |
Defensive |
Findings in basement |
Other location |
 |
Gloomba |
7 |
3 |
0 |
1; 6 |
– |
 |
Spinia |
3 |
1 |
0 |
2; 7 |
Rogueport Underground Glitzville |
 |
Spania |
3 |
1 |
0 |
3; 8 |
Rogueport Underground Glitzville |
 |
Dull Bones |
1 |
2 |
1 |
4; 9 |
Hooktail Castle Glitzville Palace of Shadow |
 |
Fuzzy |
3 |
1 |
0 |
5 |
Shhwonk Fortress Glitzville |
Level 10-19
| Picture |
Name |
Force points |
Attack power |
Defensive |
Findings in basement |
Other location |
 |
Paragloomba/Gloomba |
7 |
3 |
0 |
11; 16 |
– |
 |
Cleft |
2 |
2 |
2 |
12; 17 |
Boggly Woods |
 |
Pokey |
4 |
3 |
0 |
13; 18 |
Glitzville |
 |
Dark Puff |
3 |
2 |
0 |
14; 19 |
Boggly Woods Glitzville |
 |
Pider |
5 |
2 |
0 |
15 |
Boggly Woods Glitzville |
Level 20-29
| Picture |
Name |
Force points |
Attack power |
Defensive |
Findings in basement |
Other location |
 |
Pieks-Gloomba |
7 |
4 |
0 |
21; 26 |
– |
 |
Bandit |
5 |
2 |
0 |
22; 27 |
Glitzville |
 |
Lakitus |
5 |
2 |
0 |
23; 28 |
Glitzville |
 |
Spiny |
3 |
3 |
3 |
23; 28 |
Glitzville |
 |
Bob-omb |
4 |
2 |
1 |
24; 29 |
Glitzville |
 |
Boo |
7 |
3 |
0 |
25 |
Creepy Steeple |
Level 30-39
| Picture |
Name |
Force points |
Attack power |
Defensive |
Findings in basement |
Other location |
 |
Dark Koopa clan clan |
8 |
4 |
2 |
31; 36 |
– |
 |
Hyper Cleft |
4 |
3 |
3 |
32; 37 |
Twilight Trail |
 |
Buzzy Beetle |
5 |
3 |
4 |
33; 38 |
Pirate’s Grotto |
 |
Shady Koopa clan clan |
8 |
3 |
1 |
34; 39 |
Glitzville |
 |
Flower Fuzzy |
6 |
3 |
0 |
35 |
Glitzville Keelhaul Key |
Level 40-49
| Picture |
Name |
Force points |
Attack power |
Defensive |
Findings in basement |
Other location |
 |
Fies Parakoopa/Dark Koopa clan clan |
8 |
4 |
2 |
41; 46 |
– |
 |
Bulky Bob-omb |
6 |
2 |
1 |
42; 47 |
Pirate’s Grotto |
 |
Lava Blub |
6 |
4 |
0 |
43; 48 |
Pirate’s Grotto |
 |
Poison Pokey |
8 |
4 |
0 |
44; 49 |
Riverside Station |
 |
Spiky Parabuzzy/Spike Top |
5 |
3 |
4 |
45 |
Riverside Station |
|
Badge Bandit |
12 |
5 |
0 |
51; 56 |
– |
 |
Ice Puff |
9 |
4 |
0 |
52; 57 |
Fahr Outpost |
 |
Dark Boo |
8 |
4 |
0 |
53; 58 |
Poshley Sanctum |
 |
Red Chomp |
6 |
5 |
3 |
54; 59 |
Glitzville |
 |
Moon Cleft |
6 |
5 |
5 |
55 |
Moon |
 |
Dark Lakitu |
13 |
5 |
0 |
61; 66 |
– |
 |
Sky-Blue Spiny |
6 |
6 |
4 |
61; 66 |
– |
 |
Dry Bones |
8 |
5 |
2 |
62; 67 |
Palace of Shadow |
 |
Dark Wizzerd |
10 |
5 |
2 |
63; 68 |
Palace of Shadow |
 |
Frost Piranha |
10 |
5 |
0 |
64; 69 |
Fahr Outpost |
 |
Dark Craw |
20 |
6 |
0 |
65 |
Glitzville |
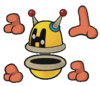 |
Wizzerd |
10 |
6 |
3 |
71; 76 |
– |
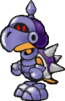 |
Dark Koopatrol |
25 |
5 |
2 |
72; 77 |
Glitzville |
 |
Phantom Ember |
10 |
5 |
0 |
73; 78 |
Palace of Shadow |
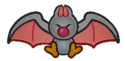 |
Swoopula |
9 |
4 |
0 |
74; 79 |
Palace of Shadow |
 |
Chain dog |
7 |
6 |
5 |
75 |
Palace of Shadow |
 |
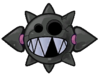
Spunia |
12 |
7 |
2 |
81; 85; 86 |
Rogueport Underground |
 |
Dark Bristle |
8 |
8 |
4 |
82; 87 |
– |
 |
Arantula |
16 |
7 |
0 |
83; 88 |
– |
 |
Piranha Plant (Pit of 100 Trials) |
15 |
9 |
0 |
84; 89 |
– |
 |
Elite Wizzerd |
12 |
8 |
5 |
91; 95; 99 |
– |
 |
Poison Puff |
15 |
8 |
0 |
92; 96 |
– |
 |
Bob-ulk |
10 |
4 |
2 |
93; 97 |
– |
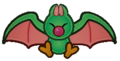 |
Swampire |
20 |
6 |
0 |
|
|
Level 50-59
| Picture |
Name |
Force points |
Attack power |
Defensive |
Findings in basement |
Other location |
 |
Badge Bandit |
12 |
5 |
0 |
51; 56 |
– |
|
Ice Puff |
9 |
4 |
0 |
52; 57 |
Fahr Outpost |
|
Dark Boo |
8 |
4 |
0 |
53; 58 |
Poshley Sanctum |
|
Red Chomp |
6 |
5 |
3 |
54; 59 |
Glitzville |
|
Moon Cleft |
6 |
5 |
5 |
55 |
Moon |
Level 60-69
| Picture |
Name |
Force points |
Attack power |
Defensive |
Findings in basement |
Other location |
|
Dark Lakitu |
13 |
5 |
0 |
61; 66 |
– |
|
Sky-Blue Spiny |
6 |
6 |
4 |
61; 66 |
– |
|
Dry Bones |
8 |
5 |
2 |
62; 67 |
Palace of Shadow |
|
Dark Wizzerd |
10 |
5 |
2 |
63; 68 |
Palace of Shadow |
|
Frost Piranha |
10 |
5 |
0 |
64; 69 |
Fahr Outpost |
|
Dark Craw |
20 |
6 |
0 |
65 |
Glitzville |
Level 70-79
| Picture |
Name |
Force points |
Attack power |
Defensive |
Findings in basement |
Other location |
|
Wizzerd |
10 |
6 |
3 |
71; 76 |
– |
|
Dark Koopatrol |
25 |
5 |
2 |
72; 77 |
Glitzville |
|
Phantom Ember |
10 |
5 |
0 |
73; 78 |
Palace of Shadow |
|
Swoopula |
9 |
4 |
0 |
74; 79 |
Palace of Shadow |
|
Chain dog |
7 |
6 |
5 |
75 |
Palace of Shadow |
Level 80-89
| Picture |
Name |
Force points |
Attack power |
Defensive |
Findings in basement |
Other location |
|
Spunia |
12 |
7 |
2 |
81; 85; 86 |
Rogueport Underground |
|
Dark Bristle |
8 |
8 |
4 |
82; 87 |
– |
|
Arantula |
16 |
7 |
0 |
83; 88 |
– |
|
Piranha Plant (Pit of 100 Trials) |
15 |
9 |
0 |
84; 89 |
– |
Level 90-99
| Picture |
Name |
Force points |
Attack power |
Defensive |
Findings in basement |
Other location |
|
Elite Wizzerd |
12 |
8 |
5 |
91; 95; 99 |
– |
|
Poison Puff |
15 |
8 |
0 |
92; 96 |
– |
|
Bob-ulk |
10 |
4 |
2 |
93; 97 |
– |
|
Swampire |
20 |
6 |
0 |
94; 98 |
– |
 |
Amazy Dayzee |
20 |
20 |
1 |
91-99 (only in battles) |
Twilight Trail |
Markets:
Charlieton is also sometimes located on the tenth floors of the Pit of 100 Trials. He sells you useful items that might be useful to you on your way through the Pit of 100 Trials
Bubuvsky – shipper
He sometimes shows up randomly and can take Mario a few floors down or to the entrance for coins. He does not reveal his shortcuts.
- 2. Floors lower – 10 coins
- 5. Floors lower – 30 coins
- To the entrance – 10 coins