
The Tattle Log appears in the game Paper Mario: The Thousand-Year Door and serves to enter all opponents. New entries can be made by using Goombella’s Tattle against an opponent or by getting information from Professor Frankly’s trash. But the latter is only possible if you can not fight against this opponent again.
List of Tattle log entries
| No | Picture | Name | Max. HP | Attack | Defensive | Location | Description |
|---|---|---|---|---|---|---|---|
| 1 | 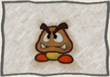 |
Goomba | 2 | 1 | 0 | Petal Meadows Shhwonk Fortress Hooktail Castle Glitzville Riverside Station | Very small fish… as they are in the textbook. Opponents without special features. |
| 2 | 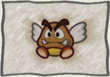 |
Paragoomba | 2 | 1 | 0 | Petal Meadows Shhwonk Fortress Hooktail Castle | Goombas with wings that are safe in the air from hammer attacks. If they suffer damage, they become normal Goombas. |
| 3 | 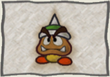 |
Spiked Goomba | 2 | 2 | 0 | Petal Meadows Shhwonk Fortress Hooktail Castle | A Goomba with a pimple hood. His attack power is slightly higher than a normal Goomba. |
| 4 | 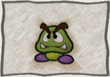 |
Hyper Goomba | 8 | 2 | 0 | Twilight Trail | Hyper-strong Goombas that can charge up. After charging, their attack power increases to 8. |
| 5 | 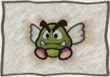 |
Hyper Paragoomba | 8 | 2 | 0 | Twilight Trail | Hyper-Goombas with wings that can recharge. After charging, their attack power increases to 8. |
| 6 | 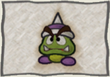 |
Hyper Spiky Goomba | 8 | 3 | 0 | Twilight Trail | Spiky hyper-goombas that can charge up. After charging, their attack power increases to 9. |
| 7 | 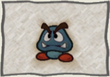 |
Gloomba | 7 | 3 | 0 | Pit of 100 Trials | Nasty Goombas who love dark tunnels. Maybe this is why the unhealthy color of the face? |
| 8 | 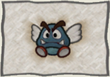 |
Paragloomba | 7 | 3 | 0 | Pit of 100 Trials | Winged glumbas with unhealthy face color. They look a little mouldy… |
| 9 | 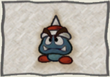 |
Pieks-Gloomba | 7 | 4 | 0 | Pit of 100 Trials | Stingy glumbas living in dark places. Better not jump on it, it might hurt. |
| 10 | 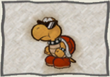 |
Koopa clan clan clan | 4 | 2 | 1 | Petal Meadows Shhwonk Fortress Hooktail Castle | Old acquaintances from previous adventures. If they lie on their backs, the defense drops to 0. |
| 11 | 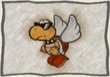 |
Parakoopae | 4 | 2 | 1 | Rogueport Underground Hooktail | Koopas with wings attacking from the air. Jumping attacks cause them to crash. |
| 12 | 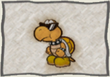 |
HP Koopa clan clan | 4 | 2 | 1 | Glitzville | Koopa clan clan clan fighting in the arena of Glitzville. Somewhat different paint, but otherwise a normal Koopa clan clan clan. |
| 13 | 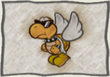 |
HP Paratroopa | 4 | 2 | 1 | Glitzville | A discolored parakoopa. Otherwise, just like a normal parakoopa. When he no longer flies, he becomes the normal Koopa clan clan clan again. |
| 14 | 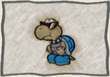 |
Shady Koopa clan clan | 8 | 3 | 1 | Glitzville Pit of 100 Trials | After overturning, its attacking power increases. The Shady Koopa clan clan is a particularly nasty Koopa clan clan clan. |
| 15 | 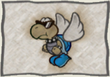 |
Shady Paratroopa | 8 | 3 | 1 | Glitzville | Shady Koopa clan clan. Force him to land. After overturning, the attacking power increases. |
| 16 | 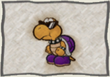 |
Dark Koopa clan clan | 8 | 4 | 2 | Pit of 100 Trials | Koopas living in the dark: hard and strong. By jumping, you can easily tip it over. |
| 17 | 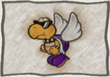 |
Dark Paratroopa | 8 | 4 | 2 | Pit of 100 Trials | Parakoopas who live in the dark. After a jump attack, they become fies-coopas. |
| 18 | 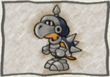 |
Koopatrol | 6 | 4 | 2 | Rogueport Underground | Sometimes they charge up too. Defeat them quickly, or they will call their friends. |
| 19 | 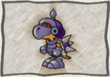 |
Dark Koopatrol | 25 | 5 | 2 | Glitzville Pit of 100 Trials | Among the coopatrols, he is an ace. When he gathers strength, his attacks are extra strong. |
| 20 | 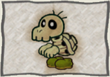 |
Dull Bones | 1 | 2 | 1 | Hooktail Castle Glitzville Palace of Shadow Pit of 100 Trials | Ossified Koopas who can throw with Bone and mysteriously reproduce themselves. |
| 21 | 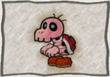 |
Red Bones | 5 | 3 | 1 | Hooktail Castle Palace of Shadow | A scary red bone coopa. Attack power is high, and can also be resurrected if HP has fallen to 0. |
| 22 | 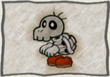 |
Dry Bones | 8 | 5 | 2 | Palace of Shadow Pit of 100 Trials | Skeletonized Koopas that can call reinforcements. After their defeat, they can be resurrected. |
| 23 | 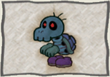 |
Dark Bones | 20 | 5 | 2 | Palace of Shadow | The head of the Dry Bones with a lot of HP. When he reaches his HP 0, he can rise again. |
| 24 | 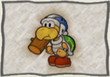 |
Hammer brother | 7 | 4 | 1 | Glitzville Rogueport Underground | Well-known opponents who throw hammers around. But did they really grow Mario? |
| 25 | 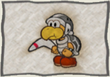 |
Boomerang Bro | 7 | 2 | 1 | Glitzville | Used for attack boomerangs instead of hammers. Attention: boomerangs can meet twice! |
| 26 | 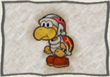 |
Fire Bro | 7 | 3 | 1 | Glitzville | A hammer brother breathing fire? If his attacks hit, you can catch fire. |
| 27 | 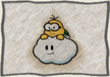 |
Lakitus | 5 | 2 | 0 | Glitzville Pit of 100 Trials | Koopas riding on clouds, throwing spiny eggs. Stachis can also hatch from the Spiny eggs. |
| 28 | 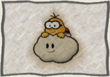 |
Dark Lakitu | 13 | 5 | 0 | Pit of 100 Trials | Lakitus on dark clouds throwing with spiny eggs. Spiny eggs can hatch Buzzy Beetle stachis. |
| 29 | 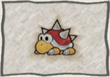 |
Spiny | 3 | 3 | 3 | Glitzville Pit of 100 Trials | Stingy armoured animal with high defence value. If they curl up, attack is useless. |
| 30 | 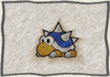 |
Sky-Blue Spiny | 6 | 6 | 4 | Pit of 100 Trials | Hatch from spiny eggs of hyper-lacitus. When they come together, any attack is ineffective. |
| 31 | 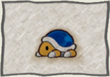 |
Buzzy Beetle | 5 | 3 | 4 | Creepy Steeple Pirate’s Grotto Pit of 100 Trials | High levels of defense, immune to fire attacks. Flip it with jumps, and the defense drops to 0. |
| 32 | 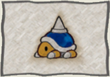 |
Spike Top | 5 | 3 | 4 | Creepy Steeple Riverside Station Pit of 100 Trials | Buzzy Beetle with Spike Trap and high defense value. Your Spike Trap can prevent jump attacks. |
| 33 | 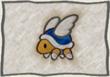 |
Parakeets | 5 | 3 | 4 | Pirate’s Grotto Pit of 100 Trials | Winged Buzzy Beetle with high defense. They lose their wings when you jump on them. |
| 34 | 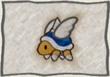 |
Spiky Parabuzzy | 5 | 3 | 4 | Riverside Station Pit of 100 Trials | Buzzy Beetle with Spike Trap and Wings. Hammer useless. Choosing the right attack will be difficult. |
| 35 | 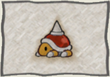 |
Spike Top | 5 | 3 | 4 | Glitzville | A Buzzy Beetle with extra strong defense. Immunity to fire and explosions. |
| 36 | 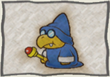 |
Magikoopa | 7 | 4 | 0 | Rogueport Underground | Elite magician of the Koopa clan clan clan clan. Use magic. Should be defeated first in battles! |
| 37 | 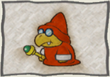 |
Red Magikoopa | 7 | 4 | 0 | Glitzville | Red Magikoopa magician with amazing power. Increases attack and defense of your opponents. |
| 38 | 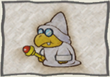 |
White magikoopa | 7 | 4 | 0 | Glitzville | White Magikoopa magician with amazing power. His magic makes your opponents fit again. |
| 39 | 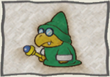 |
Green magikoopa | 7 | 4 | 0 | Glitzville | Green Magikoopa magician with amazing power. Charge opponents or make them transparent. |
| 40 | 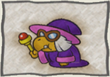 |
Kammy Koopa clan clan | 50 | 5 | 0 | Palace of Shadow | Old witch who always hangs out with Bowser. Uses different types of magic. |
| 41 | 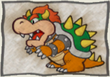 |
Bowser | 70 | 7 | 2 | Glitzville Palace of Shadow | King Bowser, known as Mario’s eternal rival. Is here looking for Princess Peach and the Star Jewels. |
| 42 | 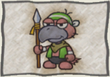 |
Gus | 20 | 3 | 0 | Rogueport | A nasty guy with a sharp lance that he throws in the fight. He is really strong, not just with his mouth. |
| 43 | 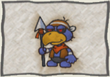 |
Dark Craw | 20 | 6 | 0 | Glitzville Pit of 100 Trials | His lance protects him from jump attacks. He throws the lance or attacks it head-on. |
| 44 | 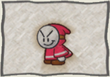 |
Bandit | 5 | 2 | 0 | Glitzville Pit of 100 Trials | Bandits steal coins. A good defense prevents theft. |
| 45 | 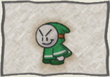 |
Big Bandit | 8 | 3 | 0 | Glitzville | The big brothers of the bandits. They steal coins and items. A good defense prevents theft. |
| 46 | 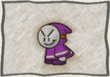 |
Badge Bandit | 12 | 5 | 0 | Pit of 100 Trials | Strong bandits who like to steal badges. Pay attention to your defense, otherwise they will strike. |
| 47 | 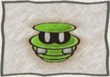 |
Spinia | 3 | 1 | 0 | Rogueport Underground Glitzville Pit of 100 Trials | Mysterious creatures, obviously a cross between plywood and springs. |
| 48 | 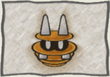 |
Spania | 3 | 1 | 0 | Rogueport Underground Glitzville Pit of 100 Trials | A spinia with spike trap on its head. In an attack with jump, the attacker suffers damage. Known for his aggressive expression. |
| 49 | 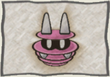 |
Spunia | 12 | 7 | 2 | Rogueport Underground Pit of 100 Trials | These strange creatures are made of slices. Look weak, but are rather strong opponents. |
| 50 | 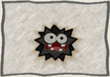 |
Fuzzy | 3 | 1 | 0 | Shhwonk Fortress Glitzville Pit of 100 Trials | Fuzzies suck up opponent’s HP and absorb them. The action command requires precise timing. |
| 51 | 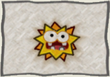 |
Gold Fuzzy | 10 | 1 | 0 | Shhwonk Fortress | Fuzzies with golden bristles. Unlike normal fuzzies, they do not absorb the opponent’s HP. |
| 52 | 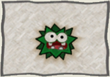 |
Green Fuzzy | 5 | 3 | 0 | Glitzville Keelhaul Key | Fuzzies from the forest that suck up your HP. Defeat them before they can divide. |
| 53 | 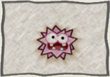 |
Flower Fuzzy | 6 | 3 | 0 | Glitzville Keelhaul Key Pit of 100 Trials | Pretty colored fuzzies that suck off BP. If they have enough BP, they use magic attacks. |
| 54 | 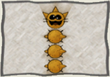 |
Pokey | 4 | 3 | 0 | Glitzville Pit of 100 Trials | Nasty cactus with spike trap. Throw pokeys with parts of her body. Sometimes they also call reinforcements. |
| 55 | 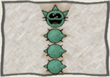 |
Poison Pokey | 8 | 4 | 0 | Riverside Station Pit of 100 Trials | Poisonous pokeys that can poison you too. Done them before they can call their friends. |
| 56 | 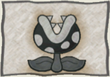 |
Piranha Plant | 4 | 2 | 0 | Boggly Woods Glitzville | A monochrome piranha plant whose bites cause great damage to the opponent. |
| 57 | 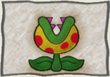 |
Putrid Piranha | 8 | 3 | 0 | Keelhaul Key | Poisonous piranha plants that contaminate their opponent. Especially in poison attacks, defense is important! |
| 58 | 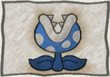 |
Frost Piranha | 10 | 5 | 0 | Outpost Pit of 100 Trials | Ice-cold piranha plants, sensitive to fire. Your bite sometimes makes the opponent freeze! |
| 59 | 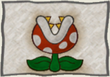 |
Piranha Plant (Pit of 100 Trials) | 15 | 9 | 0 | Pit of 100 Trials | A killer among the Piranha Plant… She supposedly loves the inside of tubes. |
| 60 | 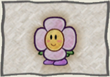 |
Crazee Dayzee | 7 | 2 | 0 | Twilight Trail | Seemingly cute creatures who like to escape. Her lullaby can put you to sleep. |
| 61 | 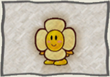 |
Amazy Dayzee | 20 | 20 | 1 | Twilight Trail Pit of 100 Trials | Legendary Susel Dusels who appear very rarely. Many HP, like to flee. Try to win anyway. |
| 62 | 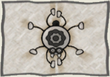 |
Pider | 5 | 2 | 0 | Boggly Woods Glitzville Pit of 100 Trials | Move up and down on threads. Aim and shoot up to three times. |
| 63 | 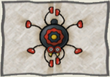 |
Arantula | 16 | 7 | 0 | Pit of 100 Trials | Underground live spiders that spit balls. They look toxic, but they are not. |
| 64 | 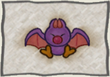 |
Swoopers | 6 | 3 | 0 | Glitzville Creepy Steeple | A kind of bat that hangs on the corners. Damage them to release them from the blanket. |
| 65 | 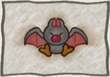 |
Swoopula | 9 | 4 | 0 | Palace of Shadow Pit of 100 Trials | Nasty bloodsuckers who rob the CCP of their victims. Make a nasty sound when they suck HP. |
| 66 | 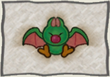 |
Swampire | 20 | 6 | 0 | Pit of 100 Trials | Bloodsuckers hiding in the dark. They suck your HP and regenerate with it. |
| 67 | 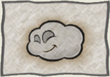 |
Dark Puff | 3 | 2 | 0 | Boggly Woods Glitzville Pit of 100 Trials | Storm clouds that can attack with lightning. Cause damage to the attacker as long as they are electrically charged. |
| 68 | 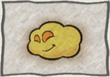 |
Ruff Puff | 7 | 4 | 0 | Riverside Station | Close relatives of the Dark Puff in other coloring. Store electricity for common electric attacks. |
| 69 | 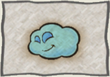 |
Ice Puff | 9 | 4 | 0 | Outpost Pit of 100 Trials | An icy relative of the sniffis. His cold wind attacks freeze the opponent. |
| 70 | 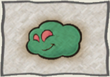 |
Poison Puff | 15 | 8 | 0 | Pit of 100 Trials | Poison gas cloud that attacks head-on or with poison. If it is charged, attacks damage the attacker. |
| 71 | 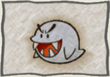 |
Boo | 7 | 3 | 0 | Creepy Steeple Pit of 100 Trials | Shy spirits who like to make themselves invisible. But for ghosts she was actually quite pretty. |
| 72 | 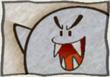 |
Nuclear buy | 40 | 4 | 0 | Creepy Steeple | A collection of several Buu-Huus. The thing attacks itself and sends doubles. |
| 73 | 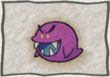 |
Dark Boo | 8 | 4 | 0 | Poshley Sanctum Pit of 100 Trials | Scary boos with more HP and attack power. Done them before they make themselves invisible. |
| 74 | 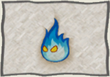 |
Ember | 8 | 3 | 0 | Keelhaul Key Pirate’s Grotto | Blue flashlights, sensitive to water and ice. Bombs also have a good effect. |
| 75 | 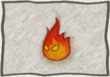 |
Lava Blub | 6 | 4 | 0 | Pirate’s Grotto Pit of 100 Trials | Fire monsters, weak against ice and water. Bombs are also good, jumps rather not… |
| 76 | 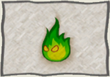 |
Phantom Ember | 10 | 5 | 0 | Palace of Shadow Pit of 100 Trials | Angry spirits, born of vengeance. Their fire attacks can set you on fire. |
| 77 | 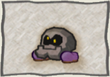 |
Bald Cleft | 2 | 1 | 2 | Shhwonk Fortress | Stone monsters with imposing faces. Fighting with full physical effort. Immune to fire. |
| 78 | 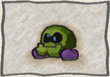 |
Hyper Bald Cleft | 4 | 3 | 3 | Glitzville | Hyper-strong Kahl kirks that can charge. After charging, the attack power is 8 points. |
| 79 | 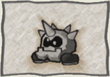 |
Cleft | 2 | 2 | 2 | Shhwonk Fortress Boggly Woods Pit of 100 Trials | A spiky stone monster. Fire is ineffective, moreover, the body is rock hard. |
| 80 | 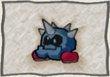 |
Steel cleft | 6 | 4 | ???? | Glitzville | Huge, hard Kirks. Immune to many attacks. How can you please defeat them? |
| 81 | 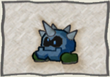 |
Steel cleft | 6 | 4 | ???? | Glitzville | Huge, hard Kirks. Immune to many attacks. He has green shoes… Probably the little brother. |
| 82 | 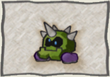 |
Hyper Cleft | 4 | 3 | 3 | Twilight Trail Pit of 100 Trials | Hyper-strong Kirks that can recharge. In the charged state, their force of application is 9. |
| 83 | 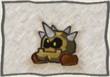 |
Moon Cleft | 6 | 5 | 5 | Moon Pit of 100 Trials | Kirks who live on the moon. High defense! The defense drops to 0 when you tip it over. |
| 84 |  |
Bristle | 2 | 1 | 4 | Shhwonk Fortress Glitzville | Stone monsters with thorns, immune to fire attacks. For defense, they drive out their thorns. |
| 85 |  |
Dark Bristle | 8 | 8 | 4 | Pit of 100 Trials | Beings made of stone with high defense. Defend yourself also with Spike Trap and spears. |
| 86 |  |
Bob-omb | 4 | 2 | 1 | Glitzville Pit of 100 Trials | Bomby party members who easily go into the air. If they get damaged, they explode on the next train. |
| 87 |  |
Bulky Bob-omb | 6 | 2 | 1 | Pirate’s Grotto Pit of 100 Trials | Huge pink bobs exploding after four moves. Before the explosion they should be defeated. |
| 88 | 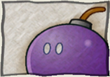 |
Bob-ulk | 10 | 4 | 2 | Pit of 100 Trials | Huge, strong bob-ombs, explode after four moves. The damage is huge, so defeat them beforehand! |
| 89 | 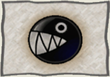 |
Chain dog | 7 | 6 | 5 | Palace of Shadow Pit of 100 Trials | Chomps are hard and strong, but they have little HP. Do it quickly with a strong attack. |
| 90 | 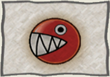 |
Red Chomp | 6 | 5 | 3 | Glitzville Pit of 100 Trials | Brutal Chomps, strong in attack and defense. The red paint is supposedly from Grubba. |
| 91 | 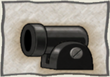 |
Bill Blaster | 5 | 0 | 2 | Pirate’s Grotto | Solid black Cannon shooting down Kugelwillis. No one knows whether they are living beings or not. |
| 92 | 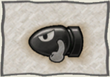 |
Bullet Bill | 2 | 4 | 1 | Pirate’s Grotto | A bullet shot by Bill Blaster. High attack power! Therefore, defeat quickly. |
| 93 | 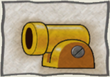 |
Bombshell Bill Blaster | 10 | 0 | 4 | Palace of Shadow | In short, a super strong Bill Blaster. Shoot Willis rockets as long as he can. |
| 94 | 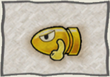 |
Missile Willi | 3 | 6 | 2 | Palace of Shadow | Basically, big bullets. Little HP, therefore easy to defeat. |
| 95 | 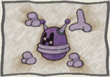 |
Dark Wizzerd | 10 | 5 | 2 | Palace of Shadow Pit of 100 Trials | Ancient robots that can use magic. Create doubles to deceive attackers. |
| 96 |  |
Wizzerd | 10 | 6 | 3 | Pit of 100 Trials | Ancient robots that can use magic. If he tickles you with his four hands… Hihihi! |
| 97 |  |
Elite Wizzerd | 12 | 8 | 5 | Pit of 100 Trials | The magical summit of ancient engineering. Confuses attackers with doubles. |
| 98 |  |
Blooper | 12 | 1 | 0 | Rogueport Underground | A huge squid that can attack with tentacles and ink. It is believed that he has found his way into the canals from the sea. |
| 99 |  |
Hooktail | 20 | 5 | 1 | Hooktail Castle | Controls tamping and biting attacks and spews fire. Is afraid of an animal that starts with “F” and ends with “sh”. |
| 100 | 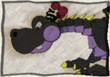 |
Gloomtail | 80 | 8 | 2 | Palace of Shadow | Hooktail’s big brother is in black. Has a poisonous breath, specialty: hyperstorm. |
| 101 | 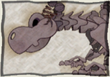 |
Bonetail | 200 | 8 | 2 | Pit of 100 Trials | Hooktail’s eldest sister is just a skeleton. But incredibly strong. The strongest opponent in the game? |
| 102 | 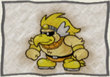 |
Rawk Hawk | 40 | 4 | 0 | Glitzville | He’s the champion, so it’s going to be a tough fight. His air strikes are probably particularly elegant… |
| 103 | 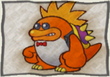 |
Macho Grubba | 60 | 4 | 0 | Glitzville | By the power of the Star Jewel, he is so strong… And he probably thinks he’s pretty nice like that. |
| 104 | 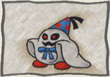 |
Rumble | 40 | 6 | 0 | Creepy Steeple Twilight Trail Palace of Shadow | Turns into his opponent before the attack. Upon Beldam’s pressure, he is a member of Three Shadows. |
| 105 | 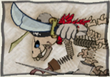 |
Cortez | 20 | 4 | 1 | Pirate’s Grotto | The restless spirit of the Pirate King… His heart is still full of anger. |
| 106 | 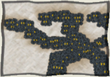 |
Smorg | 50 | 5 | 1 | Excess Express | Monster consisting of a fuzzy collective. Use his tentacles in attacks. |
| 107 | 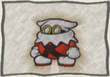 |
X-Naut | 4 | 3 | 0 | Boggly Woods Keelhaul Key X-Naut Fortress | Drink strength punch and attack head-on. Are these crucions really that easy to beat? |
| 108 | 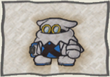 |
X-Naut PhD | 9 | 4 | 0 | X-Naut Fortress | X-Naut PhD throw their various chemicals. They test the effect of their developments. |
| 109 | 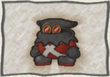 |
Elite X-Naut | 10 | 5 | 1 | X-Naut Fortress | Crucion elite who also like to use chemistry. Her Jraft comes from chemical research. |
| 110 | 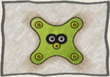 |
Yux | 3 | 2 | 0 | The Great Tree X-Naut Fortress | Combat units made by the Crucions. For defense, they used mini-crucimats. |
| 111 | 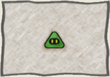 |
Mini-Yux | 1 | 0 | 0 | The Great Tree X-Naut Fortress | protection units for the crucimats. A maximum of two pieces per Yux. You have to go first. |
| 112 | 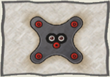 |
Z-Yux | 7 | 4 | 0 | Moon X-Naut Fortress | Advanced crucimates with HP recovery. Are perfectly protected by mini crucimats. |
| 113 |  |
Mini-Z-Yux | 2 | 0 | 0 | Moon X-Naut Fortress | Up to four of them protect the Z-Yux. Defeat them all to defeat the Z-Yux. |
| 114 | 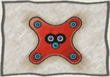 |
X-Yux | 10 | 3 | 1 | X-Naut Fortress | Make two mini crucimats appear per move. Sometimes they manage to paralyze the opponent. |
| 115 |  |
Mini-X-Yux | 1 | 0 | 0 | X-Naut Fortress | Small crucimates that protect the X-Yux. Kill them before attacking the main opponent. |
| 116 | 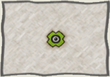 |
Grodus X | 3 | 4 | 0 | Palace of Shadow | Magic items that protect Grodus. Annoying things! With four crucitectors, Grodus becomes invulnerable. |
| 117 | 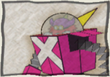 |
Magnus von Grapple | 30 | 2 | 1 | The Great Tree | The most powerful and modern robot of the Crucions. Especially dangerous are his rocket fists. |
| 118 | 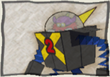 |
Magnus von Grapple 2.0 | 70 | 6 | 2 | X-Naut Fortress | A further development of the Magnus of Grapple. Special improvement: an MG. Attention! Danger! |
| 119 | 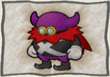 |
Lord Crump | 30 | 4 | 0 | Rogueport Keelhaul Key | Commander of the Crucions, fighting with physical action. But he doesn’t always have it easy in his job either. |
| 120 | 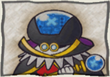 |
Grodus | 50 | 7 | 1 | Palace of Shadow | Leader of the Crucions and Princess Peach’s kidnappers. A nasty guy who aspires to world rule. |
| 121 | 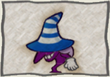 |
Beldam | 30 | 5 | 0 | Boggly Woods Palace of Shadow | Leader of the shadow trio, uses various magic. It has a very bad character… |
| 122 | 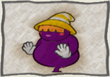 |
Marilyn | 40 | 7 | 0 | Boggly Woods Palace of Shadow | Member of the shadow trio, Beldam’s younger sister. High attack power, so better defeat quickly! |
| 123 | 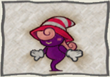 |
Barbara | 10 | 1 | 0 | Boggly Woods | Beldam’s sister, belongs to the Three Shadows. This beautiful witch certainly has many admirers. |
| 124 | 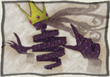 |
Shadow Queen | 150 | 7 | 0 | Palace of Shadow | The Shadow Queen: The Thief of Princess Peach’s Body. She wants to darken the world, but Mario prevents it. Princess Peach is also certain: end good, everything good. |