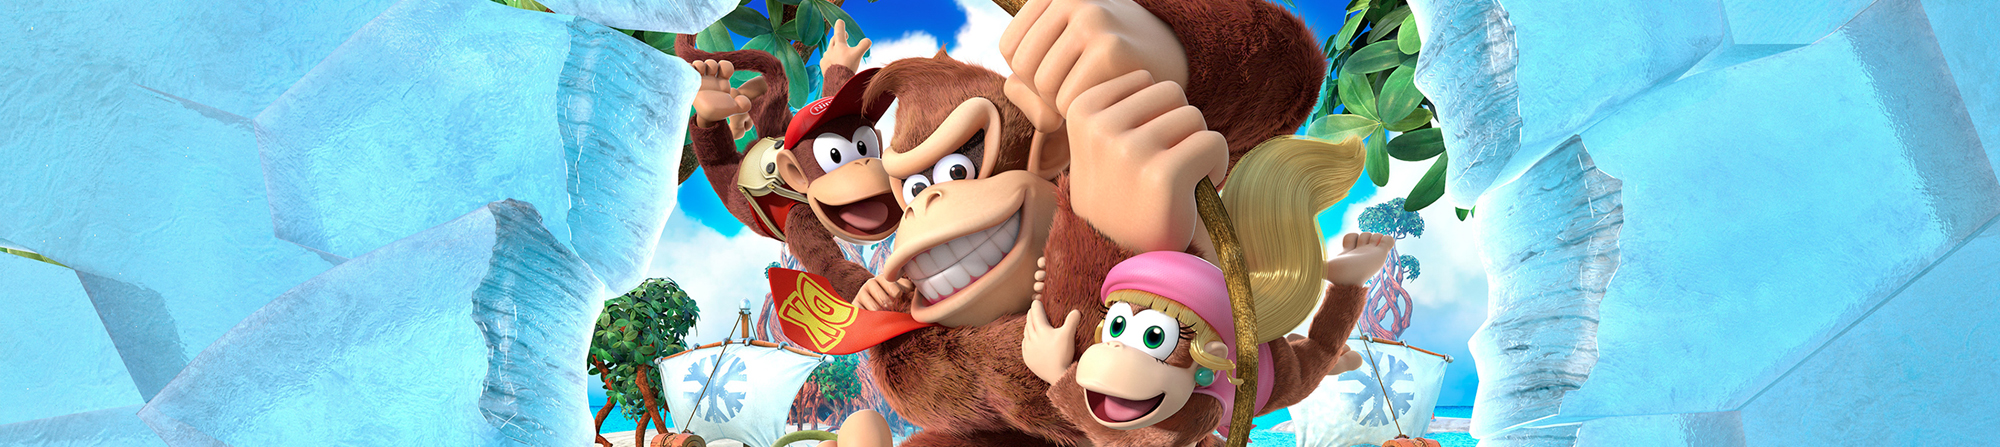

Donkey Kong, Diddy, Dixie and Cranky are finally back home – at least almost. Donkey Kong Island was completely frozen by King Qual and his cattle henchmen. In the sixth world of Donkey Kong Country: Tropical Freeze you will work your way through familiar areas of the island: Jungle, Beach, Ruins, Caves, Forest, Cliff, Factory and Volcano consciously remember the worlds of Donkey Kong Country Returns.
With eight regular levels, Donkey Kong Island is the biggest world in the game. Added to this are 6-A Dynamite Dash, 6-B Icicle Arsenal, the K-level Slippy Spikes and, of course, the final battle against King’s agony. The only secret exit in the world can be found in 6-7 Frozen Frenzy. This opens 6-A; after its completion, 6-B is automatically unlocked. If you collect all KONG Letters in all levels, you can also try 6-K.
6-1: Homecoming Hijinxs
Sad home, ice alone brings Donkey Kong back to its home jungle – but there is nothing left of tropical temperatures. Almost all platforms are iced and many break down as soon as you enter them several times. Therefore, stay constantly in motion, especially in the climbing passages.
- Puzzle Piece 1 — After the first longer Blast Barrel sequence, you land on an icy slope. Don’t slide down to the right. To the left of you is a hidden blast barrel. Jump in and collect all the bananas in the bonus room.
- K Shortly after the first checkpoint you reach several blue owls. The K hovers over the gap. Use a normal owl as a springboard or float over with Dixie or Diddy.
- Puzzle Piece 2 After the tunnel with the Spike Trap you land on a large wall with climbing grass. Climb down instead of up. At the very bottom is the second Puzzle Piece. Then quickly up again – the wall begins to fall apart.
- A little later the O hangs under an owl directly above a blast barrel. Jump on the owl, drop through the letter block and then land safely in the barrel.
- Puzzle Piece 3 After the second checkpoint you meet a big blue rabbit. Jump on his head and grab the climbing grass on the ceiling. Go to the left and up. In a treasure chest lies the third Puzzle Piece.
- N After the following cannon ride you land on a long decaying ice platform. The N is at the right end. Start immediately and get it before the entire section plunges into the depths.
- Puzzle Piece 4 In the subsequent vertical climbing passage, complete walls fall down. On the right side is a small niche behind a wooden shed. Jump in, take the Puzzle Piece and continue the ascent immediately.
- G Directly after the climbing passage, the G floats above a burning blue owl. Another roll jump brings you to the Letter Block. With Dixie, the job is much easier.
- Puzzle Piece 5 At the target barrel you first collect all the banana trees around the barrel. If necessary, roll under the target barrel without touching it. Once you have collected everything, the last Puzzle Piece appears.
6-2: Seashore War
The former beach of Donkey Kong Island is completely iced. Numerous ships are trapped in the ice and can be lifted or tipped over handles. Exactly this mechanic is also required for several KONG Letters.
- K The K is already waiting in the first section. Jump over the fish shooting out of the water or ice and use one of them as a springboard.
- Puzzle Piece 1 — Puzzle 1 Directly to the right of the K is a handle in the floor. Pull it vigorously and a frozen ship is lifted out of the water. Stamp on the ship’s middle wooden slabs and get the Puzzle Piece from inside.
- Puzzle Piece 2 Only a short time later, a large plant or fruit stands on a platform. Stamp on it. A blast barrel appears and takes you to a bonus room.
- O The O is surrounded by several burning blue owls. Go to the left of them and lift the ship below. Wait for a gap between the owls and jump to the letter block.
- Puzzle Piece 3 — After the big ship, you pass an Enemies that shoots fish at you. Stomping on the plant just behind. Several bananas appear – collect them completely.
- N Directly after Puzzle Piece 3, the N hangs on a vine. Pay attention to the owl next to it and grab the letter block swinging past.
- Puzzle Piece 4 Crosses the following ship platforms. On one of the ships, the ground is iced. Destroy the ice sheets with a ground pound and drop down into the hidden bonus room.
- G After the bonus room you get a burning owl and another handle. Pull on it to lift the big ship and then run back a bit to the left. The G is thereby achievable.
- Puzzle Piece 5 After the next checkpoint you will find a yellow plant on the top right. Jump on the large bouncing Enemies when he is in the air and use the recoil to reach the elevated platform. Dixie is even easier. Stamp on the plant and take the last Puzzle Piece.
6-3: Aqueduct Assault
Aqueduct Assault leads through the icy ruins of the island. Entire aqueducts and platforms break away as soon as Donkey Kong enters them. Often this is even intended: Some collectibles can only be reached if you let a platform consciously collapse.
- Puzzle Piece 1 — After the first big Enemies you run over a long iced aqueduct. Stay on it until it drops to the left. The two stone pillars remain standing and a blast barrel appears on the left. Jump in and complete the bonus room.
- K Immediately after that, the K is under another iced platform. Let this drop to the right and then jump through the K into the blast barrel below.
- After the ice slide you see the O over an owl. Jump on her head and get the letter block.
- Puzzle Piece 2 — Puzzle 2 A penguin shooting fish turns several bananas over you in circles. Use his bullets as springboards and collect all the bananas.
- Puzzle Piece 3 Shortly after the partner barrel, a door or target plate is blocked on the left. Go to the right and stun the penguin with a helmet. Carry him back and throw him against the barrier. Behind this is the third Puzzle Piece.
- Puzzle Piece 4 — Puzzle 4 After the checkpoint, you reach a blast barrel that would shoot you into the background. Don’t jump in yet. Instead, stay on the second icy platform to the right of it and let it sink. Below or next to the barrel, a further small area with Puzzle Piece is thereby achievable.
- N A little later, the N floats over a moving ice platform. Stay on the ice block until it is driven high enough or tipped, and jump to the letter block.
- Puzzle Piece 5 Right next to the platform with the N is a yellow plant. Stamp on it and the last Puzzle Piece appears.
- G Towards the end, a blast barrel shoots you through another decaying aqueduct. After landing, the G is slightly behind you. Jump back and take the letter block with you before the platform disappears.
6-4: Blurry Flurry
Blurry Flurry is a frosty reinterpretation of Rocket Barrel levels from Donkey Kong Country Returns. Huge snowballs and bullets destroy the cave as you fly through narrow ice tunnels with the Rocket Barrel. With seven Puzzle Pieces, there is a lot to collect here.
- Puzzle Piece 1 — Puzzle 1 Right at the beginning you will find a grip in the floor. Pull on it and the first Puzzle Piece appears.
- Puzzle Piece 2 Take the partner barrel a bit further to the right and carry it back to the beginning of the level. Ship it against the target plate or wooden wall left. Behind it is a bonus room.
- Puzzle Piece 3 At the beginning of the Rocket Barrel ride you flies through two rotating circles made of bananas. Steer down the first one and up the second one, so you really get all the bananas. Then the Puzzle Piece appears.
- K Shortly thereafter, the K lies in the lower part of the ice tunnel. Stay as deep as possible with the Rocket Barrel.
- Puzzle Piece 4 In the following descent, a continuous row of bananas appears. Fly clean through the complete row and the fourth Puzzle Piece appears.
- Now great snowballs of cannons are being shot into your trajectory. The O is in the middle of this passage. Stay attentive and avoid the snowballs only immediately before the collision.
- Puzzle Piece 5 During the next climb, a long line of bananas follows again. Collect all the bananas.
- N Shortly thereafter, the N lies above a large block of ice. Hold the Rocket Barrel in medium to high position.
- Puzzle Piece 6 — In the next snowball passage you not only have to avoid the bullets, but at the same time collect all bananas and banana coins. If you have caught the complete series, the sixth Puzzle Piece appears.
- G The G is only a little later directly on the flight path and is much easier to reach than the previous collectibles.
- Puzzle Piece 7 At the target barrel, the level is not completely finished. Take a long roll jump to the right of the target barrel to a hidden wooden platform. Stamp on it and enter the last bonus room.
6-5: Forest Folly
The snowy forest is full of huge snowflakes spinning, freezing platforms or blocking entire paths. Numerous areas are made of climbing grass and rotate during your jump. For the G, Dixie is particularly practical.
- Puzzle Piece 1 Run from start to right until you reach a large frozen fruit or plant. Stamp on it and collect all the bananas that appear.
- K The K is shortly thereafter to the left of a larger area with climbing grass. Jump off the platform at the right moment and pay attention to the passing snowflakes.
- O In a large rotating wheel with climbing grass, the O is on the right side. Hold on at about medium height and wait until the wheel leads the letter block past you.
- Puzzle Piece 2 After the rotating passage you land on a springy platform. Wait until she points to the left, and stamp on it. You will be thrown into a hidden bonus room.
- Puzzle Piece 3 Shortly afterwards, three tendrils full of bananas hang over the path. Collect all bananas from all three vines.
- N In the section with several springy platforms you have to time the launch exactly. The N is between two platforms on your jump path.
- Puzzle Piece 4 A short blast barrel sequence follows. Wait to launch until the Puzzle Piece is right in your trajectory.
- Puzzle Piece 5 Shortly before the end you meet a large Enemies with Hammer. Defeat him and then stamp on the Crate full of fish. A flying banana appears. Collect everything that she drops.
- G The G hangs below a platform near the level end. A further roll jump works, but with Dixie’s helicopter swirl the letter is much easier to reach.
6-6: Cliffside Slide
Cliffside Slide relies on the well-known silhouette look. But the real problem this time is the environment: icebergs break apart and in the end a huge avalanche chases you up the mountain. In this last passage there is hardly any opportunity to stop.
- Puzzle Piece 1 — Puzzle 1 Once you reach the first penguin with barbed helmet, you do not move on to the right. Run back to the left and under the wooden platform. This is where the first piece of the puzzle lies.
- K Shortly after, a section with small, unstable ice platforms begins. The K hovers above the path. Jump off early before your platform breaks away.
- Puzzle Piece 2 — After the first checkpoint, you will see an Enemies shooting fish at the top right. Defeat him and then move left behind his position. There is the hidden area with the Puzzle Piece.
- Directly to the right of the second Puzzle Piece, the O floats over several small platforms. Do not stay too long, as they disintegrate quickly.
- Puzzle Piece 3 A little later you have to hold on to a grass area above you. Don’t jump on immediately. Climb or jump to the top of this grass platform and stamp on the plant there.
- N Shortly thereafter, the N hovers above an owl. Use it as a springboard.
- Puzzle Piece 4 After the second checkpoint, you first move to the right. Then turn around and make a long roll jump back to the raised wooden platform. Stomping on the plant there.
- Puzzle Piece 5 In the big avalanche finale you have to climb quickly to the top. On your escape route is a yellow plant. Stamp on it, take the Puzzle Piece and move on immediately.
- G Upstairs during the avalanche escape, a Penguin fish shoots at you. Use it or one of its shells as a springboard and get the G before reaching the avalanche.
6-7: Frozen Frenzy
The old factory of Donkey Kong Island was transformed into an electric frozen frenzy by the cattle goats. Platforms alternate between foreground and background, electric shocks travel across the floor and numerous metal surfaces are temporarily under tension. It is also the only secret exit of Donkey Kong Island.
- Puzzle Piece 1 Use the Blast Barrel at the beginning and shoot yourself into the background. Move there at the Vine to move several platforms and then return to the foreground. To the left of the large DK symbol or the drum, a hidden area with the first Puzzle Piece is now accessible.
- K Shortly afterwards, a partner barrel is available. To the left of it flies an owl. Jump on her head and get the K. Dixie or Cranky can also easily reach the letter block.
- Puzzle Piece 2 — Puzzle 2 With two electrical obstacles, you can see an ice sheet that looks a little different than the rest. Stom on it and fall through the floor into a bonus room.
- O The O hovers above an electric trap. Jump over it and take the letter block with you. Pay attention when landing on the Penguin on the other side.
- Puzzle Piece 3 You reach a mobile platform over which current surges run regularly. Above the platform appears a long line of bananas. Collect all bananas while avoiding electricity.
- Puzzle Piece 4 With a large tilting ice platform, there is a barely visible blast barrel at the bottom of the screen on the left. Drop in and complete the bonus room.
- Puzzle Piece 5 After the next checkpoint, you first go back a bit. Jump over the lianas and grab the climbing grass on the top left. Climb all the way up and jump to the platform above the vines. This is where the last piece of the puzzle lies.
- N Shortly after, a large walrus opponent and an owl stand under the N. Jump first on the walrus and then on the owl to get enough height.
- Secret exit to 6-A – Dynamite Dash Directly after the N you reach a tipping platform. Instead of following the normal path to the right, you have to reach the top left via several small spiky platforms. With Dixie you can hover over the tops; with Cranky you just jump over it with his stick. On the left is a blue portal. Behind it is the secret target barrel that unlocks 6-A Dynamite Dash.
- G On the normal path, several ice sheets collapse among you just before the end. Jump on the Penguin and take the G with you.
6-8: Meltdown Mayhem
After all the ice, you reach the Volcano of Donkey Kong Island – and the frozen surface is already starting to thaw. In Meltdown Mayhem, Rambi also makes his big appearance. Try to keep the rhino until the end, because you can easily smash numerous ice walls and obstacles.
- Puzzle Piece 1 Runs from the start first to the right and stamps on the large DK plate to open the door. But don’t go in yet. Run back to the left. A passage was also opened there. In the bonus room you collect all the bananas.
- K Shortly afterwards, she frees Rambi from his Crate. Ride over the decaying ice platforms. With a Penguin you jump with Rambi on his head and get the high-floating K.
- A little later, the O lies on a platform that is already sinking into the lava. Keep moving and take the letter block with you as you pass.
- Puzzle Piece 2 Destroys the next marked ice or Rambi crystal block with Rambi. Several bananas appear. Collect them all before the platform disappears in the lava flow.
- Puzzle Piece 3 Directly after a checkpoint, a yellow plant stands on the ground. Stamp on it and take the Puzzle Piece.
- Puzzle Piece 4 A little later you reach a square stone or ice wall. Rambi can completely smash them. Behind it lies a small secret room with the fourth Puzzle Piece.
- Puzzle Piece 5 Later you move across several platforms that are pushed up by lava fountains. Collect all bananas and banana coins on these platforms.
- N The N floats below a thin ice platform and directly above an owl. Stand on the ice above the letter block and wait until it melts or breaks. Drops through the N, jumps on the owl and then lands in the blast barrel on the top right.
- G In the final section, a huge lava wave breaks out behind Donkey Kong. Run to the right as soon as possible. The G is in the middle of the escape route – jump in time and take it with you.
6-A: Dynamite Dash
Dynamite Dash is unlocked via the secret exit in 6-7 Frozen Frenzy. The entire ice cave is equipped with explosives. Once you enter one of the big triggers, a short fuse runs off and entire platforms or walls explode. Think about where you want to jump.
- Puzzle Piece 1 — In the second major section with exploding switch platforms, bananas and banana coins hover over the path. Collect all items before the platforms explode.
- K Shortly afterwards you move across several explosive platforms that move up and down. The K is between them. Jumps at the right moment before the right platform falls down.
- Puzzle Piece 2 Just before the first checkpoint you will find a normal barrel. Throw it against the raised blast switch. This will ignite a bomb and several bananas will appear. Collect them completely. Then another banana trail leads you down left to a hidden blast barrel and into the bonus room.
- Puzzle Piece 3 After the checkpoint you reach a large bike with climbing grass on the Blanket. Climb around it and collect all the bananas.
- In the following Blast Barrel sequence, the O lies on a straight banana line. Wait until the barrels are aligned correctly and shoot your way through the letter block.
- Puzzle Piece 4 — Puzzle 4 After the second checkpoint, you have to flee from a long explosion chain. Shortly after, two cracked blocks of ice lie on a wooden floor. Destroy them and then stamp through the ground. Below is a bonus room.
- Puzzle Piece 5 Later you detonate two longer explosive charges at the same time. As soon as the ice and wooden structure collapses, wait and jump on the falling Icicle or the newly created platform. At the bottom right, a small niche opens. Pulls on the handle there and the Puzzle Piece appears.
- N In the next passage you have to hang along climbing grass, while behind you the entire construction explodes. The N is at the very end. Continue climbing without a break.
- G Shortly before the target barrel you slide over several lianas or rope. Do not jump off at the transition. Just drop Donkey Kong from the penultimate rope and you’ll automatically land on the next rope – taking the G with you.
6-B: Icicle Arsenal
Icicle Arsenal will automatically unlock once you have completed 6-A Dynamite Dash. In the cave, huge Icicle constantly fall from the blanket. You even need some as a platform – so watch the blanket closely before you stop under a dripstone. In total, seven Puzzle Pieces are hidden here.
- Relatively early, the K lies between two icy platforms. Stand on the upper ice surface and wait until it melts or breaks away. Drops through the letter block and lands on the lower platform.
- Puzzle Piece 1 — Shortly afterwards you reach a platform that can be lifted via a handle or airflow. Grab the climbing grass on the ceiling and hang yourself all the way to the left. Stomping on the yellow plant.
- Puzzle Piece 2 A little further a sack hangs over the path. Take the partner barrel from the left and throw it against the sack. Collect all the bananas that fall out.
- Puzzle Piece 3 Immediately afterwards, a large Enemies with Hammer blocks your way. Wait until he lifts the hammer, rolls into his stomach and repeats it a total of three times. Then pull on the handle in the ground.
- O In the following short blast barrel sequence you have to wait a bit at the last barrel. The O moves into your trajectory. Shoot yourself only when you fly safely through the letter block.
- Puzzle Piece 4 After the cannon journey, you destroy two blocks of ice on the right. This reduces several platforms. Jump over them to the left and grab the climbing grass on the Blanket. Hang left to a hidden blast barrel and complete the bonus room.
- Puzzle Piece 5 Goes back to the right after the fourth Puzzle Piece. On a wooden platform is a handle. Pull on it, get carried up and then jump left into the hidden bonus area.
- N Shortly thereafter, the N hangs high over two owls. With Dixie you can float directly. Without Dixie, wait until the penguin runs right to left, jump on him and then on the upper owl.
- Puzzle Piece 6 Right after the N you pull on the next handle. Several wooden platforms go upstairs. Jump to the right platform and from there to the grass on the ceiling. Stomping on the yellow plant. A blast barrel appears and takes you to the bonus room.
- Puzzle Piece 7 — Puzzle 7 Towards the end of the level, two grass areas hang over you. First grab the left and move to the right. Don’t jump to the next surface yet – the last piece of the puzzle falls just before you. Let yourself fall behind in a controlled manner and then grab the grass again.
- G The last Blast Barrel sequence requires perfect timing. The G floats over two adjacent barrels. First shoot yourself into the right barrel, immediately back to the left through the G and then directly back to the right so that you do not crash.
6-BOSS: Volcano Dome
It is time for revenge. At the very beginning of the game, King Qual, the leader of the Snowmads, ruined Donkey Kong’s birthday, froze all of Donkey Kong Island and blown the Kongs all the way to Lost Mangroves. Now we are finally before his throne.
The battle takes place deep in the Volcano on several stone platforms above a lava lake. King torment is not directly attackable as long as he is in the background. You must first hurl one of his own helpers against him. As a result, he jumps to the main platform and starts his ramming attacks. Dixie Kong is particularly recommended for this fight because of its helicopter vortex.
Phase 1: King Tribulation first jumps to the back platform and blows into his magic horn. Several iced Enemies fall from above on your platform. On small ice shards at the top of the screen, you can predict where they will hit. Stand in a free space.
After the impact, several snowmads remain on the platform. Jump on one of them, pick up the stunned Enemies and throw him on King’s torment in the background. If possible, wait until he changes direction, straightens his helmet or stops short. If you meet him, jump to your platform.
Now the king runs towards you with his horned helmet. Stay approximately in the middle and jump on his back at the last moment. In the first phase, he usually runs back and forth several times – with good timing you can hit him several times during the same attack series. After a total of three hits, phase 2 begins.
If you miss one of his attacks, King Anguish jumps up into the air and tries to hit you with several tamping attacks. Pay attention to his shadow and constantly change position. Due to its landings, individual parts of the platform are temporarily pressed into the lava.
Phase 2: Now King Torment no longer uses his horn only to summon his soldiers. In addition, he summons huge ice dragons that crash onto the arena from above. Again, small splinters of ice show the impact points at the top of the screen. Move to the side.
The hit platforms ice and become extremely slippery. Adjust your jumps accordingly. When King Tribulation conjures up iced Snowmads again, you repeat the familiar tactic: dodge Enemies, stun a Snowmad, record and throw at the boss in the background.
In this phase, in addition to normal penguins, jumping Enemies appear, which are a bit more difficult to capture. Meet King’s torment with a thrown Enemies and then jump back on his back as he storms across the platform. After three more hits, the final phase starts.
Phase 3: Now the fight is much hectic. King torment jumps high into the air and strikes the platform with full force. As a result, large parts of the bottom of lava fountains are thrown upwards. Watch carefully which lava fountains disappear first – these platform parts also fall down first. If possible, choose the segment that stays the longest up.
King Qual now combines all previous attacks. More ice dragons fall from above, his soldiers appear in larger groups and his ramming attacks become much faster. So jump a little earlier than before, or run briefly in the same direction as King’s agony, and don’t jump on his back until he’s right among you.
Later, he even fires the ice dragons directly from his horn across the platform. If King takes a particularly long air, a single very fast dragon comes – jumps immediately. In a series of smaller dragons you have to pay attention to their wings: You jump over low-flying dragons, under higher-flying missiles you can duck.
Stay calm and wait for safe options. Bring King’s torment forward with a thrown Enemies and hit him three more times on his back. After the ninth goal, the leader of the Snowmads is defeated. Then follow the faded key commands and Donkey Kong gives him a due rub.
Donkey Kong Island finally belongs to the Kongs again. As a reward, you will also get another mysterious artifact. If you have also collected the artifacts from all six K levels, the secret seventh world Incognito Island opens.
6-K: Slippy Spikes
Slippy Spikes is the last regular K level of the game. It will be unlocked once you have collected all KONG Letters in all levels of Donkey Kong Island – including 6-A Dynamite Dash and 6-B Icicle Arsenal.
The name is program: Practically the entire floor and the blanket are covered with Spike Trap. In addition, the few secure platforms are iced and slide back and forth under your feet. There is no control point. Cranky is very helpful because of his pitch over Spike Trap, while Dixie gives you more control over long jumps with the helicopter swirl.
- Puzzle Piece 1 Relatively early swings a small ice platform over a complete barbed field. The first Puzzle Piece is located below or laterally of the platform. With Dixie you make a roll jump through the Puzzle Piece and then float back. With Cranky you can jump on the Spike Trap.
- Puzzle Piece 2 Later, a long ice platform moves up and down and comes dangerously close to the spiky Blanket. At the right end there is a grip in the floor. Duck yourselves first as the platform moves up. Pull the handle out only when it has sunk again. The Puzzle Piece appears on the right in the gap.
- Puzzle Piece 3 For several swinging platforms with climbing grass, you must first jump from left to right. Climb to the right platform and then jump back to the top of the left. There is a violet vessel there. Stamp on it and collect all the bananas.
- Puzzle Piece 4 In the next long section, grassy areas and iced platforms alternate. Take the upper route and collect all the bananas that gradually appear on the climbing surfaces. If you have caught the entire row, the fourth Puzzle Piece appears.
- Puzzle Piece 5 — Just before the end, Donkey Kong slides down a long iced slope. Between several spike traps, the last Puzzle Piece hovers over the track. Don’t jump too early and not too late. With Dixie you can correct your flight if necessary.
After that, survive the last iced platforms and sting traps. At the end awaits the mysterious artifact of Donkey Kong Island. Together with the artifacts from 1-K to 5-K and the artifact of King’s agony, you have all seven artifacts of the main game together.
This opens the way to the secret world of Incognito Island – and to the last three levels of Donkey Kong Country: Tropical Freeze.