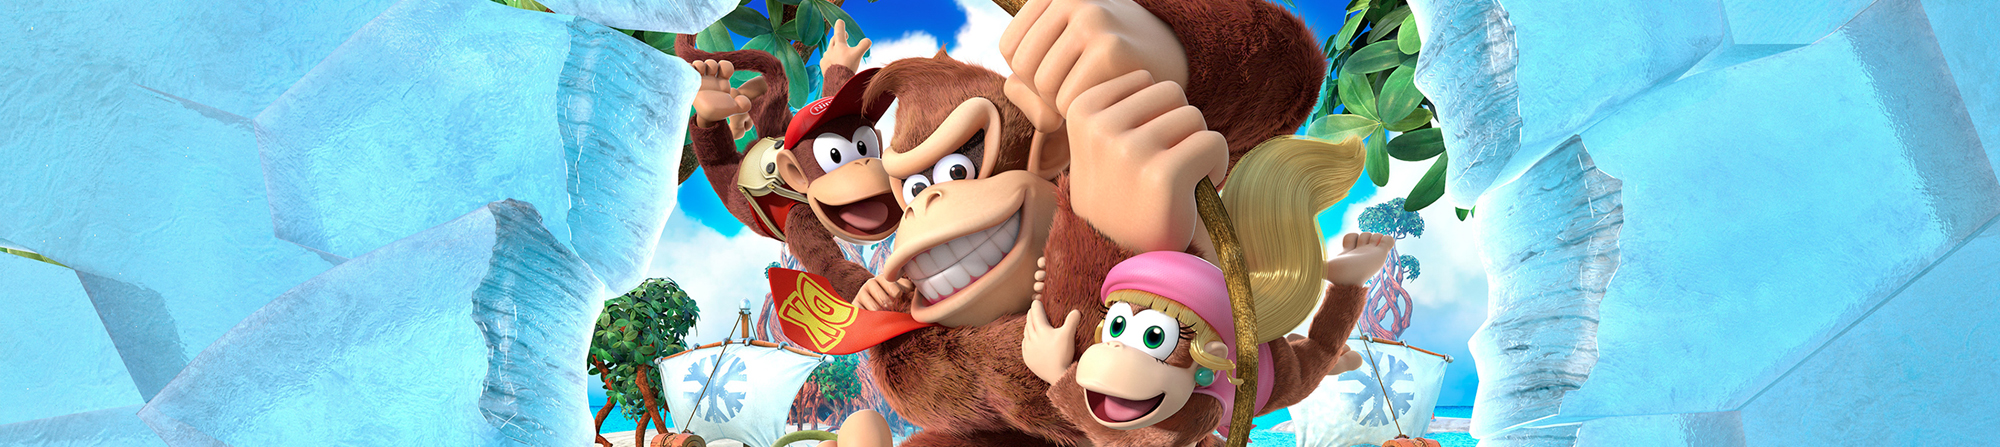

Welcome to Sea Breeze Cove, the fourth island of Donkey Kong Country: Tropical Freeze. Now it is time to stop air, because a large part of this world plays under water. Sunken ruins, strong currents, mines, electric plants and huge Elder Princess Shroob make the search for all KONG Letters and Puzzle Pieces much more challenging. In addition, 4-1 Deep Keep and 4-A Rockin‘ Relics hide secret exits that unlock the two bonus levels of this world. For 100 percent you should have Dixie and Cranky in particular.
4-1: Deep Keep
Deep Keep is your introduction to the longer stretches of Tropical Freeze. Underwater, you can turn off Enemies with a shooting attack and destroy brittle walls. Also pay attention to your air supply and regularly take one of the rising air bubbles with you. For the secret exit you need Dixie Kong.
- Puzzle Piece 1 — Puzzle 1 Before you dive properly for the first time, you swim to the right in the starting area. Under the jetty you reach a small island with a chest. Stamp on it and collect all the bananas that appear.
- K then dives directly below the small island into the water. Between two fish the K floats. With a spin attack you can eliminate the Enemies and take the letter block with you at the same time.
- Puzzle Piece 2 In the large underwater area you swim all the way up to the right. There are the remains of a shipwreck. Destroy the rotten wood and behind it comes the second Puzzle Piece.
- Shortly after the first checkpoint you reach a rotating blade. The O rotates together with her. Wait for a safe gap and swim in and out quickly.
- Puzzle Piece 3 Immediately after the O you reach a much larger rotating blade. At the bottom right is a brittle wall. Break it with a spin and collect all the bananas in the bonus room.
- Puzzle Piece 4 Follow the main path to the right until you have to destroy several cracked stones. After the passage is free, you also perform a rotary attack downwards. Under the normal path lies a small secret room with the Puzzle Piece.
- Puzzle Piece 5 You get into a room with three luminous points. Swim through all three so they are deactivated. Then return a piece. The previously electrified Crystal block has sunk and releases a new passage on the left. Follow him to the Puzzle Piece.
- Secret Exit to 4-A – Rockin‘ Relics Right next to Puzzle Piece 5 is a strong current that Donkey Kong can’t normally swim against. With Dixie Kong and her propeller braid, you can fight your way through the current to the right. Then swim up into the hidden passageway and enter the portal. The target barrel unlocks 4-A Rockin‘ Relics.
- N After the second checkpoint you swim further to the right. The N is located between a small group of fish. Turn through the Enemies and collect the letter block.
- Puzzle Piece 6 In the huge construction with the rotating Spike Trap you swim all the way down. There are several brittle stones. Destroy them and collect all the bananas in the hidden room.
- G In the following section, Donkey Kong is pushed by a strong current through several dangerous obstacles. The G is right on the way. Stay as far down as possible and correct your swimming direction in time.
- Puzzle Piece 7 — Puzzle 7 At the end of the level you do not jump into the target barrel immediately. Instead, break through the ground or dip under the barrel. There is another bonus room. Collect all the bananas and you have found all seven Puzzle Pieces.
4-2: High Tide Ride
High Tide Ride trades quiet swimming for a fast-paced mine cart ride. The tracks lead partially into the background and are divided into several tracks. Many collectibles can therefore no longer be retrieved later – in the event of an error, you have to play the section again.
- Puzzle Piece 1 — Even before the actual mine cart ride begins, there is a hidden blast barrel below the first larger platform. Drop in and collect all the bananas in the bonus room.
- K Right at the beginning of the mine cart ride, the rails rise and share. Jump in time to the upper track and then over the barrier. This is where the K hovers.
- Puzzle Piece 2 — After jumping over several sharks with the mine cart, the second Puzzle Piece appears just above an obstacle on the track. Jump at the last moment to get far enough.
- Puzzle Piece 3 Shortly after the first checkpoint, a new Loren section begins. Collect here all the bananas of the given rows. If you have omitted none, the third Puzzle Piece appears.
- O Directly afterwards, the track leads into the background and divides into several tracks. Take the left track to collect the O. Then jumps back quickly because the rail section is very short.
- Puzzle Piece 4 — In the section with the movable wooden walls you have to collect all the bananas again. For some of these, a risky jump on the left lane is necessary.
- Puzzle Piece 5 — Just after the second checkpoint, you can see the Puzzle Piece in the distance before it is covered by a wall. Remember its position and change to the appropriate track at the right moment.
- N Shortly before the third checkpoint, the N hovers above several blue owls. Use the Enemies as a springboard or jump off with the mine cart in time.
- G In the last section huge stone blocks crash on the tracks. The G is on the inner left track. Stay there until you have collected the letter block and then change back in time.
4-A: Rockin‘ Relics
Rockin‘ Relics is the first secret level of Sea Breeze Cove and will be unlocked via the secret portal in 4-1. Thunderstorms always set ancient mechanisms in motion here. A total of nine Puzzle Pieces hide in the level. For the second secret exit you should definitely take Cranky Kong with you.
- Puzzle Piece 1 Relatively far at the beginning there are some conspicuous floor plates between two up and down springing spiked balls. Stamp on the marked plate and you fall into a bonus room. Collect all the bananas.
- K For the next platforms to pop up, the K is just above the water surface. Jump into the water and wait until the platform or the letter is favorable.
- Puzzle Piece 2 In the following dive section you get to a warp pipe that moves you back and forth with its flow. Collect all the bananas in this area and the second piece of the puzzle appears.
- Puzzle Piece 3 Later, a large shipwreck is thrown up by a Lightning. Collect all the bananas in the air during the movement.
- O On the following platforms, several spiked balls jump up and down. The O is at the end of this passage. Wait for a safe gap or approach out of the water.
- Puzzle Piece 4 Just below the O you dip into the water and break through the floor in the middle. In the area below you have to collect all the bananas again.
- Puzzle Piece 5 After the next section, you get to a wooden walkway. Don’t jump to the Vine right yet, but dives under the jetty. Between the aquatic plants hides a blast barrel that shoots you into a bonus room.
- Puzzle Piece 6 — Puzzle 6 In the next underwater section, a strong current pulls or pushes you again. Collect all the banana trees in this area.
- N After the second checkpoint, a large shipwreck moves up and down. The N is located on or above the ship. Use its upward movement to reach the letter block.
- Puzzle Piece 7 — Puzzle 7 Shortly afterwards you move over several tilting wooden platforms. Collect all bananas before the platforms change their position.
- Secret exit to 4-B – Shoal Atoll In the later section, several large spiked balls jump up and down. Above this, a vine swings. With Cranky Kong you can jump with his stick on one of the spiked balls and reach the Vine. Swing right to the hidden portal and use the target barrel behind it. This unlocks 4-B Shoal Atoll.
- Puzzle Piece 8 Shortly behind the secret portal is a blast barrel waiting. Don’t jump in yet, dive into the water first. At the bottom between the seaweed lies the eighth Puzzle Piece.
- G In the subsequent Blast Barrel sequence, the G is directly on your flight path. Wait for the right moment so that the spiked balls do not hit you.
- Puzzle Piece 9 — Puzzle 9 At the end of the level, a blast barrel aims at the target barrel. Intentionally shoot yourself not directly in, but into the blast barrel next to it. With further barrels you reach the last Puzzle Piece and then the goal.
4-3: Amiss Abyss
Amiss Abyss is one of the most atmospheric levels of the game. Large parts of the cave are almost completely dark. Shining fish make the dangerous plants disappear for a short time and show you the safe way. With nine Puzzle Pieces, there is also a lot to discover here.
- K Shortly after you jumped into the water for the first time, the K is between dangerous dark plants at the top right. First, attack the glowing fish nearby. Through their light, the plants disappear for a short time and you can safely reach the letter block.
- Puzzle Piece 1 In the first large dark underwater room, several ballfish swim. Stay on the top right and destroy the remains of a shipwreck. In the secret room behind you collect all the bananas.
- Puzzle Piece 2 — After the first checkpoint, you defeat the spear penguin and jump on the helmet penguin. Pick it up, go back with it to the top left and throw it against the barrier there. Behind it is a bonus room.
- Also shortly after the first checkpoint you reach a springboard. Use it to hurl directly up to the O.
- Puzzle Piece 3 then dives back into the water. With several jellyfish swimming around a large spiky plant, you first go down to the right and then back up. To the right above the jellyfish lies the third Puzzle Piece.
- Puzzle Piece 4 In the next huge underwater room, numerous jellyfish rotate in circles. Swim into the middle and collect all the bananas between them.
- N The N is located directly to the right above the fourth Puzzle Piece. Use a gap between the jellyfish and swim up quickly.
- Puzzle Piece 5 After getting out of the water, several bananas appear above the water surface. Collect them all and the next Puzzle Piece appears.
- Puzzle Piece 6 Shortly after the second checkpoint you will encounter a helmet penguin again. Jump on him, take him with you and go back to the left. Ship it against the sack or the barrier and collect the appearing bananas.
- Puzzle Piece 7 Immediately after that you jump back into the water. On the left is a tiny air pocket or niche with the seventh Puzzle Piece.
- Puzzle Piece 8 — Puzzle 8 In the section with the dangerous dark underwater plants, you have to follow a swarm of glowing fish. In the second large circle you swim almost once completely around and then at its lower end upwards. There is another bonus area.
- G In the last escape sequence, the electric or dark plants close behind you. The G is directly on the main path – stays close to the glowing fish.
- Puzzle Piece 9 At the end of the level there is a brittle wooden wall to the right of the target barrel. Destroy them and collect all the bananas in the bonus room.
4-B: Shoal Atoll
The name is program: Shoal Atoll is a large underwater maze. To open the level end, you have to find different colored keys and chests one after the other. The order is: red key → red chest → green key → green chest → blue key → blue chest → yellow key → yellow chest → purple key → exit.
- Right at the beginning, the K floats over a series of penguins. Jump over their heads and take the letter block with you.
- Puzzle Piece 1 — Puzzle 1 On the right side of the starting area, a wooden bridge collapses as soon as you enter it. Sprint over the bridge and jump to the right as far as possible. With Dixie, the jump is much easier. There is a chest on the platform. Stamp on it and collect all the bananas.
- Then dive into the labyrinth. In the first larger room you swim past the red treasure and take the upper path. There the O is next to a partner barrel.
- Puzzle Piece 2 Continues from the O to the top left. In the following room you will find the red key. Swim even further into the upper left corner and let the current pull you into the bonus room. Collect all the bananas.
- Open the red chest with the red key and you get the green key. The green chest then contains the blue key. From the blue chest you get the yellow key, while the yellow chest finally contains the violet key. With him you open the great gate to the goal.
- Puzzle Piece 3 In the large room with the yellow chest lies a smaller treasure chest at the bottom right. Destroy it with a spin and take out the Puzzle Piece.
- N Below the green chest floats an electric Enemies. Eliminate it and get the N that floats in the middle of the room.
- Puzzle Piece 4 Floats from the room with the N to the left. In the next area are three circles of bananas under closed openings in the blanket. Collect the bananas at the left or third circle completely. This opens a secret corridor. Follow him and collect all the bananas up to the blue chest in the strong water stream.
- G After receiving the violet key and opening the big gate, Donkey Kong is pulled to the exit by a strong current. The G is in the middle of this tunnel. Position yourself in the middle in time.
- Puzzle Piece 5 In the last room you do not yet swim to the target barrel. At the bottom right is a small treasure chest. Destroy them for the fifth and final Puzzle Piece.
4-4: Irate Eight
In Irate Eight, you’ll have to deal with a giant Kraken whose Elder Princess Shroob will take the entire level apart. Mines explode, chains are destroyed and in between you have to flee from the monster. Do not lose sight of your air supply.
- Puzzle Piece 1 Climbs up the Vine at the beginning and jumps from there to the right into a hidden area. Collect all the bananas in the bonus room.
- Puzzle Piece 2 After diving you get to several mines. Swim close enough for them to explode and avoid the rubble. Through the resulting opening you swim up and collect all the bananas there.
- K Shortly thereafter, the K is located between two rotating mines. Trigger the mines beforehand if necessary and only then swim to the letter block.
- Puzzle Piece 3 During the first major Kraken chase, you destroy a chain. Then swim right into the small hidden area and take the Puzzle Piece with you before you continue to flee.
- O After the first escape sequence you get to several cannon barrels. The O is between two of them. Shoot through at the right moment.
- Puzzle Piece 4 After the first checkpoint you swim past several tentacles. One person regularly hits a wall. Above and to the right of this Elder Princess Shroob is a hidden passageway. Collect all the bananas in the bonus room.
- N Shortly afterwards you swim through a circle of ballfish. The N is right in the middle. Wait until a sufficiently large gap opens.
- G During the last big Flee before the Kraken you move up. The G is directly on your escape route and is hardly overlooked.
- Puzzle Piece 5 In the same last escape phase, several Elder Princess Shroob hit the aisle from the right. Swimming right above Elder Princess Shroob into a hidden side area. Get the Puzzle Piece and quickly return to the main path.
4-5: Sea Stack Attack
Sea Stack Attack takes you back to the surface. Huge rock towers break apart, explosives fly through the area and numerous barbed platforms make progress dangerous. Water bombs or watermelon bombs are required several times in order to expose hidden Puzzle Pieces.
- K Under a blanket of grass, two burning owls fly. Climb along the grass and drop onto the small platform with the K. For the way back you can use one of the owls as a springboard.
- Puzzle Piece 1 Directly after the K there is a hidden bonus room on the left. Jump over the spear penguin or use it as a springboard to reach the entrance.
- Puzzle Piece 2 Shortly after the first checkpoint, a large barbed ball swings over the path. Right underneath is a handle in the floor. Pull on it and the Puzzle Piece appears.
- Shortly after Puzzle Piece 2, you reach a lowerable platform. Wait until it stands low enough, roll forward and jump to the O.
- Puzzle Piece 3 Take a watermelon bomb and throw it to the top left against the wooden box. This is the third piece of the puzzle.
- N Directly after the third Puzzle Piece you jump over several small platforms. Use one of the jumping fish opponents as a springboard to reach the N.
- Puzzle Piece 4 A blast barrel sequence follows. At the beginning, four banana coins revolve around you. Shoot back and forth between the barrels and collect all four.
- Puzzle Piece 5 — After the next checkpoint, you need Dixie or Cranky. Jump over the platforms all the way to the top left. There is the entrance to a bonus room.
- G Directly after Puzzle Piece 5 there is a large barbed plate. The G is behind it. Wait until the spine side is turned to the other side, and slip through quickly.
- Puzzle Piece 6 Immediately behind the G are two wooden boxes. Ship a watermelon bomb on it and destroy both. Inside is the sixth Puzzle Piece.
- Puzzle Piece 7 — Puzzle 7 Shortly before the target barrel you have to destroy several boxes by tamping attacks. Stamp the two right boxes and you will find the last Puzzle Piece.
4-6: Current Capers
Current Capers is one of the more technical underwater levels. Large gears change the flow, purple spiked tentacles block the path and some rooms turn completely. With Cranky you can destroy some of the spiky obstacles, but he is not absolutely necessary.
- Puzzle Piece 1 Dives into the water at the beginning and follows the banana trail down. Collect all the bananas and the first Puzzle Piece appears.
- Puzzle Piece 2 In the next large room there is a gear between several violet barbed obstacles. Attack the gear and then collect all appearing bananas.
- K Shortly after the second piece of the puzzle you reach a room full of violet spine tentacles. The K is in the middle of them. With Cranky you can destroy the Elder Princess Shroob, otherwise you are waiting for a safe gap.
- Puzzle Piece 3 After the first checkpoint you should not immediately swim further to the right. Returns a bit to the left with a partner and opens the previously unattainable chest there.
- Puzzle Piece 4 — After the third part, you will be shot back into the water with a blast barrel. In the area with the circulating violet spine balls you swim through the first room and in the second directly upwards through the destructible Block. Collect all the bananas in the secret room.
- In the next room is the O. Through the current, you may have to swim around the entire room before you can reach it safely.
- Puzzle Piece 5 After the second checkpoint you swim to the right and then directly up. Even before you pass a purple sting tentacle, there is a hidden bonus room with 30 bananas.
- N Directly after Puzzle Piece 5 you get into a room with several violet spiked tentacles. The N floats in the middle.
- G In the next room you have to avoid several sting traps. The G is directly on the normal path. Focus on not being trapped by the moving obstacles.
4-BOSS: Fugu Face-Off
Fugu is the boss of Sea Breeze Cove and at the same time the only boss fight in Tropical Freeze that takes place completely under water. This makes him particularly dangerous: you not only have to keep an eye on Pfuigu’s attacks and the Spike Trap-studded edge of the arena, but also collect air bubbles regularly.
Pfuigu’s body is almost completely covered with Spike Trap. Its vulnerability is the bright, unprotected spot on its rear part. Attack it with a spin. Alternatively, you can hurl green fish against him with a shooting attack.
Phase 1: At the beginning, Pfuigu absorbs large amounts of water. Swim away from him with all your strength so that you will not be drawn into his mouth. Then he blows the water out again and pushes you towards the spiky outer wall. Floats or rotates against the flow. After that, Pfuigu rolls through the arena. Pay attention to when its bright vulnerability is exposed and hit it with a spin. After the first hit, he repeats his suction and blow attack and spits out green fish. Attack a fish so that it is hurled against Pfuigu. After a total of three successful hits, the second phase begins.
Phase 2: Pfuigu continues to inflate and now occupies a large part of the arena. When he rolls along the edge, only above or below his body remains a narrow gap. Swimming to the free side in time. In addition, he is now increasingly spitting out sea urchins, which you should not touch in any case. After his quick attacks, Pfuigu hits the wall and briefly exposes his vulnerability. Take this opportunity. If he spits out green fish between the sea urchins, you can throw them against him again. After another three hits, the last phase begins.
Phase 3: Now Pfuigu inflates almost to the maximum size. During his rolling attack, only a very small free area remains above or below his body. At the same time, Spike Trap or sea urchins can detach themselves from the wall and drift through the arena. After a few attacks, Pfuigu rams the outside wall and then turns through the cave. His weakness is always visible for a short moment. Stay patient and only attack when the path is truly free. At the end, the well-known suction and blow attack with green fish follows again. Sling one of them back or hit his rear part directly. After a total of three more goals, Pfuigu is defeated and the way to Juicy Jungle is clear.
Tip: Do not attack hectic. Pfuigu’s fight is less a matter of harm than proper timing. Keep your air supply up and take a safe bubble with you instead of risking your heart for an extra hit.
4-K: Spinning Spines
Spinning Spines will be unlocked once you have collected all KONG Letters in all regular and secret levels of Sea Breeze Cove, including 4-A Rockin‘ Relics and 4-B Shoal Atoll. As with all K levels, there are no checkpoints and no KONG Letters. For this, five Puzzle Pieces and one of the mysterious relics await you.
- Puzzle Piece 1 — Puzzle 1 Relatively early in the level, a large armored Enemies guards a violet jar. Wait until he lifts his gun and roll into him. Repeat this three times. Once the Enemies is defeated, you stamp on the violet jar and get the first Puzzle Piece out.
- Puzzle Piece 2 — After a blast barrel sequence, you reach a gap between two platforms. Underneath it hovers the Puzzle Piece together with a flying enemy. Lure the Enemies in your direction, jump on his head and use the recoil to collect the Puzzle Piece and land on the other side.
- Puzzle Piece 3 Later you land in a lava section with large rotating stone rollers. The platforms are slowly starting to decline. Work first to the right and then quickly back to the top left. This is where the third piece of the puzzle hovers.
- Puzzle Piece 4 Shortly afterwards you have to jump over the lava over three owls. Get as much height as possible when jumping to the third owl. Above the gap hovers the fourth Puzzle Piece.
- Puzzle Piece 5 At the end of the level, the lava rises quickly as you climb up a rotating pole. Reach the cannon barrels in time. The last barrel can fire in several directions. Wait until it points to the left and shoot yourselves to the fifth Puzzle Piece.
After the last Puzzle Piece, you only have to overcome the final sting traps. At the end awaits the mysterious relic of Sea Breeze Cove. Collect also the relics of the other K levels – they are needed later to fully unlock the last secret area of the game.