

World 2 covers courses 2-1 to 2-4 in the original NES version of Super Mario Bros. Open a map to enlarge it, or scroll it sideways to follow the main route and side rooms. These directions describe the first quest.
World 2-1 – Vine and cloud bonus
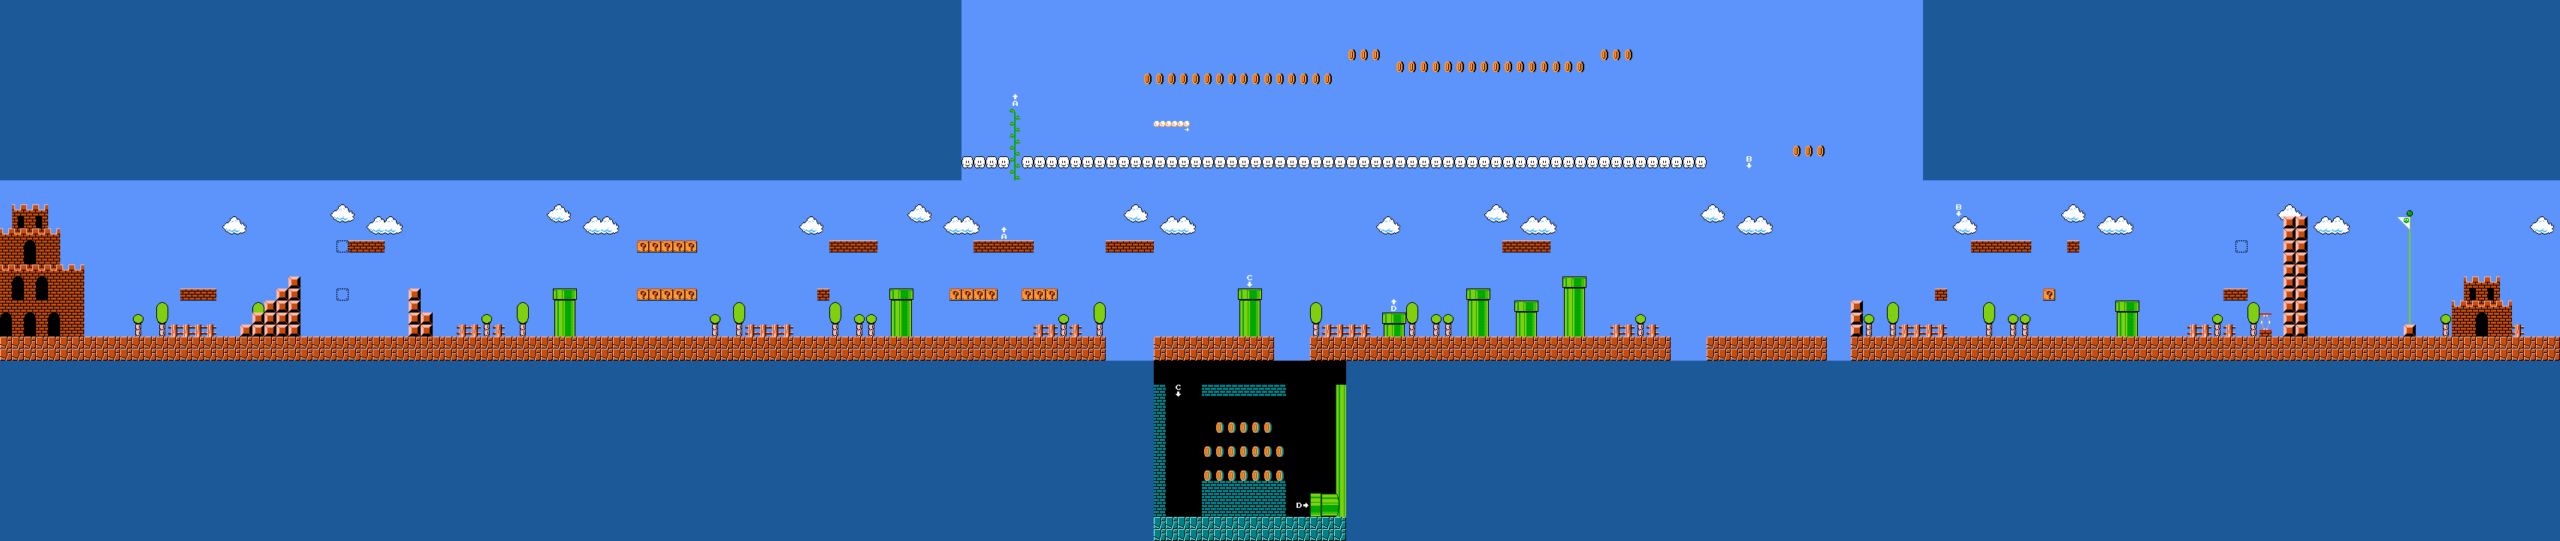
View map World 2-1 in original size
Move the map sideways to view the entire level and the side rooms.
Get the power-up from the middle of the first three bricks. Goombas and Koopas run between the following block groups; jump over the depressions without landing on a shell that runs out.
After the first larger pipe section you will find bricks above question mark blocks. A vine in the upper row leads to a bonus area in the clouds. Climb up and ride right through the coins on the cloud platform. The return route drops you off later in the level. If you stay on the ground, you can instead enter an underground coin room via one of the following pipes.
In the last section there are tubes, short pits and Koopa Paratroopas. Use the safe tube roofs to check the next jump. There is a Springboard in front of the high finish wall. Press the jump button when it’s fully compressed to cross the wall. Alternatively, the invisible block above the two bricks helps as an intermediate step.
Tip: Cloud Bonus and Coin Room are voluntary side paths. The Vine here does not lead to a later world.
World 2-2 – The first water level

View map World 2-2 in original size
Move the map sideways to view the entire level and the side rooms.
After the entrance tube, swim up by repeatedly pressing the jump button. Without input, Mario sinks. At first, stay at a medium height so that you can react to both bloopers above you and cheep-cheeps coming from the side.
Bloopers track you and can swim through obstacles just like fish. A pillar is therefore not reliable cover. Let a blooper come towards you first and then alternate under or past it with short swimming strokes. You are slower on the ground and are particularly at risk on precipices.
Currents flow downwards through three openings in the floor. Swim higher in front of these places and continue to press the jump button quickly until you have the opening behind you. When in doubt, avoid deep coins. The tube on the far right leads to the surface; there you jump over the stairs to the flag.
Tip: You can’t defeat enemies underwater like you can on land simply by jumping from above. Keep your distance or use fireballs as Fire Mario.
World 2-3 – Bridges and jumping fish

View map World 2-3 in original size
Move the map sideways to view the entire level and the side rooms.
As soon as you step on the bridges, red Cheep-Cheeps jump into the picture from below. Move to the right at a steady pace. If you turn around in the middle of the bridge or wait a long time, it’s easier to move onto the next flight path.
Jump over the gaps with enough running speed, but not unnecessarily high. The fish are additional obstacles and not reliable stepping stones. The only question mark block on the way contains a power-up. Get it when the area above is clear, then pick up the pace again.
In the second half the intermediate platforms become smaller. Instead of watching every fish, look for the nearest solid landing spot. Correct a jump that is too far early by releasing the run button. The stream of fish ends at the stone steps in front of the finish; There you can prepare the jump to the flag in peace.
Tip: The normal NES first round does not have any Koopas on the bridges. Additional enemies may belong to the more difficult second round or to other versions.
World 2-4 – Lava and opposing platforms

View map World 2-4 in original size
Move the map sideways to view the entire level and the side rooms.
Fire bubbles jump up in front of the first lava areas. Wait for a bubble to descend again, then cross the small island. The power-up hangs above the middle platform. Take it with you before you go down the long Fire Bar corridor.
Behind the lava the path splits into an upper and a lower route. In this first version, the lower route is less densely populated with Fire Bars. Nevertheless, check each turning circle individually. Do not jump from the lower path up into a pole whose attachment is on the upper level.
This is followed by two platforms that move vertically in opposite directions. Jump onto the first one when it’s reachable and move on when the height is convenient. Bowser fireballs are already approaching behind the last gaps. Defeat the fake Bowser with fireballs or overcome him and touch the axe.
Tip: The platforms continue to move even when you stand still. Wait on solid ground and not on the edge of a lift for the next favorable phase.