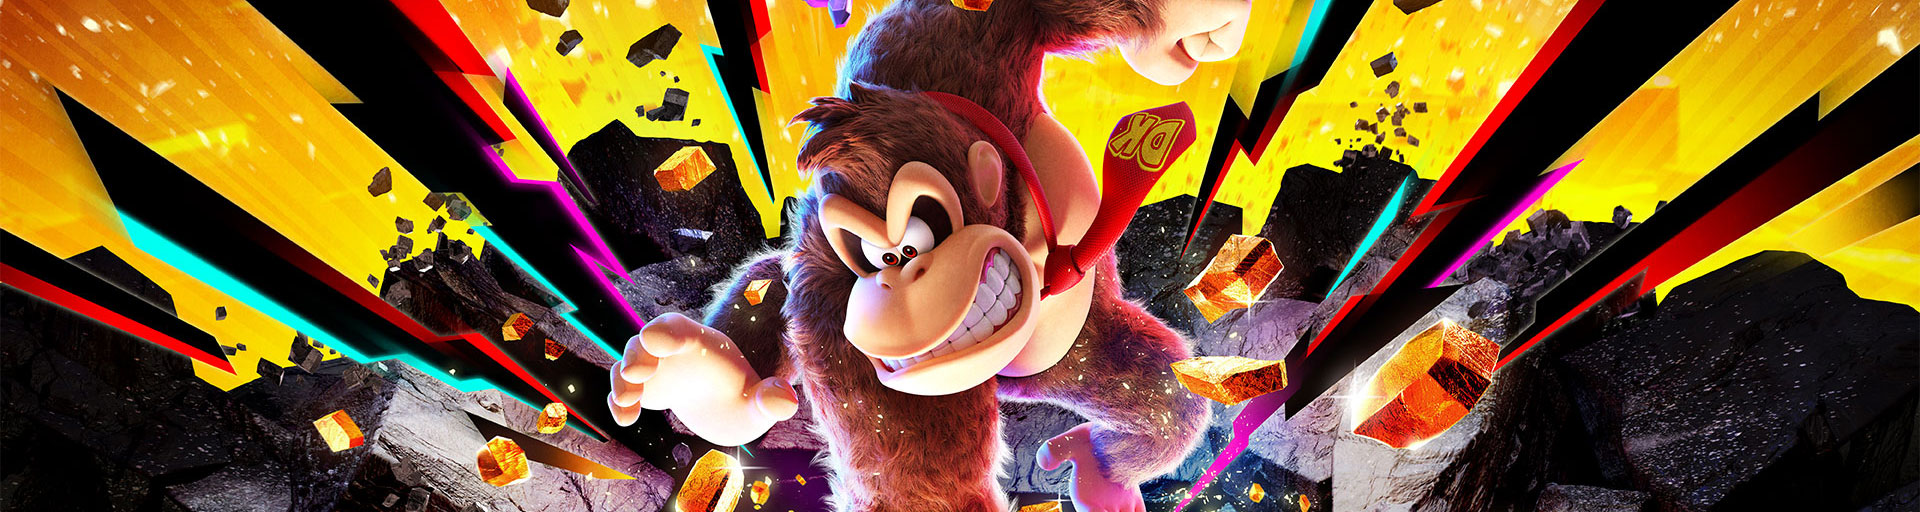

In our Donkey Kong Bananza complete solution to the Resort Layer we show you all the secrets of the sunny sub-level SL800. After fighting Void Kong at the junction, Donkey Kong and Pauline land on a tropical archipelago with sandy beaches, floating islands, huge fruits and a massive watermelon that blocks the way ahead.
The main new mechanic of the Resort Layer is the Upwind Ore. From the rainbow-colored material you can tear out chunks that catapult Donkey Kong upwards. Even the colorful shark opponents create such rainbow paths and help you reach distant islands and hidden Banandium Gems.
In total, there are 42 Banandium sites and 30 fossils at Resort Layer. Our solution will show you all the challenges, hidden caves, the game of hide and seek, Cranky Kong, the locations on the dive island and the only postgame jewel of the shift. With the checklist you can track your progress directly while playing.
Resort Layer – main path to the huge watermelon
After defeating Void Kong at the junction, you will be hurled to the Resort Layer on SL800. Your task is quickly clear: the huge watermelon in the middle of the layer blocks the sinking hole to the next level.
First follow the route to the tropical resort and then to its outdoor area. There you get to know the rainbow-colored upwind ore.
- Perform a fall attack on the large fruits to expose upwind ore.
- Pull a chunk out of the rainbow material.
- As long as you hold it, you will be carried up.
- If you hit a rainbow shark, it also creates a long trajectory of upwind ore.
Work with it over the floating islands to the dive island. From there you will continue to the shooting footbridge above the large watermelon.
Reach the top of the watermelon and perform a fall attack. Then continue to smack through the pulp until you reach the Void pole inside.
Destroy it and the sinkhole to the Tempest Layer opens.Tempest Layer
SL800: Resort Layer – all 42 Banandium Gems
1. Drove Off Void Kong!
After defeating Void Kong at the junction, you will automatically reach the Resort Layer.
Right at your landing, a bundle of 5 Banandium Gems is waiting. This entry belongs to the main story and cannot be missed.
2. Buried in the Beach
Go from the starting point at the juice beach southwest to the edge of the island.
Near the large sandy banana formation you will find a striking spot in the sand. Use the handclap and dig down.
Under the beach is a small chamber with the jewel.
3. Strawberry and Banana
From the starting beach you will see a small floating island with a huge strawberry.
Strike a rainbow shark towards the island. It creates a trajectory of upwind ore.
Use them to get to the island and then destroy the strawberry. Inside is the Banandium Gem.
4. Checking into the Tropical Retreat
Follow the normal main route to the tropical resort.
The Banandium Gem is located directly at the fast travel point at the entrance of the village and can practically not be overlooked.
5. Resort Quiz Master
To the left of the entrance to the tropical resort you will find Quiztone.
Answer all three questions correctly:
- 1. Answer: Sunglasses
- 2. Answer: Juice bar
- 3. Answer: Coconuts
After three correct answers, you get the jewel.
6. Underground Runaround
To the right of the fast travel point of the tropical resort stands a huge orange.
Destroy them and jump into the pit that is exposed.
In the underground area there are numerous fractons that turn into arrows. Follow their directions and dig through the terrain.
At the end of the arrow chain you will find the jewel.
7. Up Means Down
Stay in the same underground cave.
Go right from the entrance until you find a fractone whose arrow points up.
Do exactly the opposite: stand under or directly in front of him and dig down.
Under the floor is a secret chamber with the Banandium Gem.
8. Secret Beachside Grotto
Travel to the fast travel point in the tropical resort and walk right around the large rock formation.
Approximately at medium altitude you will find a small sand platform on the outside of the cliff.
Throw yourself through the rock face at this point. Behind it is a hidden grotto with the jewel.
9. A Daring Drop
Above the clothes shop in the tropical resort is the Loren Challenge. Let the constructor clear the entrance for 1,000 gold.
During the mine cart ride you will reach an interruption of the route, where several large gold boulders lead vertically downwards.
Jump intentionally into this gap. Below is a secret path with the first jewel.
10. Rail-Ride Rest Stop
Stay in the Loren challenge and then follow the normal route.
About halfway you will automatically reach the second Banandium Gem.
11. End of the Line
Complete the Loren Challenge.
At the end of the route awaits the third Banandium Gem.
12. Battle: Pulverizer’s Path
Above the shelter in the tropical resort is a combat challenge.
Defeat the three opponents on the black pillars.
Use the Rainbow Sharks: Strike them towards the pillars so they create rainbow-colored paths that allow you to quickly reach the opponents.
13. The Resort Growtone
On a floating island above the tropical resort is the Growtone.
First, reach the plateau above the shops. Use a chunk of upwind ore there to get to the floating island.
Feed the Growtone with 400 gold. On the first branch appears the jewel.
14. The Hungry Resort Growtone
Keep feeding the same growtone.
Once you have invested a total of 2,000 gold, the second branch grows with the next jewel.
15. The Sated Resort Growtone
Feed the growtone to the last stage.
With a total of 4,000 gold, the top branch grows and you can collect the third jewel.
16. Resort Fragmentone Recovery
Above the shops in the tropical resort you will find Fractones.
In the immediate vicinity, three fragments are hidden. Destroy the large fruits and the terrain around the platform.
First, return a fragment to Fractones and you get the first jewel.
17. Resort Fragmentone Restoration
Find the other two fragments as well.
One is located in a deeper hidden area behind a fruit, another on a higher floating island.
Use the Rainbow Shark or Upwind Ore to reach it.
Once all three fragments are returned, you get the second jewel.
18. Resort Smashin‘ Stats
Destroy in the Resort Layer a total of 30,000 m3 of sand.
Then talk to Smashintone in the tropical resort. Once you have reached the required amount, you will get the Banandium Gem.
19. Shifty Smash: Liftoff to the Sky
On a small island in front of the tropical resort is a Shifty Smash challenge.
First dig some terrain under the triangle and get a chunk of upwind ore.
Activate the test and have the rainbow material carried to the higher target blocks.
Destroy all goals within time.
20. Cranky’s Resort Rant
Swim from the tropical resort once around the back of the large rock island.
Near the surface of the water is a small cave partially covered by seagrass.
Swim in. Cranky Kong and Rambi are waiting there.
Listen to Cranky’s complete tirade and you get the jewel.
21. At the Cannon Crossroads
Behind or next to the area of Smashintone stands a large orange.
Destroy the fruit. Inside is a blast barrel.
Get in and shoot to the floating island. There the jewel is right in front of you.
22. Battle: Baited to a Bruising
Northwest of the launch island is a small green island with a buried combat challenge.
Pay the constructor 600 gold and enter the ruin.
In battle, you must defeat three underground opponents. Stand on destructible terrain and lure them out of the ground.
As soon as they emerge, their vulnerable bodies attack.
23. Shifty Smash: Seaside Smashing
Near the fruit island shelter stands a large strawberry.
Destroy them and you expose the Shifty Smash challenge.
Several targets are located directly on or above the water. With the Zebra Bananza you can run over the water surface and reach all target blocks particularly quickly.
24. Bloomed in the Resort Layer
From the juice beach you swim or run over the water to the small island in the southwest.
There you will find Bloomintone. A large formation of concrete bananas blocks sunlight.
Destroy the concrete bananas – the Kong Bananza is particularly suitable.
As soon as light falls on Bloomintone again and its flowering rises, you get the jewel.
25. Resort Hide-and-Seek
On the island among the floating stone bananas you will find Suchton.
Find the four camouflaged fractons on and around the island.
The most difficult hides on the higher floating platform. Destroy one of the fruits and use the thus accessible rainbow material to get to the top.
Once you find all four, you get the jewel.
26. Shaved-Ice Trainee
North of the Fruit Island shelter stands a huge yellow pear.
Perform a fall attack on the fruit from above. Among them is the challenge with ice cubes and pink/blue removable material.
In the first puzzle, you have to change the changing material so that a ramp is created and the ice cube rolls safely into the shell.
Then you get the first jewel.
27. Shaved-Ice Artisan
In the second room of the same challenge, you have to build a suitable ramp again.
Throw away parts of the pink material. Blue material is produced at the opposite location.
Form a continuous path to the second shell and let the ice cube roll in.
28. Shaved-Ice Master
After the second puzzle, you reach a blast barrel.
Don’t use it yet.
Instead, go right past it and destroy the wall. Behind it is a secret third mystery room.
Here too, change the changing material so that the ice cube can roll completely into the shell.
This will give you the third jewel.
29. Rising Seafloor Ruins
Northwest of the great watermelon is an island with rainbow-colored ruins.
Destroy the small strawberry nearby. Underneath it comes a striking mechanism.
Strike against it and the sunken ruins drive up from the sea.
Climb over the newly created platforms until the end of the ruin. The jewel is waiting there.
30. Changing Lanes
At the foot of the large rock formation under the watermelon you will find the challenge with two changing tracks.
Stand on the moving lanes and change again and again between both sides to avoid the obstacles.
The first Banandium Gem is located after the first major stretch of road.
31. Clearing the Lanes
Complete the challenge.
Pay particular attention to the thorny fields. Use the existing explosives to destroy obstacles on the way.
Just before the normal exit, you get the second jewel.
32. Pause for the Underpass
At the end of the road challenge, do not immediately use the Blast Barrel.
Instead, stay on the last moving platforms. They go downstairs and wind under the actual track.
Follow them to the secret room below the target.
There is the third jewel.
With the Ostrich Bananza you can also reach the room later.
33. Adrift at Sea
In the southern sea swims a tiny green island with a Banandium Gem.
The island is constantly moving.
Open your map and look for the small moving point or tiny island.
With the Zebra Bananza you can quickly walk over the water and catch it easily.
34. Floating Freebie
Between the tropical resort and its outdoor area, a small island floats high in the air.
Hit a rainbow shark so that it creates a trajectory towards the island.
Then tear a chunk from the upwind ore and let it carry you up.
Land on the small rock island and collect the jewel.
35. Quick Snack on Skydive Isle
Travel to the fast travel point outdoor area of the tropical resort.
Use the upwind ore and rainbow sharks to work your way up the floating islands bit by bit.
Once you reach the big dive island, the Banandium Gem is right on your way.
36. Skydive Isle’s Side Pocket
Build or activate the shelter on the dive island.
Just behind the shelter is a small niche on the side of the island.
Go around the platform or drop carefully. The jewel is open in the niche.
37. Shifty Smash: Floating Rotation
Above the shelter on the dive island you will find another Shifty Smash challenge.
After launch, the target blocks appear on rotating floating islands.
The Ostrich Bananza makes the task much easier. Glide to the two islands and destroy both target blocks within the time limit.
38. Battle: Aerial Aiming
Right next to the shelter of the dive island is a combat challenge.
You must defeat three flying enemies within the time limit.
Tear chunks from the rainbow-colored upwind ore. Let yourself be carried into the air and throw the chunks at the opponents.
After the third hit, you get the jewel.
39. Down from Skydive Isle
Below the launching bridge is a large floating island.
Look for the green rope box on the edge and strike against it.
A long rope falls down.
Slip it down. It takes you to a small hidden island below the main platform on which the jewel lies.
40. Above the Big Watermelon
This jewel lies almost directly on the path of the main story.
From the launching bridge you follow the rainbow-colored track towards the large watermelon.
At the end of the trail, you tear out a chunk of upwind ore and let yourself be carried to an even higher small rock island.
This is where the Banandium Gem.
Then jump down and destroy the watermelon with a fall attack.
41. Decked Out in Dampness
This jewel is available only after the main story is completed.
After the credits, return to the monument of the great watermelon. Glamtone is waiting there.
Equip Donkey Kong to match the desired wet beach look.
A safe combination is:
- Wet tie
- Aqua blue fur
- Swimwear
The crucial equipment in particular is the wet tie, which you can get later in the Planet Core.
Then talk to Glamtone again and you get the Banandium Gem.
42. Resort Chip Exchange
Visit the chip changer above the grocery store in the tropical resort.
Exchange banandium chips for a banandium gem.
The exact price depends on how many jewels you have previously bought from chip changers in other layers.
For the collection entry of the Resort Layer one purchase is sufficient.
All 30 fossils of the Resort Layer
In the Resort Layer there are a total of 30 fossils. Unlike in the large layers, only one fossil species exists here: 30 blue-colored leaf fossils.
There are no rare red and no extra-rare fossils. All 30 are on SL800.
On the juice beach there is a crater next to the large sandy banana formation.
Tomb from there straight down. In the sand below the crater lies the first fossil.
Stay on the same crater next to the large sand banana.
Use the hand clapper again and dig up a second area of the crater. The next fossil is also buried there.
East of the large sand banana is a small sand formation in the shallow water.
Swim there and destroy or dig the sand. Below is the fossil.
South of the large sand banana lies a remote small island.
There is a concrete pillar there. The fossil is on the side of this pillar.
Release it with a chunk or destroy the surrounding material.
West of the large sand crater lies another island with a bridge.
Look directly under the bridge. The fossil is attached to or under the construction.
Look for the island with the big strawberry and the jetty.
The fossil is located in the lower region of the web near the water surface.
Stay on the same jetty of Strawberry Island.
In the lower area is a second leaf fossil. Use the handclap if you don’t see it between the rocks right away.
On the island with the four large strawberry blocks you go to the outer cliff edge.
The fossil sits laterally in the rock face. Let yourself carefully fall on the lead before it.
On the same island there is a large strawberry block.
Perform a fall attack on the strawberry from above and dig or hit yourself down.
The fossil lies directly under the fruit.
West of the island with the four strawberries is the island with the huge pear.
Perform a fall attack on the pear and completely destroy the fruit.
Below is the leaf fossil.
Travel to the next small island west of the pear island.
There is a large crystal. Destroy it completely.
Inside is the fossil.
Travel to the fast travel point outdoor area of the tropical resort.
There a large carrot or turnip grows in the middle of the area.
Pull them out of the ground. Below is the fossil.
Stay at the outdoor area of the tropical resort.
Go to the edge of the island and examine the side cliff wall with the hand cloth.
The fossil is right in the rock.
On one of the islands with a teleport gong is a large red water bubble.
Spring or swim into the bubble.
The fossil is inside.
Stay on the island with the Teleport Gong.
Examine the large rock formation next to the gong. The fossil is open on one of the rocks.
There is a shop on the same island.
Enter the building or hit yourself inside. Inside you will find the next fossil.
On one of the islands, a fractone carries the fossil directly on its back.
Go behind him or around the figure. The sheet can be collected directly.
Look in the water for the large carrot block.
Right next to it stands a small rock from the sea.
Swim there. The fossil is located on this rock just above the surface of the water.
On the island with the Teleport Gong there is also a huge strawberry block.
Destroy the strawberry completely. Inside is the fossil.
Climb to the cliff above the teleport gong.
The fossil lies at the top of the rock formation.
Stay on the same island as the Teleport Gong.
Let yourself fall from the cliff down to the deeper level.
Below the main plateau is the nearest fossil.
Near the tropical resort stands a large orange fruit block.
Perform a fall attack on it and jump into the cave exposed below.
Go all the way back inside. That’s where the fossil is.
Look for a striking ring of gold on a stretch of sand.
Stand right in the middle of the ring and dig down.
The fossil is buried directly underneath.
West of the island with the Teleport Gong is an elevated sand formation.
At the top grows a large turnip.
Pull them out. Below is the leaf fossil.
Journey to the huge watermelon in the center of Resort Layer.
Examine the foot of the large rock formation on which the watermelon lies.
The fossil is located directly at the base of the rock.
Work your way over the upwind ore to the floating islands towards the dive island.
On one of the smaller platforms, the fossil is open.
Reach the dive island.
The fossil is at the bottom of the large island.
Stand on a lower platform and throw boulders of earth or rainbow from below against the fossil until you can collect it.
A bridge or a connecting bridge is located on the dive island.
Look directly under the bridge.
The fossil hangs on the underside of the construction.
Near one of the fast travel points in the upper island area hovers a small separate rock island.
Use upwind ore or the ostrich Bananza to get over.
The fossil is on the island.
The last fossil is located on the large rock formation that carries the huge watermelon.
Surround the rock and use the hand cloth.
The leaf fossil is on the outside in the formation and can be knocked out directly.
Using Fossils in the Clothing Store
All 30 leaf fossils of the Resort Layer can be traded in the tropical resort’s clothing store.
This unlocks various special coat colors for Donkey Kong:
- Banana gradient: 2 fossils
- Wave gradient: 8 fossils
- Dragon fruit gradient: 8 fossils
- Shining magenta fur: 12 fossils
The combined cost is exactly 30 fossils. If you want to have all the cosmetic offers of the Resort Layer, you have to find all the leaf fossils.
Resort Layer Completely Completed
For a complete conclusion, your checklist should display the following values at the end:
- Banandium Gems: 42 / 42
- Fossils: 30 / 30
- Total: 72 / 72
If you are missing exactly one banandium entry after normal playthrough, it is very likely to be No. 41 – Style Examination: Wet and Cool. Glamtone appears only after the main story has been completed.
There is no rare variation in fossils. All 30 leaf fossils are located on SL800 and can basically be collected during normal exploration of the Resort Layer.
Frequent questions about the Resort Layer
How many Banandium Gems are there in the Resort Layer?
The collection of the Resort Layer contains 42 banandium entries. The first entry is a bundle of five Banandium Gems.
How many sub-levels does the Resort Layer have?
The Resort Layer consists exclusively of SL800. There is no SL801 or SL802.
How many fossils are there?
On SL800 you can find a total of 30 leaf fossils. Rare and extra-rare fossils do not exist in this layer.
How do I get to the floating islands?
Use the rainbow-colored upwind ore. Pull out a chunk and hold it so Donkey Kong is carried up. Even the rainbow sharks can create long distances from this material.
How do I open the way to the Tempest Layer?
Work your way over the dive island and the launching pier to the huge watermelon. Perform a fall attack and dig up to the Void stake inside. After you destroy it, the sinkhole opens to the Tempest Layer.
Why am I only missing 41 out of 42 Banandium Gems?
The last jewel at Glamtone is a postgame find. After the credits, return to the monument of the great watermelon and complete the style examination.