
In our Donkey Kong Bananza complete solution for the Feast Layer we show you all the secrets of the sub-levels SL1400 and SL1401. The Feast Layer is one of the most extensive optional areas in the later game, transforming the underworld into a huge theme park around burgers, fries, soda, oil and lots of dangerous muck.
One of the most important mechanics of this layer is salt. The green muck can hardly be eliminated with normal attacks. Therefore, tear chunks from the white salt deposits and throw them on the muck to expose locked doors, platforms, opponents and hidden collectibles.
In total, there are 69 Banandium sites and 72 fossils in the Feast Layer. Our solution takes you through the Lion Market, the crumbling carousel, the large swings, the Brutzelkabinett, the oil cruise and finally the kitchen on SL1401. In addition, we will show you all challenges, Cranky Kong, Fractones, Quizmeister, the game of hide and seek and the location of the extra rare robot fossil.
Feast Layer – Main Path
The Feast Layer will only be accessible in the later game. Return to Radiance Layer SL1204 and open the sealed access there. Then jump through the shaft to SL1400.
Salt against Muck
Right at the start, you learn the most important rule of the Feast Layer: Salt removes muck.
- Tear chunks of white salt.
- Throw them at green walls.
- Even muck opponents can be made vulnerable with salt.
- With the Elephant Bananza, you can absorb large amounts of salt and shoot targeted.
Activate the Burger Switch
Follow the path from the entrance to the large market. In the theme park you have to activate several huge burger switches.
The first one is just behind the market gate. For the other switches, the path leads you to the crumbling carousel and the large swings, among other things.
On the crumb carousel, the zebra Bananza is suitable for running quickly up the walls. The Ostrich Bananza helps with the swings, as you can use winds and fly over larger gaps.
Boss: Mad Mixer Remix
In the Hot Brutzel Cabinet, Mad Mixer Remix is waiting.
During the fight, you drive on a mine cart. Collect salt and boilers along the way. With the salt you first remove the green muck on the boss. Once his armor is exposed, you throw boulders at the exposed area.
After several hits, Mad Mixer Remix is defeated and you can activate the next Burger Switch.
Oil Cruise and Big Lion
After that, the path leads you over the big oil cruise and on to the huge lion’s hole. Use salt platforms, mobile lions and the various bananzas to reach the big banana burger.
On its tip is the Void-Pile. Destroy it and jump down to SL1401.
SL1400: Feast Layer – Banandium Gems 1–57
1. Free Fallin‘ to the Feast Layer!
This bundle of banandium can only be reached after unlocking the feast layer.
After the corresponding story progress, return to the Radiance Layer SL1204 and open the sealed access there.
Jump through the shaft. When you land on SL1400, you will receive the three Banandium Gems.
2. A Slime-Slathered Treat
Directly at the first fast travel point there is a wall of green muck on the left.
Pull a chunk of salt out of the white terrain and throw it against the wall.
Once it has completely disappeared, the jewel is exposed.
Challenge: Freestyle demolition
3. Wrecked by Freestyle Bananzas
Enter the challenge in the wall near the market.
Destroy the entire building within the time limit. With the Elephant Bananza you can suck in large amounts of material; the Kong Bananza also works very well.
Once the goal is reached, you get the first jewel.
4. Fast-Paced Freestyle Bananzas
Complete the same demolition challenge especially quickly.
Destroy the building completely, keeping at least 20 seconds of remaining time on the clock.
Then the second jewel appears.
5. Lost and Found under the Building
Stay in the challenge after demolition.
Use the strike mechanism on the back so that the remaining platform lifts.
Then drop under it and destroy the foundation.
In the underground world lies the third jewel.
6. Battle: Bouncy Beatings
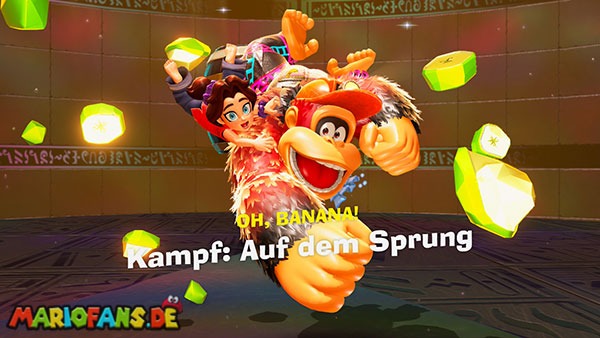
The battle ruin is located in the market storage room.
You have to defeat five antickoids. Use the elastic platforms to quickly switch between enemies and attack them immediately after landing.
If all five opponents are defeated, you get the jewel.
7. Snacking from the Stockroom
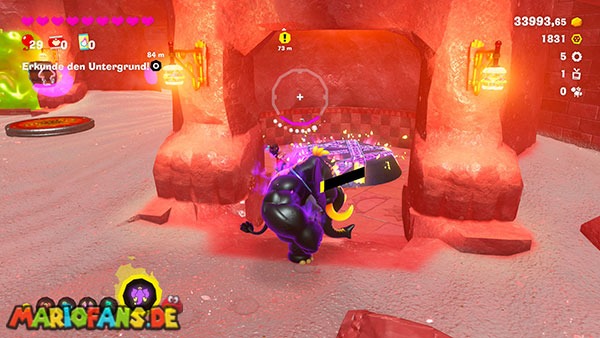
Go to the storage room below the market.
One of the walls is completely covered with muck. Get salt and remove the green layer.
Behind it is the Banandium Gem.
8. A Banana among Friends
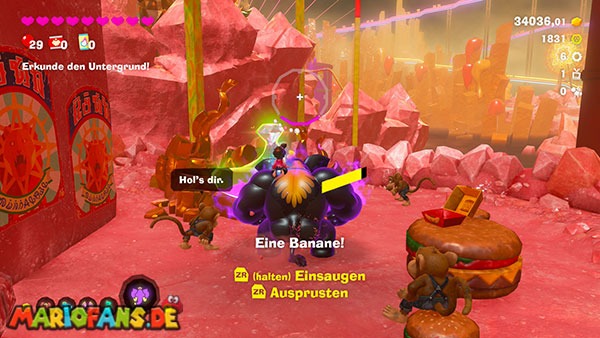
At the fast travel point of the market is a small restaurant.
Go to the lower platform inside or behind the residents.
This is where the jewel lies.
9. Battle: Wallopoid Warfare
Directly to the left behind the large market gate is a battle ruin.
Defeat ten haumauroids or wallopoids.
Dodge their heavy blows and attack as soon as they briefly stop after an attack.
After the last opponent, the jewel appears.
10. A Soda-Infused Banana
Go to the large soda container next to Growtone.
The Banandium Gem is in the tank.
Climb up or destroy the appropriate access and get the jewel from the soda container.
11. The Feast Growtone
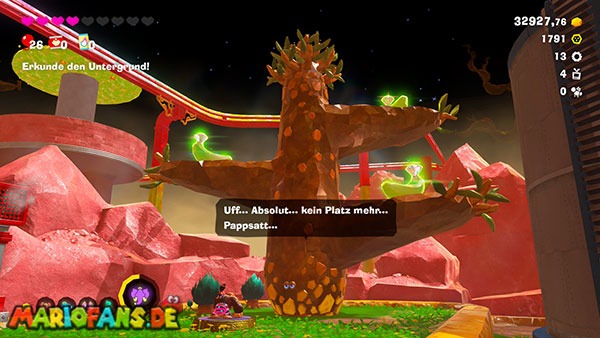
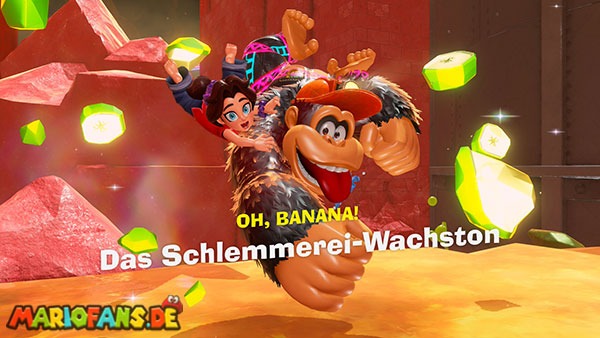
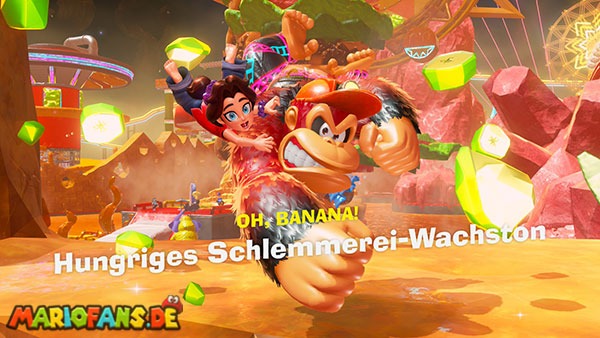
Next to the lemonade tank you will find Growtone.
Feed it with 500 gold. The first branch grows and exposes the Banandium Gem.
12. The Hungry Feast Growtone
Keep feeding the same growtone.
With a total of 2,500 gold, the second branch grows with the next jewel.
13. The Sated Feast Growtone
Feed the growtone to the last stage.
With a total of 5,000 gold, the last branch grows. There is the third jewel.
Challenge: Salt on the rolling line
14. A Secret Salty Snack
The challenge is in the wall next to Growtone and the lemonade tank.
On the first vertically upwards moving salt wall you smack into the wall.
Inside is the secret room with the first jewel.
15. Slinging the Salt
Climb the first rising salt wall completely upwards.
Right at the top is the second jewel on your normal path.
16. Melting the Muck
Master the complete course.
Use chunks of salt along the way to eliminate muck opponents and blocked paths.
At the end of the challenge, the third jewel is waiting.
17. Steamed-and-Salted Banana
Go on the outside wall of the square in the direction of crumbling carousel.
Near the entrance there is a small salt area or a location blocked by Muck.
Remove the muck with salt. Behind it lies the jewel.
18. At a Grate Height
Climbing incrumbling carouselupwards.
The Zebra Bananza is excellent for the vertical walls.
At the top you will find several openings covered with muck. Remove the muck.
One of the openings leads down to the Burger Switch – but for this gem you climb to the roof of the carousel.
This is where the Banandium Gem.
19. ‚Round the Grater-Go-Round!
This bundle belongs to the story path.
Work your way up in the carousel and remove the muck from the openings.
Find the shaft with the arrow down and jump in.
Below you activate the Burger Switch and get the three Banandium Gems.
Challenge: Fallen Towers
20. Through the Mauling Walls
Enter the trap towers next to the large swings.
Follow the normal path through the moving walls.
Approximately halfway there is the first Banandium Gem directly on the main path.
21. A Wall All Alone
Shortly after Jewel 20 you climb up on a wall.
Follow her around the corner and destroy the sandy Wallopoid.
Then hit the ground.
Among them is a secret climbing path that leads you to the second jewel.
22. Falling Mauling Walls
Master the complete trap-tower course.
At the end of the course awaits the third Banandium Gem.
23. Up High in a Sky Container
Climb at the big swings far up.
On one of the upper pillars is a niche that is completely covered by Muck.
Take a chunk of salt upstairs and throw it at the muck.
The niche is exposed and you can collect the jewel.
24. Swingin‘ through Kingly Swings!
This bundle of banandium you get in the course of the main task.
Use the swings, upwinds and the ostrich Bananza to get to the top.
Activate the burger switch.
After that, the three Banandium Gems appear.
25. Soda-Spout Clean Out
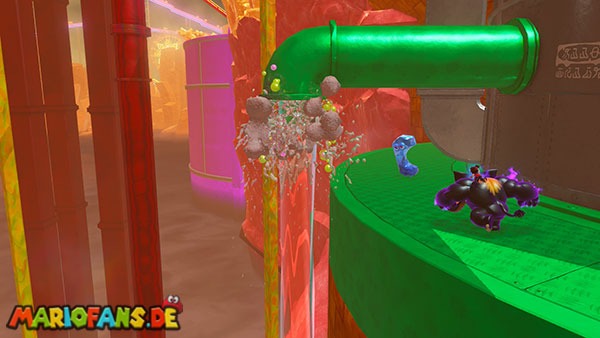
Next to the large swings is the outlet of a lemonade tank.
The tap or outlet is blocked by Muck.
Throw salt on it until all the muck is gone.
Then the jewel becomes accessible.
26. Battle: Muck on Parade
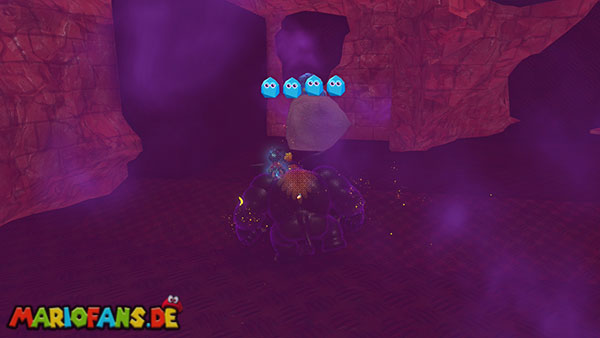
North of the swing area is a constructor.
Let him open the battle ruins and defeat the four Muck opponents.
Throw salt at the opponents to remove their layer of cloth and then attack their exposed bodies.
27. Shifty Smash: Over the Oil Lake
The Shifty Smash challenge is located near the large lion statue.
Activate the crystal and go to the end of the emerging white platform.
Use the Elephant Bananza and work your way backwards over the path while destroying so you don’t fall into the lake of oil.
When you reach 100 percent, the jewel appears.
28. Feast Smashin‘ Stats
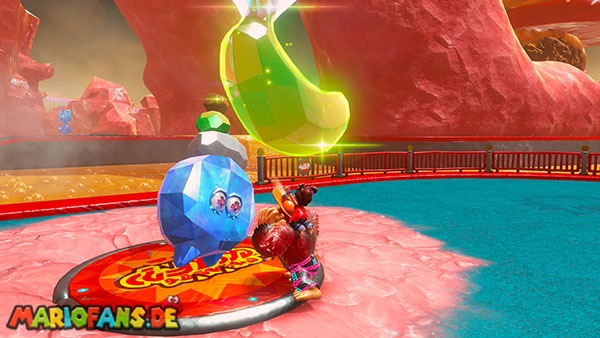
For this task, you have to destroy a total of 30,000 m3 of salt in the Feast Layer.
The term “smallwood statistics” is somewhat misleading – the salt terrain is actually crucial here.
Once you have reached the required amount, talk to Smashintone at the large lion statue.
29. Feast Quiz Master
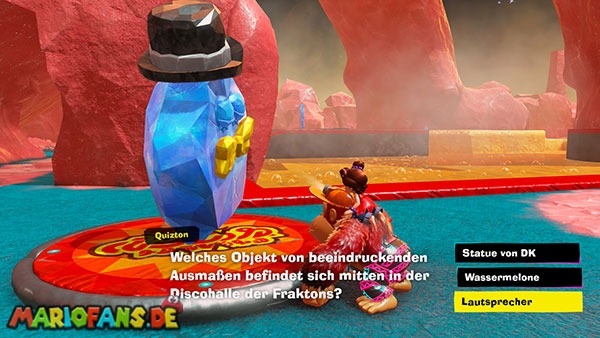
Quiztone stands near the large lion statue.
Answer all three questions correctly.
The correct answers are:
- A huge speaker
- Lighting equipment
- A forest of nuggets
After the third correct answer, you get the jewel.
30. Feast Fragmentone Recovery
Fractones is located below the large lion statue.
Follow the Fractones out of the way to the left.
There you will find the first lost fragment.
Follow it back. On the way back, parts of the platform sink down – so jump on it regularly so that the way comes up again.
After the first returned fragment, you get a jewel.
31. Feast Fragmentone Restoration
For the remaining two fragments, go from Fractones to the right.
Destroy the wall there and find the two parts behind it.
Join both safely back to Fractones.
When all three parts are reunited, you get the second jewel.
32. Banana by a Greasy River
Behind the tail of the large lion statue runs an oil flow.
On its edge is a wall of Muck.
Get salt and remove the muck completely.
Behind it is the Banandium Gem.
33. Center of the Oil Stream
Stick to the oil flow behind the lion statue.
Follow the Void Terrain to its origin and destroy the Terravoider.
As a result, a banandium gem is exposed in the middle of the oil flow.
34. Battle: Mine-Cart Muck
The battle ruin is located on the hind leg of the large lion statue.
You must defeat 13 Muck opponents within the time limit.
Throw the ready salt balls specifically at the opponents in the tower.
If all 13 are eliminated, you get the jewel.
35. Fryin‘ at Ferocious Fryhouse!
This bundle belongs to the main story.
Enter the Brutzelkabinett and jump into the mine cart. This starts the fight against Mad Mixer Remix.
While driving, collect salt and destroy the boss’s green clone armor.
As soon as a gap has emerged, attack with the boulders.
After the win, you activate the Burger Switch and get the three Banandium Gems.
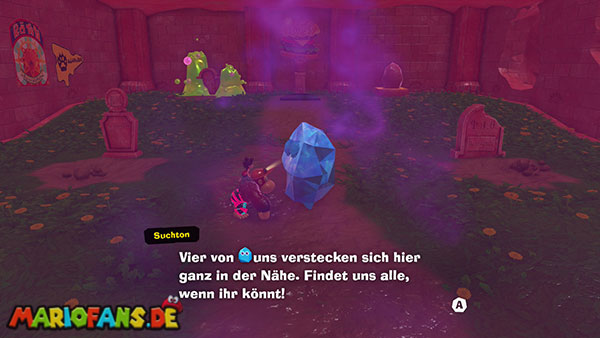
36. Feast Hide-and-Seek
Near the entrance to the Loren Challenge is a hidden room.
Grab by the ladder through the grass floor down and talk to search sound there.
Then find all four hidden fractons in the room.
The hand cloth helps you to locate the hiding places in the terrain.
Challenge: Leulorenparcours
37. Roarcoaster Rest Stop
Let the constructor open the Lorenparcours at the Brutzelkabinett.
Drive through the course with the first mine cart.
At the end of the first section you will reach a resting place with the first jewel.
38. Behind a Roaring Waterfall
During the Lorenparcours you will pass a large waterfall.
Behind the water is a hidden switch.
Meet him in time.
This will take your mine cart to the right track behind the waterfall and take you to the secret jewel.
39. A Roaring Finish
Master the complete Lorenparcours.
At the end of the last stretch awaits the third Banandium Gem.
40. Unmucking the Works
In the lemonade plant near the Brutzelkabinett, a largeblue tubethrough the wall.
Follow the tube to its lower end.
There Muck blocks the drain.
Throw salt at the blockade.
Once the pipe or basin has completely drained, the jewel is exposed on the ground.
41. Fries on the Side
During the big oil cruise you drive past floating fries.
Jump from your platform to the fries.
There is a wall covered with muck.
Throw salt against it and get the jewel from the niche behind it.
42. The Duct Inspector’s Reward
On the oil cruise, ventilation pipes or shafts run on the ceiling.
Climb up and follow the pipes around the large blue construction.
At the end of the shaft you will find the Banandium Gem.
43. Floating on a Royal Oil Cruise!
Follow the complete oil cruise to the end.
Master all moving platforms, clinch barriers and oil passages.
At the finish, you get the story bundle with three Banandium Gems.
44. The Salt’s Last Stop
At the end of the oil cruise, a ladder leads up.
Don’t use them yet.
Instead, go to the right and jump again on your salt platform or raft.
Follow the additional tunnel.
At the very end is the hidden jewel.
45. Eating the Lion’s Share
In the eastern part of SL1400 is a large stone lion head.
Take the left track from the central station.
The route leads directly past the open lion’s mouth.
In the mouth is the jewel.
46. Shifty Smash: Huge Monument
Behind the refinery’s fast travel point is the Shifty Smash challenge, near the access to the oil cruise.
Activate the crystal and destroy the huge monument within the time limit.
The Elephant Bananza makes the task much easier.
47. Danger Doubling Back
To the left of the entrance to the oil cruise is a walled door.
Destroy the wall and follow the trail behind it to the Terravoider.
Destroy him.
Then return the same way.
Near the beginning of the corridor, the Banandium Gem is now accessible.
48. Battle: Labyrinth Lurkers
From the area of the oil cruise follow the main route.
On the left is a battle ruin with five haumauroids.
Master the small labyrinth and defeat all five opponents.
Then the jewel appears.
49. Triple-Gated Banana
Drive on the Lorenbahn to the to-go box station.
There, Muck blocks access.
Remove the green layers with salt and work your way through the multiple blocked areas.
Behind the last barrier lies the jewel.
50. Shifty Smash: Out of the Box
At the break station of the Lorenstrecke there is another Shifty Smash challenge.
Activate the crystal and destroy the given blocks or boxes within the time limit.
After successful completion, the jewel appears.
51. Up through the Layer of Muck
Get off at the Straw Station from the Cart Mine.
There is a fractone with salt.
Use the salt to eliminate the muck above you.
Then activate the Snake Banana and jump with a charged jump to the top of the pillar.
This is where the jewel lies.
52. Folded into the Patty
Prepare for the big banana burger.
The jewel is located in the lower area or bottom of the huge burger patty.
Destroy the edible terrain and dig into it until you reach the banandium.
53. Order Up at the Banana Burger!
Once the big banana burger is fully built, you climb all the way up.
Directly next to the Void lock or Void stake is the jewel.
54. Under the Lion’s Mane
Go inside the large lion wheel or the huge lion construction.
Run once to the bottom or to the lowest point of the mane.
This is where the Banandium Gem.
55. A Snack with a View
A gondola rides on the large Lion’s Wheel, which is completely covered with green muck.
Take enough salt with you and remove the entire layer of clone from the gondola.
Inside is the jewel.
56. Crowning the Monarch
Climb to the huge lion statue or the large lion head.
At the top of his head, the Banandium Gem is like a crown.
57. Feast Chip Exchange
Visit a chip changer on SL1400.
Exchange banandium chips for a banandium gem.
Only the first purchase counts for the collection entry of the Feast Layer.
SL1401: Kitchen & Oil Containers – Banandium Gems 58–69
58. Muckin‘ Up Cat-Scratch Kitchen!
Destroy the Void stake on the large banana burger on SL1400 and jump through the open shaft.
When you land on SL1401, the next Banandium Gem is right in front of you.
59. Battle: Ducking the Muck Wall
Directly to the left of the starting area is a combat ruin.
You have to defeat two Muck opponents.
Use their attacks or salt from the environment to remove their protective layer and then attack the exposed bodies.
60. Stuck in the Gutter
In the first larger area, Muck opponents attack you.
Lock their melting attacks on the drain in the ground.
Once the metal has melted, you can go down.
Then destroy the wall of melted cheese.
Behind it lies the jewel.
61. Cranky’s Feast Rant
Reach the salt storage room.
First go back a bit and destroy the boxes on the wall.
Behind it comes a hidden door.
Follow the corridor to a waterfall.
Cranky Kong hides behind the waterfall.
Listen to his complete tirade and you get the jewel.
62. As Seen through the Grate
Shortly before the salt camp is the waterfall, behind which lies the secret path to Cranky.
Look behind the water for another tunnel.
Follow him.
Behind the grid or at the end of the narrow path lies the jewel.
63. The Muck’s Private Stash
In the salt storage room, several Muck opponents sit on the wall.
Go to the opponents on the right.
Behind them is a hidden area.
Lock the opponents away or defeat them and get the jewel from the secret store.
Challenge: Waves from walls
64. Resist the Tide of Walls
To the left of the fast travel point on the waste oil container is the challenge with the created walls.
Follow the first path straight ahead and avoid the rolling or emerging walls.
The first jewel is on the main path.
65. Bouncing Tall off a Wall
Stay in the same challenge.
Find the place where the walls arise from a drain or generator.
Stand right on it and activate the Snake Banana.
With a fully charged jump you reach the frame or the platform on the Blanket.
There lies the hidden second jewel.
66. Strike Back against the Walls
Master the complete course of the Wall Challenge.
Avoid the changing walls and use the snake gaze if the movements become too fast for you.
At the destination, the third jewel is waiting.
67. Melt through the Metal Bridge
In the area of the waste oil container there is a metal bridge.
Lock one of the Muck opponents so that his melting attack hits the right spot on the bridge.
Use the hand cloth to determine the exact location of the jewel.
Once the metal surface has melted, you can collect the jewel underneath.
68. Stuck in the Muck
Go to the end of the waste oil container.
Nearby there is a salt deposit, which you can activate or expose with the hand clap.
Behind this area lies a thick wall of cloth.
Remove the muck completely with salt.
Behind it hides the jewel.
69. Decked Out in Matching Clothes
This jewel is available only after the main story is completed.
Then return to the end of SL1401 and talk to Glamtone at the sinkhole.
The following garments shall be fitted for the style test:
- Donkey Kong: fire trousers
- Pauline: Yellow Storm Coat
Other coat colours or ties are not required for this test.
Talk to Glamtone while both clothes are worn, and you get the last Banandium Gem of the Feast Layer.
Boss: Defeat Muckety-Muck
At the end of the waste oil container you reach the loading station. Jump into the big pit and the fight against Muckety-Muck begins.
Remove clinch armor
Muckety-Muck’s entire body is covered with green muck.
Lock first his acid attacks on the floor of the arena. The shells melt holes into the underground world and expose salt.
Pull salt out and throw it at Muckety-Muck.
Using Elephant Bananza
With the Elephant Bananza, you can absorb salt particularly effectively and shoot it as large shells.
Concentrate your hits on the main body until the complete clone shell is gone.
Attacking the core
As soon as the armor has melted, the golden machine or the core inside comes to light.
Activate the Kong Bananza and attack the core as often as possible.
Muckety-Muck then rebuilds his skin. Repeat the same procedure.
In the later stages, additional obstacles fall from above. Pay attention to the red markings on the ground and get out of the impact zones in time.
After the victory, you can destroy the Void stake and travel on to the Forbidden Layer.Forbidden Layer
All 72 fossils of the Feast Layer
In the Feast Layer there are a total of 72 fossils:
- 61 old-tyre fossils – normal
- 10 Tube Television Fossils – Rarely
- 1 Robot fossil – extra rare
Most of the fossils are on SL1400. However, some old tires and a tube TV are also in the kitchen and the used oil container on SL1401.
Old tires 1–43 – SL1400
Old tire 1 Directly at the arrivals area of SL1400. The fossil is laterally in a wall.
Old tires 2 In the market area below the large stone bridge. Remove the wall with salt.
Old tire 3 Also under the stone bridge at the market. A further tire is located behind a second loop surface.
Age tire 4 Below the same stone bridge. Use the hand cloth to locate the tire in the rock.
Old tyres 5 Under the market near the Loren or track system.
Age tires 6 follow the tracks under the market into the tunnel. The fossil is in the tunnel area.
Old tire 7 return to the starting gate and climb over the big banners. This is where the tire is in the wall.
Old tire 8 Between starting gate and market stands a stone lion head. The fossil is on its back.
Old tire 9 Right at the entrance to the big market.
Old tires 10 climb to the entrance gate of the large frying area. The fossil is on top of the arch.
Old tyres 11 Behind the high lemonade or pool tower on the fries court.
Old tire 12 At the entrance of the frying area, a fossil is located directly in the side wall.
Old tire 13 Back in the market area below the large stone bridge.
Old tyre 14 On a stone arch at the frying area.
Old tyres 15 on the route between Frittenplatz and Refinery.
Old tire 16 Also on the way to the refinery. Remove a wall of salt there.
Old tires 17 In a cave near the refinery. First destroy the Void influence so that the area becomes accessible.
Old tire 18 On the stone arch at the speed travel point of the refinery.
Old tyres 19 At the top of the fast travel point or building of the refinery.
Old tire 20 Above the water basin in the refinery area.
Old tire 21 On the roof of the entrance to the crumbly carousel.
Old tyres 22 Under the bridge at the fast travel point of the carousel.
Old tyres 23 Go to the back of the fast travel point at the crumbling carousel.
Old tire 24 Directly at the station of the crumbling carousel.
Old tire 25 At the rear wall of the station of the crumbling carousel.
Old tyres 26 In the area of large swings behind a clinch wall. Take salt with you.
Old tyre 27 Behind the challenge ruin at the big swings.
Old tyre 28 At the fast travel point of the swings lies a huge cheese-like block. Destroy it or dig it underneath.
Old tire 29 Pull near the battle ruin at the swings the big turnip from the ground. In the room below is the fossil.
Age tire 30 On the ground behind the fast travel point of the big swings.
Old Tire 31: During the big swing ride, the fossil in Muck sticks to the pillar closest to the fast travel point.
Old tire 32 Also during the swing ride. Take a booby and throw it on the fossil as you pass.
Old tire 33 Above the clothes shop in the area of large swings.
Old tire 34 near the station. The fossil hangs in the tunnel on the Blanket.
Old tire 35 directly above the tunnel entrance at the station.
Age tyre 36 In the immediate vicinity of the fast travel point at the Brutzelkabinett.
Age tire 37 At the refinery on the second stone lion head above the rails.
Old tires 38 In the area of the Brutzelkabinett near the refinery.
Old tire 39 On the nose of a stone lion’s head over the rails at the Brutzelkabinett.
Old tire 40 At the gate immediately behind the fast travel point of the Brutzelkabinett.
Old tire 41 On a blue glowing fries pillar near the Brutzelkabinett.
Age tire 42 During the oil cruise. The fossil is on a pillar in a corner of the interior.
Age Tire 43 At the big Lion wheel just below the lion’s right ear.
Old tyres 44–54 – SL1401
Age tire 44 After landing on SL1401 in the kitchen. The fossil is in a wall.
Age tire 45 In the same kitchen on one of the big pillars.
Old tire 46 On the way out of the kitchen you will find a ladder. Climb down to reach the fossil.
Age tire 47 When opening next to a metal grid in the kitchen.
Old tire 48 On the lower level below the kitchen. The fossil is in a wall covered with muck.
Old tire 49 In the storage room immediately in front of the waste oil container. The fossil lies on the floor between two stacks of boxes.
Age tire 50 In the same storage room. A second tire is in a wall covered with muck.
Old tire 51 Right next to the fast travel point of the waste oil container.
Old tire 52 In the used oil container. Climb the ladder and follow the normal path.
Old tire 53 At the loading station, the fossil is stuck in a wall.
Old tire 54 On the opposite side of the loading station.
Old tyres 55–61 – back to SL1400
Age tire 55 At the foot of the big lion tail at the lion wheel.
Old tire 56 Behind the Lion wheel on a huge fries.
Old tire 57 In the open mouth of the big lion on the lion wheel.
Age tire 58 On one of the movable platforms of the Lion’s Wheel. The fossil is on the back of a fracton.
Old tire 59 On the left forefoot of the large lion statue.
Age tire 60 On a stone immediately next to the left forefoot of the lion.
Old tire 61 On a pillar along the rails near the straw station.
All 10 tube television fossils
Look into his open mouth. There is a rare fossil.
Pull them out of the ground.
This opens up an underground room with the tube television.
First, remove the Void influence or Terravoider.
After that, you can collect the rare fossil in the cave.
Near the top is a small niche with the fossil.
This is where the rare fossil lies.
Drop onto the deeper platform and knock it out.
On one of these platforms is the fossil.
Take salt with you and remove the green layer.
Directly below is a door to a lower-lying room.
Go inside and get the tube TV.
Climb the fries above or in front of the shop.
There is the tenth tube television.
Robots – extra rare fossil
Climb first at the lion’s tail.
At the tip of the tail is salt terrain.
Pull out several bricks of salt and throw them at the large wall of the lion at the back.
Remove the entire muck.
Below this comes the huge robot fossil.
Destroy the surrounding material and collect the extra-rare fossil.
Feast Layer Completely Completed
For complete completion, your checklist should display the following values:
- Banandium Gems: 69 / 69
- Fossils: 72 / 72
- Total: 141 / 141
The Banandium sites are divided into 57 entries on SL1400 and 12 entries on SL1401.
Especially easy to miss are the secret room in the challenge “Salt on the Running Belt”, the jewel behind the waterfall in the Leulorenparcours, the last additional tunnel of the oil cruise and the banana on the Blanket of the Wall Challenge on SL1401.
For the fossils, you should search especially the large Lion wheel thoroughly. There are several old-tyre fossils, a tube television and the only robotic fossil.
Frequent questions about the Feast Layer
How many banandium gems are there?
In the Feast Layer there are a total of 69 Banandium sites: 57 on SL1400 and 12 on SL1401.
How many fossils are there?
You can find a total of 72 fossils: 61 old tires, 10 tube TVs and an extra rare robot.
What helps against the green muck?
Use salt. Tip chunks of white salt terrain and throw them at the muck. The Elephant Bananza is particularly practical because it can absorb and shoot large amounts of salt.
What are the answers to the Quizmeister?
The right answers are giant speakers, lighting equipment and forest from nuggets.
What do you need for “Stylish: Partner Look”?
After completing the main story, you’ll have to put on Donkey Kong’s fire trousers and Pauline’s Yellow Storm Coat. Other garments are not required for this test.
Where is Cranky Kong?
Cranky is located on SL1401. Go back to the salt camp, destroy the boxes in front of the hidden door and follow the corridor. Cranky is waiting behind the waterfall.
Where can I find the robot fossil?
The extra-rare robot fossil is on the back of the giant lion on SL1400. Climb over the tail, get salt there and remove the wall on the back.
How do I defeat Muckety-Muck?
Lock his acid attacks on the ground so that salt is exposed. Throw the salt on his clone armor. Once the core is exposed, attack it with the Kong Bananza. Repeat the procedure until the boss is defeated.