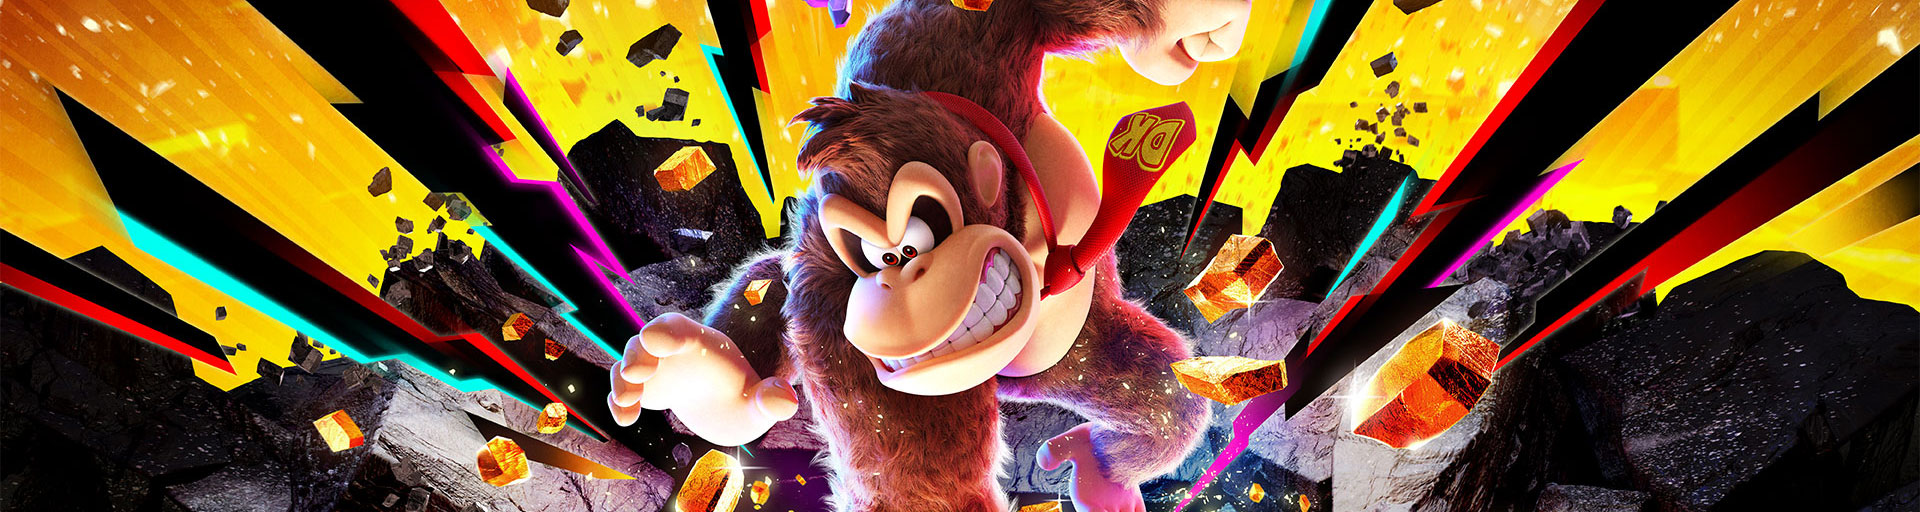

Here you are at the complete walkthrough of the game ‘Donkey Kong Bananza‘ for the Nintendo Switch 2 in the Canyon Layer.
Explore with us the different layers under the earth. In the Canyon Layer SL300 you will find a total of 80 Banandium sites and 72 leaf fossils. Our complete solution shows you all the locations, challenges and hidden spaces.
With the checklist you can tick off each Fund directly. Your progress is automatically stored in the browser.
SL300: Canyon Layer (1-60)
1. Tumbled into the Canyon Layer!
1 – Crashed into the Canyon Layer! (3) Immediately after your arrival at the Canyon Layer, the three Banandium Gems are in front of you. You can not miss them and get them almost automatically on the way.
2. Behind Tallfall Cliffs
2 – Behind the steep fall cliffs journey to the first fast travel point on the steep fall cliffs. Destroy the ground there and drop into the room below. Then break through the back wall to find the Banandium Gem.
3. Hanging in the Cliffs
3 – Hanging in the cliffs From the fast travel point of the steep fall cliffs, you go through the left exit and drop one level lower. Enter the cave in front of you and look up: the jewel hangs on the ceiling. Climb the material up and grab it.
4. Scenic Smokestack View
4 – View at the Schlot Climb right in the starting area outside at the high Schlot upwards. Use the ladder or the climbable material. On a small metal platform at the vent awaits the Banandium Gem.
5. Shifty Smash: Cliff Valley
5 – Shifty Smash: Klippental Above the exit with the mine cart you will find a Shifty Smash challenge. Activate the triangle and destroy all predefined blocks within the time limit. As a reward, the jewel appears.
6. Growing from the Stone Wall
6 – Growing up from the stone wall climbs at the end of the steep fall cliffs above the Lorenstrecke. The Banandium Gem juts out clearly from the rock face or the stone banana projection.
7. Buried in Tallfall Cliffs
7 – Buried under the steep fall cliffs Enter the tunnel on the right in the launch area near the Mine Cart. Drop into the lower room and use the hand cloth near the vent. The sonar shows you the jewel buried in the ground. Then dig it up.
8. Unpilfered Potassium
8 – Non-Looted Banana After your first mine cart ride you get off and immediately go to the right. There is a two-story rock house. Destroy the wall on the lower floor and get the jewel inside.
9. Stuck in a Side Cave
9 – Hidden in a side cave follow after the first mine cart ride the tunnel towards the Plateau village. Behind the tunnel you climb right over the rock and drop to a small cave underneath. Inside you will find the jewel.
10. Pay Dirt under the Plateau
10 – Buried under the plateau From the exit of the previous tunnel you go left over the low rock face. On the concrete floor below is the jewel. Use a booby or the Kong Bananza to destroy the hard ground.
11. Battle: Exploding Pork Platoon
11 – Combat: Exploding pig gang South of the Plateau village, next to the ladder is a hidden access to the battle arena. Destroy the rock face and enter the ruin. Defeat all ten opponents within the time limit and you get the Banandium Gem.
12. Spinning in the Stone Pillar
12 – In the rotating stone pillar in the plateau village you will find a large rotating stone pillar next to the clothes shop. Go or hit yourself inside the pillar. The jewel is directly in it.
13. Moseyed into the Village!
13 – Arrive in Plateau Village! This jewel is located directly at the fast travel point of the Plateau village. You automatically get past it throughout the story.
14. High Shelf Down Below
14 – High shelf low down Talk in the plateau village with the fractone next to the item store. It marks the location. Then go to the camp below the village and use a Brocken jump to reach the high metal platform at the large pipe.
15. Sunken and Soaking
15 – Sunken and soaked Go to the underground camp north of the Plateau village. Next to the large horizontal pipe is a small water basin. The Banandium Gem is down in the water.
16. Mine Your Step
16 – Careful when excavating In the underground camp you will find a booby in a corner. Fire it and open the door to the challenge with the thorns. Cross the first section of sand and thorns. The first jewel is on the normal path.
17. Kaboom in the Hidden Room
17 – Hidden room with popping effect In the same thorn challenge, you traverse the second thorn section and then drop down. Detonate the bombs behind you. Then use a chunk jump and a roll in the air to reach the hidden adjoining room with the second jewel.
18. Mine the Gaps
18 – Through the gaps In the last section of the thorn challenge, you must trigger the booms between the thorns. For this, throw a piece of soft terrain on the boulders and clear a safe path to the last jewel.
19. An Underground Guide
19 – An underground guide In the camp under the Plateau village you will find a small eel by the large pipe. Strike him and follow him as he digs through the ground. At the end of his tunnel, you destroy the wall and find the jewel behind it.
20. Canyon Fragmentone Recovery
20 – Canyon Fragments: First Fragment In the underground camp stands a Fragmentone. Talk to him and find his missing parts. The first fragment is located very close behind or next to the grid. Bring it back safely and you get the first jewel.
21. Canyon Fragmentone Restoration
21 – Canyon Fragments Completely Find the two remaining fragments as well. The small fractons must not fall into the water. Grab therefore a dry path or a ramp through the soft rock and accompany both back to Fragmentone. If all three parts are back, you get another jewel.
22. Traversing the Cliff
22 – At the edge of the cliff, walk in the plateau village towards Lorenstation and stay left at the outer edge of the cliff. Let yourself fall down carefully. There you will find a small cave at the foot of the vent. Destroy the wall inside and take the jewel.
23. Unplundered Produce
23 – Unlooted harvest Behind or below the fast travel point in the Plateau village is a small house. Inside, a large turnip grows. Pull them out of the ground and jump into the resulting pit. Below is the jewel.
24. Wrecked by Kong Bananza
24 – Kong Bananza: City Destruction Talk to the constructor in the Plateau village to unlock the challenge. Turn into the Kong Bananza and destroy the entire building within the time limit. For this you get the first jewel.
25. Quickly with Kong Bananza
25 – Quick with Kong Bananza Repeat or master the city destruction particularly quickly. You have to completely demolish the building and have at least 20 seconds left on the clock. Then the second jewel appears.
26. Beneath the Central Pillar
26 – Under the Center Pillar In the City Destruction Challenge, the third jewel is under the Great Center Pillar. After destroying him, dig right below his former location.
27. Sparkling in the Secret Storeroom
27 – Sparkle in the secret warehouse Go to the outer cliff edge behind the Plateau village’s fast travel point and destroy the soft rock. Work your way through the hidden corridor and blow up the last wall at the end. Behind it is the jewel.
28. Banandium Gem in the House
28 – Banandium Gem in the House After removing the void surface at the Mine Cart in Plateau Village, go back a bit. On the left side is a closed or walled house entrance. Destroy the rock face and get the jewel inside.
29. Unstuck the Mine Cart
29 – Mine Cart Removes the Void Plain from the Cart Mine that continues from the Plateau Village. As soon as the track is clear again, the Banandium Gem appears directly at the rails.
30. Big-Wheel Balloons
30 – Ferris wheel balloons Enter the Ferris wheel challenge at the base of the great summit. Destroy or touch all five balloons. Then you get the first jewel.
31. Big-Wheel Basement
31 – Under the Ferris Wheel In the back room of the Ferris Wheel Challenge, you head back towards the entrance and drop below the platform. With a roll in the air, you reach the deeper level below the previous jewel.
32. Big-Wheel Back Room
32 – Behind the Ferris Wheel Stay in the Ferris Wheel Challenge. On the right side of the large wheel is climbable material. Climb on the outside around the construction. In the hidden back room you will find the third jewel.
33. Shifty Smash: Cliff’s Edge
33 – Shifty Smash: Cliff edge On the outside of the great summit is another Shifty Smash challenge. Activate the triangle and destroy the given blocks in time. Then the jewel appears.
34. Sleeping by the Smokestack
34 – Sleeping at the vent Climb the great summit. About halfway up you will find a destructible door or rock face. Strike straight in instead of following the normal path around the curve. Behind it lies the jewel.
35. Canyon Smashin‘ Stats
35 – Smallwood Statistics Canyon Destroy a total of 30,000 m3 of terrain in the Canyon Layer. Then talk to the corresponding statistical fractone at the big summit. He gives you the jewel.
36. An Edible Earring
36 – An edible earring On the great summit you will find the huge faces carved in the stone of the Void Company. Climb to Poppy Kong’s head. The jewel is like an earring on her ear.
37. Banana up the Nose
37 – Banana in the nose climbing to the large Grumpy Kong stone figure. The banandium gem is directly in his nose and can simply be knocked out or collected.
38. Hidden beneath Scoundrels
38 – Hidden among villains Go to the back of the great summit below the Void Kong stone figure. There you will find a concrete wall. Destroy them, defeat the opponents behind them and then break another wall. In the back room is the jewel.
39. Circling in the Concrete Pillar
39 – In the concrete pillar halfway up the great summit stands a rotating concrete pillar. Use the Kong Bananza to break up the hard concrete. The jewel is inside.
40. Battle: Sturdy Pork Platoon
40 – Fight: Robust band of pigs Halfway up the summit, you will find a battle ruin. Defeat all five robust opponents within the given time. After the fight, you get the jewel.
41. Finally within Reach
41 – Finally close to grasp After the fight against Mad Mixer or after your return from the refinery you reach the exit at the Giraffe vent. Climb onto the large overturned giraffe-shaped tube behind the fast travel point. In one of the “horns” lies the jewel.
42. Battle: Explosive Laps
42 – Combat: Explosive rounds Directly at the exit of the Giraffe Slot is a combat arena. You ride a mine cart in a circle and have to hit the opponents with booby boulders. Defeat all opponents within time and you get the jewel.
43. The Canyon Growtone
43 – Canyon Growtone At the village near the Giraffe Slot you will find the large Growtone. Feed him 500 gold first. A branch grows and exposes the first Banandium Gem.
44. The Hungry Canyon Growtone
44 – Hungry Canyon Growtone Then feed the Growtone another 1,000 gold. As a result, the next branch grows and you get the second jewel.
45. The Sated Canyon Growtone
45 – Satter Canyon-Growtone Growtone last 2,000 gold. After that, he is fully grown and at the very top appears the third jewel.
46. The Lift’s Secret Stop
46 – Secret Elevator Stop Enter the Elevator Challenge north of the Giraffe Slot. While the first elevator moves upwards, there is a destructible stone wall on the side. Strike them in time and get out at the secret stop. Behind it lies the jewel.
47. Going Up!
47 – Up! Stay in the same elevator challenge and follow the normal course. The second banandium according to FIG.
48. Going Way, Way Up!
48 – All the way up! Complete the elevator challenge and reach the end of the course. The third jewel is waiting there.
49. Cranky’s Canyon Rant
49 – Cranky’s Canyontirade North of the Giraffe’s Quick Travel Point, you’ll find Cranky Kong. Listen to his complete rant. Then you get the Banandium Gem.
50. Canyon Hide-and-Seek
50 – Canyon Layer hide and seek game Near the village at the Giraffe Slot you will find the fractone for the hide and seek game. Search the four camouflaged fractons in the area. Watch for suspicious flat or fracton-shaped spots and release them. Once you have found all four, you will get the jewel.
51. Proximity Punching
51 – Close combat West of the village at the constructor of the Lorenstrecke there is a tunnel in the rock. Follow him and destroy the roof of the cooling tower below. Then hit the blue ball several times so that the jewel approaches. Once close enough, grab it before it slips back.
52. Bust through the Giraffe’s Spot
52 – Go from the village towards the high vent and drop down to the right of the platform. Run outside around the vent. At one point, the wall is made of soft material. Destroy them and get the jewel from inside.
53. Behind the Moving Walls
53 – Behind the moving walls As you climb through the vent, you pass a turnstile. Behind it, walls of soft material move back and forth. Strike yourself through or behind these walls. There the jewel is hidden.
54. Above the Moving Walls
54 – Over the moving walls Immediately after the previous jewel, wait until the last moving wall is fully extended. Climb up at her and then turn back. Above there is a destructible wall with the next jewel.
55. Slip into the Secret Room
55 – Secret room in the vent After the section with the rotating walls you will find a small square opening on the side. Jump off and roll in the air through the opening. Behind it is a secret room with the Banandium Gem.
56. Hanging from the Crane
56 – On the crane Reach the roof of the vent. Behind the fast travel point hangs a jewel on a crane. Climb or jump on the construction and get it.
57. The Crane’s Precious Cargo
57 – Precious crane freight Right from the fast travel point on the vent roof, a large concrete block hangs on a crane. Destroy the concrete – easiest with the Kong Bananza. Inside is the jewel.
58. Battle: Knotted-Thorn Knockout
58 – Combat: Thorn knots Talk to the constructor on the vent roof and open the battle ruins. Defeat the two opponents while observing the thorns and obstacles. After the victory you get the jewel.
59. Foreman’s Secret Stash
59 – Secret hideout of the foremen From the highest point of the great summit you can reach a small neighboring island. Jump off, roll in the air and land there. At the bottom of the raised rock formation is a destructible wall. Behind it lies the secret jewel.
60. Canyon Chip Exchange
60 – Canyon Chip Exchange Visit the Banandium Chip Dealer in Plateau Village and exchange enough chips for a Banandium Gem. Only the first jewel bought there is one of the 80 finds of the Canyon Layer.
SL301: Banandium refinery (61-79)
61. Beat Grumpy Kong!
61 – Grumpy Kong defeats! (3) Defeat Grumpy Kong in the first major boss battle of the Canyon Layer. After winning and removing the Void stake, you will automatically receive three Banandium Gems.
62. Battle: Laser-Wall Brawl
62 – Combat: Laser Wall Angel In the refinery you will find a combat ruin with three crockoids on the second larger platform. Avoid the laser walls and defeat all three opponents. Then the jewel appears.
63. The Refinery’s Hidden Hallway
63 – Refinery hideout After the first mine cart ride through the refinery, you go up the ramp. In the Void Kong posters there is a passage on the right. Strike through the hidden corridor and follow it around the corner to the jewel.
64. Peak’s Peek at the Refinery
64 – View over the refinery This jewel belongs to SL301, but is reached from SL300. At the big summit there is a small access down to the refinery. Enter it and follow the short path to the viewing platform with the jewel.
65. Asleep in a Dormitory
65 – Among the Accommodations at the Refinery Staff Member Accommodations is a small platform on the left. Get down there or walk around the building. This is where the jewel lies.
66. Surveying the Staff Dorms
66 – View of Accommodations This SL301 gem is also accessible from SL300. At the Plateau village stands next to the Warp-Gong a high tower. Turn into the Kong Bananza and destroy the concrete roof. Then drop into the tower.
67. Tucked Away in a Dormitory
67 – Hidden in the Accommodation Right from the entrance to the Laser Zone Challenge is a tall stone accommodation building. Strike in or climb to the hidden interior. This is where the Banandium Gem.
68. Battle: Leaps over the Laser
68 – Combat: Laser Jump First remove the void flooring at Staff Member accommodations. This makes the nearby battle ruin accessible. Defeat the two opponents and skip the laser attacks. For the victory you get the jewel.
69. Laser-Zone Crossing
69 – Crossing in the Laser Zone Enter the challenge with the rotating lasers above the Staff Member accommodation. Overcome the first two laser passages. Then you reach the first jewel of the course.
70. Laying Low in the Laser Zone
70 – Buried in the laser zone In the third section of the laser zone challenge, you will find a place for the hand clap. Use your sonar and examine the floor next to it. There the second jewel is buried.
71. Laser-Zone End Point
71 – At the end of the laser zone, complete the entire laser zone challenge. Behind the last laser passage is the third Banandium Gem.
72. De-Voiding the Dorms
72 – Floor Removed in Accommodation Destroy the Void Floor at the Refinery Staff Member Accommodation. Directly at the subsequently reusable Lorenweg appears or lies the jewel.
73. Beat the Mad Mixer!
73 – Mad Mixer defeats! (3) Follow the main story through the refinery and defeat Mad Mixer. After the boss fight, you automatically get three Banandium Gems.
74. Mad Mixer’s Parting Gift
74 – Farewell gift from Mad Mixer After the fight against Mad Mixer, you will go from the fast travel point in the gravel camp over the metal bridge. On the other hand, there is a large storage container or pot. Destroy or dig into it. Therein lies the jewel.
75. Dropped into the Refinery Depths!
75 – Deep in the Refinery (3) Return to SL300 to the high vent and jump down through its opening. After destroying the Void stake, you end up deep inside the refinery and automatically get three Banandium Gems.
76. Shifty Smash: Moving Targets
76 – Shifty Smash: Moving targets In the gravel camp in front of Staff Member accommodations, you will find a Shifty Smash challenge with moving targets. Activate it and destroy all marked blocks within the time limit. Then the jewel appears.
77. Treasure by the Triceratops
77 – Treasure at Triceratops In the gravel camp in front of the Staff Member accommodation stands or lies the large Triceratops structure. Use the handclap and look in loose gravel near it. Grab the jewel in the indicated place.
78. Under Twin-Horn Smokestacks
78 – Under the double horn vent This jewel belongs to SL301, but is reached over SL300. Let the constructor build a lore route to the northeastern island at the Plateau village for 1,000 gold. Drive over, climb on the right of the two vents and destroy the concrete roof with the Kong Bananza. Drop in and collect the jewel.
79. Hanging Hallway over the Refinery
79 – Closed view over the refinery This jewel also belongs to SL301, although the access is on SL300. Reach the small island at the big summit and jump into the vent there. The shaft leads you into a hidden corridor above the refinery where the jewel hangs.
SL302: Canyon Layer (80)
80. Decked Out in Helmets
80 – Fashion Review: Helmets This last Banandium Gem is available only after the main story has been completed. Return to the Canyon Layer and sinkhole on SL302. Equip Donkey Kong with the miners‘ helmet and Pauline with the gold miners‘ clothing. Then talk to Glamtone next to the sinkhole. With the right clothes, you get the 80th and last Banandium Gem of the Canyon Layer.
Fossils of the Canyon Layer
In the Canyon Layer you can find a total of 72 fossils. They are divided into three different ways:
- 61 Fossils
- 10 trilobites
- 1 Triceratops
The fossils are located exclusively on SL300 and SL301. There are no other fossils on SL302. Regularly use the handclap to track down hidden or buried fossils near you.
SL300 – fossils
Fossils
Sheet Fossil 1 Start at the Fast Travel Point Steepfall Cliffs and follow the normal path. On the left, the rock opens to a cliff. The fossil is on the outside of the rock face of this opening.
Blatt-Fossil 2 Take the Mine Cart from the cliff cliffs to the long-necked plateau. Immediately after your arrival, there is a small group of fossils in the sand below the surface. Grab the first leaf there.
Leaf fossil 3 The second fossil is located in the same sandy area directly after the mine cart ride to the Langhals plateau. Use the handclap and dig in the sand.
Leaf fossil 4 Also the third fossil of this group is buried in the sand near the arrival point of the Mine Cart. Pay attention to the opponents in the area.
Blatt-Fossil 5 After the mine cart ride to the Langhals-Plateau there is a house on the right. Climbing to the roof. There, the leaf fossil lies open on the surface.
Leaf Fossil 6 On the way to the Plateau Village, you’ll be on the right. On a raised projection stands a stone cylinder. The fossil is right on top of it.
Leaf fossil 7 Between the long-necked plateau and the plateau village is an elevated grass platform. Directly next to it protrudes a small rock protrusion. There you will find the fossil.
Leaf fossil 8 Go back to the house immediately next to the Loren arrival at the Langhals plateau. The fossil is on the outside of the wall on the lower floor.
Leaf fossil 9 On the ramp up to the plateau village hang several Void posters. Right next to one of these posters, the fossil is in the wall. Take care of the crockoids in this area.
Leaf fossil 10 Just before the ladder up into the plateau village runs a long rock face on the left. Strike yourself through or behind this wall. This is where the fossil is hidden.
Blatt-Fossil 11 In the Plateau village, there is a house near the Lorenstation blocked with void covering. The fossil is on the outside of its wall.
Leaf fossil 12 trip to the fast travel point at the foot of the great summit. Below the ramp or the slope that leads up to the high vent, you will find the fossil.
Leaf Fossil 15: On the edge of Mechaneck Island is a slightly elevated platform. Climb up. The fossil is there open on the projection.
Leaf fossil 16 travel to the fast travel point on Mechaneck Island and use the rear exit. From there you can already recognize the fossil in the environment and reach it directly.
Leaf fossil 17 As you climb through the huge vent next to Mechaneck Island, you will encounter moving walls. In one of these walls is the fossil. Release it during movement.
Leaf fossil 18 Go to the foot of the huge vent next to Mechaneck Island. The fossil is located directly at the base of the construction.
Blatt-Fossil 19 climb almost to the top of the large vent at Mechaneck Island. There you will find a large block of earth. On this block is the fossil.
Leaf fossil 20 Start again at the steep fall cliffs and follow the path forward. Above a concrete wall is a small niche in the rock. That’s where the fossil is.
Leaf fossil 21 Go to the Banandium Gem “View at the vent”. From there, let yourself fall on the lower cliffs. In a higher cave at the foot of the vent you will find the fossil.
Leaf Fossil 22: On the top of the steep-fall cliffs, this fossil is contained in a crystal. Destroy the crystal and take care of the explosive enemies nearby.
Fossil 23 Behind the fast travel point of the long-necked plateau are several stepped cliffs. Climb them up. The first of three leaf fossils lies there.
Leaf fossil 24 Stay on the stepped cliffs behind the long-necked plateau. Climb one level further and search the next lead for the second leaf fossil.
Leaf fossil 25 The third fossil is also located on the stepped rocks behind the long neck plateau. Look for the uppermost or lateral projections.
Leaf fossil 26 This fossil is located directly on the way from the Langhals plateau towards the Plateau village. Stick to the rock face and use the hand cloth if necessary.
Leaf Fossil 27: At the outer edge of the long-necked plateau stands a smaller vent. Search the area around this vent. There is the fossil.
Leaf fossil 28 Just outside the plateau village you will find a small niche below a cliff with a protruding stone cylinder. Therein lies the fossil.
Fossil 29 In the same environment, a stone cylinder sticks out on a cliff. Climb up. The fossil lies directly on this cylinder.
Leaf Fossil 30: On the lower plateau to the side of the plateau village, a crockoid runs around. The fossil is directly on or against this opponent. Defeat him to collect it.
Leaf Fossil 31: On the lower plateau next to the plateau village stands a house. Destroy the wall to the right. Behind her is the fossil.
Leaf fossil 32 Below the Plateau village is an underground space. Grab or hit yourself down and use the handclap to locate the fossil in the chamber.
Leaf-Fossil 33 Go to the deepest platform under the Plateau village and enter the underground tunnel. There are three leaf fossils in concrete. Detonate the nearby boulder and break the first fossil.
Leaf Fossil 34: The second fossil is located immediately next to it in the same concrete tunnel. Also use the blast or explosion to release it from the concrete.
Sheet fossil 35 Also the third leaf is in the same underground tunnel in concrete. Remove the remaining concrete with the explosion or later with the Kong Bananza.
Leaf Fossil 36: On the low plateau next to the plateau village stands a house. Look closely at its window. There, the fossil is visible in the opening.
Blatt-Fossil 37 Take the back exit at the Plateau-Dorf fast travel point. To the right of it you can see the fossil on the outside of the cliff wall.
Leaf fossil 38 Beside the high-speed travel point Plateau village begins a long hidden passage below the sandy slope that leads to the Lorenstation towards the great summit. Follow the tunnel to the very end.
Leaf Fossil 39 Leave the Plateau Village fast travel point through the rear exit and drop to the deepest level. On the outer edge of the map is a small niche with the fossil.
Leaf fossil 40 This fossil is located on the remote foremen island at the single vent. First, remove the corresponding Void stake and use the path through SL301, which also leads to the Banandium Gem 79.
Leaf fossil 41 Go to the area of the banandium jewel “Bruchtest: cliff edge”. From there, an entrance leads into a cave. The fossil is in the concrete and must be knocked out.
Leaf fossil 42 Below the fast travel point at the foot of the great summit and the nearby Lorenstation is a chamber full of gold. The fossil is on a golden crockoid.
Leaf-Fossil 43 Stay in the gold chamber below the great summit. Right next to the barrel cannon, with which you reach the top again, is the next fossil.
Leaf Fossil 44: The third fossil of the gold chamber is located at the foot of the small vent within this underground space.
Leaf Fossil 45: On the other side of the slope at the fast travel point at the foot of the great summit is a large cave. Go inside and turn right back to the entrance. Above the entrance is the fossil.
Leaf Fossil 46: On climbing to the high vent of the great summit, you will pass several stone cylinders. On one of these cylinders on the slope is the fossil.
Leaf Fossil 47: At the foot of the ladder leading to the highest vent of the great summit stands a concrete crockoid. The fossil is right on his head.
Leaf fossil 48 grave at the foot of the same vent ladder down – here is also Banandium Gem 34. Then use the handclap. The fossil is in a nearby wall.
Leaf fossil 49 On the side of the great summit is the huge stone figure of Cranky Kong. Just below his head is a small niche with the fossil.
Leaf fossil 50 climbing to the large stone figure of Void Kong on the other side of the summit. The fossil is near the top of his ear.
Blatt-Fossil 51 Journey to the fast travel point at the Doppelhorn-Schloten. The fossil is located directly above the fast travel point on the construction.
Leaf fossil 60 Mechaneck Island has a giraffe fractone. Climb or look at his long neck. There is the fossil.
Blatt-Fossil 61 rise again through the huge vent next to Mechaneck Island. In one of the rotating concrete obstacles is the last leaf fossil. Use the Kong Bananza to destroy the concrete.
Trilobites on SL300
Trilobit 2 As you climb through the large vent, you will encounter rotating gears or disks of earth. Let yourself consciously fall down from them. Behind a wall on the lower level, the trilobite is hidden.
Trilobite 3: In the huge vent, the trilobite is located in one of the rotating concrete segments. Turn into the Kong Bananza and destroy the segment.
Trilobit 4 Just before the ladder up into the plateau village you will find a large Void Kong poster on the wall. Blow directly through the poster and the wall. In the small room behind is the trilobite.
Trilobit 5 Enter the item/clothing store in the Plateau village. The trilobite is located directly inside the store.
Trilobit 6 On the lower plateau to the side of the Plateau village is a Loren platform. Go to their outer edge. This is where the trilobite lies.
Trilobit 7 On the other side of the slope at the fast travel point at the foot of the great summit is a large cave. Go inside and use the ladder inside. At the top you will find the trilobite.
Trilobit 8 Climbing alongside the great summit to the huge Cranky Kong stone figure. The trilobite is located on the helmet or headdress of the statue.
Trilobit 10 On the outside of Mechaneck Island is the entrance to the Combat Challenge. Use the handclap there. The trilobite is buried nearby in the ground.
SL301 – Banandium refinery: fossils
Fossils
Blatt-Fossil 13 Several slopes run at the offices of the Banandium refinery. Use the handclap there. The fossil is behind a wall marked with a sticker or symbol of a tie.
Blatt-Fossil 14 Go to the Staff Member accommodations of the Banandium refinery. In one of the larger interiors, the leaf fossil is open on or in the wall.
Leaf Fossil 52: During a mine cart ride through SL301, you pass a stone wall after the laser section, in which three leaf fossils are next to each other. Have a booby ready and throw it on the wall. This is how you get the first fossil of the group.
Leaf Fossil 53: The second fossil is located directly next to leaf 52 in the same wall during the mine cart ride. A well-placed blast block can hit several of the fossils at once.
Leaf Fossil 54: The third leaf is also located in this group of fossils on the stone wall behind the laser section. Throw a blast from the moving mine cart in time.
Leaf Fossil 55: When the Mine Cart arrives at the Refinery Staff Member Accommodations, look into the sand immediately to the right of the arrival point. This is where the fossil is buried.
Sheet-Fossil 56 Journey to the Fast Travel Point Refinery Terrace. Climb to the upper floor or to the upper level of the building. That’s where the fossil is.
Blatt-Fossil 57 In one of the high rooms of the Staff Member accommodations, the fossil is located high up on a wall. Climb or destroy the surrounding material to get up.
Leaf fossil 58 In the refinery there is an area with large amounts of scrap. Climb to the top of the plant. The fossil is just below the surface next to a gold outlet and not far from Banandium Gem 76.
Leaf Fossil 59: Just before you reach the area with Mad Mixer or the Mad Mixer, you come to the last big scaffolding. The fossil lies at the foot of the scaffolding immediately below the end of the ladder.
Trilobites on SL301
Trilobit 1 Go to the Staff Member accommodations of the Banandium refinery. Directly in front of the entrance to the challenge ruin there, the trilobit is open on the floor.
Trilobit 9 This trilobite can be found during a lore ride through the refinery. Look for a striking red fossil on a stone wall. During the journey, throw a booby on it to collect it.
Triceratops – Extra-rare fossil
Triceratops fossil The only Triceratops fossil of the Canyon Layer can be found during the mine cart ride through the Banandium refinery on SL301.
During the journey you will reach an abandoned refinery area. On the left side of the track, look for the huge Triceratops skeleton or skull in the wall.
Take in several boobys already in front of the site. During the mine cart ride, repeatedly throw boulders at the great fossil. After several hits, the complete Triceratops fossil is collected.