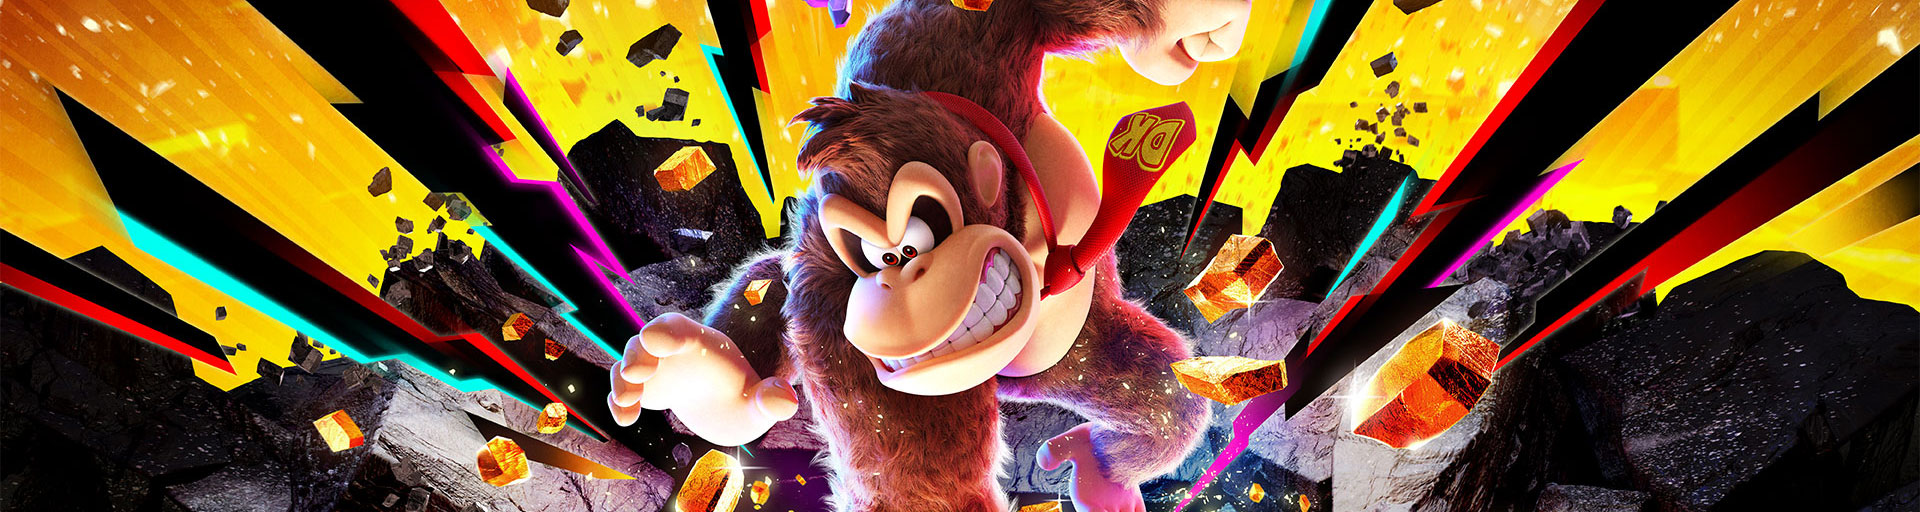

In our Donkey Kong Bananza complete solution to the Freezer Layer we show you all the secrets of the icy sub-levels SL500 to SL503. In this large layer, you will find snowy mountains, the crumbling bridge, the cooling caverns, the Schokolava Lake, the gallop dairy and finally the huge Cool Tower.
Along the way, you’ll also learn the Zebra Bananza, which allows Donkey Kong to sprint at tremendous speed across brittle paths and dangerous surfaces. We help you with all challenges, hidden rooms and boss fights and show you the locations of all 87 Banandium Gems and 72 fossils.
Some banandium gems can only be obtained later or even after the main story has been completed. With our checklist you can track your progress directly while playing and make up for missing collectibles.
SL500: Freezer Layer – Banandium Gems 1–39
1. Chillin‘ in the Freezer Layer!
After your decision at the fork, you reach the Freezer Layer. The first Banandium Gem is right in front of you when you arrive and cannot be missed.
2. A View of Crumbly Bridge
At the start mountain, the first long snow slope leads down. Below the end of this slope is a cave. Spring or dig in and get the jewel with a view of the Broesel Bridge.
3. A Snowy-Cliffside Secret
Slide down the first big snow slope and stay right. There is a striking stepped rock face. Strike straight through it and then use the handclap. The jewel is hidden in the snow or terrain behind it.
4. Turned Up under Turnips
On the start mountain you will find a large beet field. Pull the beets out of the ground and dig directly below it. In the cave under the vegetable lies the Banandium Gem.
5. Slumbering in the Snow
Follow the long path at the foot of the start mountain to the rear. There is a small cave there. Inside, the jewel lies under a large pile of snow. Use the handclap and dig it up.
6. Under the Cliff-Edge Scoop Hut
Look for the three-story ice hut in zebra form on the cliff edge. Stand on the building and dig right down through the snow and material. Under the hut is the jewel.
7. Enshrined atop the Pillar
Slide down the second large snow slope. Turn right back down and go to the high pillar. Use the handclap in front of her. As a result, a hidden platform drives up and takes you to the jewel on the pillar.
8. Battle: Snowball Rollin‘
At the foot of the second snow slope is an ice hut. Enter or destroy access to the combat portal inside. Defeat all three rollus codes within the time limit and you get the Banandium Gem.
9. Over the Freezing River
Below the fast travel point on the Broesel Bridge, an alternative path leads through a hot cave. Cross the lava or cool it with ice. After climbing up the other side, you drop from the edge to the lower platform with the jewel.
10. Hidden behind the Waterfall
Search the waterfall near the Broesel Bridge. Roll or jump directly through the water. Behind the waterfall is a secret corridor. The jewel lies straight inside.
11. Across Crumbly Bridge
Follow the normal route over the Broesel Bridge. On the other hand, you reach the next section with the help of a barrel cannon. The jewel lies directly on this main path and is hard to miss.
12. Clearing a Red-Hot Path
Below the village side of the crumbling bridge is a challenge portal. In the course, large lava columns rotate. Work your way up the first pillar. The jewel is waiting on its top.
13. Behind the Red-Hot Paths
Stay in the same lava challenge. Climb up at the penultimate rotating column and then walk around the platform outside. Let yourself fall into the hidden section. Use the already created gap in the lava path and follow it to the secret jewel.
14. Climbing a Red-Hot Path
Completely master the lava challenge. Overcome the last rotating pillars and reach the end of the course. There you get the third Banandium Gem.
15. Battle: Quick Quake Quarrel
Near the entrance to the cooling caverns you will find a combat challenge. Always activate the switch at the end of the ice rink and defeat all six crockoids within the time limit.
16. Un-Voiding the Scoop Hut
On the way to becoming a zebra elder, you must rid an area of void terrain. Directly next to the subsequently opened passage is a zebra-like ice hut. Strike in and collect the jewel inside.
17. The Freezer Growtone
To the right of the crumbling bridge you will find the Growtone of the Freezer Layer. Feed it first with500 Gold. On the first branch appears the Banandium Gem.
18. The Hungry Freezer Growtone
Keep feeding the same growtone. Give him more1,000 goldso that the next branch grows and the second jewel appears.
19. The Sated Freezer Growtone
Feed the Growtone one last time3,000 gold. Once it is completely full, the last branch grows with the third Banandium Gem.
20. Freezer Hide-and-Seek
Go to the lower house area at the central fast travel point. Talk to the search tone and find the four camouflaged fractons in the area. Use the hand clap and examine both the floor and higher parts of the building. After the fourth find, you get the jewel.
21. Heavily Protected Produce
Behind the central fast travel point is a deeper house area blocked by Void-Terrain. Remove the void completely. This makes the Banandium Gem accessible.
22. Scoop Hut in the Sky
This jewel is particularly easy to reach as soon as youOstrich Bananzafrom the forest layer. Jump from the roof of the Cool Tower and glide to the nearby floating island. The jewel is in the ice hut there.
23. Cracking Open Coolstripe Cavern
Follow the main story and activate the large vibration mechanism in front of the cooling caverns. This opens the access to the cave system. You get the jewel at the breakthrough.
24. Edge of a Cool Pool
In the cooling caverns an Icicle leads over the water. Stand on it and use the handclap. This creates three hidden platforms. Jump over them to Banandium Gem.
25. Beware Falling Icicles
In the first large open space of the cooling caverns is an elevated platform, which is reached via a narrow sandy path. Watch for the falling Icicle and run over to the jewel.
26. Battle: Barely Skating By
In the first large room of the cooling caverns is a combat ruin. Defeat all five enemies on the slippery ice within the time limit and then collect the jewel.
27. Deep in the Cavern
Follow the normal path deeper through the cooling caverns. At the exit of the first large room with the falling Icicle, the jewel lies directly on your path.
28. Sitting on the Snow
Take the side exit from the cooling caverns. On a small platform begins a long fragile path, which later leads to the roof. The jewel lies on the snowy platform at the beginning of this path.
29. Gazing at the Cooling Tower
Follow the path through the cooling caverns. Shortly before the exit you will find on the left a platform with an unobstructed view of the Cool Tower. This is where the jewel lies.
30. Kept in a Coolstripe Cubby
Directly behind the exit of the cooling caverns, even before you drop to the next sub-level, there is loose terrain at the metal grid. Grab down there and open the hidden niche with the jewel.
31. Shifty Smash: Above the Caverns
Once you own the Zebra Bananza, you can sprint over the fragile path to the roof of the refrigerated caverns. There is a Shifty Smash challenge. Destroy all targets within the time limit.
32. Coolstripe Cavern’s Lost Treasure
Speak on the roof of the refrigerator caverns with the zebra that marks the location for you. Then stand directly over the marker and hit through the ground. Near a gold ring is the hidden treasure.
33. Shifty Smash: Ice-Cold Lakeside
At the lower part of the Cool Tower is a frozen ring or small ice lake. There you will find the next Shifty Smash challenge. Master it within the given time.
34. U-Turn on a Crumbly Road
On the back of the Cool Tower is a Zebra Bananza challenge. Sprint over the crumbling track and destroy all balloons. One of the jewels you get for the full run.
35. Crumbly-Road Run
Turn right after entering the Broselbahn and run back under the starting area. There is a jewel on the ceiling. Spring or release it during the sprint.
36. A Crusty Trust Fall
At the beginning of the Broeselbahn you can consciously drop down through a fragile section. Below the normal route is a hidden area with the jewel.
37. Behind the Cooling Tower’s Eyes
The Cool Tower is designed like a giant zebra head. Blow through one of his icy eyes. Behind it, a secret passage leads directly to the Banandium Gem.
38. Cranky’s Freezer Rant
Reach the top floor of the Cool Tower. Go outside through the left window and immediately climb to the right of the back of the tower. On the roof you will find Cranky Kong. Listen to his complete tirade and you get the jewel.
39. Freezer Chip Exchange
Visit the chip changer of the Freezer layer and exchange enough banandium chips. The price depends on how many jewels you have already bought from chip changers in other layers.
SL501: Schokolava Lake & Galopp Dairy – Banandium Gems 40–75
40. Through Coolstripe Cavern
Follow the main path through the cooling caverns and destroy the Void stake at the end. Then drop to SL501. The jewel is right next to your landing.
41. Molten-Hot Choco Banana
Just behind the fast travel point on Lake Schokolava lies a jewel under hot Schokolava. Use a falling icicle or ice to cool the lava and expose the jewel.
42. Battle: Broiling Bowling Brawl
Near the first area on Lake Schokolava is a battle ruin. Defeat all four Rolluskoiden. Use the opponents or chunks of ice to create safe paths through the lava.
43. Coolin‘ Down in Canter Creamery!
Work your way through the Schokolava Lake to the gallop dairy. Cool the hot chocolate with chunks of ice and climb the resulting safe surfaces. At the top you get the jewel.
44. Battle: Magma Mayhem
To the left of the entrance of the gallop dairy is a combat portal. Defeat all enemies and use the icy enemies to make your way over the hot surfaces.
45. Traversing the Massive Iceberg
To the right of the entrance of the gallop dairy stands a constructor. Pay him to clear the portal to the Iceberg Challenge. Sprint over the sinking ice sheets. The first jewel is at the second target.
46. Edge of the Massive Iceberg
Stay in the Iceberg Challenge. Shortly after the first jewel, there is a hidden jewel on the left on a sloping ice sheet. Get it quickly before the platform sinks.
47. Mastering the Massive Iceberg
Reach the end of the Iceberg Challenge before the track disappears completely in the water. The third jewel is waiting there.
48. Smothered in Chocolava
One of the broken records near the Cool Tower contains a Banandium Gem in the lava. Use the ice machine and guide the ice to this point. Destroy disturbing walls if necessary.
49. Shifty Smash: Over Ice and Lava
In the case of the dairy’s large fans, a fragile path leads upwards. Once you own the Zebra Bananza, you sprint up and complete the Shifty Smash challenge on the upper platform.
50. Freezer Smashin‘ Stats
Total destruction20,000 m3 of snowin the freezer layer. Then talk to Smashintone among the big fans of the gallop dairy.
51. Found above the Fan
Climbing up at the big fans of the gallop dairy. On the upper level of the second or medium large fan lies the jewel.
52. Kept Warm in the Field
To the right of the zebra elder is a hot lava field. Strike an icy opponent into the large pile of lava. The lava solidifies and the jewel hidden underneath is exposed.
53. Trembling Steps through Powder
Cool the lava in front of the nearby challenge portal with an ice opponent and enter the course. Regularly use the handclap to clear the snow and spot the safe path. The first jewel is at the end of the first section.
54. Treacherous Steps through Powder
Follow the snowy path to the barrel cannon at the actual end of the challenge. There you will get the second jewel.
55. Extra Steps through Powder
Do not use the barrel cannon yet. Instead, go straight ahead and master the extra, more difficult snow path. At the back is the third jewel.
56. Through a Too-Hot Tunnel
In the lava field to the right of the zebra elder stands a large turnip amid the heat. Cool the path with ice and pull out the turnip. Underneath it leads a tunnel through the lava. Use an ice cream to surf and reach the jewel.
57. A View of Canter Creamery
This SL501 jewel can be reached via a hidden access on SL500. Look in the cave below the Broesel Bridge for a hidden wall and a Void stake. Destroy it and drop down to SL501. There the jewel hangs in a remote area.
58. Beneath the Zig-Zag Bridges
At the zigzag bridges, there is a record piece in the lava. Use it or a chunk for terrain surfing and slide down the long lava slope. Below you will find the jewel.
59. Stake-Hidden Snack
You can also reach this jewel from SL500. Go to the foot of the starting mountain and look for a Void stake in the cave. Destroy him. The thus opened shaft leads to a secret area on SL501 with the jewel.
60. Buried in the Cooling Tower
In the first big mystery room of the Coolturm you have to control the ice maker. Direct the ice to the lower left corner of the terrain block. This will cool the lava around the hidden jewel.
61. Behind the Cooling Tower
Outside the Cool Tower runs a narrow metal path. Follow him once around the back of the tower. This is where the Banandium Gem.
Postgame – Zebra Bananza sample
The Banandium Gems 62 to 75 appear only after the credits. Collect at least 350 Banandium Gems and then talk to the zebra elder. This starts the Bananza sample of the Freezer Layer.
62. Amuse-Boost Finish Line
Complete the Amuse Boost course within the given time limit.
63. Amuse-Boost Fast Finish
Complete the same course again and achieve the goal with at least20 seconds remaining time.
64. Shifty Smash: Trot up the Tower
Complete the Shifty Smash challenge right next to the Amuse boost course and destroy all targets in time.
65. Hurl d’Oeuvres Finish Line
Master the Hurl-d’Oeuvres course within the normal time limit.
66. Hurl d’Oeuvres Fast Finish
Repeat the challenge and keep at least 20 seconds on the watch.
67. Shifty Smash: Damp Dodge ’n‘ Dash
Complete the Shifty Smash challenge next to the Hurl-d’Oeuvres course.
68. Shocking Cioppino Finish Line
Reach the end of the electric Cioppino course within the time limit.
69. Shocking Cioppino Fast Finish
Master the course again with at least 20 seconds remaining time.
70. Shifty Smash: Splashy Ascent
Complete the associated Shifty Smash challenge and destroy all targets within time.
71. Switcheroo Entrée Finish Line
Use the changing platforms and reach the end of the Switcheroo Entrée course in time.
72. Switcheroo Entrée Fast Finish
Complete the course again and save at least 20 seconds.
73. Shifty Smash: Swift Switcheroo
Complete the Shifty Smash challenge next to Switcheroo Entrée successfully.
74. Dangerous Dessert Finish Line
Master the last course of the Zebra Bananza sample within the normal time limit.
75. Dangerous Dessert Fast Finish
Complete “Dangerous Dessert” again and reach the finish line with at least 20 seconds remaining time.
SL502: Hot Hoof Heizer – Banandium Gems 76–86
76. Hoofin‘ it to Hot-Hoof Heater!
After completing the Cool Tower, the path to SL502 opens. Let yourself fall through the new shaft. The first jewel is right at your landing site.
77. Hidden in Chocolava Lake
Cross the first bridge of SL502. Below this bridge there is a gap in the lava. Drop down there and follow the tunnel with the rotating rock platforms to the jewel.
78. Battle: Fighting on the Run
To the right of the starting area, a bridge leads to a battle ruin. Let the constructor clear the access and use the Zebra Bananza. Defeat all eight opponents on the long ice path.
79. Scraping the Slope
Behind the first bridge is the entrance to the ice portion challenge. Direct the machine’s ice over the slope so that it reaches the large shell below. You get the first jewel for the successful solution.
80. A Sneaky Second Serving
In the same challenge, a second shell is hidden in the middle of the slope. Dig them out first and lead the rink to this hidden bowl first. For this you get the second jewel.
81. Over the Slope
In the same challenge, go straight to the ice maker. On the left is a hidden ascent to the construction. Climb up and get the third jewel.
82. Treat on a Tiny Island
Follow the first bridge from the fast travel point and then take on the right the appearing bridge between the lava columns. It leads to a tiny floating island with the jewel.
83. Freezer Fragmentone Recovery
Southwest of the main island, Fractones stands on a chocolate ledge. Find one of its missing fragments in the environment and bring it back. For this you get the first jewel.
84. Freezer Fragmentone Restoration
Also find the two remaining fragments and safely return them to Fractones. Once all three parts are united, you get the second jewel.
85. Tricky Trot to the Ice Maker
Next to the main island leads a long, only in the course, route to the ice machine. Activate the Zebra Bananza and sprint across the path without stopping. Above is the jewel.
86. Looking over Chocolava
This jewel can be reached via a hidden access from SL501. To the left of the entrance of the gallop dairy leads a cave under the large fans. Follow the tunnel to the Void stake, destroy it and drop to SL502.
SL503 – Banandium Gem 87
87. Stuck among the Pipes
After youInflammonitedefeated, opens the way to the compressor and to SL503.
Jump into the shaft and immediately activate the Ostrich Bananza. Glide during descent to the pipes on the wall. On one of the pipes hangs the last regular banandium gem of the Freezer layer.
All 72 fossils from the Freezer Layer
There are 72 fossils in the Freezer layer. They shall be distributed among:
- 61 Sealilies – Normal Fossils
- 10 Preserved Buzzy Beetle – Rare Fossils
- 1 T. rex – extra-rare fossil
The fossils are located on SL500, SL501 and SL502. There are no fossils on SL503. Use the hand clapper regularly, as many finds are hidden under snow, lava or in rock walls.
SL500 – Sealilies
Seelilie 1 Below the large start mountain of SL500. At the foot of the mountain, drop to the lower level and use the hand cloth.
Seelilie 2 Also below the start mountain, next to one of the zebra ice huts.
Seelilie 3 Below the start mountain lies a cave entrance. The fossil is already visible when entering the cave.
Seelilie 4 In a cave in the start mountain. Follow the gold vein or boulders deeper into the rock.
Sealily 5 is in the same cave system as Sealily 4. Follow the gold tracks even further through the terrain.
Seelilie 6 In a small cave near the Broesel Bridge. Strike the snow wall at the edge of the path.
Seelily 7 Under a zebra-like ice hut. Tomb right on the building down.
Seelilie 8 Below the start mountain above a slideway next to an ice hut.
Seelilie 9 Behind an ice hut near the Broesel Bridge.
Seelilie 10 Above the waterfall at the crumbling bridge. Climb to the higher rock level above the water.
Seelilie 11 Directly under the crumbling bridge. Carefully drop onto the underlying rock platform.
Seelilie 12 Between two zebra ice huts in the village area.
Seelilie 13 In a cave below the start mountain. The fossil is in a crystal that you must destroy first.
Seelilie 29 Directly at the fast travel point at the Coolturm.
Seelilie 30 Next to the Cool Tower near a bonus challenge.
Seelilie 31 Behind a zebra ice hut immediately next to the initially closed entrance of the cooling caverns.
Seelilie 32 On the nose of a large zebra ice hut at the central fast travel point.
Seelilie 33 Inside an ice hut. Strike a pit into the outside wall to get inside.
Seelilie 34 Below the start mountain directly on the wall next to a cave entrance.
Seelilie 35 Directly at the shelter at the water basin of the cooling cavern.
Seelilie 36 Inside the cooling caverns. Use the handclap in the first large cave room.
Seelilie 37 Also in the cooling caverns, below the shelter at the cave basin.
Seelilie 50 On the bridge at the top floor of the Cool Tower.
Seelilie 51 Right next to the fast travel point on the top floor of the Cool Tower.
Sealily 52 In a small ice ball or ice cream ball near the upper projection of the cooling cavern.
Seelilie 53 In a particularly large ice cream ball at the upper shelter of the cooling cavern.
Seelilie 54 In a small cave near the upper projection of the cooling cavern.
Seelilie 55 In the waterfall at the crumbling bridge. Search within or directly behind the water.
Seelilie 56 Once again below the start mountain. Use the handclap in the snow.
Seelilie 57 Upstairs on a large ice hut near the cave shelter on the Startberg.
Seelilie 59 At the upper projection of the cooling caverns.
SL501 – Sealilies
Seelilie 14 Directly at the fast travel point on Schokolava Lake.
Seelilie 15 On a small hill near the Schokolava Lake.
Seelilie 16 Near the gallop dairy’s grocery store.
Seelilie 17 Underground near the shelter of the gallop dairy. Grab down and use the hand cloth.
Seelilie 18 Near the shelter of the gallop dairy at the colorful sugar sprinkles.
Seelilie 19 At the zigzag bridges immediately next to a lava flow.
Seelilie 20 Near the interior of the Cool Tower.
Seelily 21 Another fossil immediately near the interior of the Cool Tower. Look deeper into the terrain.
Seelily 22 Buried in lava below the chip changer. Cool the lava with ice.
Seelilie 23 On the snow directly below the chip changer area.
Seelilie 24 In a small hill near the Schokolava Lake. Grab into the hill.
Seelilie 25 In a small ice cream hill in the surroundings of the gallop dairy.
Seelilie 26 On the outer cliff edge near the shelter of the gallop dairy.
Seelilie 27 Tomb directly below the shelter of the Galop Dairy down.
Seelilie 28 In a lava tunnel below the gallop dairy. Cool the path with ice.
Seelilie 49 Below the top floor of the Cool Tower.
Seelilie 58 Near the zigzag bridges.
Seelilie 60 At the gallop dairy next to the Schokolava Lake.
Seelilie 61 At the zigzag bridges next to a huge ice cube.
SL502 – Sealilies
Seelilie 38 Behind a small hill in the area of the hot hoof heater.
Seelilie 39 Below the hot hoof heater. Let yourself fall on the deeper platform.
Seelilie 40 Also under the hot hoof heater. Use the hand cloth between the rock platforms.
Seelilie 41 Another fossil on the lower level of the hot hoof heater.
Seelilie 42 Just below the shelter there.
Seelily 43 A second fossil below the same shelter. Look a little further on the terrain.
Seelilie 44 In the immediate vicinity of the hot hoof shelter.
Seelilie 45 On a small island near the hot hoof heater.
Seelilie 46 Near the fast travel point of the hot hoof heater. Search on the outer edge of the island.
Seelilie 47 On the way between the hot hoof heater and the compressor.
Seelilie 48 Below a bridge near the Hot Hoof Heizer.
Preserved Buzzy Beetle – all 10 rare fossils
Preserved Buzzy Beetle 1 – SL500 Below the start mountain. Go right from the first snow slide down to the hidden shelter. The fossil lies on the projection outside.
Preserved Buzzy Beetle 2 – SL500 On the small ice hut island near the waterfall.
Preserved Buzzy Beetle 3 – SL500 On the roof or plateau above the cooling caverns. Later, use the zebra Bananza to sprint the fragile way up.
Preserved Buzzy Beetle 4 – SL502 Near the shelter at Hot Hoof Heizer.
Preserved Buzzy Beetle 5 – SL501 Near Shokolava Lake. Use the handclap on the outer edge of the area.
Preserved Buzzy Beetle 6 – SL501 at the zigzag bridges.
Preserved Buzzy Beetle 7 – SL501 underground in the vicinity of the zigzag bridges. Grave in the snow or terrain down.
Preserved Buzzy Beetle 8 – SL501 Below or near the gallop dairy. Use the handclap there to find the exact point.
Preserved Buzzy Beetle 9 – SL500 Close to the upper edge of the cooling caverns and the shelter there.
Preserved Buzzy Beetle 10 – SL500 Inside the cooling caverns in the large chamber that later leads to SL501. Examine the ice wall with the hand cloth.
T.-Rex – extra-rare fossil
You need the Zebra Bananza for this. At the exit of the cooling caverns, use the long brittle path and sprint onto the roof.
Look there for the largest depression or the area under a bridge. The fossil is hidden under a thick layer of snow.
Use the handclap until the large outline of the T. rex skeleton becomes visible. Then remove the snow and release the complete fossil.
Freezer Layer Completely Complete
For the complete collection of the Freezer layers, you should have reached the following values at the end:
- Banandium Gems: 87 / 87
- Fossils: 72 / 72
- Total: 159 / 159
The Freezer layer thus has most of the Banandium sites of a single layer. Especially easy to miss are the secret entrances between SL500, SL501 and SL502, the jewels on the roof of the refrigerator caverns, as well as the 14 postgame jewels of the Zebra Bananza sample.
For the fossils, you should pay particular attention to the roof of the cooling caverns. There are both a rare preserved Buzzy Beetle and the only T. rex fossil of the entire layer.