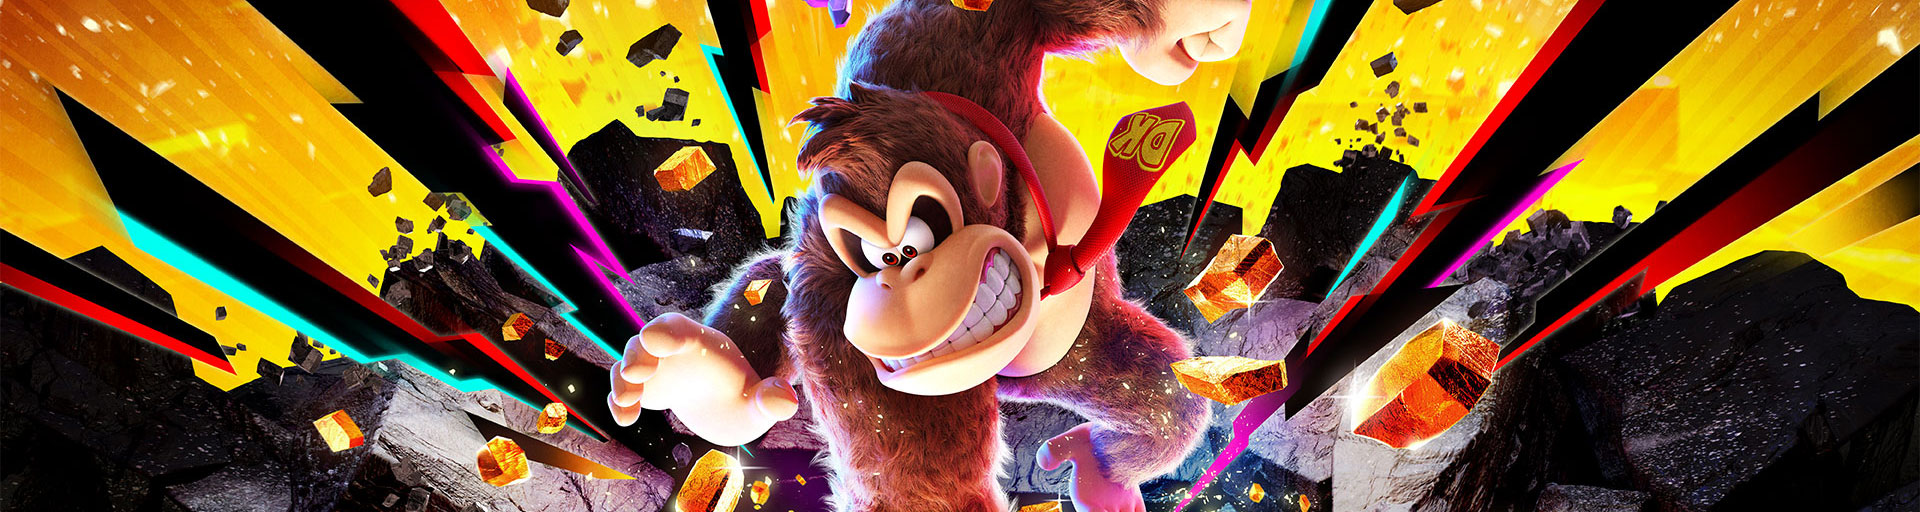

In our Donkey Kong Bananza complete solution to the Tempest Layer we show you all the secrets of the sub-levels SL900 to SL903. After the sunny Resort Layer, Donkey Kong and Pauline expect the complete opposite here: continuous rain, thunderstorms, tornadoes, hot lava and huge stone elephants characterize one of the most extensive layers in the game.
The Tempest Layer is also especially important because this is where you unlock the powerful Elephant Bananza. Donkey Kong can suck in large amounts of terrain, lava and other materials and then spit them out as shells. Numerous hidden banandium gems and fossils can only be reached with this ability.
In total, there are 70 Banandium sites and 72 fossils in the Tempest Layer. Our solution takes you through the Prediction Refuge, the Warmdusch Cave, the large elephant spa and the dangerous path to the storm station. We also show you all three fights against the Sinister Blusterwing and the Bananza sample of the elephant elders in the postgame.
Tempest Layer – Main Trail & Elephant Bananza
After the Resort Layer you land on SL900 in a stormy mountain landscape. First, follow the path to the Prediction Refuge and talk to the elephants.
The friendly residents usually provide good weather together with the Singing Stormwing. However, Void has brought the bird under his control with a mask and transformed it into the Sinister Blusterwing.
First fight against the Sinister Blusterwing
In the first fight, you do not yet own the Elephant Bananza.
- Tear chunks from the floor.
- Throw them against the two wings of the Stormwing.
- Watch out for tornadoes and bullets.
- If both wings are hit, the boss crashes.
- Jump on him and attack his body.
After the fight, you fall to SL901.
Unlock Elephant Bananza
On SL901, you search for two parts of the old record. Both are located in the area below the elephant village and can be reached via cable slides and the the cave in SL901.
Bring both plate parts to the elephant elder. Pauline learns a new song and Donkey Kong receives the Elephant Bananza.
In this form you can:
- terrain and objects,
- The lava disappears,
- store sucked-in material,
- shooting chunks with great force, and
- Expose hidden caves much faster.
Second fight against the Sinister Blusterwing
In the second fight on SL901, you can use the Elephant Bananza.
Suck in the hot material or lava and shoot the stored chunks on the wings. If both wings are destroyed, the Stormwing crashes again and can be attacked directly.
After the victory you reach SL902.
Third fight at the Storm Station
At the end of SL902 you reach the storm station and face the bird one last time.
- Avoid the marked lightning strikes.
- Suck in enough material with the Elephant Bananza.
- Wait during the big tornado with your throws.
- Meet both wings with stored pieces.
- Follow the boss to SL903.
- Land the last hit and destroy the Void mask.
SL903 belongs only to the end of the boss fight. There are no banandium gems and no fossils there.
SL900: Tempest Layer – Banandium Gems 1–24
1. Stormed into the Tempest!
After arriving at the Tempest Layer, the first bundle of banandium is right in front of you. This find belongs to history and cannot be missed.
2. Lifted to the Skies
To the left of the launch area, several rubber platforms hover over the mountain.
Throw chunks at the first platforms to sink. Then stand on it and use the handclap to lift it again.
Work your way up from platform to platform. For the last platform, take a chunk upstairs and throw it on the floating platform.
The jewel is waiting at the top.
3. Tucked by the Tornado
Go to the large tornado in the western area of the starting area.
On the outer left cliff face is a small cave.
Hit the wall and enter the niche. The jewel is in it.
4. Hiding Up High
Leave the elephant elders room by the right exit.
In the area, voltioids dig through the ground and expose upwind ore.
Use a chunk of this material and get carried far up. On the higher platform you will find the jewel.
5. Rocketing over Lava
Right next to the elephant elders is the challengeUpwind maze.
Follow the normal path through the upwind ore platforms and lava.
The first jewel lies directly on the main path.
6. Lurking beyond Lava
Stay in the same challenge.
Immediately after the first jewel you reach a section with several lava obstacles.
Use the last upwind platform and get carried to the top right to a secret sidewalk.
Follow the narrow path next to the lava on the Blanket. The jewel is buried in the sand.
7. Rocketing through Lava
Complete the entire upwind maze.
At the end of the challenge awaits the third Banandium Gem.
8. Elephant Elder’s Secret Snack
Go into the elephant elders room.
Directly behind the great head or throne of the elders is a hidden cavity in the mountain.
Strike in and get the jewel.
9. The Tempest Growtone
Find the Growtone on SL900 and feed it400 gold.
The first branch grows and exposes the Banandium Gem.
10. The Hungry Tempest Growtone
Keep feeding the same growtone.
Once you have invested a total of 2,000 gold, the second branch grows with the next jewel.
11. The Sated Tempest Growtone
Feed the growtone to the last stage.
With a total of 4,000 gold, the top branch grows and you get the third jewel.
12. Rain-Soaked Roughhousing
Above the elephant elder room is a glass battle arena.
Defeat all three enemy waves.
Make sure that the rain and the restricted movement area make dodging difficult.
After the last wave, the jewel appears.
13. Cavernous Corridors
Go to the access that leads from SL900 towards SL901 and Lava Lake.
Directly opposite is a sand wall.
Throw yourself through and enter the cave system. On the first big pillar, you turn left.
Use the handclap and follow the sonar signal to the jewel.
14. Tour through the Tunnels
Stay in the same cave system.
Near the previous jewel there is a second sand wall further up.
Strike through and follow the fractons through the narrow tunnels.
At the end of the course is the Banandium Gem.
15. The Secret Lava Pocket
You can only get this jewel comfortably after you haveElephant BananzaUnlocked on SL901.
Return to SL900.
Behind the access to the lava lake is a large pile of lava.
Turn into the Elephant Bananza and soak the lava completely.
Below is the jewel.
Postgame – Bananza sample of elephant elders
Entries 16 to 23 will only become available after the main story is completed. You will need at least 500 Banandium Gems to start the elephant elders‘ sample.
16. Salty Forecast Cleared
Start the Elephant Bananza sample and master the first section with salt.
Use the absorbency of the Elephant Bananza to specifically remove the salt and reach the exit.
17. Smart Suction to Skip the Slip
In the last area of the salt section is a large ice cube.
Suck obliquely through or around the ice and use the sucked material to reach a higher path.
There is the hidden jewel.
18. Glowing Forecast Cleared
Master the next section of the Bananza sample with lights.
Suck in the required materials and open the way to the destination.
19. Smart Suction to Light the Way
In the lighting section you will find a barrel cannon.
Throw a light into the Cannon.
This creates or activates a new way up.
Use the Cannon and get the extra jewel.
20. Golden Forecast Cleared
Master the gold section of the Elephant Bananza sample.
Suck in the gold and other materials specifically to make your way through the course.
21. Smart Suction to Build a Bridge
In the gold section is a wooden crockoid or a wooden opponent.
Use the wood together with the existing plant seed.
This creates a bridge over which you reach the hidden Banandium Gem.
22. Smart Suction to Guide the Ice
In the next puzzle you have to bring a block of ice up to a bowl.
Suck away disturbing terrain and create a continuous path.
Once the ice block reaches the shell, the jewel becomes accessible.
23. Elephant Elder’s Forecast Cleared
Complete the complete Bananza sample of elephant elders.
At the end, you get the big final bundle with three Banandium Gems.
24. Tempest Chip Exchange
Visit a chip changer in the Tempest Layer and exchange banandium chips for a banandium Gem.
The price depends on how many jewels you have previously bought from chip changers.
For the collection entry one purchase is sufficient.
SL901: Banandium Gems 25–33
25. Beat Sinister Blusterwing!
Defeat the Sinister Blusterwing for the first time on SL900.
After the fight, you crash to SL901.
Immediately upon landing, you will receive a bundle of three Banandium Gems.
26. Battle: Revolving-Ring Rumble
Go to the area to the right of the lava shelter.
Under a large umbrella is destructible terrain.
Grab down and enter the battle ruins.
Defeat all three flutter taigoids within the time limit.
27. Unbothered by Burrowers
Go to theTurning off the old plate.
There is a high tower with void terrain or a void closure.
Destroy the core.
On the grass area below, the jewel becomes accessible.
28. Battle: Iron-Inferno Imbroglio
Near the junction, voltioids excavate upwind ore.
Take a chunk and let it carry you to the top of the high oil tower.
There is a combat challenge with four Wuzoids.
Defeat all opponents in time.
29. Safe from Scalding Showers
Near the previous combat challenge, a rope slide hangs high up.
Throw a chunk against the mechanism so you can reach the rope slide.
Drive across the gorge.
On the other hand, use the hand clap to move the platform or rope slide back up.
Above you will find the jewel.
30. Lava Bath in the Hot Shower
After unlocking the Elephant Bananza, you return to the Warmdusch cave.
Completely absorb the lava on the main path.
In addition to a rope slide, this exposes the Banandium Gem.
31. Piping-Hot Platforms
Follow the path in the the cave in SL901 until the decisive tornado.
Suck away the lava and open access to the Elephant Bananza Challenge: Heathead.
Cross the first two rotating platform groups.
The first jewel is on the normal path.
32. A Scalding Secret
Shortly before the end of the heat head challenge, you do not immediately go to the barrel cannon.
Instead, suck away the lava to the left.
Through two other rotating platforms you reach a hidden area.
Remove the lava pile there. Below is the second jewel.
33. Roasting while Rotating
Complete the Elephant Bananza challenge.
The third jewel awaits at the end of the course.
SL902: Elephant Bathrooms & Storm Station – Banandium Gems 34–70
34. Beat Sinister Blusterwing! Again!
Defeat the Sinister Blusterwing a second time.
This time, use the Elephant Bananza, suck in hot lava and shoot the stored chunks at their wings.
After the win, you fall to SL902 and get the next bundle of three.
35. Taunting behind the Tap
Right at the start of the large spa area there is a huge faucet or elephant trunk.
Suck the lava from the rooster with the Elephant Bananza.
Then swim behind or under the tap.
This is where the jewel lies.
36. A View of Zip-Line Valley
Drop down to the left of the starting area of the spa section.
Speak to the constructor there and clear access to the zipline challenge.
Take a chunk at the start and climb onto the high column above the entrance.
There is a secret rope slide.
Use them and get the first jewel.
37. Zipping through the Valley
Follow the normal course.
After the first major rope slide sequence you reach the second Banandium Gem.
38. Zips, Hops, and Swaps
Complete the entire cable slide challenge.
At the destination, the third jewel is waiting.
39. Tempest Smashin‘ Stats
Destruction or saturation altogether70,000 m3 of lavain the Tempest Layer.
Speak to Smashintone in the spa area.
He gives you the jewel.
40. Sitting above the Sauna
In the spa area there is a large sauna.
Climbing up the outside of the building.
The jewel is right on the roof.
41. Tempest Hide-and-Seek
Speak with Suchton in the sauna.
Then find the four hidden fractons in the entire spa area.
Regularly use the hand clap and especially examine:
- the stone elephants,
- the area around the sauna,
- the water basins; and
- The elevated platforms.
After the fourth find, you get the jewel.
42. Cranky’s Tempest Rant
Leave the spa through the left door.
Outside there is a small resting area with loungers and books.
There, Cranky Kong is waiting with Rambi.
Listen to his complete tirade and you get the jewel.
43. Shifty Smash: Scorching Sauna
Near Cranky, a ladder leads back up to the sauna.
There is a Shifty Smash challenge.
Use the Elephant Bananza, suck in disturbing lava or terrain and destroy all targets within the time limit.
44. Taking in the Stormy Scenery
Climbing on the large stone elephant head, in which the spa is located.
Above is a dark, oil-smeared tower.
Pull up earth or stone from the ground and glue them laterally to the tower so you can climb up on it.
At the top is the jewel.
45. Battle: Elevator Encounter
At the exit of the thermal bath, a cable slide continues.
Drop from the edge down there and follow the rock face to the right.
In a hidden niche is a battle ruin.
Defeat all eight Amzekoids.
46. Stuck in the Elephant Snout
When you leave the spa, you pass a huge stone elephant head.
Climb or hit into its long trunk.
Inside is the Banandium Gem.
47. Inhaling Hot Lava
Follow the rope slide path out of the spa.
There is a lot of lava on the track.
Turn into the Elephant Bananza and soak the lava along the entire section.
Between two large pillars, the jewel is exposed on the ground.
48. Shifty Smash: Stairs in the Storm
On the stormy main path after the spa you will find another Shifty Smash challenge ruin.
Master the stairway or platform route and destroy all target blocks in time.
49. Crossing the Lava Road
Above the cliff shelter is the challengeHot lava road.
Follow the normal path.
Shortly after the first barrel cannon you reach a safe resting place with the first jewel.
50. Atop the Lava Road
Stay in the lava road challenge.
Pull a chunk out of the ground with the Elephant Bananza.
Use a chunk jump to reach the high platform in the middle of the course.
There is the second jewel.
51. End of the Lava Road
Master the complete challenge.
At the end of the hot track awaits the third Banandium Gem.
52. Scorching, Shocking Scaffolds
To the left of the main stormy path, an alternative route leads through scaffolding full of lava and electricity.
Suck as much lava as possible with the Elephant Bananza and avoid the lightning attacks.
The jewel lies on the way through the scaffolding.
53. Safe under Shelter
Follow the stormy main path to the large roof shelter.
Directly at the fast travel point there is a destructible wall.
Strike them.
Behind it lies the jewel.
54. Banana in the Mud Bath
At the large shelter there is a mud bath.
Use the hand clapper and hit or dig down around the basin.
Under the mud lies the jewel buried.
55. Among the Rocky Elephants
Use the barrel cannon north of the large shelter.
On the next platform is a fractone under an umbrella.
Talk to him. It marks a location on your map.
Follow the mark to the stone elephants and dig up the jewel.
56. Battle: Ground-Gulping Glory
Directly in front of the large shelter is a battle ruin.
Defeat all three Crockoids.
Lock them from the ground and attack as soon as their vulnerable bodies become visible.
57. Tempest Fragmentone Recovery
Let yourself fall at the large shelter in the lower area of the island.
There you will find Fractones.
Above the lava are its three fragments scattered.
First, return one of the pieces and you get the first jewel.
58. Tempest Fragmentone Restoration
Find the other two fragments as well.
Create or use safe routes over the lava and bring the parts back one after the other.
Once all three fragments are reunited, you get the second jewel.
59. Secret by the Shelter
To the right of the large shelter are two rubber platforms.
Jump over both.
On the other side is a destructible door or rock face.
Strike it up and get the jewel from the hidden room.
60. Battle: Strike like Lightning
On a lower platform of the neighboring island is a combat challenge.
Defeat all five Rolluskoiden.
At the same time, pay attention to the flash markings on the ground and keep moving constantly.
61. Halfway to the Station
In the large shelter, use the rubber platforms to make your way to the storm station.
There are several opponents in the muddy area.
Tomb there after upwind ore.
Take a chunk and get carried to the high tower.
Above is the jewel.
62. Battle: Zip-Line Zones
Follow the previous jewel out of the way.
Talk to the constructor and let the access to the battle ruin open.
Defeat the two Crockoids and use the rope slides to switch between platforms.
63. Concealed in the Sky
On one of the large stone elephant roofs stands a constructor.
Let him build a new cable slide.
Start, but jump about halfway off the rope slide.
Land on the hidden platform.
Use the hand cloth and dig up the jewel.
64. Slip by the Snipers
Below the cliff shelter is the challenge with the snipers.
Enter the course and avoid the bullets.
After the first major section you will reach a safe rest area.
There is the first jewel.
65. Sniper-Free Safe Spot
Stay in the same challenge.
On the last great ascent, you do not go straight up to the goal.
Instead, move to the right with the moving platforms.
They will take you on a hidden byway with the second jewel.
66. Scramble through the Snipers
Complete the complete sniper challenge.
The third jewel is waiting at the destination.
67. Sunk in the Pool
Directly below the cliff shelter is a water basin.
Jump in and dive to the bottom.
This is where the Banandium Gem.
68. Shifty Smash: Stormy Skies
On the last larger island in front of the storm station is another Shifty Smash challenge.
Watch for the flashes and destroy all target blocks within the time limit.
69. In a Floating Puddle
On the island of the storm station, first remove the Void closure.
Afterwards, climb on the large stone elephant head, on which the core lay before.
Activate the Ostrich Bananza and slide to a small floating platform nearby.
The jewel lies there in the middle of a puddle.
70. Atop Stormy Station
Reach the Storm Station.
Nearby there are occurrences of upwind ore.
Pull out a chunk and let it carry you to the roof of the station.
At the top is the last Banandium Gem of the regular Tempest Layer.
All 72 fossils of the Tempest Layer
The Tempest Layer contains a total of 72 fossils. They shall be distributed among:
- 61 Frog Fossils – Normal
- 10 Bulber fossils – rarely
- 1 Swordfish fossil – extra rare
The fossils are located on SL900, SL901 and SL902. There are no fossils on SL903.
Frog fossils – SL900
Frog 1 Right in front of the entrance to the Prediction Refuge.
Frog 2 On the big mountain to the left of the starting area. Search at the foot of the rock formation.
Frosch 3 Also on the big mountain to the left of the start. Climb one level higher and use the hand cloth.
Frog 4 Outside on the bridge of the big start mountain.
Frog 5 In the Prediction Refuge near the clothes shop, right at the exit.
Frog 6 Outside the refuge at the exit next to the clothes shop.
Frog 7 At the top of the big mountain to the left of the starting area.
Frog 8 On the outer edge of the map on the top of the same mountain.
Frog 9 Outside the forecaster refuge on a floating rock at the exit near the teleport gong.
Frog 10 Right next to the elephant elders. The fossil is hidden between several scrolls or objects.
Frog 11 Next to the elephant elders near the entrance of their room.
Frog 12 A second fossil is also located directly at the entrance to the elephant elder room.
Frog 13 Go outside behind the elephant elders room. The fossil is on the back.
Frog 14 climbs to the roof or the top of the room of elephant elders.
Frosch 15 Directly at the fast travel point on the Lavasee-Weg.
Frog 16 At Lavasee-Weg a staircase leads up. The fossil is in the wall.
Frog 17 Enter the central section of the Lava Lake Trail and destroy the wall right at the entrance. Behind it is the fossil.
Frog 18: At the exit of the forecaster refuge near the clothes shop, a ladder leads downwards. The fossil is out there.
Frog 19 A second fossil is also located below this exit. Use the hand cloth on the foot of the ladder.
Frog 20 In the central area of the Lava Lake Trail. Destroy the wall at the entrance and then work your way down.
Frog fossils – SL901
Frog 21 Directly at the turn off of the old plate.
Frog 22 Near the shelter at the glowing mass.
Frog 23 In the central area of SL901. There are two frog fossils close together.
Frog 24 The second fossil of the same group in the center of SL901.
Frog 25 near the the cave in SL901. Use the rope slides to reach the raised position.
Frog 26 near the lava shelter. Suck away the lava with the Elephant Bananza.
Frog 27 Directly below the cable slide at the lava shelter.
Frog 28 at the shelter of the glowing mass. Remove the lava with the Elephant Bananza.
Frog 29 Near the turn off of the old plate. Raise the rubber platform of the rope slide with the hand cloth and reach the fossil.
Frog 42 Directly at the cliff shelter.
Frog 43 Behind the three large stone elephants at the large roof shelter.
Frog 59 near the turn off of the old plate. Use the handclap in the surrounding terrain.
Frog 60 Also at the turn off of the old plate. Use a cable slide to reach the higher platform with the fossil.
Frog fossils – SL902
Frog 30 Close to the starting area of the large elephant spas.
Frog 31 Directly at the sauna shelter.
Frog 32 In the vicinity of the large spa. Examine the rocks near the water with the hand cloth.
Frog 33 The chip changer has a fractone. The fossil is right on top of him.
Frog 34 Near the chip changer is a stone elephant head. The fossil is in the trunk or nose.
Frog 35 On a large stone elephant near the sauna shelter.
Frog 36 At a smaller stone elephant near the sauna.
Frog 37 In the spa area stands a huge stone elephant head. The fossil is in one of his eyes.
Frog 38 The second fossil is in the other eye of the same elephant head.
Frog 39 Below a stone elephant is a rock face. Destroy them and get the fossil from inside.
Frog 40 In a lava pit in the spa area. Suck the lava with the Elephant Bananza.
Frog 41 Under another stone elephant. Destroy the wall of the rock to expose the fossil.
Frog 44 At the large roof shelter stands a small stone elephant. The fossil is in his trunk.
Frog 45 Below an elephant at the mud bath.
Frog 46 In the immediate vicinity of the large roof shelter.
Frog 47 On a pile of sand at the large roof shelter. Use the handclap and dig down.
Frog 48 Also near the sandy areas of the large shelter.
Frog 49 On the back of a stone elephant near the sandy surfaces.
Frog 50 By a small lake on the surrounding rocks.
Frog 51 Near the rope slide leading to the cliff shelter.
Frog 52 On top of the cliff shelter.
Frog 53 A second fossil is also on the roof of the cliff shelter.
Frog 54 In the small lake at the cliff shelter.
Frog 55 At the lower part of the storm station.
Frog 56 Also at the foot of the storm station. The fossil is on the back of an opponent.
Frog 57 Inside the storm station near the giant Apple.
Frog 58 Outside at the Storm Station.
Frog 61 at the large roof shelter. Use the handclap around the building to locate the last frog fossil.
Bulber fossils – all 10
Free access and get the rare fossil from the cavity.
The fossil is between the two figures.
The fossil is at the top.
The rare fossil is on her left side.
Climb on top of it. That’s where the fossil is.
During or after the trip, you will see the fossil in a difficult place to reach.
Throw a chunk at it to collect it.
Use the hand cloth around the rock and water areas.
Examine the edge of the rock platform with the hand clapper.
There is a stone elephant figure.
The fossil is inside the statue.
Use the handclap around the stone elephants and rock formations until the rare fossil is displayed.
Swordfish – extra rare fossil
You need the Elephant Bananza.
Go to the fast travel point and look for a wall of hot lava below the large rock platform.
Turn into the Elephant Bananza and soak up the entire lava.
Behind it opens a hidden cave area.
The large swordfish skeleton is in the wall or in the terrain and is hardly overlooked.
Destroy the surrounding material completely and collect the extra-rare fossil.
Tempest Layer Completely Completed
For complete completion, your checklist should display the following values at the end:
- Banandium Gems: 70 / 70
- Fossils: 72 / 72
- Total: 142 / 142
If you are missing several banandium entries after normal playthrough, you should pay particular attention to numbers 16 to 23. They belong to the postgame sample of the elephant elders and become available only after the credits and with at least 500 collected Banandium Gems.
With the fossils, the swordfish on SL901 is the easiest to miss, because you first need the Elephant Bananza and have to suck in a complete lava wall below the turn of the old plate.
Frequently Asked Questions about the Tempest Layer
How many Banandium Gems are there in the Tempest Layer?
The collection contains a total of 70 Banandium sites. Of these, 24 are on SL900, 9 on SL901 and 37 on SL902.
How many fossils are there?
In total, you’ll find 72 fossils: 61 frogs, 10 angler fish and an extra-rare swordfish.
Are there collectibles on SL903?
No. SL903 is used only for the end of the third fight against the Sinister Blusterwing. There are no banandium gems and no fossils.
Where can I get the Elephant Bananza?
The Elephant Bananza will be unlocked on SL901 during the main story. Find both parts of the old record and take them to the elephant elder.
What can the Elephant Bananza do?
Donkey Kong can suck in large amounts of terrain and lava, store material and shoot the sucked in chunks as strong shells.
Why am I missing Banandium Gems on SL900?
Entries 16 to 23 belong to the Bananza sample of elephant elders. It is unlocked only after the main story is completed and requires at least 500 Banandium Gems.
Where do I find the rarest fossil?
The only swordfish fossil lies on SL901 below the fork of the old plate. With the Elephant Bananza, suck away the lava wall to open the hidden area.