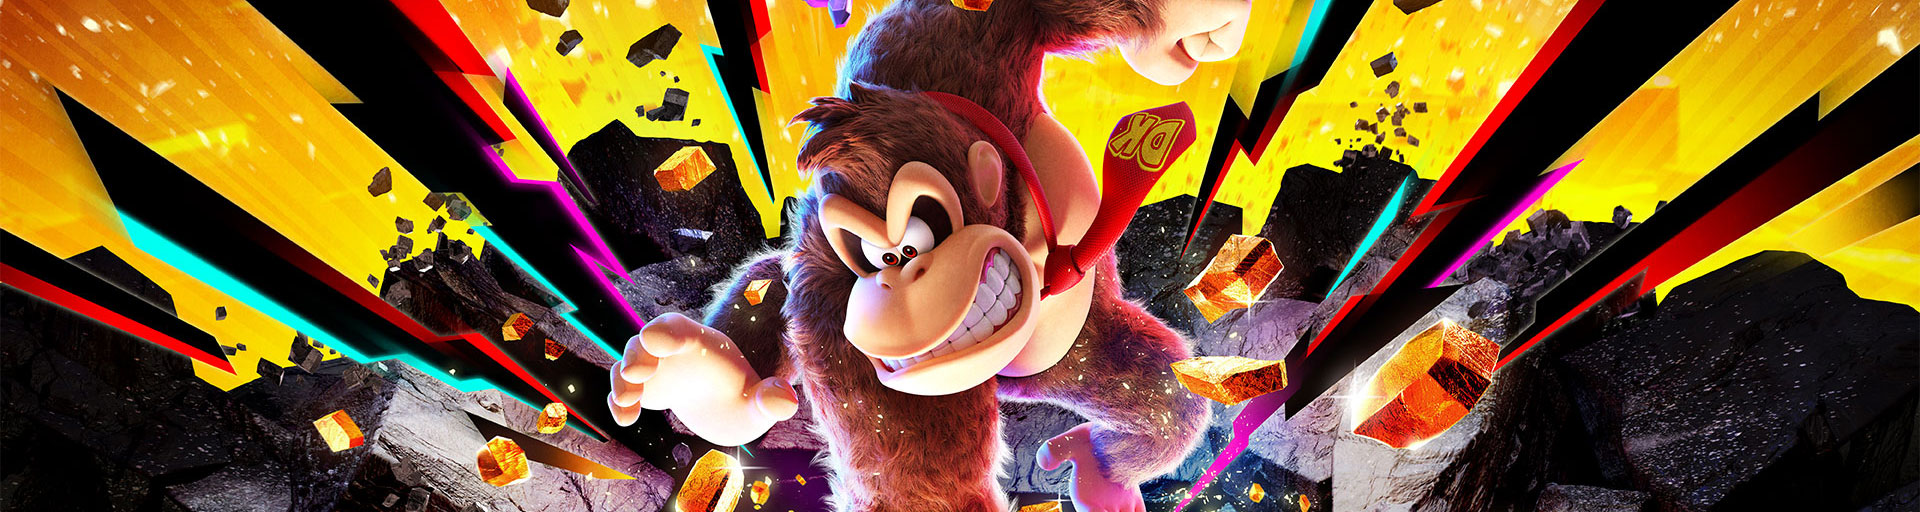

Welcome to our Donkey Kong Bananza walkthrough for the Lagoon Layer. The lagoon is the first major layer of the game and extends across the sub-levels SL100 to SL102.
We will show you the way through the entire Lagoon Layer, the locations of all 56 Banandium Gems, the distribution of 72 fossils, all Shifty Smash challenges and combat challenges as well as the boss fight against Peekabruiser.
Terrain hardness: ★★☆☆☆
100% overview: 56 Banandium Gems entries + 72 fossils.
The 56 jewels refer to the 56 entries in the collection. Some sites will reward you with a bundle of three jewels.
Watch the video walkthrough on YouTube
Lagoon Layer – Main Path
After your arrival on SL100 you must first get the reservoir back into operation. Follow the main path, destroy the Void seals and use the new boom bombs to blow up concrete and other hard materials.
Later you get to SL101 to the Rosthafen. There, a large part of the main task revolves around increasing the water level of the lagoon. Destroy the large concrete closures of the water pipes so that more and more water flows into the plain.
With increasing water levels, new paths, platforms, fossils and jewels are accessible. Finally, the bridge to the Kong Elder is created.
At the Kong Elder, you experience an important moment in history: Pauline reveals her true form and Donkey Kong learns the Kong Bananza.
With the new transformation you can break the previously indestructible path to SL102.
Follow the seabed passage until the end. After some moving platforms and opponents, the first big boss of the Lagoon Layer is waiting: Peekabruiser.
SL100 – Lagoon Layer (1–25)
1. First Crockoid Cracked!
You cannot miss this bundle of jewels. After landing in the Lagoon Layer, the three Banandium Gems appear directly in front of Donkey Kong.
Reward: 3 Banandium Gems.
2. Cave by the Cape
Return to the starting point at the Cape. Just below the small water basin is a tunnel in the rock.
Go inside and turn back inside again. Smashes the rock wall or the closed passage. Behind it hides the jewel.
3. Lagoon Smashin‘ Stats
You can only get this jewel in the postgame.
Destroy a total of 5,000 m3 of water in the Lagoon Layer and then talk to Smashintone or Smashintone north of the Cape checkpoint.
You can control your current progress via the collection in the map menu.
Availability: Only after the victory over King K. Rool in New Donk City.
4. Bathing Banana
Follow from the cape the main path towards the reservoir. Shortly after the introduction of the boom bombs, there is a sand or rock face on the right.
Strike your way through it and fall into the water of the hidden cave. The jewel is inside.
5. Shifty Smash: Beyond the Wall
Goes northeast from the Reservoir Bank checkpoint to the cliffs with the rocks apart.
Next to a boom bomb block is the luminous launch object of the Shifty Smash challenge.
Uses the explosive terrain and destroys the predetermined target within time. After successful completion, the Banandium Gem appears.
6. Battle: Stoney, Grassy Goons
Follows the main path from the Reservoir Bank control point. On the right you will find the portal to a combat challenge.
Inside, you must defeat three Crockoids. Use terrain lying around and heavy strikes to break through their defense quickly.
After the third opponent, the jewel appears.
7. A Nook behind Concrete
Near the previous combat challenge, you get to the rotating concrete walls.
Use boom bombs to break the concrete. To the right of the rotating mechanism is a small hidden niche.
Additionally, use Donkey Kong’s handshake sonar if you can’t find the exact spot. Behind the concrete is the jewel.
8. Battle: Both Sides of the Bridge
To the left of the Reservoir Hill checkpoint is another battle portal.
Enter the ruins and defeat six Antickoids within the time limit.
The opponents are on different sides or heights of the combat area. Uses terrain pieces as projectiles to quickly knock out several enemies one after the other.
9. Smash through the Floor
On the high cliff with the water flowing down from above you will find a green metal surface with a square concrete slab in the bottom.
Uses the enemy or explosive material above the plate to destroy the concrete.
Then let yourself fall through the resulting pit. In the small room below is the Banandium Gem.
10. Cranky’s Lagoon Rant
Cranky Kong sits on a small floating platform between the cliff of Jewel 9 and the large pipe system.
More specifically, you will find it behind the right monkey head on the bridge over the Reservoir Hill checkpoint.
Reach his platform, talk to him and listen to his complete tirade. Then you get the jewel.
11. A Real Mouthful
Return to the cliff at Jewel 9 and go one level up or to the right of the Reservoir Hill checkpoint.
In the rock you see a large stone mouth. Strike through the dark sand wall and enter the cave.
Inside the stone mouth hides the jewel.
Challenge: Hangeltrasse on the roof
In the left monkey head on the large bridge over Reservoir hills is the entrance to the Challenge Hangeltrasse on the roof. In it you will find the jewels 12 to 14.
12. Rest Stop on Roof Road
In the challenge level, follow the first longer hill section. After the first large piece of net you reach a small safe resting place.
The first jewel of the challenge lies directly on the main path.
13. Hidden on Roof Road
Jewel 12 is followed by a further hill section with movable stone walls.
Do not immediately follow the main path here. Move to the left and use the openings between the moving rocks.
Alternatively, you can beat yourself through the destructible material. Behind it lies the second jewel in a secret niche.
14. At the End of Roof Road
Complete the Hangeltrasse challenge.
The third jewel waits immediately before the barrel cannon at the exit and can practically not be missed.
15. Lakeside Low Road
Goes from the checkpoint Reservoir hill below the large rock bridge to the north and then to the left.
There you reach a small platform with two barrels in front of a hidden cave entrance.
Hit through the wall or the floor and follow the small cave. The jewel is at the end of the hidden path.
16. Battle: Swarms among the Pillars
In the very north of SL100 there is a combat portal on a green metal platform.
Enter the challenge and defeat a total of 50 peekaboopoids.
The opponents appear in large groups. Area attacks, roles and thrown terrain are much more effective here than individual fists.
17. Follow the Voided Terrain
In front of the large water container, drop into the pit below the pipe system.
The jewel is initially completely enclosed by void metal.
Follow the trail of the contaminated area through the cave until you reach the responsible Terravoider. Destroy him.
The void metal disappears and you can go back to the jewel.
18. Fishin‘ for Bananas
Near Jewel 17 is a small water area below the large tank.
A salvage monkey can mark you the approximate location on the map.
Walk around the edge of the water tank, smash through the rock face and follow the waterfall into the hidden cave.
The jewel is under water. Use a ground pound or dive down to the bottom.
19. Rise and Rinse
This jewel is located deep in the large water container by the twisted green pipe.
There is a blue beat switch nearby. The skin repeats on it.
This causes the platform with the jewel to rise. Jumps or swims quickly after and destroys the jewel as soon as it is reachable.
20. Placed in a Pipe
Climbs to the large twisted pipe system above the water tank.
Look for the opening from which water flows and climb into the pipe.
Follow the inner path and take the right turn. At the very end of the pipe is the jewel.
21. Shifty Smash: Atop the Pipes
On the highest or middle section of the spiral green pipe system you will find a Shifty Smash challenge.
Activate it and use the barrels or blast barrels to shoot you precisely through the given targets.
If you have destroyed all targets within time, the jewel appears.
22. Battle: Wings and the Wobbly Disc
To the left of the large water tank is the next combat portal behind a earth or stone wall.
In the challenge, you must defeat three flying buzzoids on a shaky platform.
Hit them directly from the air or use the stones they drop as bullets.
23. Beyond the Cloudy Platforms
To the east of the large water tank, you can see a small floating island behind two cloud platforms.
Ship terrain to the shiny material of cloud platforms. This makes them firm and forms a way out.
On the square movable platform at the end, the jewel is in the material.
Alternative: Return later with the Ostrich Bananza and simply slide to the platform.
24. Blasting for the Banana
Below the floating platform with Cranky Kong is a small cave.
Activates the switch there or executes a ground pound on the marked mechanism. This opens up a water basin full of explosive obstacles.
Swim carefully through the mines or blow a safe path to the opposite side.
The jewel is waiting there.
25. Lagoon Chip Exchange
The chip changer of this layer is actually on SL101, although the entry in the collection still belongs to SL100.
Exchange banandium chips for a banandium gem.
The price increases with each already performed jewel exchange.
Availability: Postgame – after the victory over King K. Rool.
SL101 – Rosthafen (26–50)
26. Landed in Salvager’s Landing!
Defeat the large concrete crockoid on SL100 and then destroy the large void seal.
Jump into the newly created pit to SL101.
Right at your landing point in the Rosthafen, this bundle of 3 is waiting. It belongs to the normal course of the game and is not to be missed.
27. Shifty Smash: A Wall Hanging in Air
After your arrival, turn to SL101 and climb onto the metal scaffold behind the rust harbour.
There is a boom bomb block next to the starting point of the Shifty Smash challenge.
Repeat the explosive material against the floating target until it is completely destroyed.
28. On the Ceiling of the Floor
This jewel hangs at the bottom of the large northern area of Rosthafen.
First, increase the water level of the lagoon to the maximum level by removing the concrete closures of the water pipes.
Then swim under the platform at the fishing village. Due to the high water level you can comfortably reach the bottom and move to the jewel.
Challenge: Thorns & assembly lines
On the northern side of the Rosthafen is the entrance to another challenge. Therein lie the jewels 29 to 31.
29. Over the Thorny Path
Follow the first two conveyor belts and avoid the spikes.
The first jewel lies directly on the main path after the first large section and can hardly be overlooked.
30. Into the Thorny Nook
In the next section, a Conveyor Belt transports explosive boom material.
Take a piece of it and destroy the thorn wall on the left.
Behind it is a small hidden niche with the second jewel.
31. Through the Thorny Walls
Follow the Conveyor Belt course until the end.
Destroy the last large mandrel barrier with the explosive material and reach the exit.
There the third jewel awaits as a final reward.
32. The Salvager’s Stash
Go to the clothing lobby shop in the Rosthafen.
Directly to the right is an inconspicuous access or mine shaft that leads into a room below the fishing village.
Follow the path down. In the hidden room is the treasure of the salvage monkey and thus the Banandium Gem.
33. Battle: Concrete-Wall Clash
To the left of the landing point or near the control point Rosthafen you will find a combat portal.
Inside, two Crockoids are waiting with hard defense.
Use explosive terrain to quickly break up their concrete tanks and then take down both enemies.
34. Up, Over, and Across
To the left of the rust harbour leads further down a path to a long hillside stretch.
Climb from the village to the roof or use brockensurfen to reach the start of the Hangelroute.
Follow the path to the other side and avoid the anticoids.
The jewel lies at the end on a striking pile of gold.
35. Within the Fast-Growing Grass
The jewel hangs just below the large floating island where your jewel finds 34.
The easiest way to reach it is after the water level has been increased to maximum.
Swim under the island and jump to the grid on the bottom.
Go quickly to the middle. The grass is constantly growing and trying to push you off the grid.
Alternatively, a difficult brockensurf jump from above is possible.
36. Hangin‘ on Orangu-Hang Highway!
Return to SL100 and destroy the small Void seal near the Combat Challenge with the 50 Peekaboopoids.
This opens the way to the large Hangeltrasse on SL101.
The bundle of 3 appears directly at the beginning of this new area.
37. Concrete Wall on the Moving Floor
Follow the Hangeltrasse to the end.
Above the exit is a concrete wall. Let the Molevoloid generate corresponding boom terrain and blow up the concrete.
Then walks to the left past another molevoloid.
A second concrete wall is located above the movable platform. Destroy them too and climb to the jewel behind them.
38. Outskirts of the Fishing Village
This jewel is located in a higher part of SL101, which is not reached via the normal village entrance.
Return to SL100 to the area north of the reservoir bank and search the crater-like area with a void seal.
Destroy them and drop down to SL101.
Follow the Hangel route to the small floating platform on the edge of the fishing village. The jewel is waiting there.
39. Crossed to the Kong Elder’s Court!
Increase the water level of the lagoon by destroying the large concrete closures of the water pipes.
Once enough water has flowed into SL101, the long bridge to the seat of the Kong Elder becomes accessible.
Follow the bridge. The jewel lies directly on the main path in front of the Elder’s seat and is not to be missed.
40. The Ship Stern’s Snack
Goes behind the seat of the Kong Elder to the large area with the stacked cargo containers.
Swimming or climbing around the containers to the back of the large ship.
At the stern between the containers hides the jewel.
Kong Elder Sample – Jewels 41 to 50
Jewels 41 to 50 are part of a postgame challenge.
You must have completed the main story and collected at least 300 Banandium Gems. Then visit the Kong Elder on SL101 and start his big rehearsal.
The main line consists of five so-called scrap grounds. Between the main examinations, there are secret adjoining rooms with additional jewels.
41. Past the First Scrappin‘ Ground
Use the first barrel cannon and enter the first combat room.
Here you have to defeat two Crockoids armored with barbed concrete.
Bre *first opens their hard outer layer and then turns off the two opponents. The jewel appears after the fight.
42. Lure and Destroy!
Destroy the stone wall to the left of Jewel 41 and enter the secret adjoining room.
There are three armored crockoids and two different switches.
First, use the blue beat switch to align your opponents correctly.
Then activates the tamping switch. The soil yields and the crockoids plunge into the depths.
43. Past the Second Scrappin‘ Ground
After the second barrel cannon, a room with nine armored munchoids awaits.
There are explosive objects in the room. Uses charged strikes and their pressure waves to detonate the explosive devices.
The explosions destroy the enemies much faster than normal attacks.
44. Lift and Destroy!
Once again destroys the hidden side wall after the second scrap ground.
In the next room are two munchoids and a platform made of sticky material.
Work your way to the top platform and activate or trigger the mechanism so that the platform falls on the opponents.
If both munchoids are crushed, the jewel appears.
45. Past the Third Scrappin‘ Ground
After the third barrel cannon, you must defeat five Stompoids.
Stay moving and use the environment to play off their jump and tamping attacks against each other.
Once all five opponents are defeated, the next jewel appears.
46. Wallop and Destroy!
Opens the secret adjoining room after the third scrap ground.
There you will find two armored Stompoids and two almost indestructible Wallopoids.
You should use the Wallopoids as weapons.
Lure the Stompoids among the big opponents and ensure that the Wallopoids fall on them or bump them from their platforms.
When both stumps are done, the jewel appears.
47. Past the Fourth Scrappin‘ Ground
In the fourth main combat room, three Molevoloids are waiting.
Normal attacks are cumbersome. Wait until the rollus codes are within reach and hit or fling them against the molevoloids as soon as they come out of the ground.
Defeat all three opponents to complete the fourth scrap ground.
48. Launch and Destroy!
Enter the adjoining room behind the stone wall after the fourth scrap ground.
Two molevoloids hang on the ceiling. Among them are smaller squeeloids.
Place yourself under an opponent and make an upward strike. This will throw the squeeloids up directly against the molevoloids.
Repeat this until both major opponents are defeated.
49. Bounce and Destroy!
In the last optional ancillary room are firing devices for heavy iron balls.
Above you hangs a thorny platform with three armored crockoids.
Uses charged strokes to hurl the iron balls upwards over the pyramidal elevations.
Hit the platform or opponents until all three crockoids fall off or are destroyed.
50. Past the Fifth Scrappin‘ Ground
In the fifth and final main area you will find a huge iron ball and a total of ten armored crockoids.
Use the large bullet to break down the opponents‘ barbed concrete tanks.
Defeat all ten crockoids.
Thus, the complete Kong elder test is done. The final bundle of jewels appears before the way back to the elder.
SL102 – Seabed Passage (51–56)
51. Dripped into Chimpy Channel!
This bundle of 3 is part of the main story.
After your visit to the Kong Elder, you will learn the Kong Bananza. Use them to break up the large void seal and uncover the way to SL102.
Jump down. Right at your landing point in the seabed passage, the three jewels are waiting.
Challenge: Kong Bananza – Balloon Party
In the immediate vicinity of the starting point of SL102 is the entrance to a special challenge that can be entered exclusively with the Kong Bananza.
Here are the jewels 52 to 54.
52. Pop and Destroy
Activate the Kong Bananza and enter the Balloon Party.
Your main goal is to destroy all the balloons in the building.
Some are worn by crockoids. Another hides below the large shooting range – destroys the ground there or hits you down.
If you have caught all the balloons, the jewel appears at the exit.
53. Atop the Concrete Roof
During the Balloon Party, leave the obvious indoor path and climb over the metal parts of the building.
On the roof of the concrete construction lies a hidden jewel.
Get it before you finish the actual challenge.
54. Hung from the Ceiling
Stay at the same challenge level.
Goes inside to the rear right area of the concrete construction. You can climb up on a wall.
At the top is a grid or a ceiling, on the bottom of which Donkey Kong can hang.
Hang yourselves along it. The jewel hangs directly under the ceiling.
55. Shipwrecked Treasure
Return to the Balloon Party entrance on SL102.
Directly opposite is a destructible rock face.
Fight your way through it and you get to an old green shipwreck.
Search under or behind the bow of the wreck. This is where the jewel is hidden.
56. Lagoon Hide-and-Seek
This last jewel appears only in the postgame.
After the credits return to the former boss arena or the large crater on SL102 and talk with search sound there.
Four fractons have hidden around the crater.
Regularly use the handshake sonar to make their positions visible. Some hide in walls or cover themselves with ambient material.
The search with the Elephant Bananza is particularly easy, as you can absorb larger quantities of disturbing terrain.
Find all four fractons and return to Suchton. This gets her jewel number 56.
All 72 fossils from the Lagoon Layer
In the Lagoon Layer you can find a total of 72 fossils. They are divided into three different rarity levels:
| Fossil | Rarity | Total |
|---|---|---|
| Ammonite | Normal | 61 |
| Anomalocaris | Rare | 10 |
| Whale | Extra Rare | 1 |
Fossils by sub-level
| Sub-level | Ammonites | Anomalocaris | Whales | Total |
|---|---|---|---|---|
| SL100 | 37 | 6 | 0 | 43 |
| SL101 | 22 | 3 | 1 | 26 |
| SL102 | 2 | 1 | 0 | 3 |
| Total | 61 | 10 | 1 | 72 |
Tips for fossil search
Regularly use Donkey Kong’s handshake with the R button. The sonar impulse briefly highlights fossils in the area – even if they are behind a wall, under you or above you.
Some fossils are enclosed in concrete slabs or other hard materials. Use boom bombs or other explosive terrain.
Other fossils hang in water bubbles or on hard to reach walls. Here it is worthwhile to increase the water level to SL101 completely.
Tip: It is best to collect fossils completely only when you have finished the main story of the Lagoon Layer. The maximum water level makes many locations much easier to reach.
The very rare whale fossil
The main fossil of the Lagoon Layer is the only whale.
Returns to SL100 in the area north of the reservoir shore. There you will find the Void seal, via which you can also reach the raised area at the edge of the fishing village on SL101.
Destroy the seal and drop to SL101.
Activate the rope shortcut there or work on the elevated platforms. On a large rock formation is the huge whale fossil.
Strike it repeatedly until it has been completely degraded.
With maximum water level, this area is much more comfortable to reach.
Boss: Peekabruiser
At the end of the seabed passage on SL102 awaits Peekabruiser, the first major boss fight after receiving the Kong Bananza.
Phase 1 – Destroying Tanks
Peekabruiser protects his actual body with a thick shell of small peekaboopoids.
Activate the Kong Bananza as soon as possible and storm towards the boss.
Strike through the outer shell. With normal, softer material, normal strikes are also sufficient; once Peekabruiser has concrete armor, the Kong Bananza is much more effective.
Use roles to simultaneously eliminate the little peekaboopoids in your path.
Phase 2 – Attacking the Core
If you have sufficiently destroyed the outer shell, Peekabruiser’s actual core becomes visible.
Attack him immediately.
Don’t wait too long – the boss tries to rebuild his protective shell from the small opponents.
Phase 3 – On the Hill
After enough damage, the core retreats and creates a hill of peekaboopoids.
Climb or strike as fast as possible to the top.
Stay in motion, avoid the shock waves and continue to strike the core.
With a well-stocked bananergy bar, you can do a big part of the fight directly with the Kong Bananza.
After the victory
After Peekabruiser’s defeat, a large void seal remains.
Destroy them and open the way to the next layer.
Before you jump down, you can return to the Lagoon Layer via the elevator or the fast journey and collect missing jewels or fossils.
Complete Lagoon Layer 100%
- ☐ SL100 – Jewels 1 to 25
- ☐ SL101 – Jewels 26 to 50
- ☐ SL102 – Jewels 51 to 56
- ☐ All combat challenges completed
- ☐ Complete all Shifty Smash challenges
- ☐ hanging terrain on the roof fully completed
- ☐ Mandrel and assembly line challenge fully completed
- ☐ Kong Bananza: Balloon party fully completed
- ☐ Congo elder sample completed
- ☐ Lagoon layer hide-and-seek game completed
- ☐ Crankys Lagunentirade belongs
- ☐ Chip changer used
- ☐ 61 / 61 Ammonites
- ☐ 10 / 10 Anomalocaris
- ☐ 1 / 1 whale fossil
- ☐ 72 / 72 Fossils
- ☐ 56 / 56 Banandium Gems entries
- ☐ Peekabruiser defeated
Once you have completed all the points, the Lagoon Layer in Donkey Kong Bananza is 100% complete.
Our complete solution continues with the Hilltop Layer.Hilltop Layer