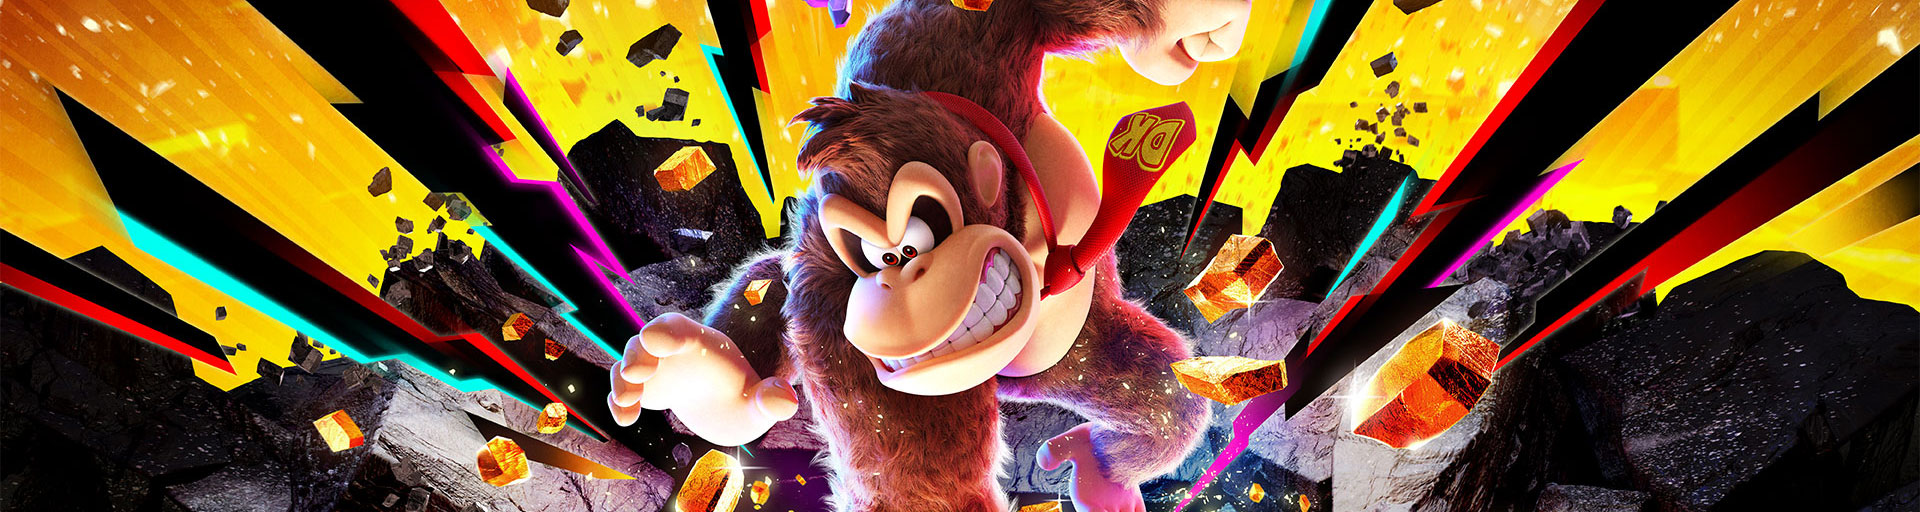

In our Donkey Kong Bananza complete solution to the Planet Core, we accompany Donkey Kong and Pauline through the last sub-levels SL1600 to SL1609. After the victory over Void Kong, it is finally clear what has really hidden deep underground: King K. Rool is back and chasing the real Banandium horsetail.
The Planet Core is the last major layer of the main story and at the same time one of the most challenging. Instead of a sprawling open world, a long descent through Kremlin fortresses, gravel paths, gel puzzles, explosive gorges, the cradle of the fractons and the Kremlining Coliseum to the Heart of Gold awaits you.
In total, there are 23 Banandium sites and 42 fossils in the Planet Core. Our complete solution shows you all the jewels on SL1600 to SL1609, the renewed fight against Stampfbaff, Cranky Kong, Quizmeister, the fight against King K. Rool and the last two banandium rewards from the final musical eel exam in the postgame.
With the fossils, you’ll find 31 8-bit barrels, 10 rare 8-bit items, and the only extra-rare 8-bit DK fossil.
Planet Core – the path to the Heart of Gold
After the second fight against Void Kong in the Forbidden Layer, the big revelation follows: The supposed banandium horsetail was actually King K. Rool, who was trapped deep underground.
K. Rool immediately sets off for the real banandium horsetail. Donkey Kong and Pauline jump behind and reach SL1600.
The Planet Core is much more linear than many previous layers. The ten sub-levels form a long descent:
- SL1600: Kremlin court and huge K. Rool statue
- SL1601: Fractone Fort
- SL1602: Dangerous zone of gravel and thorns
- SL1603: Gel and exchange material passage
- SL1604: Deep Kremlining Gap
- SL1605: Kremlinkamp and Boss Stampfbaff
- SL1606: Cradle of the fractons
- SL1607: dangerous turf surf track
- SL1608: Kremlining Colliseum
- SL1609: Final Ascent to the Heart of Gold
In the Planet Core you should use all Bananza forms regularly. Many obstacles are deliberately constructed so that you switch between Kong, Zebra, Ostrich, Elephant and Snake.
SL1600: Kremlin Court – Banandium Gems 1–3
1. Victory over Void Kong!
After defeating Void Kong, you jump into the newly opened sinkhole.
When you land in Planet Core, a bundle of five Banandium Gems appears right in front of you.
This find belongs to the main story and cannot be missed.
2. A View of the King
Turn from the starting area firstfrom the huge K. Rool statue.
Behind you lies beyond the dangerous Dornenfeld a separate rock island.
Use terrain surfing or the Zebra Bananza to quickly cross the distance.
On the island you climb to the highest rock formation. With a charged jump of the snake banana you get especially easy to the top.
On top is the jewel.
3. In the Belly of K. Rool
Go to the huge golden statue of King K. Rool.
The Banandium Gem is actually in his belly.
Climb or hit yourself into the golden belly area.
Inside you will find the third jewel of SL1600.
SL1601: Fractone Fort – Banandium Gems 4–7
4. Floating over Fractone Fort
In the Fractone Fort there is a luminous Schwindium platform high above the main area.
Activate them and use the Ostrich Bananza to slide onto the platform.
Then switch to Snake Banana.
Jump with a fully charged jump into the blast barrel above the platform.
The Cannon shoots you to an even higher floating rock island.
This is where the jewel lies.
5. Shifty Smash: Inhale and Destroy
Above the teleport gong on SL1601 is the Shifty Smash challenge.
The goal is behind several particularly resistant layers.
First activate the Elephant Bananza and soak away the lava or hot material.
Then change to Kong Bananza and destroy the concrete.
If you reach the Schwindium core within the time limit, you get the jewel.
6. Planet Core Smashin‘ Stats
Throughout the Planet Core, you have to70,000 m3 of golddestroy.
Gold is available here in huge quantities, so you usually reach the required number during normal playthrough.
Have you broken down enough gold, talk to Smashintone near the Teleport Gong.
He gives you the Banandium Gem.
7. Planet Core Chip Exchange
The actual chip changer is later onSL1606in the cradle of the fractons.
Exchange banandium chips for a jewel.
The price required depends on how many jewels you have previously bought from other chip changers.
Note: Although the chip changer is on SL1606, this jewel is assigned to the SL1601 collection.
SL1602: Danger zone – Banandium Gem 8
8. Survived the Gravel Gauntlet
SL1602 consists of a long passage with moving gravel, thorns and constantly changing obstacles.
Follow the moving terrain and stay on the safe areas if possible.
Take an explosive gold boulder along the way. This allows you to hit several thorn obstacles and fossils from a distance.
If you reach the end of the complete danger zone, the jewel is directly at the exit.
SL1603: Changing Passage – Banandium Gems 9–10
9. Klaptrapped behind the Goo
On SL1603, several areas with pink and blue changel await you.
After the first gel section, you reach a second pink area.
Climb here not immediately on the newly emerging blue wall to the top.
Instead, move on to the lower level.
Behind the gel wall is a small secondary area with the Banandium Gem.
10. The Switcheroo Chase
Then return to the normal path.
Use the change gel to change the blue and pink areas so that you can climb up.
Master both major gel obstacles.
Above the second section, the jewel is right on your path.
SL1604: Kremlin Gap – Banandium Gems 11–12
11. Korner of the Krevasse
During the descent through SL1604 you will arrive at aRotary detonatorsover.
Wait until the mechanism points to the left.
Then perform a fall attack on the switch.
The explosion opens a hidden platform or niche on the left.
This is where the jewel lies.
12. Cracking Open the Way
Follow the normal path through the entire Kremlin divide.
Use the blasting mechanisms to break open the closed areas and get further and further down.
At the end of SL1604, the last path is cleared.
Just before the transition to the next sub plain lies the Banandium Gem.
SL1605: Kremlingkamp – Banandium Gems 13–14
13. The Kremling Krew’s Last Stand
This jewel is available only after the main story is completed.
After the credits, return to Kremliningkamp on SL1605.
Here is now an additional serial fight against the Kremlining troop.
You have to survive all the enemy waves.
Use explosive chunks of gold against concrete or thorn armor Kremlin and the Kong Bananza for larger groups.
After the last wave of opponents, you get the jewel.
14. Stomped Stompenclomper! Again!
At the end of SL1605, a stronger variant ofStamped baffle.
His feet regularly alternate between stone and lava.
Attack a foot only as long as it is made of stone. If it becomes lava, immediately stay away.
Destroy both feet one after the other. Then you can attack the head or the upper armor.
In the second phase, part of the shell is made of concrete. Kong Bananza is particularly effective here.
Finally, destroy the exposed core.
After the victory you will receive the Banandium Gem.
SL1606: Cradle of the Fractons – Banandium Gems 15–17
15. Planet Core Quiz Master
Quiztone can be found below or near the Loren landing platform on SL1606.
Answer all three questions correctly.
The correct answers are:
- Seals
- Powerful
- Quiztone
After the third correct answer, you get the jewel.
16. Shifty Smash: Skyward Smashing
On the outer walls of the cradle of the fractons is a platform with a Shifty Smash challenge.
Activate the Snake Banana.
First tear a chunk out of the terrain and then use charged jumps to reach the high above you floating Schwindium blocks.
Destroy all targets within the time limit.
17. Fractone Cradle Climb
Opposite your arrival side, a particularly high, smooth wall juts out of the cradle of the fractons.
Activate the Snake Banana.
With fully charged jumps, you can work your way up bit by bit.
At the top is the Banandium Gem.
SL1607: Kremlin swamp – Banandium Gems 18–19
18. Turf Surf Pit Stop
On SL1607 you have to go a long dangerous wayTerrain surfingovercome.
Approximately halfway there is a high pillar in the middle of the thorns.
Nearby, an opponent rolls around.
Sling this opponent against the pillar or thorns to create a safe climbing area.
Then climb up the pillar.
Take a chunk with you if necessary and use upward strokes during climbing to overcome the last few meters.
Above is the jewel.
19. Turf Surf Finish Line
Continue the terrain surf course.
Dodge the thorns, gold obstacles and Kremlinings and stay on your chunk if possible.
At the end of the entire route, the Banandium Gem is waiting right at the finish line.
SL1608: Kremlining Colliseum
On SL1608 there is no own Banandium Gem. Nevertheless, you should search the level thoroughly, because here are several fossils.
In the Kremlining Coliseum, you will also find a large battle sequence against various Kremlin opponents.
Use the Bananza shapes to match the respective armor:
- Kong: Concrete and heavy opponents
- Elephant: removing large amounts of terrain
- Zebra: Reach opponents quickly
- Snake: high platforms and moving targets
After the Coliseum, the Mine Cart continues to the last sub-level.
SL1609: Heart from Gold – Banandium Gems 20–23
20. Cranky’s Planet Core Rant
On SL1609 the main path leads over several bridges towards Heart made of gold.
Go left on the first major section.
On a high platform sits Cranky Kong with Rambi.
Climb or jump up and talk to Cranky.
Listen to his complete planetary tirades.
Then you get the jewel.
21. Rocked King K. Rool!
Achieve thisHeart of goldand defeat King K. Rool.
After the boss fight, five Banandium Gems appear next to Donkey Kong.
Important: Collect the jewels before making your wish on the Banandium horsetail.
Postgame – the final musical eel exam
The last two entries are not part of the first playthrough.
After completing the main story, you must first pass the Bananza samples of all elders.
Return to the Heart of Gold on SL1609. There appears the large musical eel.
Jump into his mouth and master the most difficult Bananza challenge of the game.
22. Halfway through the Harmoneel
The first part of the final exam combines several mechanics:
- Thorn corridors
- Hills with huge spine balls
- An elevator full of opponents
- Quick change between different Bananzas
Always use the shape that matches the obstacle and don’t waste time fighting normally when you can handle opponents.
If you reach the control point approximately in the middle of the musical eel, you get a bundle of three Banandium Gems.
23. End of the Harmoneel
The second half will be even more demanding.
Among other things, you expect:
- Rails over dangerous terrain
- fast grind passages
- Changing Bananza obstacles
- A final lateral sprint
Stick to the challenge with enough healing and balloons.
When you reach the end of the complete musical eel exam, you will receive the last bundle of five Banandium Gems.
With this you have collected all 23 banandium entries of the planet core.
Boss: King K. Defeating Rool
At the end of SL1609, you finally reach the real Banandium horsetail. King K. Rool has already found them and faces Donkey Kong for battle.
Fight back cannon ball
Directly activate the Kong Bananza.
K. Rool fires a big cannonball at you.
Keep your charged fist punch ready and wait until the cannonball almost arrives at you.
Then strike him directly to K. Rool back.
After several hits, the boss is briefly stunned.
Small cannonballs
Later used K. Rool a smaller cannon and fires several bullets one after the other.
The principle remains the same: stand up right, charge the Kong strike and send the bullets back.
Removing black terrain
The cannonballs leave dangerous black terrain on the ground.
During a short period of rest, switch to the Elephant Bananza and soak away as much of it as possible.
This leaves you enough space to avoid.
Huge hands
In the later battle, K summons. Rool big black hands.
Watch their movements and roll out of the danger area early.
K. Rools Vacuum
With little life energy, K tries. Rool, pulling in the entire environment with a huge sucker.
Run or roll laterally out of his pull. Zebra Bananza is particularly helpful here.
Subsequently, send back more cannon balls until K. Rool has been defeated.
Final boss: K. Rool, king of rot
After the first win, Donkey Kong and Pauline express their wishes on the Banandium horsetail.
A huge banana column shoots them back towards the surface.
But K. Rool is not beaten yet.
After a supposed ending, the DK Island Swing follows up to New Donk City. There K is transformed. Rool eventually became the much more dangerous king of rot.
Retaliate cannon attacks
The second battle is also based on the known principle.
Use the Kong Bananza and hit K. Rool’s cannon balls back.
However, this time the projectiles move in spirals or jump over the ground.
Hold the charged stroke and correct your position forward or back until the ball passes just before Donkey Kong.
Removal of rotting
K. Rool floods large parts of the arena with black rot.
Change to the Elephant Bananza and clear a safe path.
The sucked-in chunks you can even then on K. Throw Rool.
Destroying Huge Hands
The big black hands also return.
Once you have sucked in a chunk with the Elephant Bananza, you can throw it against your hand and create a safe passage.
Prefer large cannon balls
Above all, try to fight back the large cannon balls.
They cause a lot of damage.
Change again and again between Kong to fight back and Elephant to clean the arena.
After enough hits, King K. Rool finally defeated and the main story completed.
All 42 fossils in Planet Core
The Planet Core has a total of 42 fossils:
- 31 8-bit barrels – normal
- 10 8-bit items – rarely
- 1 8-bit DK – extra rare
There are no fossils on SL1603. The remaining fossils are divided between SL1600, SL1601, SL1602 and SL1604 to SL1609.
8-bit barrels 1–6 – SL1600
To the right of the main path stands a striking triangular rock.
On this rock lies the fossil.
Nearby, a golden tendril or a golden extension protrudes from the terrain.
The fossil is at the top of it.
The fossil lies at the bottom of the statue.
Pay attention to the Kremlin opponents in the area.
There is a Kremlin running around with a thick earth armor.
The fossil is directly in its armor.
Destroy the shell completely and collect the falling fossil.
Climb to its top.
That’s where the fossil is.
Examine the rugged rocks on the edge.
The fossil is between or on the cliffs.
8-bit items 1–2 – SL1600
Cross the thorns by terrain surfing or zebra bananza.
On the island there is a small cave.
Inside is the rare fossil.
At the top, the statue bears a large golden crown.
The rare fossil is located directly in or on this crown.
8-bit barrels 7–17 – SL1601
At the top is a triangular rock.
On its top is the fossil.
Strike through the backward rock face.
Behind it is the hidden fossil.
There is a large crystal in the area.
Destroy it completely.
Therein lies the fossil.
Follow him until the end.
That’s where the fossil is right in the wall.
As a result, a previously poorly visible fossil becomes accessible in the immediate vicinity.
Collect it next to the newly built area.
At the foot of the rocks are several boxes.
Destroy them.
Behind it is the fossil.
There is a narrow projection over spikes.
Activate the Schwindium platform beforehand so that you do not fall into the thorns after dissolving the fossil.
Then collect the fossil.
Examine the outer cliff edge directly next to the Lorenstation.
That’s where the fossil is.
There is another fossil there.
Destroy the crystal and follow the tunnel to the very end.
There are two fossils there.
Collect the first one.
It is immediately on the previous find at the end of the course.
8-bit Item 3 – SL1601
At the bottom is a crystal-locked tunnel.
Destroy the crystal and go to the end.
This is where the rare 8-bit item is located.
SL1602 – 8-bit barrel 18 and 8-bit item 4
The fossil is directly in it.
It is best to take an explosive gold boulder with you before the beginning of the passage.
Throw it against the thorns from a safe distance and collect the dissolved fossil.
Use explosive gold again so you don’t have to stop in the middle of the dangerous course.
SL1604 – 8-bit Item 5
For the jewel, you let the switch point to the left.
For the fossil, you wait until the mechanism points to the right.
Perform a fall attack.
The explosion exposes the rare fossil.
SL1605 – 8-bit barrels 19-21 and 8-bit item 6
The fossil is directly in his armor.
Use an explosive chunk of gold to blow up the armor.
Then you can collect the fossil.
Examine the cliffs directly at the edge of the station.
That’s where the fossil is.
On the side where you originally enter the arena are high cliffs.
Climb up there.
The fossil is on the rock edge.
Destroy the crystal and follow the tunnel.
At the very end is the rare fossil.
SL1606 – 8-bit barrels 22–27
The fossil lies on one of the rocky outcrops.
The fossil is located directly in one of the outer walls.
Use the handclap if you don’t see it right away.
Destroy it completely.
Therein lies the fossil.
Directly above it runs a large gold vein or golden vine.
The fossil is slightly elevated on this gold structure.
Destroy or surround the barrels.
Behind it is the fossil.
On the wall in its immediate vicinity is the fossil.
Strike it out.
SL1606 – 8-bit item 7
The rare fossil is between these gold structures.
Throw a chunk at it or climb and pull it straight out.
SL1606 – extra rare 8-bit DK fossil
Travel to the fast travel point and drop left to the level with shelter and shops.
On the ground is a striking cracked spot with several bombs.
Trigger the bombs.
The explosion blows a deep pit into the ground.
Jump in.
Below you will find a concrete wall with more bombs.
Ignite those too.
Behind the wall comes the huge 8-bit DK fossil.
Trigger another bomb next to the fossil to blow it up from the wall.
SL1607 – 8-bit barrels 28–29
After breaking the first big golden barrier, turn around.
On the wall behind you is the fossil.
Nearby, smaller opponents roll around.
Sling one of these opponents against the gold obstacle.
This causes the fossil to be knocked out.
SL1607 – 8-bit item 8
The rare fossil is right in his armor.
Sling one of the small explosive opponents against the Kremlin.
The explosion destroys the armor and exposes the fossil.
SL1608 – 8-bit barrels 30–31
Before you jump all the way down, take a close look at this wall.
Therein lies the fossil.
There are high cliffs there.
Climb all the way up.
On top is the last normal 8-bit barrel fossil.
SL1608 – 8-bit item 9
Shortly after entering the sub-level, you will see a crystal on the left of the track.
The rare fossil is in it.
Throw the blast block against the crystal while driving so that the fossil falls out.
SL1609 – 8-bit Item 10
The rare fossil sticks directly to his body.
Grab or hit yourself down to him and release the fossil.
With this, you have collected all ten rare 8-bit items.
Planet Core Completely Completed
For a complete completion of the planet core, your checklist should show the following values:
- Banandium Gems: 23 / 23
- Fossils: 42 / 42
- Total: 65 / 65
If you are missing three Banandium entries after the first playthrough, this is normal:
- No 13 – Last clash of the Kremlinings appears only after the conclusion of the story.
- No 22 – Half through the musical eel belongs to the final Bananza examination.
- No 23 – Music eel you will get only at the end of this exam.
Particularly easy to overlook in the fossils are the many examples on SL1601 and the 8-bit DK fossil on SL1606. For this, you have to trigger several bomb chains at the bottom of the cradle of the fractons.
Frequently Asked Questions about Planet Core
How many banandium gems are there in Planet Core?
In Planet Core, there are a total of 23 Banandium sites. Three of them will only be available after or in the postgame.
How many fossils are there?
You can find a total of 42 fossils: 31 8-bit barrels, 10 rare 8-bit items and an extra-rare 8-bit DK.
How many sub-levels does the Planet Core have?
The Planet Core consists of ten sub-levels from SL1600 to SL1609. Thus, it has more individual sub-levels than any other layer.
Are there Banandium Gems on SL1608?
No. In the Kremlining Coliseum on SL1608 there are no own banandium entries. There you will find three fossils.
Where is the chip changer?
The chip changer is on SL1606 at the cradle of the fractons. The associated Banandium Gem is nevertheless assigned to SL1601 in the collection.
What are the answers to the Quizmeister?
The three correct answers in the quiz master of the planet core are Siegel, Mighty and Quiztone.
Where can I find Cranky Kong?
Cranky Kong is waiting for SL1609 on a raised left footbridge in front of the Heart of Gold.
Where can I find the 8-bit DK fossil?
The extra-rare fossil on SL1606 lies deep below the cradle of the fractons. Blast a pit into the ground with the bombs, then destroy the concrete wall in underground world and blow the fossil out of the wall.
How to defeat King K. Rool?
Use the Kong Bananza and hit back his cannon balls with charged fist strokes. Remove black terrain in between with the Elephant Bananza and avoid his huge hands and the vacuum cleaner attack.
Is King K. Rool the last boss?
Not quite. After the first victory, a longer final sequence follows until New Donk City. There you fight against its final form as K. Rool, king of rot.
How do I get the last two jewels?
First, pass all Bananza samples of the elders. Then return to the Heart of Gold on SL1609 and complete the final examination in the Musikaal. Halfway you get three and at the end five Banandium Gems.