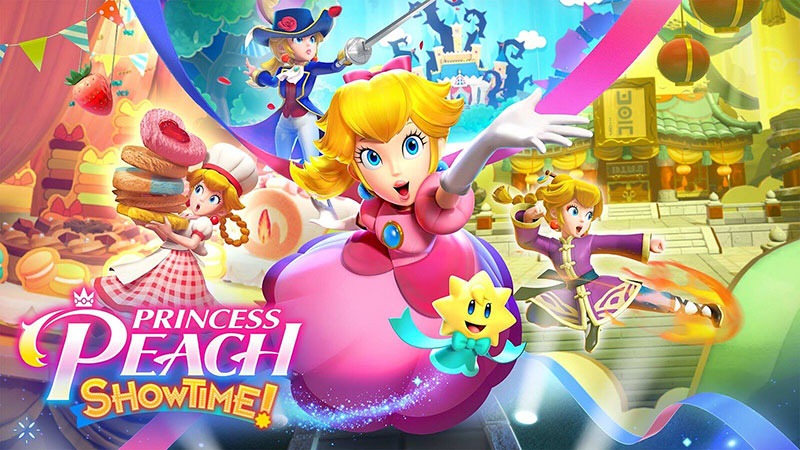

Complete The Stolen Statue in Princess Peach: Showtime! and collect the Sparkle Gems and ribbon. When you return after finishing the story, look for the three hidden Ninja Theets as well.
We will show you where to find all 7 Sparkle Gems, how to get the ribbon of the loop master, what to consider when using the gripping hook and cracking the electronic locks and where to find the 3 Ninja Theets after the main story is completed.
Locations of the Sparkle Gems
In The Stolen Statue you can find a total of 7 Sparkle Gems. The play begins on several planes and then takes you through the interior of a large airship.
Many Sparkle Gems are off the direct path. Pay particular attention to additional gripping points, sparkling pose spots and alternative paths during the final escape.
| # | Location |
|---|---|
| 1 | In the beginning, you jump from plane to plane. The first Sparkle Gem floats under one of the planes. Hang at the gripping point above it, swing Princess Peach down and collect the crystal in the flyby. Then use the next hook to get back on the upper route. |
| 2 | In the first larger section of the airship, the second Sparkle Gem is divided into eight fragments. Collect all the fragments as you pass the guard drones and electronic locks. Some fragments are slightly above the direct path, so you should use every available gripping point. |
| 3 | In the second area with the guard drones you should actually continue through the lower doors. Instead, use the blue gripping points or drones over the guards. Swing in a fast chain over all enemies. At the end of the upper route, the third Sparkle Gem waits above the exit. |
| 4 | After you leave the area with the guard drones, you reach the outside of the airship. Look directly to the left of the exit for a sparkling pose spot. Pose there and swing up in the secret room over the three gripping points. At the top you will find the fourth Sparkle Gem. |
| 5 | Outside, planes bomb the golden pipes. Don’t just run straight ahead, but use the drones and gripping points to swing a bit to the top left. The fifth Sparkle Gem lies approximately in the rear part of the passage above one of the collapsing pipes. |
| 6 | At the end of the outdoor area, Master Thief Princess Peach swings back into the airship through a window. Once you land in the control room, you will receive the sixth Sparkle Gem automatically. |
| 7 | During the final escape, the walls behind Princess Peach converge. At a turn off, you have to hang on the drone above you in time and take the upper path. There is the seventh Sparkle Gem. If you take the lower route, you cannot return to the crystal during this passage. |
Location of the ribbon
You can get the ribbon shortly after entering the airship. First opens the first electronic gate and then does not immediately continue to the right.
Run to the left instead. There is another locked door. Stand in front of the electronic lock and deactivate it with Master Thief Princess Peach’s tool.
Behind the door, the ribbon is locked. Once you free him, he hands you the master thief Ribbon for Stella.
| Rewards | Location | Task |
|---|---|---|
| Master Thief Rabbin | Left adjoining room after the first electronic gate in the airship | Deactivates the lock of the side door and frees the locked ribboner. |
Grip hooks, drones and electronic locks
Swinging with the gripping hook
As a master thief Princess Peach, you can hold onto drones, planes and blue-marked devices with the gripping hook.
Press the attack button to fire the hook. While Princess Peach is hanging, you can build momentum with the stick. Jumps only when Princess Peach swings in the desired direction.
| Action | Note: |
|---|---|
| Fire gripping hooks | Point Princess Peach at a drone or marked gripping point and use the tick button. |
| Building momentum | Moves the stick in Princess Peach’s oscillating direction to be able to jump further and higher. |
| Jumping off | Jumps only when Princess Peach swings forward or upward. |
| Connecting multiple hooks | Press the tick button again as soon as Princess Peach comes near the next gripping point. |
Overcoming guardian drones
In the airship, several robots patrol with laser beams. As soon as you turn off the lights, they start searching the room independently.
You can walk through the gaps between their laser beams or use the drones as gripping points. For the third Sparkle Gem you have to swing through space above the robots.
| Situation | Procedure |
|---|---|
| Laser moves upwards | Runs or jumps under the beam. |
| Laser moves downwards | Wait in a safe area until the path is clear again. |
| Drone as a gripping point | Hang on the drone with the gripping hook and swing over its search area. |
| Multiple drones | Try to move from one drone to the next without stopping. |
Deactivating electronic locks
Several doors and elevators are secured by electronic locks. Stand directly in front of the glowing lock and press the faded button.
Hold Princess Peach in the correct position during the process. If you move too far from the castle, the process is aborted and must be started again.
| Tip | Declaration |
|---|---|
| Stay in front of the castle | Deactivation only works if Princess Peach is directly in front of the electronic device. |
| Examine ancillary spaces | Not every castle belongs to the main road. Behind a side door is the ribboner. |
| Robots first stun | In the control room, you should turn off the guards before working on a castle for a long time. |
| Combining multiple switches | In the hangar, you must control the elevator and loading hatch in the correct order to release the statue. |
The Airship and the Stolen Statue
Jump from plane to plane
At the beginning of the play, the golden statue of the master thief Theets is stolen by an airship. A Sparkla is still attached to the statue and is also taken away.
Princess Peach tracks the thieves on several propeller planes. Use their wings as platforms and hang on the gripping points below or above the machines.
Already pay attention to the first Sparkle Gem. It lies below the normal flight route and can be easily overlooked.
Turn off the lights
Inside the airship you have to deactivate several control fields. As a result, the light goes out and the guard drones begin to search for Princess Peach with their laser beams.
First, observe the movement rhythm of the lasers. Starts only when a sufficiently large gap opens before Princess Peach.
For the second Sparkle Gem, you should check every sidewalk and top platform, as there are some of the eight fragments.
Outside along the pipes
In the exterior of the airship blows a strong wind. Princess Peach cannot be blown by the airship, but several golden pipes break apart after the attacks of the planes.
Therefore, do not stay long on a damaged pipe. Use the floating drones as additional gripping points and keep swinging before the platform disappears under Princess Peach.
The fifth Sparkle Gem is a bit off the straight path. As you swing, straighten up to the left and collect it before jumping through the window into the control room.
Take over the control room
After returning to the airship, two guard robots stand in front of the control fields. Stun both by using the intended devices or light mechanisms.
Then open the electronic gate on the right. The path leads over a rod down into the hangar.
Freeing the Golden Statue
In the hangar is the stolen statue on a platform. Several electronic switches control the elevator and the large floor hatch.
Proceeds in this order:
- Deactivates the first lock to lower the platform with the statue.
- Open the floor hatch under the statue.
- Drive the platform back up.
- Defend the attacking plane.
- Deactivates the last fuse so that the statue falls through the opened hatch.
The statue and the captured Sparkla can thus escape from the airship. At the same time, however, self-destruction is activated.
Escape from the Exploding Airship
During the escape, several walls move from left and right towards Princess Peach. In this section you cannot return to already enclosed rooms.
Therefore, keep yourself constantly in motion and consciously decide at the turn for the upper path, so that you do not miss the last Sparkle Gem.
| Danger | Procedure |
|---|---|
| Collapsing walls | Continues immediately and does not wait for additional coins if the path is already narrowing. |
| Multiple grip points | Quickly switch from one hook to the next. Do not build the maximum momentum at every single point. |
| Branch | Hang on the upper drone and take the upper gear to reach the seventh Sparkle Gem. |
| Lower route | Here is the third Ninja Theets after the end of the game. However, you missed the Sparkle Gem on this path. |
| Last jump | Jump in time at the end. Princess Peach then automatically opens her glider and escapes the airship. |
After Completion: Find the 3 Ninja Theets
After completing the main story, you can re-enter the play to find the hidden Ninja Theets. In The Stolen Statue are hidden three Theet.
The first Theet can be overlooked right at the beginning. The third is during the escape on a route that does not lead to the last Sparkle Gem.
| # | Location |
|---|---|
| 1 | Turn to the left immediately after the start of the play. The first Theet hides behind or to the left of the platform on which Princess Peach starts. Don’t jump on the first plane before you’ve spoken to him. |
| 2 | The second Theet is located in the area with the guard drones and the turned off lamps. Before you leave the room to the right, swing into the upper left area. There the Theet camouflages in front of the wall. |
| 3 | The third Theet hides during the final escape. Take the lower route at the turn. The Theet is just before the point where the lower and upper paths reconnect. If you have taken the upper path for the Sparkle Gem, you can drop shortly down at a suitable point. |
Tips for The Stolen Statue
| Tip | Declaration |
|---|---|
| Check start area first to the left | After the end of the game, the first Ninja Theets stands directly behind the starting platform. |
| Look under the planes | The first Sparkle Gem is well below the normal path. Use the hook above him to come back safely. |
| Collect all eight fragments | For the second Sparkle Gem you must not overlook any fragment in the first airship section. |
| Swinging over the drones | The third Sparkle Gem is located above the exit of the second guard room and can only be reached via the upper route. |
| After the first gate to the left | Behind the electronically locked side door, the ribboner is waiting. |
| Use pose-place outside | The fourth Sparkle Gem is located in a secret room on the outside of the airship. |
| Do not stand on damaged pipes | The planes destroy the platforms after a short time. Use the drones to swing quickly. |
| When fleeing, take the upper path | Only the upper route leads directly to the seventh Sparkle Gem. |
| Walk down for the last Theet | The third Ninja Theets hides on the lower escape route just before the merger of the two paths. |