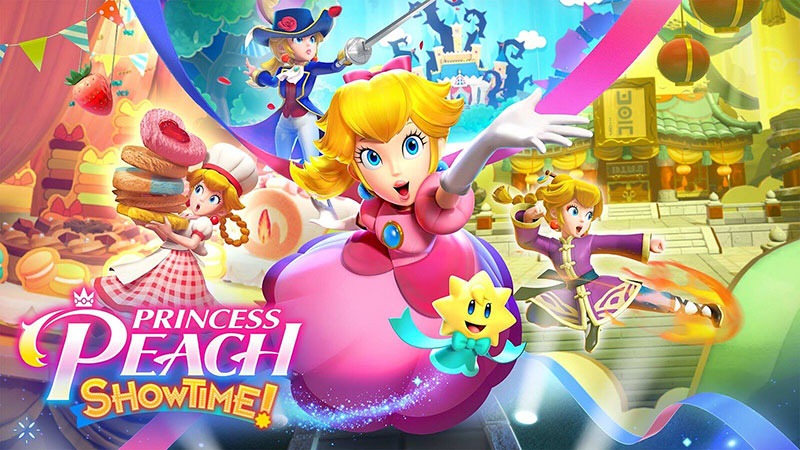

Complete Blight of the Sea in Princess Peach: Showtime! and collect the Sparkle Gems and ribbon. When you return after finishing the story, look for the three hidden Ninja Theets as well.
Locations of the Sparkle Gems
In Blight of the Sea you can find a total of 7 Sparkle Gems. Already in the first area you need a fish to open shells and close a secret room.
Later, you track a ship infested by the dark. Since the camera moves automatically during a section, you should collect the third Sparkle Gem immediately. Inside the ship, you must also steer fish through grids and use a moraine to free the ensemble.
| # | Location |
|---|---|
| 1 | Make friends with the yellow fish at the beginning and then look for a sparkling pose spot in the middle area between the spoiled sparkles and shells. Pose there and enter the secret room. Guide the flock of fish to the four trapped sparkles to free them. Then you will receive the first Sparkle Gem. |
| 2 | Leave the secret room and swim to the right. Above or to the right of one of the spoiled sparkles is a closed shell. Lead the fish to the shell with Princess Peach’s singing and open it. Therein lies the second Sparkle Gem. |
| 3 | In the next section you follow the spoiled ship and the camera moves automatically to the right. Pay attention to a shell beneath a pyramidal arrangement of coins. Quickly direct the fish to the shell before it reaches the left edge of the screen. In it you will find the third Sparkle Gem. |
| 4 | At the end of the persecution, the corrupt ship confronts you. Surround the emerging villains with the flock of fish and then hurl them against the ship. Avoid the rocks and other attacks. After defeating the ship, you will automatically receive the fourth Sparkle Gem. |
| 5 | Inside the ship you will find a yellow fish behind a grid. Take control of him and then swim to the right. Steer the fish down through the metal rods. Below the main path lies the fifth Sparkle Gem behind the grid. |
| 6 | After collecting the fifth Sparkle Gem, you must free the captured ensemble. Open the way for the great moray and steer them against the cage with Princess Peach’s singing. The moraine destroys the prison and frees the musicians. For this you get the sixth Sparkle Gem. |
| 7 | At the end of the play follows another musical performance. Steer the stick in time in the direction from which the fish swim towards Princess Peach. With the big fish you have to react correctly several times in succession. If you successfully complete the concert, you will receive the seventh Sparkle Gem. |
Location of the ribbon
The Mermaid Ribbon can already be obtained in the first area. The ribboner is enclosed in a shell above the launch platform.
Swim to the right and make friends with the yellow fish. Then return to the beginning of the play and lead the fish to the shell on the top left.
Open the shell with mermaid-peachs singing. The freed Ribboner thanks you and gives you the mermaid Ribbon for Stella.
| Rewards | Location | Task |
|---|---|---|
| Mermaid Ribbon | Shell above the launch platform | First get the yellow fish, return to the beginning and open the shell at the top left. |
Steering Fish with Princess Peach’s Singing
As a mermaid Princess Peach, you can attract and steer different sea creatures with your singing. Hold the appropriate button until the fish respond to Princess Peach.
Then move the crush with the stick. The fish can open shells, circle opponents, swim through narrow grids and eliminate certain obstacles.
| Action | Note: |
|---|---|
| Attracting fish | Hold the singing button until the fish or swarm begins to glow and Princess Peach follows. |
| Shell opening | Directs the fish directly to the closed shell and waits for it to be fully opened. |
| Swimming through a grid | Princess Peach can give orders to the fish even if she herself does not fit through the opening. |
| Surrounding opponents | Move the swarm completely around the villain. Once the circle is closed, the opponent is captured. |
| Steering moraines | Large ocean creatures can destroy stable grids, cages and other obstacles. |
Fish do not move too fast
The swarm sometimes needs a brief moment to follow Princess Peach’s change of direction. Therefore, guides the stick in quiet movements to the goal.
For small shells and narrow grid openings, you should collect the swarm directly in front of it. Then slowly steer it through the opening.
Continue to control distant fish
The fish also respond to Princess Peach’s singing when there is a grid or part of the backdrop between them. You don’t always have to swim next to the swarm.
This mechanic is especially needed inside the ship. Princess Peach stays there on the main path as you guide the fish through the metal rods to the fifth Sparkle Gem.
The spoiled seabed
At the beginning of the play, part of the sea was affected by the darkness of the Sauertruppe. Several sparkles are spoiled and shells have been sealed.
Swim to the right until you discover a small yellow fish behind a rock. Use Princess Peach’s sparkling power or singing to join you.
With this fish you can now reach the first secret room, the second Sparkle Gem and the Ribbon.
Go back to the ribbon first.
After the fish Princess Peach has joined, you should first swim left to the start. The shell with the ribboner is located above the initial platform.
If you do not open the shell immediately, you can reach it later in the same area. However, once you start the chase, a return is no longer possible.
Pose site for the first Sparkle Gem
In the middle of the seabed, several stars sparkle on the sand. Put Princess Peach in the middle and press ZL or ZR.
In the secret room are four Theets enclosed. Steer the fish crush around them or to their obstacles. When all four are saved, the first Sparkle Gem appears.
Track the Broken Ship
After the launch area, a large ship appears, which was infested by the dark force. Princess Peach follows him through an automatic underwater section.
The camera is moving steadily to the right. Missed mussels and objects cannot be reached during this passage.
Open the third Sparkle Gem in time
Watch the bottom half of the screen during the tracking. Under a triangular or pyramidal coin arrangement, there is a closed shell.
Direct the fish immediately down to the shell. You don’t have to collect all the coins. Focus on the Sparkle Gem before the shell disappears from the picture.
| Danger | Procedure |
|---|---|
| Automatically moving camera | If possible, stay in the middle of the screen so that you can react to shells above and below the path. |
| Rubble and rock | Move Princess Peach out of the trajectory and then return to the destination. |
| Closed molluscs | Open it immediately. Once they leave the left edge of the screen, you cannot return. |
| Fish are left behind | Hold the singing button and wait for the crush to catch up with Princess Peach. |
Boss fight against the spoiled ship
At the end of the pursuit, the ship stops and several members of the Sauertruppe attack Princess Peach. The villains throw rocks and other shells through the water.
You cannot attack the ship directly with Princess Peach. Instead, you have to capture the emerging enemies with the fish and use them as shells.
Circling rogues with fish
Hold the singing button and move the crush of fish in a complete circle around an opponent.
If the rogue is completely surrounded, it is absorbed by the fish. Then steer the swarm towards the ship. The opponent is thrown against the hull and removes some of the dark energy.
| Boss action | Reaction |
|---|---|
| The villain appears | Surround him with the entire swarm of fish. |
| The enemy is captured | Steer the fish directly against the ship. |
| Rocks flying towards Princess Peach | Interrupt the circle and swim out of the trajectory. |
| No opening of attack | Stay moving and wait for the next villain. |
Repeat the process on all enemy waves. Each successful hit drives away another part of the darkness.
After the ship has been completely cleaned, you will receive the fourth Sparkle Gem. Princess Peach can then swim through an opening into the interior.
Freeing the Ensemble in the Ship
Inside the ship, members of the underwater ensemble are held in a large cage.
The direct route to the prison is blocked by metal rods and other obstacles. You must first use the yellow fish and then a large moray.
Fifth Sparkle Gem behind the grid
Take control of the yellow fish behind the first metal rods. Swim to the right with Princess Peach.
Below the main path is a narrow grid. Steer the fish down through the opening. Directly behind is the fifth Sparkle Gem.
Afterwards, get the crush of fish back before taking care of the cage.
Freeing the Morays
In an adjoining area, a large moraine swims behind another barrier. Opens the passage with the help of the flock of fish.
As soon as the moray can come out, she also responds to Princess Peach’s singing. Steer them carefully through the room and to the ensemble’s cage.
Destroying the cage
Lead the moraines directly against the bars. The great sea dweller breaks through the prison and frees all musicians.
For the successful rescue you will receive the sixth Sparkle Gem.
| Task | Solution |
|---|---|
| Crystal behind metal rods | Steer the small fish down through the narrow grid. |
| Reaching moraines | Open your closed passage with the fish. |
| The ensemble liberated | Lead the moraine with the singing directly against the cage. |
| Getting Sixth Crystal | It appears automatically as soon as all musicians have been rescued. |
The Underwater Concert
After the rescue of the ensemble, the final performance begins. The mini-game works similarly to the concert in Melody of the Sea.
Fish swim from different directions towards Princess Peach. Move the stick in time in the direction from which the respective fish appears.
Focus on the next fish
Do not watch the entire picture at the same time. Always pay attention to the fish that reaches Princess Peach next.
Hold the stick short in its direction. Does not move to the next page until the current note has been collected.
Large fish meet several times
The particularly large fish do not disappear after a single input. You have to hit their direction several times in the right rhythm.
Remains with the stick in the indicated direction and reacts to the individual signals. If you change too early, you miss a part of the note.
| Situation | Procedure |
|---|---|
| Small fish | Hold the stick in its direction in time. |
| Fish in succession | Alternates in a quiet rhythm between left and right. |
| Large fish | Take the indicated direction several times in succession. |
| Two pages almost simultaneously | First, focus on the fish closest to Princess Peach. |
Complete the entire performance successfully. Then you will receive the seventh Sparkle Gem and finish the play.
Hidden pose spots
In Blight of the Sea, there are two sparkling pose spots. The first leads to the first Sparkle Gem. The second is located inside the ship and contains additional coins.
| # | Location | Rewards |
|---|---|---|
| 1 | In the middle part of the first area between the spoiled sparkles and shells. | First Sparkle Gem |
| 2 | Inside the ship in front of two cross-mounted wooden boards between two lanterns. | Coins |
Pose position in ship
After entering the ship, pay attention to a wall with two wooden boards attached by cross. Lanterns hang on the left and right of it.
On the ground in front of it, several stars sparkle. Posed at this point to enter a secret room with additional coins.
This area does not contain Sparkle Gem, but is needed for the complete finding of all pose spots.
After Completion: Find the 3 Ninja Theets
After completing the main story, you can re-enter the play to find the hidden Ninja Theets. In Blight of the Sea, three Theet are hidden.
The first two Theet are already in the starting area. The third is waiting inside the spoiled ship.
| # | Location |
|---|---|
| 1 | The first Theet hides directly at the beginning to the left of the platform on which Princess Peach starts. First swim to the left before you turn to the yellow fish and shells. |
| 2 | The second Theet is located below the shell with the second Sparkle Gem. Opens the shell first with the fish and then examines the lower part of the rock face. |
| 3 | The third Theet is waiting inside the ship. After entering the ship, search in the lower right area before continuing to the captured ensemble. |
Tips for Blight of the Sea
| Tip | Declaration |
|---|---|
| Return to the start after the fish | The shell with the ribboner is above the starting platform and can only be opened with the yellow fish. |
| Use First Pose Position Early | The first Sparkle Gem is located in a secret room in the launch area. |
| Shells open immediately | The third Sparkle Gem lies in an automatically scrolling section and can not be reached later. |
| Keeping the ship moving | Wait for an opportunity to circle and dodge the thrown rock. |
| Throw opponents against the ship | The spoiled ship cannot be attacked directly. Use the captured villains as bullets. |
| Sending fish through the grid | The fifth Sparkle Gem is below the normal path and can only be reached by the small fish. |
| Use moraines for the cage | The little fish cannot destroy the prison. Free the moraines first and direct them against the bars. |
| React calmly at the concert | Always focus on the next note and don’t change direction too early. |
| Large fish meet several times | The large notes require several correctly timed inputs. |
| Finding First Two Theet Before Pursuit | After the start of the automatically moving section, you can no longer return to the starting area. |
| Seek third Theet immediately in the ship | It hides at the bottom right in the first interior and can be easily overlooked. |