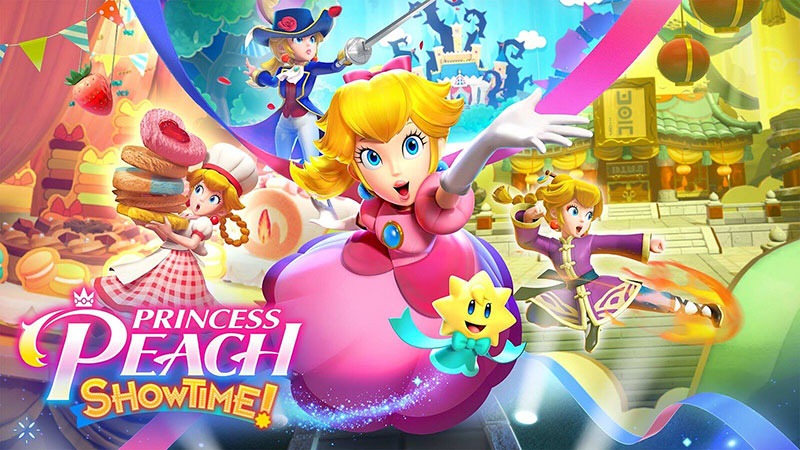

Complete The Dark Locomotive & the Doomed Town in Princess Peach: Showtime! and collect the Sparkle Gems and ribbon. When you return after finishing the story, look for the three hidden Ninja Theets as well.
After completing the main story, you can re-enter the play and search for the hidden Ninja Theets.
Locations of the Sparkle Gems
In The Dark Locomotive & the Doomed Town you can find a total of 5 Sparkle Gems. The play begins directly with a fast ride in which Cowgirl Princess Peach must rescue the captured Cowgirl Sparkla from the approaching train.
Later you drive with several carriages through a collapsing city. Since a large part of the play is automatic, you can not make up missed Sparkle Gems in the same pass.
| # | Location |
|---|---|
| 1 | During the first ride, Princess Peach pursues the dark train. As soon as the first two mounted opponents appear, you switch to the upper or middle track. The first Sparkle Gem floats between two large rocks. Align the horse for the gap early and collect the crystal before jumping on the train cars. |
| 2 | At the end of the first pursuit, the Cowgirl Sparkla is tied to a stake on the tracks. Ride on the middle lane and throw out the Lasso in the faded-in moment. Princess Peach pulls the Sparkla off the track before the train reaches it. For the successful rescue you get the second Sparkle Gem. |
| 3 | After the rescue, get on the ready carriage. Don’t do that yet. Runs first to the right or north to the sparkling pose spot at the plants and the damaged tracks. Pose there and defeat all four opponents in the secret room. Then the third Sparkle Gem appears. |
| 4 | During the subsequent ride with the carriages, an enemy horse approaches from the left. On his back or on the carried luggage is a Crate. Bring the Crate with the Lasso and destroy it. Therein lies the fourth Sparkle Gem. |
| 5 | In the final chase, the dark train goes directly behind your carriages. Drag the floating barrels with the Lasso to Princess Peach and throw them back against the locomotive. Keep the train at a distance and prevent it from ramming your rear carriage several times. If you reach the last jump with a sufficiently well-preserved carriage, you get the fifth Sparkle Gem. |
Location of the ribbon
The multi-colored Cowgirl Ribbon can be found in the destroyed city after the big jump with the carriage.
Runs over the roofs and collapsed parts of the building. On the main path you have to pull a beam or a pillar out of the way with the Lasso.
Then do not immediately move to the right. Nearby, the ribboner is in a barrel under or between the rubble of the building.
Ship the Lasso to the barrel and pull out the ribboner. As a thank you, he gives you the multi-colored Cowgirl ribbon for Stella.
| Rewards | Location | Task |
|---|---|---|
| Multicolored Cowgirl Ribbon | Destroyed buildings after the first big carriage jump | Find the ribboner in the barrel and pull him out of the rubble with Cowgirl-Peachs Lasso. |
The first ride against the dark train
The play begins without a long introduction. The Cowgirl Sparkla has been tied to a stake on the tracks and the dark train races directly towards him.
Cowgirl Princess Peach jumps on her horse and immediately takes up the pursuit.
Switching between the tracks
During the ride, the horse moves automatically forward. With the stick you change between the different tracks.
Pay attention to rocks, boxes and enemy riders. Many obstacles are already visible several seconds in advance. Therefore, change to a free track early.
| Danger | Procedure |
|---|---|
| Boulder | Change to a different track early or jump over smaller obstacles. |
| Opponents on a Horse | Pull it out of the saddle with the lasso or change track in time. |
| Crate on a car | Take the Lasso and pull the Crate to Princess Peach before she disappears from the picture. |
| Gap between wagons | Jumps just before the edge so that Princess Peach lands safely on the next car. |
Collecting the first Sparkle Gem
The first Sparkle Gem lies between two rocks during the fast ride. He appears at about the time when Princess Peach has caught the first opponents on horseback.
Do not stay permanently on the lower track. Align early on the gap between the two rocks.
Once you have passed the crystal, you cannot ride back during this passage.
Jumping on the wagons
Princess Peach finally catches up with the train and has to ride on several wagons. Jump over the gaps and dodge the boxes on the roofs.
Some wagons are damaged or detached from the train. Therefore, do not stay unnecessarily on a car.
Saving the Cowgirl Sparkla
Shortly before the captured Sparkla you have to put the horse on the middle track. If Princess Peach is on the upper or lower track, she cannot reach the stake in time.
Wait for the blended Lasso marking and throw out the rope. Princess Peach pulls the Sparkla out of the danger zone and the train races past both.
For the rescue you will receive the second Sparkle Gem.
Hidden pose location
In The Dark Locomotive & the Doomed Town there is a sparkling pose spot. You will find her immediately after the rescue of the Cowgirl Theets.
| Location | Task | Rewards |
|---|---|---|
| Right or north of the carriage at the plants and damaged tracks | Pose and defeat four opponents in the secret room. | Third Sparkle Gem |
Seek before boarding
The Cowgirl Sparkla asks Princess Peach to get on the carriage. As soon as you get in, the next automatically running section begins.
Therefore, runs first into the rear or right part of the area. There are several stars on the ground.
Place Princess Peach in the center and press ZL or ZR to enter the secret room.
Defeat all four opponents
In the secret room, four armed members of the Sauertruppe attack. Use the Lasso to unbalance opponents and then throw them out of the area.
Keep moving so that Princess Peach is not locked between several villains. After defeating all four opponents, the third Sparkle Gem appears.
Carriage ride through the destroyed city
After the rescue of the Cowgirl Theets, Princess Peach, the Sparkla and the Horse continue with several connected carriages.
The tracks and bridges were damaged by the Sauertruppe. Parts of the carriage break apart during the journey, which is why you have to change between the cars regularly.
Pay attention to the damage
The carriages have several platforms in succession. If a car is damaged too much, it starts to blink and breaks off shortly afterwards.
Jump to the front car in time. Don’t wait until the platform is already tilting down completely.
| Situation | Procedure |
|---|---|
| Car begins to flash | Jump immediately to the next carriage further forward. |
| The bridge is interrupted | Runs to the front and jumps only at the last moment. |
| The opponent approaches from the side | Pull him with the Lasso from the horse or from his platform. |
| Crate on an enemy horse | Use the Lasso quickly before the horse runs out of the picture again. |
Fourth Sparkle Gem
Already in the early part of the carriage ride, an enemy rider approaches from the left.
On the horse is a crate with the fourth Sparkle Gem. Ship the Lasso several times or at the right moment to pull the Crate to Princess Peach.
Then destroy or open the crate. If you wait too long, the opponent rides out of the picture and the crystal is lost for this passage.
Through the Threatened City
After a big jump over a gorge, Princess Peach ends up in a city whose houses and bridges are already collapsing.
The direct path leads over roofs, debris and narrow beams. In this area you will find the ribbon and after completing the main story the hidden Theet.
Remove rubble with Lasso
Multiple pillars and beams block the path. Stand at a sufficient distance in front of the obstacle and throw out the Lasso.
Pulls the stick or follows the indicated movement to tear the object out of the way.
Some debris subsequently serve as a bridge. Pay attention to where the beam falls before you jump on.
Ribbons not overlooked
The ribboner is in a barrel between the destroyed buildings. His call for help can be heard before it becomes fully visible.
Look for the area around the third destroyed building or at the pillar that you have to remove with the Lasso.
Draw the barrel to Princess Peach and free the ribboner before moving on to the next carriage section.
Jumping over the roofs
Some roofs collapse after Princess Peach’s landing. Therefore, do not stop and jump directly to the next secure platform.
For larger gaps you should run to the edge. A jump too early may not reach the next building.
Back to the carriage
After the destroyed city, Princess Peach jumps back on the carriage. Several paths are skewed or only partially present.
Pay attention to the track of the carriage and if possible stay on the front platform. The rear carriages are damaged faster during the large jumps and collisions.
Changing between horse and carriage
In some sections, Princess Peach has to jump from the wagons to her horse. The change is partly automatic as soon as you reach the edge.
Princess Peach is still centered on the horse. If you jump too far left or right, you may lose a heart and have to repeat the short section.
Prepare for the next persecution
Shortly before the finale, the dark train reappears. This time he does not drive in front of Princess Peach, but pursues the carriage from behind.
From now on you have to use barrels to keep the locomotive at a distance.
Boss fight against the dark train
The dark train is the real boss of this play. Princess Peach cannot stop him directly with the Lasso.
Instead, you have to grab the barrels floating along the way and throw them back on the locomotive.
Catching barrels with Lasso
The barrels appear on the left, right or above the carriage. Drop the Lasso as soon as a barrel is within reach.
Princess Peach pulls it in and holds it for a short time. Then aim back and throw the barrel against the front of the train.
| Situation | Procedure |
|---|---|
| Barrel floats next to the carriage | Take the Lasso to Princess Peach. |
| Train is far away | Keep the barrel briefly and do not throw it until the locomotive approaches. |
| Train catches up quickly | Ship the next available barrel immediately to the rear. |
| Rear carriage flashes | Change to a car further forward. |
Preventing collisions
When the locomotive reaches your carriage, it rams the rearmost carriage. After several clashes, the platform is destroyed.
For the fifth Sparkle Gem you must not miss too many barrels. Keep the train at a distance as far as possible throughout the journey.
Focus on the barrels and not on every single coin. Coins can be collected at a later pass, but the Sparkle Gem needs a successful chase.
Damaged wagons left in time
The rear carriages can also be damaged by the track itself. When a platform starts to blink or burn, you jump forward immediately.
Continue to ship barrels while you are on the front carriage. Cowgirl-Princess Peach can also use the Lasso from there.
The Last Jump
At the end of the route, the carriage reaches a destroyed bridge. Hold the train back with one last barrel and jump over the gorge.
The dark train does not make the jump and plunges into the deep. If your carriage was not damaged too much during the chase, the Cowgirl Sparkla will hand you the fifth Sparkle Gem.
This concludes the play.
After Completion: Find the Ninja Theets
Upon completion of the main story, you can re-enter the play to find the hidden Ninja Theets.
Since it is a short play in the basement, only one Theet is hidden here.
| # | Location |
|---|---|
| 1 | The Theet is at the beginning of the second large section. After Princess Peach and the Cowgirl Sparkla have crashed with the carriage or landed in the destroyed city, you are looking for on the next high bridge post or steel girder. The Theet stands up there before you jump on the three connected carriages. |
Looking for carriages before jumping
Once you reach the destroyed city, you should not immediately follow the main path.
Climb over the building parts and examine the nearest high bridge post or steel girder near the secret pose site.
The Theet stands on top of the carrier and stands out only a little from the dark background. Speak to him before jumping on the three carriages and the automatically running section begins.
The Dark Locomotive & the Doomed Town
| Tip | Declaration |
|---|---|
| Only five Sparkle Gems | The third plays in the basement are shorter and contain five Sparkle Gems each. |
| Change the track early on the first ride | The first Sparkle Gem lies between two rocks and cannot be reached after passing. |
| Save Sparkla on the middle track | Ride centrally towards the stake and throw out the Lasso only at the faded mark. |
| Posing before boarding | The only pose location is on the right or north of the carriage and leads to the third Sparkle Gem. |
| Defeat all four enemies in the secret room | The third Sparkle Gem appears only when no opponent is left. |
| Attack riders with the Crate immediately | The fourth Sparkle Gem is in his cargo and disappears from the picture with the horse. |
| Looking for a barrel with the ribboner | He is stuck between the destroyed buildings and must be freed with the Lasso. |
| Blinking carriages left | Damaged cars break off after a short time and can tear Princess Peach into the depths. |
| Prioritize barrels instead of coins | Only by regular hits the dark train remains far enough away from the carriage. |
| Protecting rear wagons | Too many collisions with the locomotive prevent the preservation of the fifth sparkling crystal. |
| Search Theet before the next trip | It stands on a high bridge post or steel girder near the beginning of the second section. |