

Painting the Planet Yellow
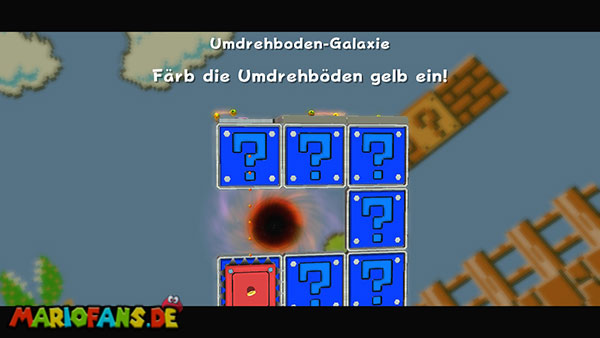
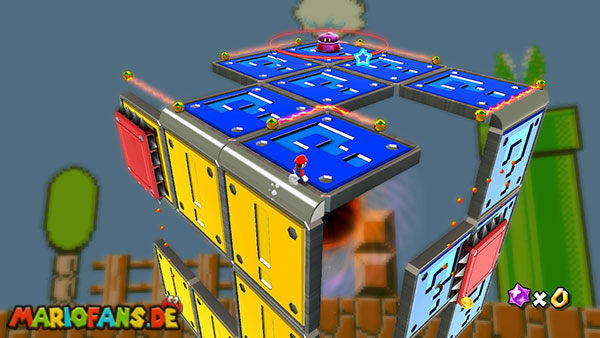
The Flipswitch Galaxy is one of the smaller galaxies of Super Mario Galaxy and will be unlocked on the observatory terrace once you have collected at least seven Power Stars. Unlike in the previous worlds, you do not have to travel numerous planets here or defeat a big boss. Instead, a single cube-shaped planet awaits you, whose surface is almost entirely composed of blue and yellow bottom plates. In total, you need to activate 18 Flipswitch Panels for the hidden Power Star to appear. This sounds simple at first, but requires a carefully planned route, because the floor plates change their color with each touch. When you enter a blue flipswitch panel, it turns yellow. If you run over the same plate again, it turns blue again. Only when all 18 fields simultaneously glow yellow, the puzzle is solved.
Already when you land, the first Flipswitch panel is activated automatically. This leaves 17 blue fields, which you have to enter one after the other. Before you leave, you should look at the structure of the planet. The platforms are distributed over several interconnected sides of a cube. Gravity changes at the edges, so Mario can easily walk from one side to the next. However, not all paths are harmless. Two red platforms with spiky edges move along fixed paths, several electrical barriers block the narrow transitions and on the upper surface stands a large shock wave robot that regularly emits circular energy waves. It is therefore particularly important not to touch already yellow-colored bottom plates again if possible. With targeted jumps, you can cross individual fields without changing their color again. The narrow gray borders of the base plates are also partly suitable as safe running paths.
The first Flipswitch Panels on the left
Move from the starting point first to the left and run over the edge of the cube to the adjacent side face. The camera automatically realigns as soon as gravity changes. Follow the narrow path down and enter all the blue turning floors one after the other. Try to walk as straight as possible over the fields so that you do not accidentally touch any of the already activated plates a second time. At the bottom you reach a slightly wider section, over which a red barbed platform regularly drives. The movable platform is provided on its sides with sharp spikes. If you touch it, Mario loses vital energy and is pushed back. Therefore, wait at the edge on a safe surface until the red platform passes your position, and then cross the remaining blue fields on the lower side.
Once all the bottom plates of this section have turned yellow, you must get back to the top of the cube. For this you can use the red mobile platform. Wait until she approaches your position, and gently jump on her safe top. If possible, stay in the middle while moving over the abyss. As soon as it reaches the opposite platform, you jump off in time. It is especially important not to jump laterally against the red block, because that is where the spikes are located. Once you have arrived on the top side, you should also avoid walking immediately back over the previously yellow-colored floor plates. If necessary, jump specifically over individual fields to leave their color unchanged. If you accidentally color a switch again on the way up, you can enter it again. You don’t have to start the whole puzzle all over again.
The upper surface and the shockwave robot
On the upper side of the cube there are several more blue turning floors. From your current position, first run over the fields that have not yet been activated and follow their arrangement as far as possible in a large arc. Pay particular attention to the electrical barriers that move along the edges. They are made up of luminous energy lines that hurt Mario during contact. Observe their movement and only jump over the dangerous spot when a sufficiently large gap has emerged. At some transitions, you can simply skip the electric line, while for others it makes more sense to wait for it to move away from your position. Try to touch only the actually still blue floor plates. If you have to cross an already yellow switch, you can jump over it with a jump.
In the rear area of the upper surface stands a large purple shock wave robot. This opponent cannot move freely, but at regular intervals sends red circular energy waves across the ground. As soon as such a wave comes to Mario, you have to jump over it in time. Observe the time when the energy spreads from the robot and press the jump button just before the wave reaches your position. This section becomes particularly unpleasant if you have to activate several blue Flipswitch Panels at the same time. Therefore, first concentrate on the avoidance and then run over the missing fields. You can also temporarily interrupt the robot by jumping to its top, but you do not have to defeat it for the actual puzzle. Keep a distance as much as possible and color the floor panels around it yellow one after the other before you continue.
The last switches on the opposite side
If you have activated all Flipswitch Panels of the upper surface, usually only a few spaces remain on the opposite side of the cube. Go from the shockwave robot to the appropriate edge and walk carefully downwards. Gravity changes again and the camera is aligned to the next surface. Here, too, there are several movable obstacles. Especially the second red barbed platform can be unpleasant, as it travels directly over the narrow turntable floors. So wait until she moves away from you before you enter the next blue switch. If possible, follow the fields in a continuous movement to the lower end of the platform and make sure not to accidentally run back up over an already yellow plate.
The last blue bottom plates lie on the lower or lateral section of this cube surface. If you only lack a single switch, you should first look closely at the environment. Often it is on the opposite side of an already activated plate, which you do not want to enter again. In this case, use a targeted jump or wait again for the passing red platform to cross the appropriate path. As soon as you touch the last blue Flipswitch panel and all 18 fields have turned yellow at the same time, the puzzle is automatically completed. All floor panels are now colored green and can then no longer be switched back. At the same time, the electrical barriers disappear or the moving obstacles are stopped, so that you can now move safely across the planet.
With the jumping robot to the Power Star
After successful inking, the Power Star appears on the top surface of the cube, directly above the previously dangerous shockwave robot. You must therefore return to this opponent once again to collect the star. Since the floor plates have now become green and the obstacles are no longer active, you can complete the way back without major difficulties. Run across the upper platforms back to the purple robot and stand right in front of it. The opponent is no longer dangerous after the completion of the puzzle and now serves as a spring.
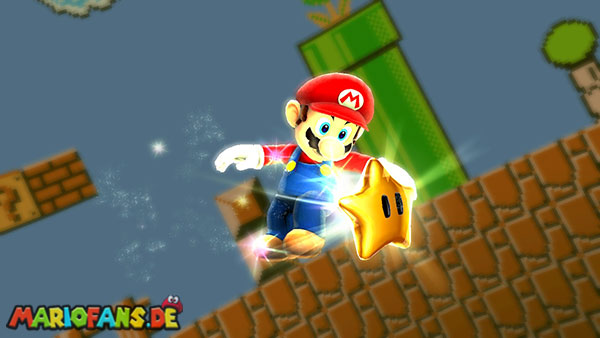
Jump to the top of the robot and let its spring throw you high into the air. If Mario does not reach enough altitude on the first attempt, you can also use a ground pound immediately before landing. This compresses the spring more strongly and Mario jumps particularly high. Then steer towards the floating Power Star and touch it before you fall back down. You have completed the only mission of the Flipswitch Galaxy.
There are no other hidden Power Stars or Prankster Comets in this galaxy. You do not have to search for additional star part reserves here, because the small cube planet does not contain any Star Bits. Only two ordinary coins are available, with which you can restore lost health if necessary. Once you have collected the Power Star, the Flipswitch Galaxy is therefore completely complete. Then you can continue your journey on the terrace and prepare for the next challenges. Bowser Junior’s robotic reactor in particular is already waiting for Mario to thwart his further plans.