

After Mario frees the first Grand Star from Bowser's violence in the Gateway Galaxy, the observatory is slowly coming back to life. Rosalina explains to him that the observatory’s individual domes offer access to numerous galaxies, in which other Power Stars are hidden. Our first destination is the Good Egg Galaxy on the terrace. Already after a collected Power Star she becomes accessible and takes you on a journey over small, unusually shaped planets, through twisted gravitational puzzles and finally to the first two big boss opponents of the adventure.
In total, six Power Stars are waiting for you. You can collect three of them directly during the regular story. Another star appears later after Luigi is rescued from the Ghostly Galaxy and set out on his own. The last two stars are among the Prankster Comets that unlock additional challenges. In the first comet, you have to defeat Dino Piranha under time pressure, while in the second you collect a total of 100 Purple Coins on three interconnected planets. Especially for a complete score is therefore worth a later return after the first three missions.
Dino Piranha
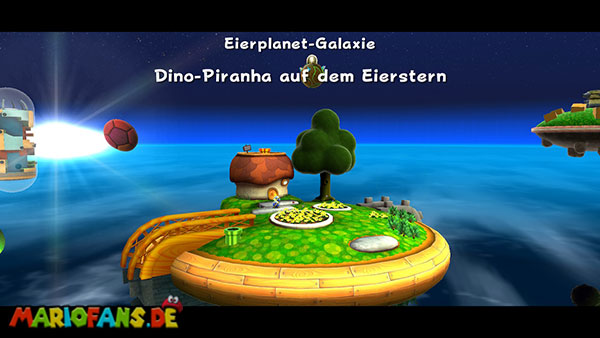
Your first adventure begins on a small, unusually shaped planet with a sunny and a dark side. On the bright half stands a lonely house, next to which several electric Goombas patrol. You should first turn off the two blue opponents with a spin, because if you touch Mario and his health quickly lose a point. Then you can look around in peace. The flowers and bushes contain numerous Star Bits, which you can collect with the pointer of the Wii remote control or the corresponding control on the Nintendo Switch. Already here it is worthwhile to create a small stock. Star Bits are later needed not only as bullets against enemies, but also for various hungry Lumas and to unlock other galaxies.
For the actual path you go from the starting point over the left bridge to the dark side of the planet. Follow the curved stone path that appears to run perpendicularly along the surface. Gravity changes automatically, so Mario can also walk on the lateral and lower surfaces. Especially in the beginning, this requires some getting used to. Therefore, orient yourself on the course of the stone plates and do not jump unnecessarily over the outer edge. On the dark side are several dead trees, in whose branches additional Star Bits hang. In addition, small Star Bits regularly fall from the sky. If you have enough time, you can already collect some additional Star Bits here before you go further.
In the middle of the dark planet rises a tall stone tower whose walls you can climb over a narrow spiral path. Follow the steps up and avoid the electric Goomba waiting on one of the upper platforms. At the end, you will encounter a small Luma, which turns into a Launch Star or opens the way to the next Launch Star. Use a spin to let him hurl you through space. On the Wii you shake the remote control; in the Nintendo Switch versions you can alternatively use the corresponding button. After a short flight, you land on an elongated planet that is roughly the shape of a peanut.
Five Star Chips on the peanut-shaped planet
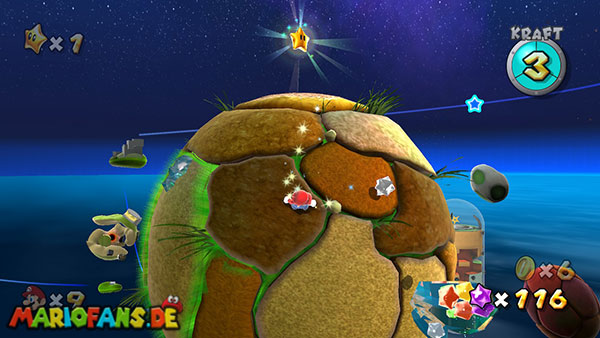
On this small planet, you must first collect five yellow Star Chips. Only when you have found all five, the next Launch Star will appear. The planet is covered by numerous rolling boulders and several mud surfaces. Especially in the mud, Mario moves much slower, so you should not stop there longer than absolutely necessary. The large rocks follow fixed paths around the planet. Observe their movements and only run over an open section when no boulder is approaching. By the way, you can also destroy the rocks with a spin if you meet their striking red crystal core. Since the timing on the first visit can still be a bit unusual, evasion is usually the safer solution.
Start your search directly at the landing site and first run around the narrow side of the planet. The first Star Chips are clearly visible on the ground or on small elevations. Pay particular attention to the places next to the mud surfaces and to the opposite side of the planet. Because gravity holds Mario on the surface, you can orbit the entire planet without falling into space. If you lose health on the way, you can restore it with the scattered coins. Once the fifth star splitter has been collected, all the pieces combine to form a new Launch Star. Return to it and use a spin to fly on to the next planet.
The Piranha Plant and the Growing Planet
You land on a small green planet where several simple enemies and a large piranha plant are waiting. Defeat the plant either with a well-timed spin or by jumping on her head as soon as she takes her attack break. In its place, a long vine grows from the ground. Stand right next to it and perform a spin so that Mario holds on to it and is automatically pulled up. The vine transports you to a larger planet, the surface of which is partly reminiscent of a bitten apple.
Here the path becomes a bit more dangerous. Large rocks roll over the green and brown surfaces again, while several opponents guard the narrow passages. On some platforms stand large elastic balls that are attached to short stems. If you give them a strong push with a spin, they swing forward and can hit opponents or rolling rocks. However, make sure that you do not stop immediately in front of the ball when it swings back. She can otherwise meet Mario herself and subtract a life point.
On this planet, there are two possible paths to the next destination. The direct path leads across the upper half of the planet to a large purple piranha plant. You can hit them with one of the elastic bullets or get them done from a safe distance after their attack break. After their victory, a new vine grows, through which you reach the next planet. For our first complete run, however, we first choose the slightly longer path through the green tube, because there you can expect a small switch puzzle with an additional opportunity to collect a 1-Up Mushroom.
The Mystery with the Blue Switches
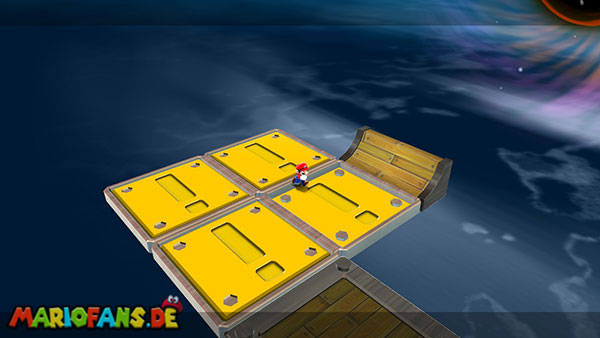
Look for the green tube on the lower side of the apple planet. A piranha plant guards its entrance, which you can defeat with a spin or jump. Then you climb in and reach an unusual planet whose surface is completely made of blue turntable floors. As soon as Mario walks over such a floor, he changes his color. Your task is to activate all blue fields so that they become yellow. Only when all fields have been switched will the Launch Star appear to the next planet.
Start with the fields right next to your landing site and follow the narrow path once around the first platform. Pay particular attention to the red moving platforms that travel over deep abysses. Their sides are provided with spikes, which is why you should only stand on the safe top if possible. As soon as a platform approaches your position, you jump on it and get transported to the next section. There you activate the remaining blue fields by entering them one after the other. On one of the side platforms there is also a 1-Up Mushroom, which you can collect on occasion. Once all the fields have turned yellow, their color changes again and a new Launch Star appears. Use it to continue the journey.
The ruined planet in front of Dino Piranha
After the flight you land on another small planet with large stone blocks and several electric Goombas. Gravity also pulls Mario onto the surface here, so you can circle the entire environment. Pay particular attention to the dark bottom, where several invisible opponents move. Their footprints reveal their position. With a spin you can make them briefly visible and then defeat them. They leave numerous Star Bits that you should collect before the boss fight.
On the front of the planet stand three larger stone blocks, arranged like stairs. Jump to the lowest block and work your way up from there. Behind the blocks is another 1-Up Mushroom that you can take with you before climbing. At the top there is a large crystal, which includes the next Launch Star. Destroy it with a spin and then use the Launch Star. He transports you to the last planet of this mission, where a huge egg is already waiting.
Boss Fight: Dino Piranha
After landing on the last planet, you discover a massive egg from which a long, spiky tail sticks out. Approach carefully and watch the red ball at the end of the tail. As soon as you are within range, you perform a spin against the ball. As a result, the tail beats against the egg and breaks the shell. From the inside emerges the giant Dino Piranha, who immediately recognizes Mario as an intruder and pursues furiously across the planet.
The weakness of the boss remains the round ball on his tail. Don’t try to jump right on his head or hit him from the front with a spin. Instead, you have to get behind him and hit the ball so that the tail hits his own body with full force. Since the planet is very small, you can simply circle Dino Piranha and cut his path. First, keep a little distance and watch in which direction it runs. Once he has passed you, you turn around and perform a spin against the tail ball.
After the first successful hit, Dino Piranha becomes even more angry and begins to pursue Mario faster. On another hit, his body turns red and his movements become much hectic. Especially now you should not try to run after him directly, as you can hardly catch his dick. Move in the opposite direction around the planet and wait for the boss to pass you. This makes it much easier to get into the right position for the next attack. If necessary, you can numb Dino Piranha with a targeted star part and give yourself a moment.
After the first hit that destroyed the egg, you need three successful tail hits to finally defeat the boss. Once the third hit against his body succeeds, Dino Piranha loses his power and falls into numerous Star Bits. In its place, the first Power Star of the Good Egg Galaxy appears. Collect it and return to the observatory. With this you have received the first regular star of your journey through the galaxies.
A Snack of Cosmic Proportions
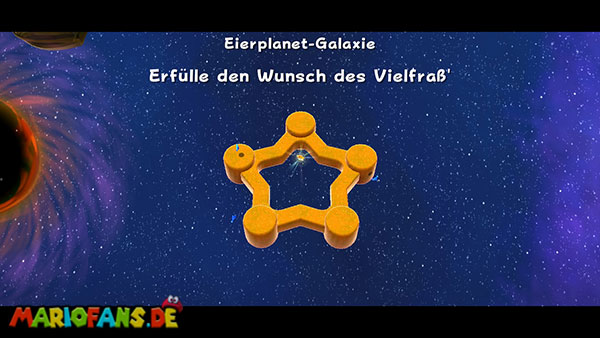
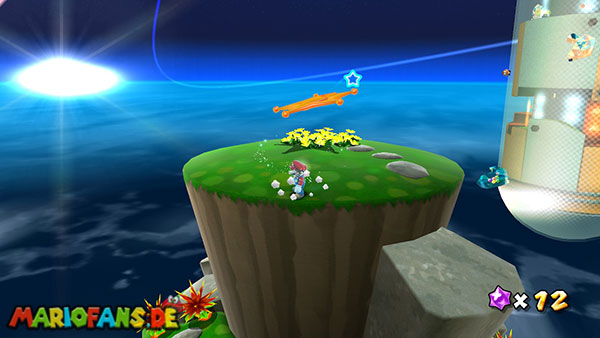
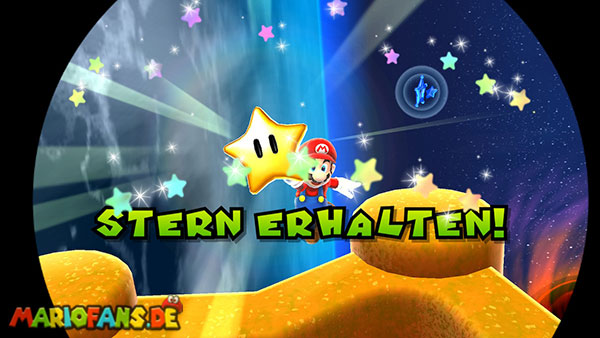
Your second mission in the Good Egg Galaxy is not about defeating a big boss. Instead, Mario encounters a particularly hungry Luma who needs a massive amount of Star Bits to transform into a new planet. In total, you have to bring him 100 Star Bits. Since you travel several smaller planets on your way, you can collect the required amount on the way. However, it is best to start directly on the launch planet and take as many Star Bits as possible before using the first Launch Star.
First, search the flowers and bushes on the sunny side of the launch planet. Often, small star subgroups hide in it, which you can expose with a spin. Then you go over one of the two bridges to the dark side and examine the dead trees. In their branches hang more Star Bits, which you can easily collect with the pointer. In addition, small Star Bits fall from the sky again and again. Wait a moment and collect the falling pieces. Especially productive are the crystals and the? block on the dark side. Destroy the crystals and jump against the block to release additional Star Bits.
Once you’ve gathered a good supply, head to the large stone tower in the middle of the dark planet half. Unlike the first mission, this time the exit is not directly on the top of the tower. Instead, look for the narrow side stone path that leads to a small blue Luma. Talk to him. The Luma transforms into several floating Pull Stars, with which Mario can overcome the big gap to the next Launch Star. Point the pointer at the first Pull Star and hold the appropriate button so that Mario is pulled to it. Then change to the next Pull Star and move in this way until the Launch Star. Once you are within reach, you release Mario and activate him with a spin.
The Pear Planet and the First Star Bits
You land on a small green planet whose shape is reminiscent of a bulb. On its surface stand several spiky plants and some Goombas guarding the path. Since you need a total of 100 Star Bits for the later transformation of the hungry Luma, you should destroy all crystals here and defeat the opponents with spins. Many of them leave additional Star Bits. Between the spiky plants are also several elastic balls, with which you can hit the obstacles from a safe distance. Stand next to such a ball and strike against it with a spin, so that it swings forward and eliminates the spiked plants.
There are several Launch Stars on the pear planet that take you to the neighboring planets. For our round you should first use the ordinary ring that leads to the red rock planet. During the flight, additional Star Bits appear, which you can collect automatically. Pay attention to a second Launch Star, which you fly past on the way. If you activate it in time with a spin, you will skip a planet and reach directly to the large egg planet. For collecting as many Star Bits as possible, it is worthwhile to first fully explore both smaller planets.
The Red Rock Planet
On the rock planet, numerous large stones roll over the red surface. As with the first star, you should avoid them as much as possible and not unnecessarily put yourself in their trajectory. Some rocks again have a striking red crystal core, which you can hit with a targeted spin. As a result, they break and leave additional Star Bits. Especially the crystals on the edge of the planet contain other small supplies that you should collect. Examine the entire surface and pay attention to the small platforms, which are slightly higher than the rest of the floor.
On a side elevation, there is also a small Launch Star that hurls Mario to a coin and other Star Bits. Use it when needed and then return to the main path. Once you have found enough Star Bits, you can activate the big Launch Star, which will take you to the next planet. During the flight, several Star Bits are created again, so that your display should now be as close as possible to the required 100.
The hungry Luma on the egg planet
The next planet has the shape of a giant Yoshi ice. Between its white and green surfaces move some Goombas that you can defeat to get more Star Bits. There are also several crystals on the surface. Collect their contents and then walk to the striking small figure on one of the green surfaces. Here is the sought-after wolverine-Luma, who explains to you that he is incredibly hungry and needs exactly 100 Star Bits for his transformation.
If you have already collected enough Star Bits, you point the pointer at the Luma and shoot the required amount at it. On the Wii you use the B-key for this. The Star Bits are swallowed one after the other and the Luma grows with each additional part. Once he has eaten all 100, he can hardly hold back his transformation. Eventually, it turns into an entirely new tower planet that appears immediately next to the egg planet. At the same time, a new Launch Star is created, with which Mario can reach the additional area.
If you are missing some Star Bits, you do not have to restart the mission. Using the existing Launch Stars, you can return to the pear and rock planets and investigate further crystals, opponents or Star Bits. Especially the trajectories between the planets are helpful, as additional Star Bits appear there. Then return to the dinosaur and feed it with the missing amount. Only when the full 100 Star Bits have been submitted, the new planet appears.
Climb the tower planet
Activate the resulting Launch Star and land on the new tower planet. Its surface consists of several grassy elevations and numerous superimposed stone platforms. In addition, some spiky plants grow here, which make it difficult to climb. First find the lower path that runs around the side of the planet and jump to the first stone blocks. With a combination of ordinary jumps and backflips, you can overcome several levels at once. For this, press the corresponding Duck button at standstill and then jump upwards. So Mario reaches much higher altitudes than with a normal jump.
On the back of the planet is an additional 1-Up Mushroom in a narrow depression. If you want to take it with you, let yourself carefully fall into the gap between the two stone walls and then jump back up with wall jumps. Follow the higher platforms until the summit. Near the last lead, several enemies are waiting, which you can either avoid or eliminate with a spin. At the top is the next Launch Star, which will transport you to a huge glass capsule.
The glass case and the changing gravity
The next station is one of the most unusual planets of the early stages of the game. Mario lands on the outside of a huge glass capsule, inside which numerous platforms and opponents can be seen. First run over the outer surface until you discover a striking crystal behind which there is a passageway. Destroy it with a spin and then jump through the opening into the interior of the capsule. There, the camera perspective changes and the entire route is played like a laterally displayed skill level.
The greatest peculiarity of this section is the different gravity fields. Depending on which area Mario is in, he is pulled up, down or to the side. The corresponding surfaces are marked in color. Blue areas usually pull Mario down, while red areas reverse its gravity direction. Therefore, always pay attention to the arrows and the current orientation of the level. Especially when switching between two areas, you should not jump recklessly, otherwise Mario will fall in the wrong direction.
First follow the lower path to the right and jump over the small platforms until you reach an area with several retractable stone blocks. These regularly drive out of the wall and disappear again after a short time. Observe their rhythm and only move over the gap when the platforms are just retracted or there is enough space to pass. Then you reach the next gravity area where Mario is suddenly pulled to the top of the screen. Let yourself fall up in a controlled manner and keep yourself as far away from the lateral abysses as possible.
In the upper part, the route is divided into two paths. The right passageway leads past a large movable stone plate, which can trap Mario in an imprudent movement. If you take this detour, you will find another 1-Up Mushroom. Wait until the plate has completely retreated, and then jump through the free gap. Alternatively, you can use the left path, which leads up through several small platforms. Both routes end in the same upper section of the capsule.
At the highest level, some Goombas and another Launch Star are waiting. Defeat the opponents if necessary and then activate the ring. Mario is thrown through the glass outer shell and lands on a small, star-shaped planet, in the middle of which the next Power Star is already floating.
Five Star Chips before the Power Star
On the last planet you have to collect five blue stars again. These lie on the various tips and side faces of the small star planet. Since gravity changes depending on the position, you can orbit the entire planet and collect the individual splinters one after the other. Be careful not to jump unnecessarily far from the surface, because there are larger gaps between some tips. It is best to move first over the lower side, collect the visible splinters there and then follow the other tips upwards.
Once all five Star Chips have been collected, several Pull Stars appear, through which you can reach the Power Star in the middle. Point the pointer at the first Pull Star and hold the appropriate button so that Mario is pulled to it. Then change to the next Pull Star and slowly move towards the Power Star. Don’t let Mario go until you’re right above the star. Once you touch it, the mission is complete and you get the second Power Star of the Good Egg Galaxy.
King Kaliente's Battle Fleet
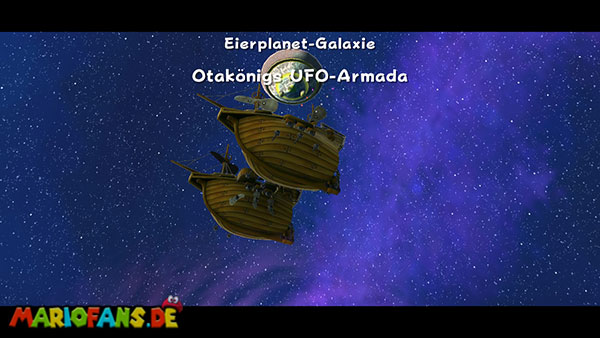
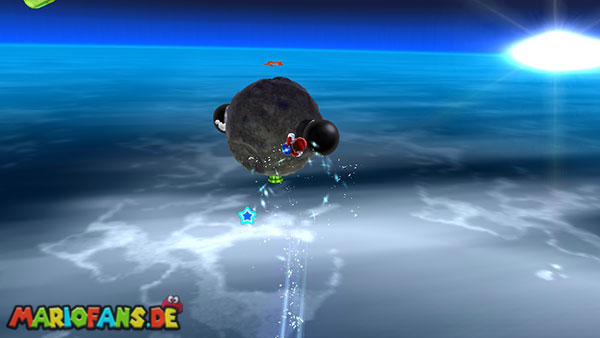
On the third mission, you will find an attack on the UFO armada of the King Kalientes. Instead of the known small star planets, the route leads this time through several dangerous combat stations and over two large spaceships. Already on the launch planet, the position of the Launch Star has therefore changed. He is now on the roof of the small house on the sunny side. You can either reach the roof with a well-executed triple jump or use the orange tube that lies on the opposite, dark side of the planet. For the complete run, we first take the tube, because inside there is a small bonus task with an additional life.
From the starting point, go over one of the two bridges to the dark side and find the orange tube at the bottom of the planet. Get in and you reach a small enclosed space whose floor and walls are connected by special gravity fields. Run first over the small ramp to the right and then follow the path along the wall. Touch the large? coin so that several musical notes appear. Collect the notes as quickly as possible in the order provided before they disappear again. If you succeed, a 1-Up Mushroom appears for the reward, which you can take directly with you.
Then follow the further ramps to the upper wall of the room. There is a second orange tube, through which you reach directly on the roof of the house. On the roof, the Launch Star is already waiting for the actual mission. Use it and hurl to the first small planetary island of the UFO Armada.
Coconuts and the giant spiky plant
You land on a tropical planet with palm trees, sandy surfaces and several large sting plants. Right next to your landing site is a violet toad in a crystal. Destroy the crystal with a spin and talk to it. He tells you that the spike plants are sensitive to coconuts. These lie on the ground at several points and can be thrown in a certain direction with a spin. Therefore, stand behind a coconut so that the large plant stands directly in front of you and perform a spin.
As a result, the coconut is thrown forward at high speed and destroys the struck stinged plant. For the normal small plants, a successful hit is enough. Particularly important, however, is the huge porcupine plant on the upper part of the planet. Align one of the surrounding coconuts as closely as possible and throw it against it with a spin. After the hit, the plant decays and releases a new Launch Star. Use it to get to the next tropical island.
On the second planet, a big pokey awaits you, whose spiky body wards off ordinary jumps. Again, you must first use one of the coconuts. Stand behind a coconut and hit it with a spin against the pokey. Due to the hit, he loses his body or is weakened so far that only his head remains. Then jump on the head or run a suitable ground pound to finally defeat the opponent. In its place, the next Launch Star appears, which takes you deeper into the UFO armada.
Chain Chomps and electric fences
After the next flight, you land on a small planet where several Chain Chomps roll around along fixed tracks. The large black balls are largely insensitive to ordinary jumps and turning attacks. Therefore, do not try to attack them directly, but observe their movements and walk past them as soon as a sufficiently large gap opens. At the bottom of the planet is another green tube, through which you can reach a small bonus room. There is a? coin waiting, which after collecting makes a rainbow star appear.
With the Rainbow Star, Mario becomes invulnerable for a short time and can even destroy the large Chain Chomps by mere touch. If you want to collect additional Star Bits, you should take this opportunity and defeat as many enemies as possible before the effect disappears again. Then return to the main trail and use the next Launch Star to reach the dangerous electric planet.
The following planet consists of several interconnected platforms surrounded by electric fences. In addition, some electric Goombas patrol the narrow paths. If you touch one of the fences, Mario immediately loses vital energy and is pushed back. Therefore, move as carefully as possible and only jump over an abyss if the next platform is actually freely accessible. First, stick to the bottom of the planet and follow the path around the outer edge. On the opposite side you can see a larger stone and metal structure that sticks out of the planet like a small tower.
Jump onto the first platform of this construction and work your way up the narrow projections. Along the way, you have to dodge several Bullet Bills that are shot from large cannons. Wait until a projectile has flown past you and then use the next stone blocks as stairs. At the top is a large crystal that includes another Launch Star. Destroy the crystal with a spin and activate the ring. Mario is then hurled directly to the first large spaceship of the UFO armada.
The two ships
After landing, you are on the deck of a small spaceship. In front of you floats a second ship, on the deck of which two large Octoombas stand. These opponents attack Mario with coconuts and fireballs. If possible, you should skip fireballs or avoid them sideways, because they can not be sent back in the same way. As soon as an opponent spits out a coconut, you position yourself as frontally as possible and perform a spin at the right moment. As a result, Mario throws the coconut back to the attacker.
If the repulsed coconuts meet the Octoombas, they are defeated. Once both enemies have disappeared, the large wooden bridge between the two ships descends. Cross them and on the opposite deck defeat the electric Goombas guarding the way ahead. To the right of one of the large boxes, you can also find a Life Mushroom. Destroy the box with a spin and collect the mushroom so that Mario's maximum health temporarily increases from three to six points. Especially for the following boss fight, this is a helpful additional protection.
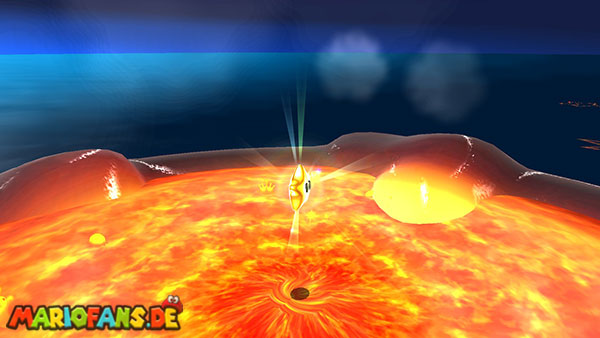
Then go to the wheel at the end of the second spaceship. Near it is another crystal that includes the final Launch Star. Destroy him and use the ring. After a long flight, you will land on a dark lava planet covered by numerous small craters and several crystals. On the opposite side is the actual leader of the Armada: King Kaliente.
Boss Fight: King Kaliente
Before you approach the boss, you should destroy the crystals on the lower planet half and collect the contained Star Bits or coins. In addition, a small Luma is waiting to warn you of the danger on the other side. Then go around the planet until you reach a large lava lake. Once Mario gets close enough to the crater, the formidable King Kaliente emerges from the lava. The giant octopus has several tentacles and attacks Mario with a mixture of fireballs and coconuts.
The fight works similarly to the confrontation with the Oktumbas on the spaceships. King Kaliente first spits several fireballs in Mario’s direction. You should deal with a lateral jump or a short run along the crater rim. Then the boss shoots a coconut that moves towards Mario. Stand as close to her as possible and wait until she gets close enough. Then perform a spin so that the coconut is thrown back directly to the King Kaliente.
On the first hit, King Kaliente is immediately hit by the repulsed coconut. He retreats briefly and then emerges again from the lava. Now the fight becomes more difficult, because the boss begins to fight back the coconuts even with his tentacles. As soon as you throw a coconut at him, he will not immediately plug it in, but send it back in your direction. Observe their trajectory and perform another spin to throw them back a second time. Only then does the coconut hit the boss and cause the next damage.
After the second hit, King Kaliente loses his crown and becomes significantly more angry. He now hurls several fireballs one after the other and additionally shows up small lava opponents who move on the crater rim. Therefore, keep as far away as possible from the lava flow and first focus on finding a safe position for the next coconut. As soon as King Kaliente spits out a coconut again, you send it back with a spin. The boss will now fight them back twice in a row, so you will need a total of three successful spins before the coconut finally hits him.
Try to stay in one place when beating the coconut as far as possible and not to move sideways unnecessarily. So the flight path of the projectile remains clear and you can time the following spins better. Once the last coconut hits King Kaliente, the octopus loses its strength and sinks back into the lava. On a small lead on the edge of the crater, the third Power Star of the Good Egg Galaxy appears. Jump carefully to the platform and collect it without falling into the lava.
Luigi on the Roof
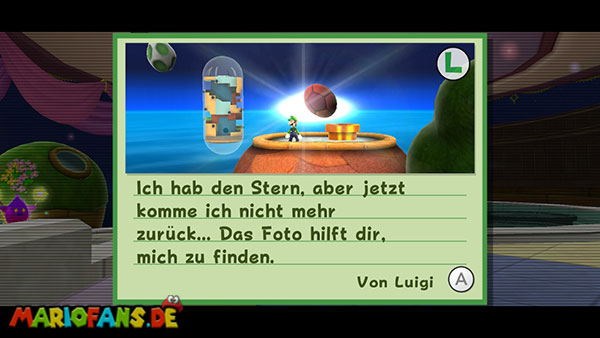
In addition to the three regular missions, the Good Egg Galaxy has an additional hidden Luigi star. To unlock it, you must first free Luigi from the haunted house in the Ghostly Galaxy. After that, he first stays in the garage of the observatory with the Toad search party. After some time, he himself begins to search for Power Stars in the various galaxies. However, he always gets into trouble and sends Mario a postcard with a picture of his whereabouts.
Once you have received the first corresponding postcard from Luigi, you recognize in the picture a small planet with a house. What is meant is the launch planet of the Good Egg Galaxy, on whose roof Luigi is stuck. Therefore, return to the terrace and select the Good Egg Galaxy. You can start any of the three regular missions for the search because Luigi is on the roof independently of the chosen main mission. However, the easiest way to choose “Dino Piranha” is because you land right at the usual starting point.
After landing, first go to the small house on the sunny side of the planet. Luigi is located directly on its roof. If you’re already good at Mario’s higher jumps, you’ll reach it with a combination of backflip and spin or a clean triple jump. Stand as close as possible to the house wall, jump up and use the spin at the highest point to overcome the last height difference. Then you can land on the roof and talk to Luigi.
If this jump combination still causes you difficulties, there is a much easier way. Go over the left or right bridge to the dark side of the launch planet and find the orange tube there. It leads into the same small gravity room you visited during the mission “King Kaliente’s Battle Fleet”. Follow the ramps along the walls until you reach the second orange tube on the upper side of the room. It takes you straight to the roof of the house, so you don’t even have to make a particularly difficult jump.
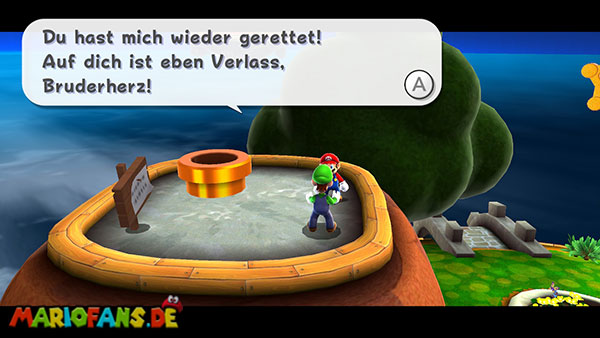
Talk to Luigi there. He explains to you that he has found a Power Star, but afterwards he did not know how to come down from the roof. In gratitude for Mario finding him again, he hands him the star. This gives you the fourth Power Star of the Good Egg Galaxy. At the same time, the first of a total of three special Luigi search missions is completed. Later you can find Luigi again in the Battlerock Galaxy and finally in the Honeyhive Galaxy.
Dino Piranha Speed Run
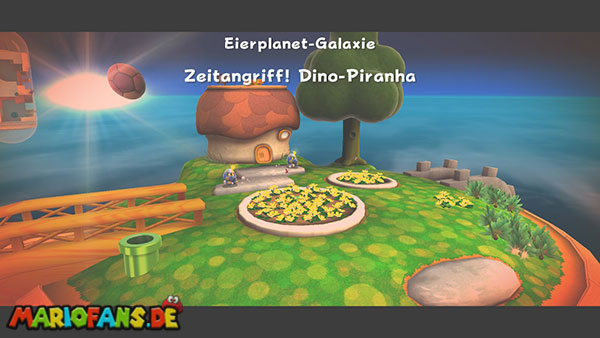
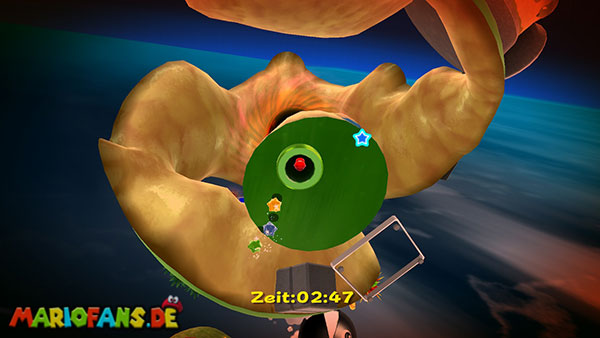
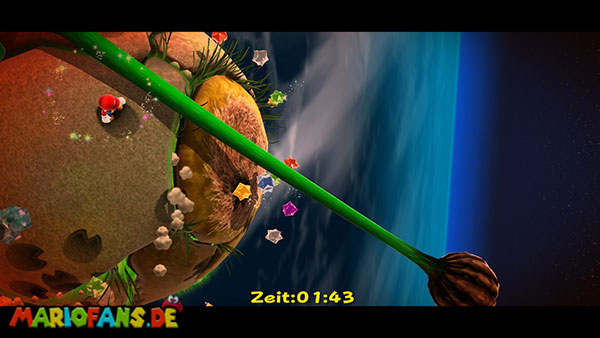
This mission will be unlocked as soon as a red Prankster Comet appears over the Good Egg Galaxy.
For the fifth Power Star, you have to complete the first mission again, but with one crucial difference: This time you only have four minutes to reach and defeat Dino Piranha. As soon as Mario lands on the launch planet, the countdown begins. It continues throughout the mission and will not be stopped until you have actually collected the Power Star. Therefore, you should not make any unnecessary detours and solve all already known puzzles directly on the fastest way possible.
Immediately after launch, run across the left bridge to the dark side of the planet and follow the stone path to the top of the tower. Ignore the extra Star Bits in the trees and the enemies that are not immediately on your route. The Luma on the upper platform is already prepared in this mission and opens the way to the Launch Star. Use it immediately and let yourself be hurled to the elongated peanut planet. Here the first important change of the time attack is already waiting.
Instead of the ordinary rolling rocks on the peanut planet, large Chain Chomps now move across the surface. They are especially dangerous because you can’t just destroy them with a normal spin. Therefore, do not try to attack them, but run past them and focus on the five star shards. Since you already know their positions from the first mission, you should collect them one after the other as quickly as possible. Above all, move on the solid floor surfaces and avoid the mud spots that slow Mario down considerably.
Once all five Star Chips have been found, use the resulting Launch Star and land on the small vine planet. Defeat the piranha plant immediately with a spin and swing up the plant to the next planet. There, too, the ordinary rocks were largely replaced by Chain Chomps. For a fastest possible route, you should not take the detour via the green tubes and the blue turning floors this time. Instead, run directly to the large purple piranha plant on the upper side of the planet. Defeat them with one of the elastic bullets or a suitable attack and then use the tendril that appears in their place.
This allows you to reach the small ruined planet without having to complete the additional switch puzzle. Run directly to the three large stone blocks and jump over them to the highest platform. Ignore the electric Goombas unless they immediately block your path and destroy the crystal with the Launch Star. Use it to reach the last planet with Dino Piranha. Ideally, you should now have significantly more than one minute on your ad, so that there is enough time for the actual boss fight.
Defeat Dino Piranha under time pressure
The fight against Dino Piranha works just like in the first mission. First hit the ball on his tail with a spin so that the egg breaks and the boss hatches. Then you have to throw his tail against his body three more times. Since Dino Piranha gets faster after every successful hit, you should outmaneuver him if possible by clever changes of direction. Don’t run after him permanently, but move in the opposite direction around the small planet. So the tail ball comes to you regularly and you can hit it with a spin.
If you execute the three goals without a major interruption, the boss can be defeated within a short time. It is particularly helpful that the actual arena is very small and therefore Dino Piranha can hardly hide. However, be careful not to stop immediately in front of his head, as a collision takes precious time and health. As soon as the last hit succeeds, the Power Star appears. Collect him immediately, because the countdown continues even after the defeat of the boss. If you succeed within the four minutes, you own the fifth Power Star of the Good Egg Galaxy.
Purple Coin Omelet
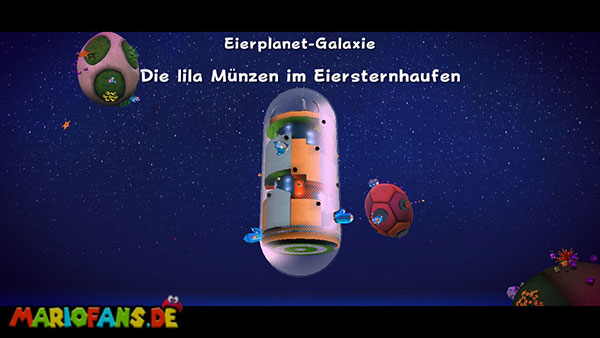
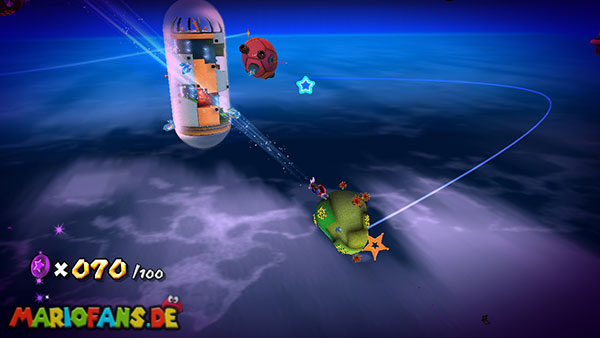
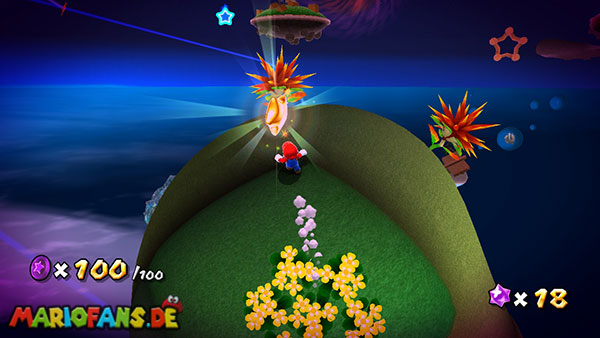
This mission is available only after you defeat Bowser in the final and a purple Prankster Comet appears over the Good Egg Galaxy.
For the sixth and final Power Star, you have to collect a total of 100 Purple Coins. Unlike many later Purple Coin missions, this challenge has no time limit. So you can explore the individual planets in peace and try the flight routes several times. The special feature is that the coins are not on the ordinary launch planet. Instead, you travel to three smaller planets that you already know from the mission “Fulfill the Desire of Welfare”: the pear planet, the red rock planet and the large Yoshi egg planet.
In total, there are 40 Purple Coins on the surfaces of the three planets. The remaining 60 coins are on the trajectories between them and are collected by the Launch Stars. Since some flight routes have two different Launch Stars, you can skip individual planets and reach additional coin rows. This is where the greatest danger lies if you start the mission unprepared: If you overlook one of the intermediate rings, you may have to orbit several planets again. With the following route you collect all 100 coins without complicated detours.
Purple Coins 1–15: The Pear Planet
At the beginning of the mission you will land directly on the green pear planet. The first 15 Purple Coins lie in a recognizable row along its surface. Follow the coin track first over the green floor areas and collect all coins. Some are right next to spiky plants, which you should avoid as large a space as possible. In contrast to the previous Wolverine mission, there are hardly any ordinary enemies on the road, so you can concentrate completely on the coin search.
The coin trail will eventually lead you to a large crystal that includes a Launch Star. Before you destroy it, you should control your ad. It must now display 15 out of 100 coins. If you are still missing individual coins, orbit the planet completely and especially control the areas behind the spiky plants. Only when all 15 coins have been collected, you destroy the crystal with a spin and use the Launch Star.
Purple Coins 16–35: Two Flight Routes
The Launch Star hurls Mario towards the red rock planet. During the flight, you automatically cross a long row of ten Purple Coins. You do not have to control yourself, because Mario flies directly through the coin trail. However, make sure that just before reaching the red planet, another Launch Star appears in the middle of space. You should not overlook this if you want to use the fastest route.
Once Mario reaches the floating Launch Star, you will perform a spin. This changes his trajectory and he does not fly to the rock planet, but directly to the large Yoshi egg planet. On this second flight route, you automatically collect ten more Purple Coins. When landing, you should therefore have a total of 35 out of 100 Purple Coins. If you missed the intermediate ring, you do not have to cancel the mission. You can also reach the planet via the other Launch Stars, but you will need some additional flights.
Purple Coins 36–45: The Yoshi Egg Planet
You land on the large Yoshi egg planet, which is easily visible on its green and white surface. During the earlier mission, the hungry Luma waited here for his 100 Star Bits. This time, instead, a series of ten Purple Coins is on the floor. Follow the highly visible trail over the green grass areas and make sure not to miss any coin on the side round of the planet. Since gravity keeps Mario on the surface, you can easily orbit the entire planet.
At the end of the coin trail is the next Launch Star. Before using it, you should check your ad again. If you have collected all the coins from the pear planet and the two previous flight routes, it must now display 45 out of 100. If you are missing a coin, you should first search the entire surface of the egg planet before you fly on.
Purple Coins 46–65: Back through Space
Now use the Launch Star on the Yoshi egg planet. Mario is first hurled towards the pear planet and automatically collects ten more Purple Coins. This increases your ad to 55 coins. Also on this flight, an additional Launch Star in the middle of space appears shortly before the destination. Therefore, be ready to perform a spin in time during the flight.
Activate the intermediate ring as soon as Mario passes close enough. This changes his trajectory and he is hurled directly to the red rock planet. On this second route you collect ten Purple Coins again. Once Mario lands on the red planet, you should own a total of 65 out of 100. This means that almost two-thirds of the mission has already been completed, although you have only explored two planets on foot so far.
Purple Coins 66–80: The Red Rock Planet
The red rock planet is slightly more dangerous than the two previous worlds. Over its uneven surface roll numerous large boulders that can injure and push back Mario upon contact. However, the remaining 15 Purple Coins on the ground are also in a largely coherent track. Carefully follow them around the planet, observing the paths of the rocks. Especially in the narrow places, you should first wait until a boulder has rolled past before you run to the next coin.
If you lose health, you can restore it with the ordinary coins on the planet. However, avoid unnecessary jumps directly in front of the rolling rocks. Their movements follow a fixed rhythm, so that you can usually recognize the free sections well. Collect all 15 Purple Coins and follow the trail to the next crystal with a Launch Star. Your ad should now show 80 out of 100 coins. Only the last two flight routes are missing.
Purple Coins 81–100: The Last Two Launch Stars
Destroy the crystal with a spin and use the Launch Star on the red rock planet. Mario is first hurled towards the Yoshi egg planet. On this flight route, he automatically collects ten more Purple Coins. This increases your ad to 90 coins. Also this time be sure to pay attention to the additional Launch Star, which appears in the middle of space. As soon as Mario flies close enough past him, you activate him with a spin.
The intermediate ring directs Mario on the last trajectory to the pear planet. During the flight, he crosses the last ten Purple Coins. Once the display reaches 100 out of 100, the sixth Power Star of the Good Egg Galaxy is created. It appears on the pear planet, right where you started the mission. After landing, you only have to run to the appropriate place and collect the star. With this, you have also completed the last regularly achievable challenge of the Good Egg Galaxy.
If you end up with less than 100 coins, it’s usually because you missed an intermediate ring during one of the flights. The coins on the planet itself are comparatively easy to find, as they lie along clearly recognizable paths. You do not need to restart the mission. Just follow the existing launch Stars again and pay attention to the flight route you have not used before. With a little patience, you can catch up on all missing coins and collect the Power Star in peace.