

Watch Your Step
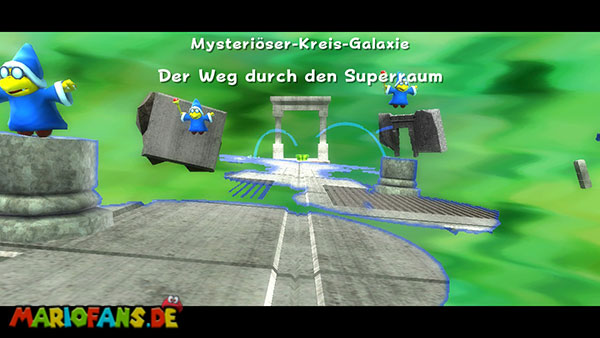
The Matter Splatter Galaxy can be found in the loft of the Comet Observatory. It will be unlocked once you collect at least 50 Power Stars and complete the Heavy Metal Mecha-Bowser mission in the Toy Time Galaxy. Immediately after your landing, it is noticeable that large parts of the path always disappear. Small luminous balls move across the floor, creating temporarily round platforms. As soon as the light moves on, these surfaces dissolve again. Therefore, wait at the beginning until the first path has fully formed before you, and then run forward without stopping if possible. Jump over smaller gaps and orient yourself to the glowing balls so that you do not step into the void. On the first pillar to the left of the path is an optional 1-up mushroom. Jump onto the pillar as soon as the adjacent platforms become visible, collect the mushroom and return to the main path. Further forward appear several Magikoopas who shoot with their magic bullets for Mario. You can defeat them with a spin or jump. If the path already dissolves, however, it is safer to walk past them instead of stopping for an attack. Follow the emerging platforms to the green warp tube at the end of the section.
After the tube, you end up in a dark room, whose platforms are also visible only by wandering light fields. Run to the right first and wait until the two vertical walls appear next to you. Take turns jumping against the left and right walls and work your way up with several wall jumps. Make sure that both walls are still lit, because as soon as the light disappears, you can no longer repel them. On the upper platform you follow the light first further to the right and reach a second, slightly lower wall passage. Climb up here with wall jumps. Then you have to follow the visible path to the left, although your actual goal is further to the right. Wait until the light field moves again in the opposite direction, and run back with it to the right. There appear the walls for the next ascent. Climb up and follow the newly emerging platforms to the left. At the end of this section is another Magikoopa, which you can avoid with a quick jump or which you can turn off with a spin. Jump over the last visible platforms to the green warp tube and enter them.
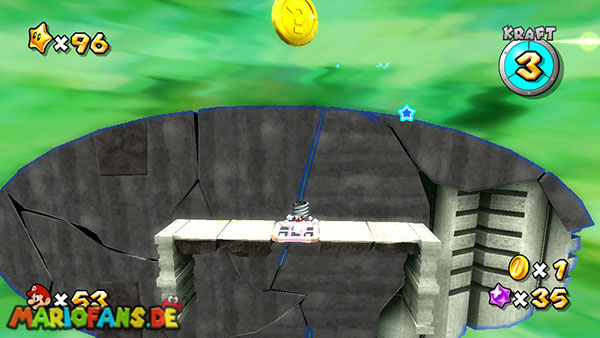
The next area leads vertically up and requires the transformation into Spring Mario. Run first to the large crystal on the lower platform and destroy it with a spin to expose the trapped feather fungus. Once you collect it, Mario starts to jump up and down continuously. Hold the A button when it comes up in order to perform a particularly high spring jump. Subsequently touch the large? coin so that the migrating light field moves upwards and exposes the next platforms. You must now keep up with the rising light. The already existing platforms disappear again after a short time, so you can not wait arbitrarily long on one level. Jump directly from one platform to the next and plan your landings so that you can jump off quickly. The pink grid platforms are particularly helpful: Mario can jump through them from below, but then lands safely on their top. With closed platforms this does not work, which is why you have to reach them from the side.
Approximately halfway up, the light field begins to move somewhat laterally. Follow its movement and jump to the platform, which is currently fully visible. Do not try to reach a higher platform while it is still outside the light. Further up is a swinging platform with a 1-up mushroom. If you want to collect the extra life, jump to one of the higher pink grid platforms and drop onto the vibrating surface. Direct high spring jump from below is more difficult because the platform moves laterally. Collect the mushroom during a quiet pendulum movement and jump immediately to the next safe surface. A little later, another?-coin appears, which releases numerous Star Bits. Take the reachable Star Bits without interrupting the ascent for too long. As soon as the light moves further up, perform high spring jumps again until you reach the top platforms.
At the end of the Spring Mario section is a Launch Star, which you usually use for the onward journey. It transports you to the last planet and ends the spring transformation. However, there is also an optional secret path: Jump past the Launch Star on the left and reach the exit without touching the Launch Star. This way you can take your spring transformation to the last section. This is worth it if you want to collect extra life, because on the high pillars at the beginning of the last planet there are a total of three more 1-up mushrooms. Some of them hover so high that you can only reach them reliably with particularly high spring jumps. Jump from one pillar to the next and collect the mushrooms before you move on to the Power Star. Note, however, that the following obstacle course as Spring Mario is much more difficult to master because you can no longer walk normally. If you do not need the extra lives, you should therefore use the regular Launch Star and complete the last section as a normal Mario.
On the last planet, a great labyrinth of vanishing paths awaits you. As soon as Mario runs far enough forward, the light field sets in motion and uncovers different platforms one after the other. Stay on the wide gray path first and run straight ahead until the track branches. Stick to the right at the first major turn and follow the visible platforms until the next transition. There, the middle way is the most favorable choice, as you can reach the following sections without major jumps. Be careful not to walk past the top of the wandering light field, because the still dark platforms are not walkable. If necessary, wait a short moment on a fully visible field and then follow the light. If you accidentally get into a dead end, you can often return with a targeted long jump on a neighboring path. For this purpose, hold the Z key while running and then press the jump key. At the end of the jump, a spin will give you some extra time to reach the next platform.
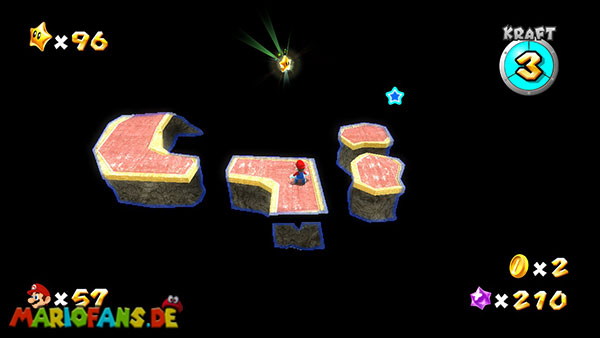
Further forward appear two Magikoopas who block the way with their magic bullets. If possible, do not run directly towards them as long as both attack at the same time. First wait for a gap between the floors and then jump to the first Magikoopa. Eliminate it with a spin and continue your way immediately before the platform you are using disappears. You can defeat the second Magikoopa in the same way or deal with a long jump. Behind the two opponents, the surface changes: instead of the wide gray platforms, narrow reddish paths now appear, which branch off several times. At the first turns, keep yourselves as left as possible and follow the light over the narrow webs. Once the path splits into several small individual stone slabs, switch to the right section. Jump from one plate to the next very carefully, because the small areas disappear quickly and offer hardly any room to correct a jump.
A further branch is located shortly before the end. Take the left path there and follow it to the last larger platform. As soon as you approach the Power Star, the light field begins to shrink particularly quickly. Therefore, do not stop and do not try to defeat the other opponents on the sideways paths. Run directly towards the star and overcome the last small gap with an ordinary jump or a long jump. Touch the Power Star before the illuminated area completely disappears. This completes the only mission of the Matter Splatter Galaxy. In addition to the Power Star, you can collect several additional lives in this galaxy, including the 1-Up on the first pillar, the mushroom on the swinging platform and the three hidden 1-Ups at the beginning of the last section.