

In the Honeyhive Galaxy of Super Mario Galaxy, Mario expects a vast world with huge trees, waterfalls, floating flowers and sticky honey walls. The friendly honeybees live here under the rule of their queen, but are now beset by aggressive stinkk beetles. In total, you can collect six Power Stars in this galaxy. Three of them will come through the regular missions, two more appear through Prankster Comets and an additional star awaits you later when Luigi gets into trouble in his own search. For a complete conclusion, you should therefore return to the Honeyhive Galaxy regularly after the first three stars.
The galaxy is located on the terrace of the observatory and is already accessible after three collected Power Stars. Particularly important here is the Bee Mushroom, with which Mario temporarily transforms into Bee Mario. In this form, he can fly short distances, cling to honey walls and land on special flowers. However, its flight energy is limited and is only replenished once it touches safe ground or a suitable surface. You should definitely avoid water: Just a short contact with a waterfall or a puddle is enough for Mario to lose his bee suit.
Bee Mario Takes Flight
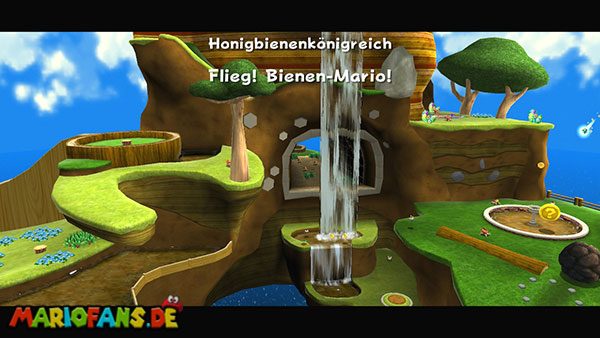
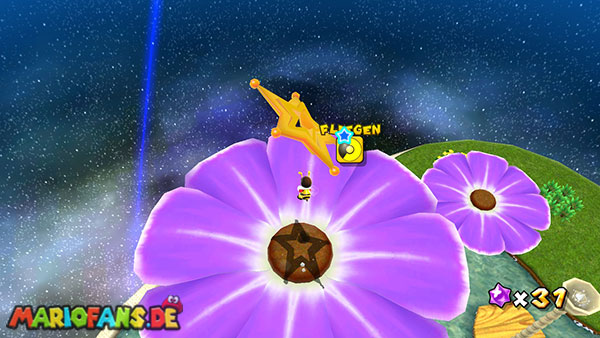
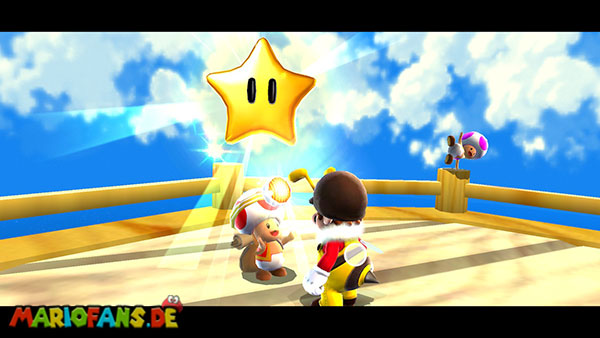
After arriving in the Honeyhive Galaxy, you will land on a green meadow in front of a large tree. First take a brief look around before you follow the actual path. To the left behind the railing is a 1-Up Mushroom that you can reach with a careful jump over the edge. Then return to the main path and go right up the slope. Along the way, you’ll encounter several small bugs and some rocks rolling down the path. You can easily avoid most opponents with a jump or a spin. Follow the path to the large fountain surrounded by several honey bees.
Above the fountain hovers a large?-coin. Jump on the small elevation in the middle and touch it. As a result, a yellow-black striped Bee Mushroom appears further down the way. Run back a bit and collect it so that Mario becomes Bee Mario for the first time. With the new suit, you can fly by holding down the jump button after a jump. At the bottom of the screen, a flight energy display appears, which slowly empties. As soon as you land on a solid surface again, the display is filled up. Therefore, fly in several short stages instead of using all the energy at once.
Your next destination is the elevated platform behind the waterfall. Go back to the fountain and stay to the right of the falling water. Jump up and use the ability to fly to overcome the rock edge. Steer as far as possible past the water, because as soon as Bee Mario comes into contact with the waterfall, he loses his transformation. On the upper protrusion you will find a narrow passage leading into a hollow tree trunk. Follow it to the end and collect the 1-Up Mushroom behind the tree stump if necessary before jumping down through the opening.
Inside the log begins a long slide that transports Mario to a lower area of the kingdom. On the way, you can collect several coins and Star Bits. Once at the bottom, you see a high rock face in front of you that you could not overcome as an ordinary Mario. If you lost your bee suit on the way, you will find another bee mushroom in a crystal nearby. Destroy the crystal with a spin and collect the mushroom. Then fly to the top and follow the narrow path to the right.
This section is partially covered with honey, which slows Mario down greatly when touched. As a Bee Mario, however, you can fly over the sticky spots and land on the small flowers along the way. Use the flowers as intermediate stations to recharge your flight energy. At the end of the path, a Launch Star is waiting. Stand right next to it and use the spin so that Mario is hurled to the next planet.
Over the floating flowers
You land on a small water planet, over which several large pink flowers float. The water is especially dangerous in this mission, as you would lose your bee suit. Therefore, jump first on the small water lily leaves and look for a large puff flower on the edge of the planet. Stand under their stems and perform a spin. Mario clings to it and is thrown up at high speed. Once he reaches the highest point, you let go and fly as Bee Mario to one of the floating flowers.
On the large flowers you can land briefly and fill up your flight energy. As an ordinary Mario, the flowers would disappear under your weight, which is why the bee suit is especially important here. Work your way from the first flower to the middle platform to the highest flower. Along the way, there are several Star Bits and coins that you can collect on occasion. Also, pay attention to the water fountains shooting up between the flowers. If one of them touches you, you lose your transformation and have to get a Bee Mushroom again.
On the tallest flower floats another Launch Star. Fly up to him and activate him with a spin. He promotes Mario to the bee palace, where the honeybee queen lives.
Climb the honey wall to the palace
After landing, you will see a huge vertical honey wall. As Bee Mario, you can hold onto the golden honeycombs and climb along them. First jump to the lower section of honey and move Mario upwards. Once you reach a gap, you jump off the wall and fly to the nearest honey field. The individual honeycombs serve as safe intermediate stations where the flight energy replenishes. Therefore, do not try to overcome the entire wall in a single flight, but gradually move from one surface of honey to the next.
On the right side is another? coin en route, which makes an additional coin trace appear after collecting. If you have enough flight energy, you can take this small detour with you. Finally, at the top of the honey wall is a larger platform with a piranha plant. Defeat them with a spin or a suitable jump. In its place, a long tendril grows from the ground, which transports Mario upwards to the Palace of the Honey Bee Queen. Stand in front of it and perform another spin to hold on to the tendril.
Queen Bee’s five Star Chips
Arriving at the top, you finally meet the honeybee queen. The giant bee floats over a stretch of water and tells Mario of a strange itch that has plagued her for some time. In fact, five Star Chips got caught in their fur. Since Mario can stick to soft and sticky surfaces with his bee suit, she asks him to remove the disturbing objects. First, jump off the surrounding platform and fly directly toward her body. Once you touch her hairy surface, Bee Mario can hold onto it.
Now move slowly over the queen’s body and collect all five stars. Some are clearly visible at the front, others are slightly further to the side or on the back. Turn the camera if necessary so that you can better recognize the individual spots. You do not have to fly from the platform every time, because Bee Mario can climb directly on the body of the queen. Just be careful not to accidentally fall into the water beneath her. Once you have collected all five Star Chips, a new Launch Star will be created near them.
The honeybee queen thanks Mario and is finally freed from the annoying itching. Return to the surrounding platform and use the newly created Launch Star. It sends you back to the main planet, but not to the original starting point, but to the top of the big tree. There is already waiting for the Toad search party, who has also got lost in the Honeyhive Galaxy. Talk to the leader of the group. He tells you that the Toads have found a mysterious star here and presents Mario with the first Power Star of the Honeyhive Galaxy.
After returning to the observatory, you will meet the Toad search party again. The little mushroom dwellers have decided to support Mario in his further search for the Power Stars and start building their own small spaceship. Thus, the Toads will keep important hints and additional tasks for you in the further course of the adventure.
Trouble on the Tower
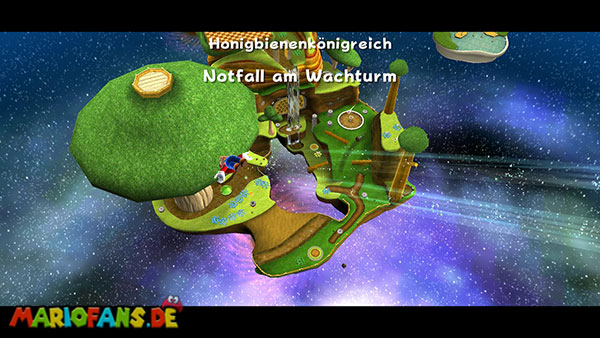
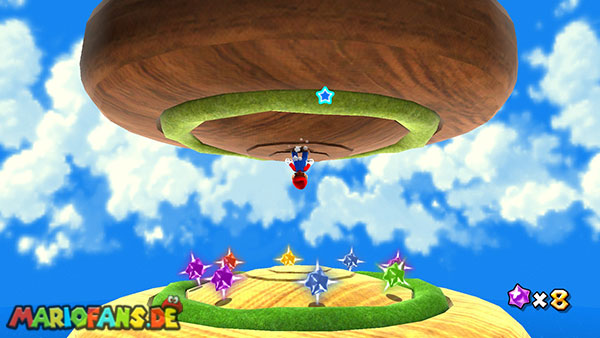
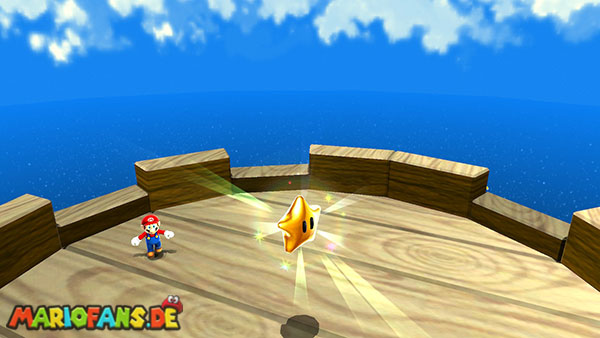
During your second visit to the Honeyhive Galaxy, a lot has changed. In several places are large round stones, which were not yet present in the first star. In addition, the honey bees tell you that aggressive sting beetles from a neighboring area have invaded their kingdom. Your next destination is therefore the large watchtower, whose top platform has now been occupied by the bugs. For this mission, you do not need a Bee Mushroom first. Instead, you learn how to destroy the large stones using Mario’s ground pound.
From the starting point, move back to the right and follow the familiar path up the slope. Next to the path stand several large round stones. Jump on the second stone and run a ground pound. On the Wii, you press the Z button on the Nunchuk when jumping. Mario then falls down with full force and destroys the stone. From within, a long tendril grows, to which Mario can hold with a spin. With it, swing upwards and then grab the second tendril that moves you to the higher side of the kingdom.
Arriving on the other side, you follow the green path first to the left. Nearby are several more stones and a small jump platform. If you want to collect additional Star Bits, you can also destroy the stones with a ground pound. For the actual route, you then keep to the north until you reach a small increase. There, a wiggler walks in a circle around a red ground switch. You can dodge him or first turn him on the back with a spin and then defeat him. Then stand on the counter and use the ground pound.
The hit shows a new wooden bridge on the left, over which you reach the next section. Cross them and go to the second big ground switch. You also activate this with a ground pound. Then several wooden platforms change on the high wall in front of you and form a kind of staircase. First jump on the lower protrusions and work your way up. In some places, ordinary jumps are enough, while in the higher sections you need a wall jump. Jump against the first wall and press the jump button again as Mario slides down on it. He pushes away from the wall and can then jump to the opposite side. Repeat this change until you reach the top platform.
Follow the narrow path along the creek. Pay special attention to the abysses next to the wooden paths and do not jump too far outwards. At the end of the watercourse stand two tall wooden walls immediately next to each other. Take turns jumping against both walls and use more wall jumps to get to the top end. There is a Launch Star, with which you leave the main planet and fly to a smaller group of planets.
The Two Mushroom Planets
The Launch Star takes you to an unusually shaped planet reminiscent of a large mushroom. Follow its surface down and remove the piranha plants along the way if they block your path. Once you reach the bottom, you can get attracted by a jump from the gravity of the neighboring planet. There are more enemies and several Star Bits that you can collect. Run to the bottom on this small planet too and use the next Launch Star to continue the journey.
You end up on another floating construction with a large hole in the middle. Before you jump through, you should examine the environment. Nearby is a? coin, which after collecting makes a rainbow star appear. If you touch him, Mario becomes invulnerable for a short time and can already defeat ordinary opponents by mere touch. Take this opportunity to quickly take down the piranha plants and other enemies on the platform and collect additional Star Bits. Then you jump down through the hole in the middle and finally reach the actual watchtower station.
Climb the Watchtower
On the lower level of the watchtower, several Mandibug patrol, who with their powerful shells fend off ordinary jumps. To defeat them, you must reach their unprotected back and run a ground pound on it. Avoid their rapid rushes and watch in which direction they run. Especially on the narrow wooden platforms, you should avoid standing directly in front of a bug. If you wish, you can first go to the left edge of the lower level. There is a Life Mushroom on a lower platform that increases Mario’s maximum health from three to six units. Collect it before climbing the tower.
Then return to the higher level. First, use the small spring platform, which Mario flings up after a ground pound. On the next level there are two closely adjacent walls. Jump against it alternately until you reach the upper edge. Here is another Mandibug, which you can avoid if necessary. Follow the narrow path to the left to a red ground switch and activate it with a ground pound.
Through the switch, the large mill wheel starts to rotate next to the watchtower. Several wooden platforms now move slowly along the tower and allow the ascent to the top. Jump onto a passing platform and stop on it as it moves up. Pay attention to the nearby spikes and prepare your jump to the highest level in time. As soon as the platform approaches the upper edge, you jump over. There the leader of the Mandibug waits, who keeps the watchtower occupied.
Boss — the Mandibug pair
On the roof of the watchtower stand two Mandibug on top of each other. The smaller bug sits directly on his mother’s back, protecting her vulnerability. As long as he sits there, you cannot reliably attack the big opponent. First, watch the two bugs move across the platform and avoid their rushes. Then jump as close as possible over the little bug and use a ground pound as soon as Mario is immediately above his back. A successful hit defeats the young animal and leaves the large Mandibug mother alone.
The mother then becomes much more aggressive and begins to pursue Mario with faster rushes. Don’t constantly walk directly towards her, but keep some distance and wait until she has set her direction. As soon as she passes under you, you jump up and run a ground pound on her back again. If you meet its unprotected top, the big Mandibug mother is defeated. In their place, the second Power Star of the Honeyhive Galaxy appears, which you can collect afterwards.
Big Bad Bugaboom
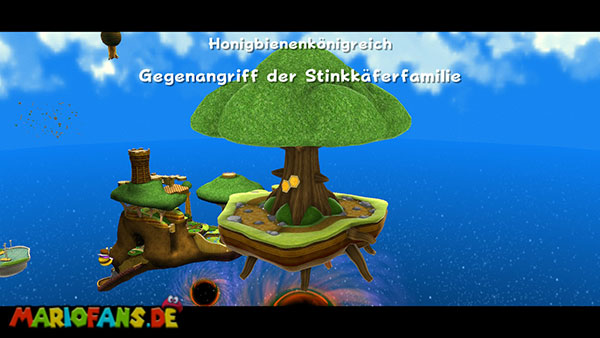
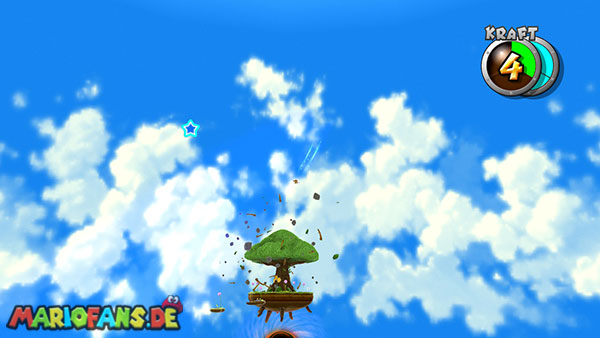
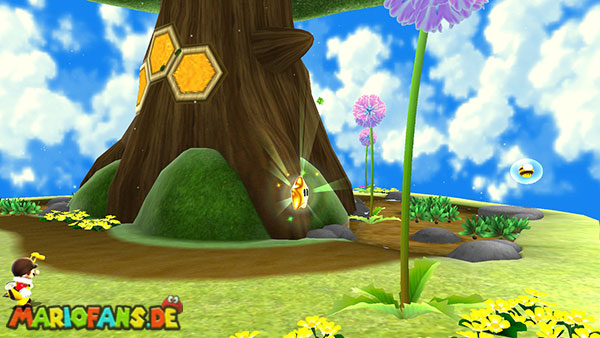
After the defeat of the Mandibug mother, it seems to have returned to peace in the Honeyhive Galaxy. But already on the next visit you realize that the bugs have not given up. Several additional stink beetles patrol the known paths and the honey bees report a particularly large adversary threatening the kingdom. This time you have to return to the Palace of the Honeybee Queen before you can challenge the leader of the Mandibug family.
From the starting point, first move to the right and follow the path to the known fountain. On the way, several boulders roll down the slope again, which you can avoid with a timely jump. At the fountain is now a large soap bubble cannon, which regularly shoots bubbles through the air. Jump on the small block near them and stand up so that one of the bubbles hits you. Once trapped by her, Mario automatically carries him across the abyss into the upper reaches of the kingdom.
On the other hand, you reach a platform on which another Bee Mushroom is located. Collect it and turn into Bee Mario again. If you would like to take the optional Life Mushroom with you, you can also search the corresponding side platforms here. For the main route, however, you first go to the green tube and climb in. It leads back to the lower area near the waterfall, from where you can reach the palace with the ability to fly.
Now head north and fly carefully to the platform behind the waterfall. This time, several soap bubble cannons are additionally active, which make the passage difficult. Be careful not to be hit by the bubbles or the water, otherwise you will lose the bee suit. If this happens, you can return to the Bee Mushroom via the green tube and collect the transformation again. Once you reach the upper passageway, follow the way forward to the Honey Bee Queen.
The Queen tells you that the Mandibug family is still not defeated and now their most dangerous leader is attacking the kingdom. Afterwards, a new Launch Star will appear, which will transport you directly to the planet of the great Mandibug King. Activate it with a spin and prepare for the next boss fight.
Across the flowers to Bugaboom
The Launch Star will first take you to a small floating island with several coins and a large flower. If you have lost your bee suit, here is another opportunity to transform. Stand under the blowflower and use a spin so that Mario is thrown up. Then fly to the next small island and repeat the process with the flower there. Be careful not to use up the flight energy too early, as the distances between the individual islands are sometimes quite large.
After the second flower flight, you finally reach the large beetle planet. In its center stands a huge tree, whose trunk is partially covered with honey. There are also several waterholes and large flowers on the planet. Especially these flowers will play an important role, because they can hurl Mario far up and thus enable the necessary ground poundn on the boss. If necessary, collect some coins first and be careful not to accidentally fall into one of the puddles. As long as you stay Bee Mario, the fight is much easier.
Boss — Bugaboom
As soon as Mario has entered the planet, the mighty Mandibug King appears. The large bug has a heavily armored body and a strikingly marked weak spot on its back. Ordinary jumps on his head or attacks against his front do not cause any significant damage. Instead, you have to get high above him and fall with a ground pound on his back. For this, the large blowflowers and Bee Mario's flying ability are particularly helpful.
During the first phase, the Bugaboom moves mainly on the ground. Watch his career and use one of the breeze flowers to hurl Mario high in the air. Then fly over the boss and align yourself as closely as possible over his back marking. Once the bug is right below you, you drop Mario down with a ground pound. A successful hit throws the opponent off balance and ends the first phase.
After the first hit, the Mandibug King spreads his wings and begins to fly over the planet. At the same time, he regularly drops small bombs, which explode upon impact on the ground. Therefore, keep moving as much as possible and observe its trajectory. Wait until he approaches one of the big flowers and let him throw you up again with a spin. Then use the bee flight to get over his back. It is especially important that you do not run the ground pound too late. The bug is now moving much faster than before, so you have to consider its flight movement already at the jump.
After the second hit, the Bugaboom finally becomes angry. His body turns red and he flies at an even higher speed over the arena. In addition, it occasionally rotates around its own axis, making its vulnerability harder to reach for a short time. Therefore, do not try to constantly follow him directly. Instead, find one of the big flowers, watch his movement and wait until he comes back in your direction. Jump up with the blowflower, hold Bee Mario as above the boss as possible and run the ground pound as soon as his back mark is directly below you.
In total, the Bugaboom needs three hits. After the third successful ground pound, he loses his strength and disappears. In its place, on a small raised surface of the planet, the third Power Star appears. Before you collect it, you can still study the outer edge of the planet if necessary. On a narrow branch is an additional 1-Up Mushroom. Then you take the star with you and have completed all three regular missions of the Honeyhive Galaxy.
Luigi in the Honeyhive Kingdom
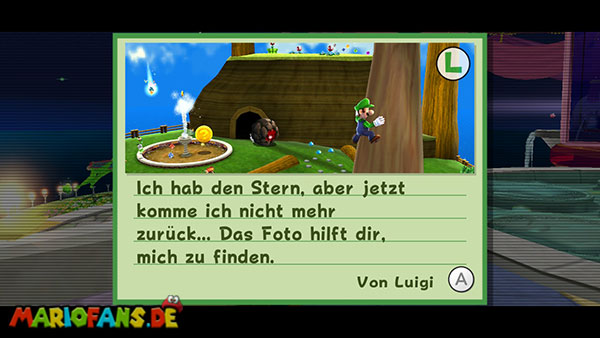
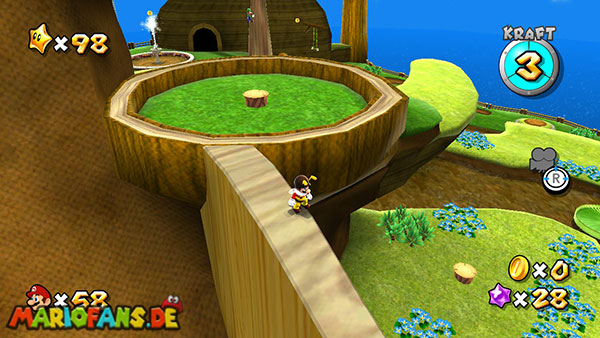
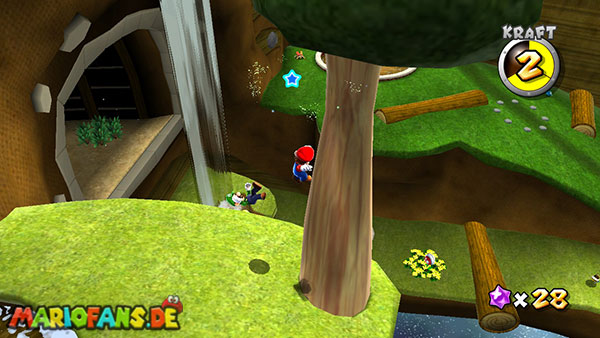
The fourth Power Star of the Honeyhive Galaxy is one of the special Luigi search missions that you will unlock later in the adventure. First you have to free Luigi in the Ghostly Galaxy from the haunted house. Afterwards, he stays in the garage of the observatory and occasionally goes on a search for other Power Stars. However, he gets into trouble several times and sends Mario a postcard with a picture of his whereabouts. Before you can find it in the Honeyhive Galaxy, you must have already completed the two previous Luigi search tasks on the egg planet and in the Battlerock Galaxy.
Once the corresponding third postcard arrives, it shows Luigi clinging to a tree in the Honeyhive Galaxy. Therefore, return to the terrace and choose the “Fly” mission again! Bee Mario! Starting from the starting point, go up the right slope as on the first visit and collect the large? coin in the fountain. Then you get the Bee Mushroom and turn into Bee Mario. This allows you to reach the tree where Luigi is stuck.
Luigi is located on an elevated surface near the waterfall, at the back of a large tree. From below it is difficult to recognize at first. The easiest way to reach it is by flying with Bee Mario over the raised grassy outcrops next to the waterfall. If necessary, use the small branches and platforms as intermediate stations to recharge your flight energy. Once you reach the right tree, you recognize Luigi, who is anxiously clinging to the trunk.
As close as possible to him and throw a star part at him with the Wii remote control. Alternatively, you can touch it with a jump or a spin. As a result, Luigi loses his grip and falls on the platform below the tree. Then talk to him. He tells you that he hid from a big bug and therefore could not come down from the tree. As a thank you for his rescue, he presents you the fourth Power Star of the Honeyhive Galaxy. This also concludes the last of the three special Luigi search missions.
Honeyhive Cosmic Mario Race
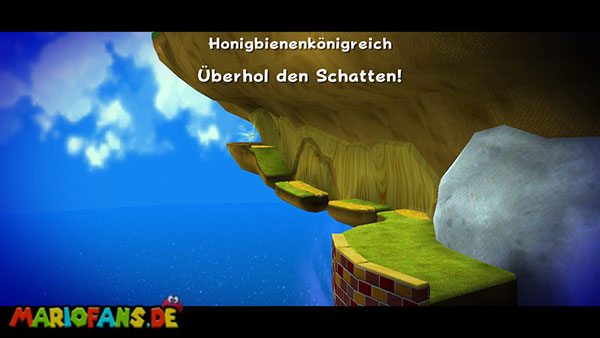
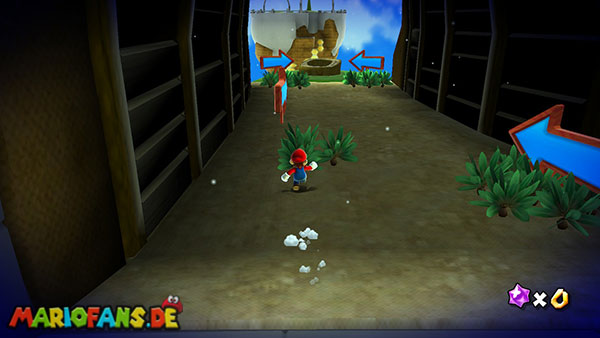
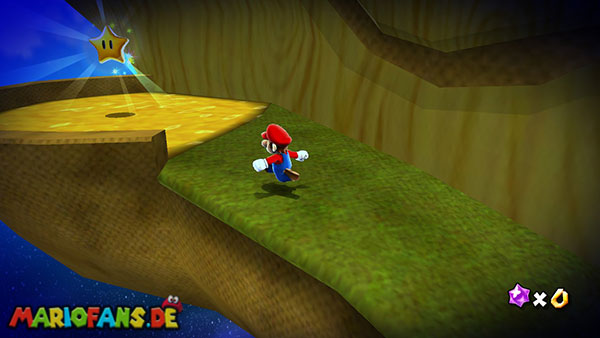
This mission is available as soon as a corresponding Prankster Comet appears above the Honeyhive Galaxy.
In this special challenge, Mario competes against his mysterious double Shadow Mario. Both start at the same time on the main planet of the Honeyhive Galaxy and must reach the Power Star waiting at the end of the route as quickly as possible. Unlike the first mission, this time there is no Bee Mushroom available. Instead, additional blocks and protrusions were set up to overcome the heights normally only accessible with the bee suit. Thus, success depends above all on fast jumps, skilful shortcuts and a clean movement across the narrow platforms.
After the start signal, you immediately run to the right and follow the familiar path to the fountain. Shadow Mario is already pretty fast, so you should make as few unnecessary movements as possible. Long jumps are particularly helpful, with which you can cover longer distances in a short time. For this, hold the Z button on the Nunchuk while running and jump immediately afterwards. Mario performs a flat, wide jump that gets you over straight tracks much faster than ordinary running.
At the waterfall you have to get this time without a bee suit on the high projections. Therefore, look for the small brown blocks next to the rock face. First jump to the first block and then perform a backflip to reach the higher platform. For this, you press the Z button and then press the jump button. On the next lead, repeat the movement until you reach the upper grass area. Shadow Mario also needs some time at this point, so you can extend the advantage of a clean start here well.
Then follow the narrow path to the large hollow tree trunk and jump in. Mario automatically slides to the lower honey section. Once at the bottom, use the extra blocks to jump to the next lead. Depending on your position, you can do a backswing or a triple jump again. It is particularly important that you do not hang on the edge of the block when jumping up and fall back down. Then you reach the last section before the Power Star.
There is a lot of sticky honey on the floor. Avoid it as completely as possible, because every contact slows Mario down considerably. Jump from platform to platform and use the existing projections to get to the destination as directly as possible. Once you reach the Power Star, you just have to touch it in front of Shadow Mario. If you succeed, you win the race and receive the fifth Power Star of the Honeyhive Galaxy. If Shadow Mario arrives first, you lose an attempt and can then start the challenge again.
The Honeyhive’s Purple Coins
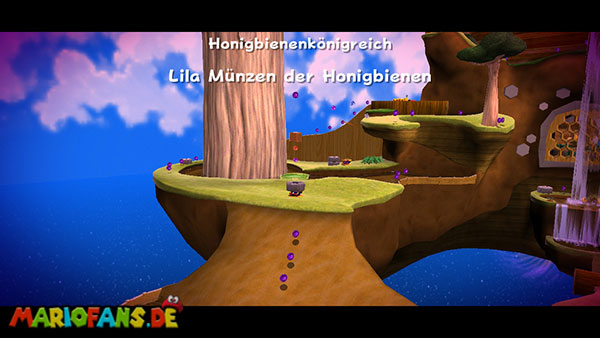
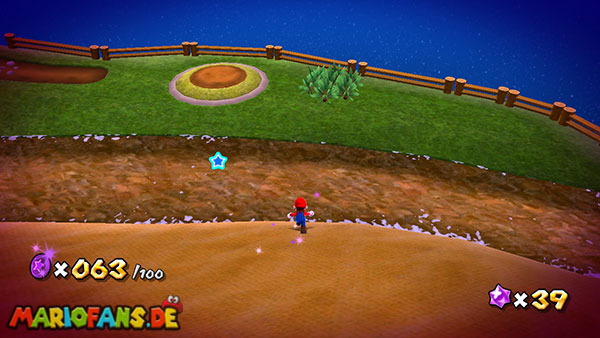
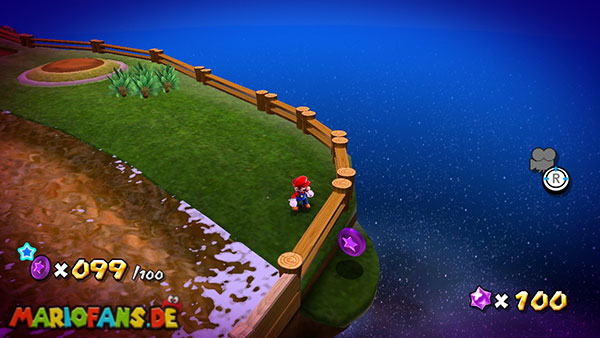
This mission will not be unlocked until you defeat Bowser in the final and a purple Prankster Comet appears over the Honeyhive Galaxy.
For the sixth and final Power Star, you have to collect a total of 100 Purple Coins on the main planet of the Honeyhive Galaxy. Unlike some later Purple Coin missions, there is no time limit here. You can therefore explore the entire world in peace and also try hard-to-reach coins several times. Nevertheless, you should proceed as systematically as possible, because the coins are distributed over numerous small projections, narrow paths and hidden caves. Especially some locations behind the waterfall and on the upper wooden platforms are easily overlooked if you follow exclusively the main path.
The following route takes you through all the important areas and contains several intermediate stands where you can control your coin count. If you have fewer coins than specified after a section, you should first re-examine the last area crossed before moving on to the next platform.
Purple Coins 1–11: The Start Area
Turn around immediately after landing and examine the railing behind Mario. There is a single Purple Coin, which you can only reach if you jump carefully over the railing. Then return to the starting point and collect the highly visible coins on the meadow and in the shallow waterhole. In total, there are five coins on the dry ground and five more in the water. Together with the coin behind the railing, you should now own 11 out of 100 Purple Coins.
Then go right up the known slope. You can leave three coins on the side slope at first, as we collect them later on a cheaper route. For now, focus on the small elevation below the rolling rocks. There is another Purple Coin floating a little above the ground, which you can reach with a backwards balance or a sideways jump. Wait until no boulder rolls down so that Mario is not hit when collecting.
Purple Coins 12–23: The Swing and the High Rock Face
Follow the path to the well-known vine swing. Near it, another Purple Coin floats a little higher in the air. Jump to the swing and let Mario go at the right moment to reach the coin. Then you jump on the small projection to the right below the swing. There is another coin that is easily overlooked from the main stretch. After that, drop to the other side and collect the coin in the small puddle.
Follow the narrow path further to the right until you reach two high rock walls that are close together. There begins a longer wall jump section. Jump alternately against the left and right walls and collect the six Purple Coins distributed along the ascent. On the upper platform, an additional two more coins are waiting. If you have taken all the locations, you should now have 23 Purple Coins.
Purple Coins 24–31: The Fountain and the Waterfall
From the upper projection you drop down to the area with the large fountain. There are five Purple Coins around the basin, which you collect completely at first. Then you go to the left and examine the high column of round stone blocks. Place Mario on the top surface and use a ground pound to destroy the blocks. This will give you another Purple Coin, which was previously hidden by the stone construction.
Then jump up between the two high walls near the waterfall. Behind the falling water is a small lead with two additional Purple Coins. Collect them and check your ad. You should now own 31 out of 100 Purple Coins. The actual passageway behind the waterfall is partially blocked in this mission by a large honey grid. Don't try to overcome it all over again. We reach the coins hidden there later from the other side.
Purple Coins 32–42: The Honey Platforms
Use the green tube behind the waterfall to get into the lower section of honey. There you will find on the left a series of narrow platforms, the tops of which are covered with sticky honey. Since Mario does not need a bee suit for this mission, you can overcome the entire route with ordinary jumps. However, make sure to spend as little time on the honey as possible, as it slows down your movements greatly. Jump from platform to platform and collect the nine Purple Coins along the way.
Arriving at the end of the route, turn around and return to the entrance of the honey section. Directly below is another small platform on which two additional coins are located. Fall down carefully and collect them. Then you use the green tube there to return to the upper part of the main planet. So you should have a total of 42 Purple Coins.
Purple Coins 43–49: The Vines and the Spring
After returning, you will be back near the vine swing. Walk a little bit down the slope with the rolling rocks and examine the single large round stone next to the path. Destroy it with a ground pound so that a long tendril appears. Swing upwards and then use the second tendril to reach the opposite side of the kingdom. At the bottom of this range you will find three Purple Coins on the right, which you should collect before moving on.
Then go to the left to the big spring. If it is still covered by a round stone, destroy it first with a ground pound. Then use the spring to get onto the block above. Just above him hovers another Purple Coin, which you reach with a backflip. Then you follow the left slope down and retrieve the three coins, which we deliberately omitted at the beginning of the level. If you found all seven coins in this section, your ad should now show 49 out of 100.
Purple Coins 50–65: The Big Tree and Wigglers Platform
Return over the tendrils to the upper platform and go to the large tree in the middle of the shallow pool of water. Run once around its trunk and collect the five Purple Coins that lie between its roots and on the water’s edge. Then you jump on the narrow raised border of the kingdom. Carefully follow her up and collect another five coins. Pay particular attention to the narrow curves. An imprudent jump can cause Mario to fall back on the lower path.
Once at the top, you can reach the well-known platform with the Wiggler and the red floor switch. Defeat the opponent if necessary and first examine the entire environment before hitting the switch. On the right in the shallow water is a Purple Coin. Another two coins hide behind the tall tree at the edge of the platform. For the last three coins of this section, follow the southern narrow lead to its end. Collect them carefully and then return to the red switch. If you have considered all the locations, you now own 65 Purple Coins.
Purple Coins 66–80: Wooden Platforms, Honey Grids and Tree Slides
Now activate the red floor switch with a ground pound so that a new bridge appears on the left. Cross them and stand in front of the next wooden counter. You also operate this with a ground pound. This changes several wooden blocks on the wall and forms a walk-in staircase. Jump up the individual levels and collect a total of four Purple Coins. On the upper path, you can see another coin on the left that hovers a little above the edge of the rock face. Use a backflip to reach them safely.
After collecting these five coins, you turn the camera a little down. There you can see two large brown blocks that are below the current lead. Carefully drop on the first block and collect the Purple Coin on it. Then you jump to the second block, on which there is another coin. From there you reach the back of the large honey grid, which we saw before at the waterfall. Behind the grid are three more Purple Coins, which you can now reach without difficulty.
Then follow the path back to the large hollow tree trunk and jump down through its opening. On the long slide are this time five Purple Coins, which you have to collect during the slide. Try to move into the right position in front of the respective coins so that you do not suddenly steer too far to the left or right. At the end of the slide, you use the green tube to return to the vicinity of the vine swings. So you should have a total of 80 out of 100 Purple Coins.
Purple Coins 81–90: The Upper Wooden Path
For the last twenty coins, you must return to the upper part of the kingdom once again. Use the tendrils again, cross the bridge and jump up the wooden blocks. Subsequently follow the path on to the known wall jump section. Directly to the left of it are initially three Purple Coins on a small grass area. A fourth coin floats over the neighboring rock face and can be reached with a backwards salvo.
Then jump up between the two tall wooden walls. Along the climb, there are three more coins that you can collect automatically if you perform the wall jumps cleanly. At the top, follow the small elevated path to the right. There are three Purple Coins on a narrow margin. This increases your ad to 90 from 100. The last ten coins are now on the lower paths towards the waterfall.
Purple Coins 91–100: The Path Behind the Waterfall
Go to the end of the upper projection and look carefully down. Directly below you runs a narrow wooden path behind the waterfall, on which several Purple Coins lie. Let yourself fall on this path in a controlled manner and follow it along the rock face. Here you will find five Purple Coins, which partly hover very close to the edge. Collect them without hectic jumps, otherwise you could easily fall on a lower platform.
At the end of the narrow path you jump on the lower surface at the small fountain. Here are the last five Purple Coins of the entire level. Some lie directly on the ground or along the small watercourse, while a coin is on the top of the well. Jump to the raised center to collect them. Once your ad reaches 100 of 100 Purple Coins, the last Power Star of the Honeyhive Galaxy will automatically appear.
However, the star does not form immediately at your current position, but at the original starting point of the galaxy. Therefore, return to the first great meadow via the familiar paths and collect it. You have also completed the extensive Purple Coin mission and own all six Power Stars of the Honeyhive Galaxy.