

The Fiery Stronghold
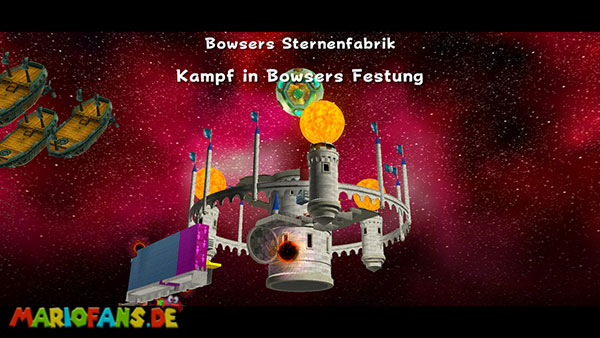
With Bowser’s Star Reactor you reach the last galaxy of the bathroom in the comet observatory. Once you have collected at least 15 Power Stars, you can venture into the fortress of the Koopa King, who is trapping another Grand Star here. Unlike the previous galaxies, no ordinary Power Star awaits you in the end, but an important fight against Bowser personally. Before you face it, however, you must overcome a dangerous obstacle course full of rotating flame traps, huge stone blocks and changing gravity fields. Immediately after your landing you are on a small platform, from which a narrow, colorful path leads to the actual fortress. First talk to the Luma near you and then follow the winding path up. On the way, several rotating fire bars block the way, which you can either overcome with a targeted jump or by skilful evasion. Observe their direction of rotation, especially in the larger flame traps, and use the gaps between the fireballs to continue running safely. Along the way, you can collect some coins and a 1-Up Mushroom. Take the accessible items as far as possible without unnecessarily putting you in danger. As soon as you reach the stone fortress, in addition to other fire bars, a fire cannon awaits you, which regularly shoots flames over the ground. Wait until the fire jet goes out and then keep running quickly. Immediately behind is a huge block of stone that regularly rises and falls to the ground with full force. Stay out of his reach at first and wait until he floats back up. Then quickly walk underneath and enter the green platform that transports you to the next section.
On the opposite side, a particularly unusual part of the fortress begins, because here gravity changes depending on which area you are in. The blue-colored surfaces pull Mario down while you are pulled to the ceiling in the purple areas. Small arrows show you in which direction gravity is currently acting. Be sure to pay attention to these markings, because outside the safe platforms there are several black holes that immediately devour you if you fall. Run to the right until you reach a place where there is a black hole below the path. Do not try to jump over the gap, but use the purple gravity field above your position. Jump up and let reverse gravity pull you to the ceiling. There you can continue your way upside down to the right. However, continue to pay attention to the rotating fire bars, which also regularly cross your running route in this area. Follow the path until you are approximately above the coins and a moving red platform. First, wait until this platform passes directly below you, and then jump down into the blue gravity field. Mario is immediately pulled down and lands on the moving platform. Stay as centered as possible while she takes you to the opposite side, because a careless step over the edge leads directly into the black hole. Once you reach the next wall, you jump back into the purple area and get pulled back to the ceiling. From there it continues to the right, passing another fire bar and a large stone block. Wait until the block has completed its movement and only then runs through the resulting opening. At the end, you get to a yellow platform that transports you out of this section and to the next construction.
Now you reach a larger circular platform on which four rotating fire rods move around the center. A sufficiently large area remains free between the flames in which you can stand safely. Therefore, do not immediately run across the platform, but first oriented yourself to the movement of the fire rods. Once you are in a safe gap, you can run a bit with the rotation and slowly work your way to the opposite side. To the left of the platform, you can also collect another 1-Up Mushroom if you want to increase your life reserve a bit. Then follow the stone path up until you reach a large stone block again. Behind it are several fire cannons that shoot their flames at regular intervals over the ground. Especially dangerous is the combination of both obstacles, because a too late run can lead you directly into the next fire jet. Therefore, wait until the stone block moves up, and move through it as quickly as possible. Jump over the fire jets immediately afterwards or run between their eruptions before the next flame sequence begins. Further up, there are additional rotating fire bars that you can overcome with careful jumps. Orient yourself along the way and collect the coins along the way if your health has already dropped. Once you reach the higher, chessboard-like patterned platforms, you approach the actual destination of the fortress.
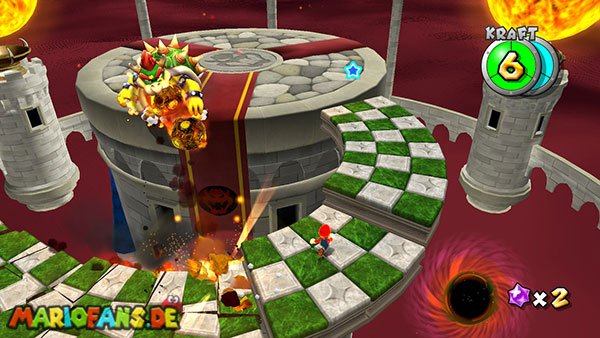
After a few more steps, Bowser finally appears, who discovers you from the top of his tower and immediately begins to hurl large boulders on your way. The impacts gradually destroy the floating platforms on which you are currently. From this moment on, you must no longer stop unnecessarily, but must get to the top of the tower as quickly as possible. Follow the narrow path up and jump from one platform to the next in time before the individual pieces break apart and plunge into the depths. Be careful not to move too far on the outer edge so that you have enough space for the landing on a jump. Along the way, you will find a particularly important Life Mushroom that increases your maximum health from three to six units. Try to take him with you, because the upcoming fight against Bowser can cost some hits. The mushroom lies a little away from the direct running direction at one of the corners of the path. Therefore, take it as you pass and continue your ascension immediately before the platform collapses among you. Once you reach the top level, Bowser will face you personally. After a short conversation, the fight shifts to a small, spherical planet, whose surface consists of green surfaces and several blue glowing fields. Now begins the first real fight against the Koopa king.
On the small planet, Bowser has several different attacks. First, he tries to hit you with huge jumps, as they land, circular waves of energy spread across the planet. You can overcome these with an ordinary jump. Be careful not to jump too early, because the wave moves quickly over the ground and can still catch you on landing. In addition, Bowser spits fireballs that jump over the surface for a while and hurt you when touched. Therefore, keep moving as much as possible and try not to be encased between several fireballs. To make Bowser vulnerable, you must use his jump attack to your advantage. Stand on one of the blue glowing fields and wait until Bowser sets for the next huge jump. As soon as he rises into the air and aims for your position, you quickly run to the side. Bowser lands on the blue field, shatters its surface and glowing lava emerges underneath. The Koopa king burns his tail and then begins to run around the entire planet with a burning rear. Now you have the opportunity to attack him for the first time.
However, don’t try to just follow Bowser, because he moves much faster than Mario in this phase. It is much easier to walk in the opposite direction around the planet and meet it. Once Bowser notices you, he stops and turns to escape the other way. This is the moment you must take advantage of. Run close enough to his burning tail and perform a spin before accelerating again. On a successful hit, Bowser loses his balance, tilts on his back and begins to slip helplessly on his shell across the planet. However, the first attack option is not yet complete, because you have to hit him a second time with a spin, in order to actually damage him. Run again against his direction of movement instead of chasing after him. As soon as the Bowser slipping on the shell meets you, you use the next spin. Once you have met him, he straightens up again and begins the second phase of the fight. If you miss the right moment and Bowser recovers beforehand, you have to lure him to one of the blue fields again and set his tail on fire.
After the first successful attack, Bowser becomes much more aggressive. He now begins to shoot several fireballs in a row and jump to the ground more often. This partly creates two successive energy waves, which you have to avoid with well-timed jumps. Do not try to run towards Bowser during these attacks, but first focus on keeping enough distance and safely overcoming the energy waves. As soon as he jumps high in the air again and tries to hit Mario with a ground pound, you stand back on one of the blue fields and dodge immediately before his landing. Through contact with the underlying lava, Bowser burns his tail again and flees around the planet. As before, you should run against him as far as possible and wait for his short rotation before you hit the burning tail with a spin. Bowser then tips again on his shell. Run in the opposite direction and catch him during his uncontrolled movement with another spin. After this second successful attack, the last and most difficult phase of the struggle begins.
In the third phase of combat, Bowser deploys his attacks even faster, combining several fireballs with successive waves of energy. Make sure that you do not immediately run back towards the opponent after the first jump, as there is often another wave of energy. Wait until his attack sequence is complete and only then stand again on one of the blue shining fields. As soon as Bowser arrives at the next ground pound, you move to the side and land it on the blue surface. After burning his tail again, he runs particularly fast across the planet. Therefore, move as directly as possible in the opposite direction, so that you can meet him halfway and use his short rotation for a targeted attack. Once Bowser is on his shell, however, you have to be prepared for an additional difficulty: This time a single spin against the sliding Bowser is no longer enough. Meet him as usual while he meets you on his shell. As a result, it is thrown away again, but remains vulnerable. Turn around immediately, watch his next direction of movement and run towards him again. Once he reaches you again, you use the decisive spin. With this last hit, Bowser is finally defeated.
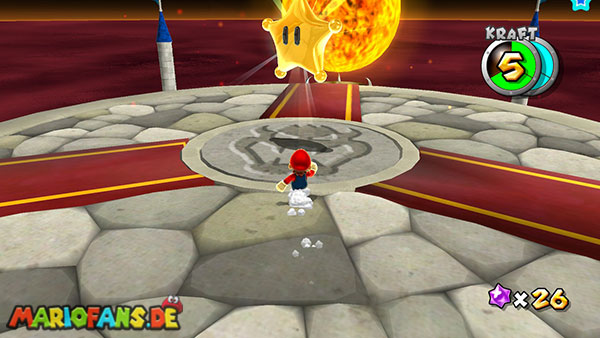
After the fight, Mario and Bowser land again on the top of the fortress. The Koopa King must admit his defeat, but does not give up his plans and finally disappears from the galaxy. In its place now appears the huge Grand Star, which you can collect with a jump. Not only did you complete the only mission of Bowser’s Star Reactor, but you also saved the third Grand Star of the adventure. Back in the comet observatory, the rescued star is absorbed into the energy supply and brings another area of the observatory to life. This opens the door to the kitchen, where new galaxies and other challenges are already waiting for you. Before you continue your adventure, you can of course return to the already visited galaxies and collect missing power stars, secret missions or comet stars. An overview of the further adventures can be found in our Super Mario Galaxy complete solution.