

Luigi and the Haunted Mansion
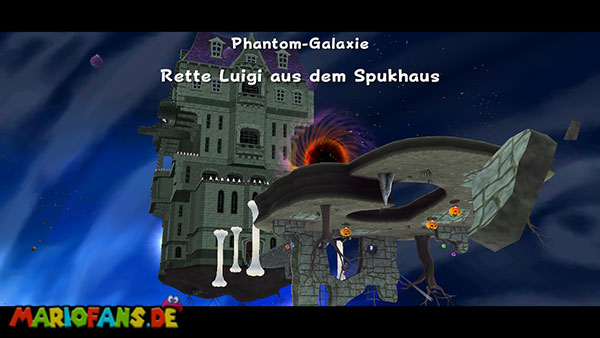
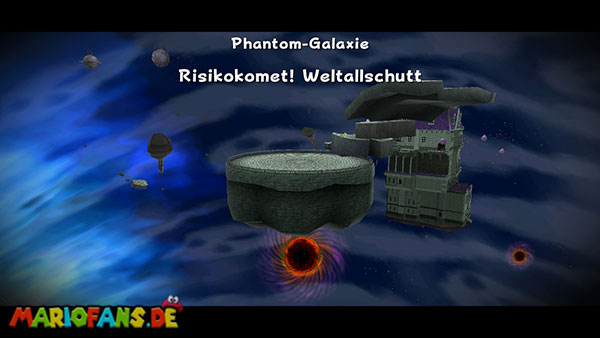
The Ghostly Galaxy is one of the larger galaxies in the Comet Observatory kitchen and will be unlocked once you have collected at least 20 Power Stars. Right on your first visit, a special rescue mission awaits you, because Luigi has been captured in an abandoned haunted house on his search for Power Stars. Launch on a small mushroom spaceship of the Toad Search Force that floats in the middle of dark space. Talk to the Toads if you want to know more about Luigi’s disappearance, then walk to the bottom of the spaceship. There is a Launch Star that catapults you directly to the entrance of the haunted house. On the small cemetery planet, you will first expect several pumpkin Goombas and a large spider hanging from the ceiling. The pumpkin Goombas have a protective pumpkin shell, which you must first remove with a spin, before you can defeat them with a jump. The spider can also be stunned with a spin and then done by another attack. Run through the stone arch and follow the narrow path to the large villa. On the way, huge Chain Chomps regularly roll over the bridge, which can hurt you if touched or even push into the depths. Therefore, first observe their movements and avoid one of the wider points on the roadside as soon as a Chain Chomp approaches. Wait until it rolls by and continue on your way afterwards. Since there is a black hole underneath the narrow bridge, you should not try to avoid the obstacles by risky jumps over the edge. At the end you finally reach the entrance of the abandoned haunted house.
Inside the villa you can expect a large entrance hall with several Bowser statues, a wide staircase and some locked doors. Shortly after your arrival, a Boo appears who follows you through the room. Ordinary jumps cannot hurt the mind, and even a spin is not enough to permanently defeat it. However, the Boos have a decisive weakness: they do not tolerate bright light. Therefore, first runs to the switch to the right of the entrance door and activates it with a spin. This switches on a headlamp whose light cone falls on a part of the ground. Now lure the Boo in this direction by turning your back and letting him fly behind you. As soon as the mind is in the light, it dissolves. Then you walk up the big stairs, where another boo emerges from one of the paintings. He carries a key inside him that you absolutely need to open the next door. Lure this ghost into the light cone of the spotlight as well and collect the key it leaves behind when it disappears. This automatically opens the closed door on the upper left side of the entrance hall. Run over to her and enter the next room.
Here you will find an unusual gravity room, the interior of which consists of several interconnected walls, narrow ramps and small platforms. Although you are initially on the floor, you can also walk along the side walls and even the ceiling via the sloping transitions. Your task is to collect a total of five Star Chips distributed throughout space. Some float visibly above the floor, while others can be found on the walls or on the ceiling. First runs over the lower level and collects the reachable Star Chips. Then you use the narrow ramps to get to one of the side walls. Follow its course and also examine the higher sections until you finally reach the ceiling. Along the way, she encounters more pumpkin Goombas, which you best stun from a distance with Star Bits before defeating them with a spin and a jump. You have to be especially careful near the large windows, because behind them there are black holes that immediately devour Mario when you fall in. Therefore, make sure to make your jumps as far as possible towards the safe platforms and not to move too far from the walls.
Before you leave the gravity room, a small detour to a hidden secret room is worthwhile. Go to the ceiling of the large room and look for a striking, circular spot with several cracks. Stand right above it and run a ground pound to break up the damaged ground. You will then fall into a secret library where numerous coins are waiting for you. First activates the switch on the wall so that several rows of coins appear in the room. Then you use the small Launch Stars to hurl from one side of the library to the other and collect as many coins as possible. Since the additional coins disappear after a short time, you should not stay unnecessarily long after activating the switch. With a little skill, you can collect a larger amount of coins here and even get an extra life. Once you have fully explored the secret room, you return to the great gravity space via the opening. Now collect the missing Star Chips until all five parts make up a Launch Star. This one appears in one of the large window openings on the side of the room. Run or jump there and activate it with a spin to catapult you to the outside of the haunted house.
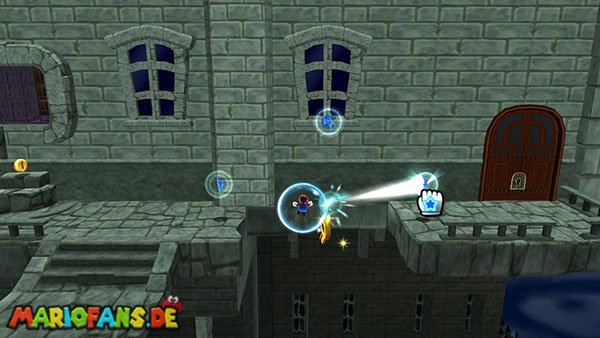
After the flight you land on a narrow platform on the outside wall of the villa. If you look around, you can already spot Luigi behind a barred window desperately calling for help. Unfortunately, the direct access to his room is blocked, so you have to find another entrance first. Run to the right to the edge of the platform, where several blue Pull Stars hover over a dangerous abyss. Beneath these stars is a golden key that you must collect to open the next door. At first, gently jump down and try to touch the key during the fall. However, align your pointer with one of the blue Pull Stars before jumping, so that you can hold the A key immediately after collecting the key. This pulls Mario up before he falls into the abyss. Do not wait too long with the Pull Star, because directly below the key is a dangerous area full of spikes. Once you have returned to the safe platform, you can reach the next section of the haunted house through the now open door.
In the following course, you will encounter two other boos who follow you at every step. Since you do not need a suitable beam of light to clear the way, you can first avoid them and quickly run to the opposite side. There is a yellow coin whose touch makes a new object appear: the spirit mushroom. Collect him and Mario turns into Boo Mario, a small white Boo with Mario’s signature red hat. In this form, you can float through the air by repeatedly pressing the A button. In addition, Boo Mario has the ability to become invisible for a short time, thereby penetrating certain grids and obstacles. Shake the Wii Remote while you are in front of a grid and then float through it. However, make sure that your transformation ends immediately if you are hit by a ray of light or are damaged. Before you cross the first grid wall, you should also float up to the ceiling of the room. There is another? coin waiting, which makes a 1-Up Mushroom from one of the paintings appear. Gather the extra life before you continue your path.
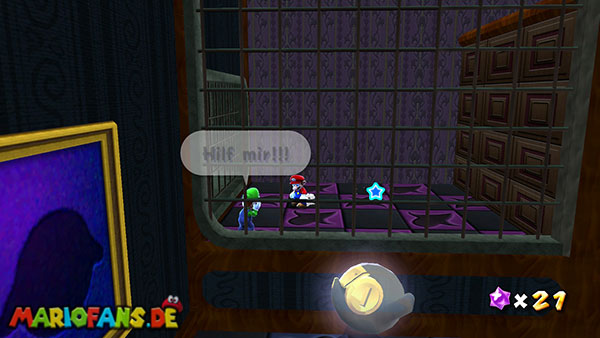
Then float as Boo Mario through the first grid and hold yourselves to the right in the next room. Here you already discover another barred opening, behind which Luigi's prison cell is located. With a renewed movement of the Wii Remote, make yourself invisible and fly through the bars. Inside the cell, Luigi is already waiting for his rescue, but there is one small problem: As long as you look like a boo, your brother is afraid of you and refuses to talk to you. Therefore, you must first change back again. On the right side of the room there is a bright cone of light, into which you can float as Boo Mario. As soon as the Light meets you, you take on your ordinary form again. Then you jump on the small jump platform and let yourself be catapulted over the shelf to the left side of the room. There is Luigi, who finally recognizes you. Talk to him and learn that he was captured by the ghosts in his search for Power Stars. As a thank you, he gives you the found Power Star, which you can collect next to him. With this, you have completed the first mission of the Ghostly Galaxy and successfully freed Luigi from the haunted house.
After returning to the Comet Observatory, Luigi will be in the garage with the other members of the Toad Search Force. In the further course of the game, he occasionally goes independently on the search for more Power Stars and then sends you postcards with hints on his locations. In this way, you can later find three additional stars in already visited galaxies, including the green star under the disc of the Battlerock Galaxy. Therefore, pay regular attention to the news of the Mailtoad so that you do not miss any of his hints.
A Very Spooky Sprint
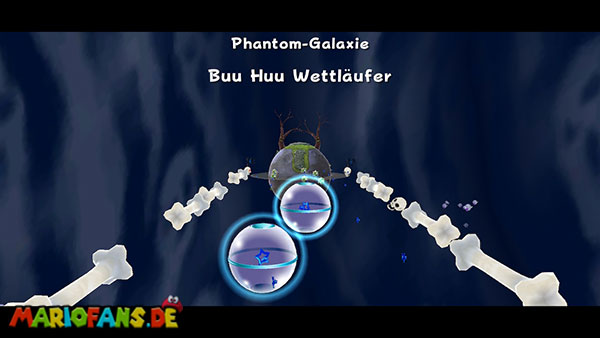
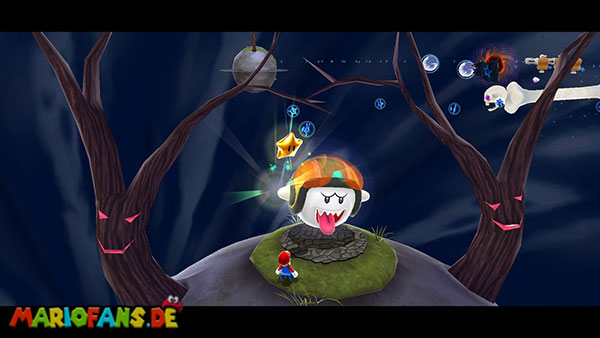
On your second visit to the Ghostly Galaxy, you can expect an unusual competition against a particularly fast spirit. You start again on the small mushroom spaceship of the Toad search party and first use the Launch Star on its bottom to reach the cemetery in front of the haunted house. There, however, the environment has changed compared to your first visit. The stone bridge to the villa is no longer fully present, so this time you have to reach the entrance via a series of blue Pull Stars. Run through the arch first and get rid of the pumpkin Goombas and bats that stand in your way. Then you jump towards the first Pull Star and hold the A button so that Mario is captured by its attraction. Change quickly from one Pull Star to the next and work your way across the abyss to the opposite side. Be careful not to let go of the A button too early as long as there is no other Pull Star in range. In front of the entrance of the villa, you will finally discover a new Launch Star, which will transport you to a small asteroid with the desired A Very Spooky Sprint. There are also several Star Bits nearby that you can collect before you address the ghost.
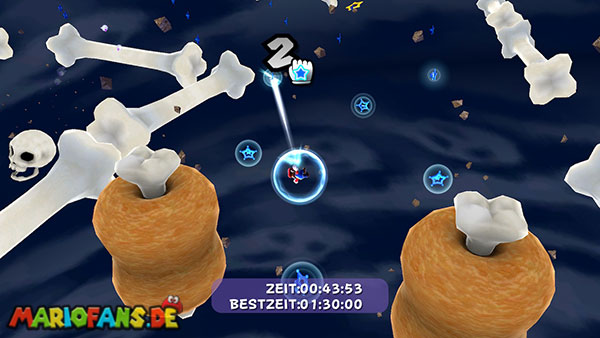
The big boo wears a flashy helmet and challenges you to a race through space. Once you have accepted his challenge, a race begins over a longer distance, which consists almost exclusively of Pull Stars. You must reach the target planet before the spirit and not take more than two minutes. Before you start the race, you should therefore already remember the first blue Pull Star on the left side of the starting planet. Align your pointer as early as possible so that you can immediately press the A button after the start signal and fly off. From now on, it is especially important to switch between the Pull Stars as quickly as possible. Do not wait every time until Mario has fully reached the center of a star, but already target the next one during the movement. This way you can keep your speed up and lose significantly less time. The route is traversed by several large, flesh-like obstacles that can push you back when touched and take you out of your trajectory. Therefore, try to select the Pull Stars so that you pass these obstacles as laterally as possible. You should also avoid the long bone constructions, as you can lose contact with the current Pull Star in the event of a collision.
About halfway along the way, you’ll discover a small Launch Star floating a little off the direct route. This is especially important because it allows you a clear shortcut. Therefore, try to steer your flight in its direction early and activate it with a spin as soon as you reach it. This will throw you over a larger part of the obstacle course and give you a valuable advantage over the A Very Spooky Sprint. After the onward flight, two small celestial bodies await you first, whose gravity can attract you. Use the Pull Stars if possible so that you do not have to land unnecessarily on their surfaces, because the jumping again would take additional time. You will then enter the final section of the race, where several explosive space mines float between the Pull Stars. You can already explode these from a distance with Star Bits and thus create a safe passage. However, be careful not to spend too long destroying the mines, because the racer continues to move inexorably. It is usually enough to choose a lateral trajectory and simply bypass the particularly dangerous obstacles.
Once you reach the end of the minefield, you will already recognize the small target planet, on the surface of which a finish line is marked. With the last Pull Stars, pull as close as possible to the planet and release the A button as soon as its gravity can detect Mario. You can additionally accelerate the landing by detaching from the Pull Star and falling directly towards the surface. Run then without detours over the finish line so that the race is finished. Once you arrive before the A Very Spooky Sprint, it acknowledges your performance and rewards you with the second Power Star of the Ghostly Galaxy. If you lose the race, you have to start the challenge again. Therefore, memorize the position of the abbreviated Launch Star and the course of the minefield. If you try again, you can cross the entire course much faster. Also, don’t forget that there is already an additional hidden Launch Star on the cemetery planet before the race. This guides you to the secret mission “Floating Star in Raven Black”, which you can also discover during this visit.
Beware of Bouldergeist
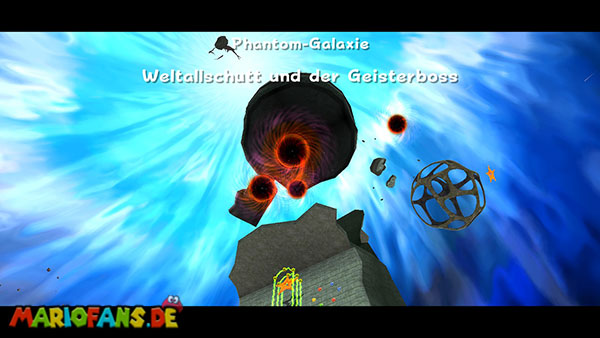
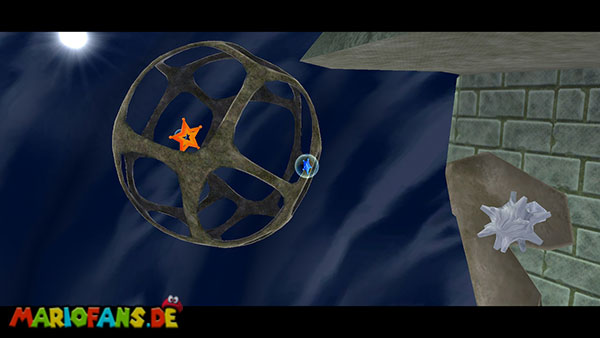
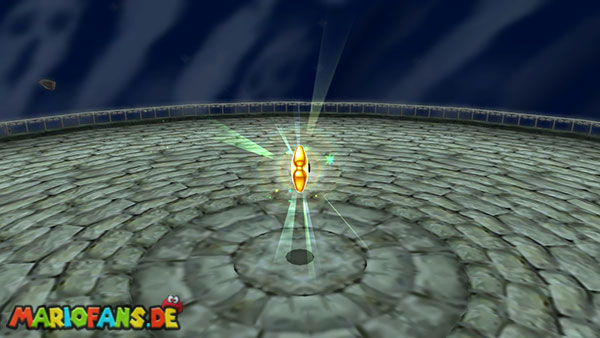
In the third regular mission, you return to the abandoned haunted house to face the spirit responsible for Luigi’s imprisonment. Unlike your previous visits, this time you do not have to search for a key or win a race, but fight your way through several dangerous celestial bodies up to the great ghost boss Bouldergeist. Launch as usual on the mushroom spaceship and use the Launch Star on its bottom to get to the cemetery planet. Run through the arch and follow the narrow bridge towards the villa. Along the way, you will encounter several bats and spiders that you can eliminate with spins. Also, pay attention to the Chain Chomps that regularly roll across the path. Wait in the wider places until they come by, and then continue on your way. Once you have reached the haunted house, you enter the large entrance hall again. Here you can no longer expect the ordinary boos from the first mission, but a new, particularly dangerous variant: the Bomb Boos. These black spirits have an explosive effect and can be thrown against objects with a skilful spin.
Immediately after your arrival, a Bomb Boo appears, following you through the room. First, let him get a little closer and then do a spin as soon as he is within your range. This keeps the ghost attached to Mario and circles around him like a small bomb. Now move so that the Bomb Boo is in the direction of one of the big Bowser statues, and hurl it with another spin against the statue. The explosion breaks it and exposes the area behind it. In total, there are four destructible statues in the entrance hall, behind which you can discover various coins and Star Bits. Particularly important is the statue in the fireplace on the left, because behind it hides the further path through the galaxy. So attract a new Bomb Boo, hold it with a spin and hurl it targeted against the statue in the fireplace. Once the explosion has opened the way, a Launch Star will appear. Before using it, you can destroy the remaining statues and collect additional Star Bits from the existing? blocks on the upper level of the room. Then you jump into the fireplace and activate the Launch Star, which catapults you to the next celestial body.
You land on an unusual asteroid whose surface consists of several broken stone slabs and large cracks. First, follow the narrow path forward and eliminate the spiders you encounter along the way. On the left is a moving platform that takes you to a higher section. Jump over to them and watch for the spider that is near the first Sling Pod. If possible, stun them with a star part from a distance before you approach. Then you can jump with a backflip to the upper platform and reach the cocoon. Point the Wii Remote's pointer at the sticky structure, hold the A button and pull it backwards against your desired direction of flight. Once you release the button, Mario is catapulted through the air like a giant slingshot. Use the first Sling Pod to reach the next platform and then follow the path to the left. There is already another cocoon waiting, with which you can hurl to a small Launch Star in the middle of the asteroid. Make sure to aim as accurately as possible, because below the platforms there is a black hole that immediately devours you in an uncontrolled crash. Once you reach the small Launch Star, activate it and catapult yourself to the next larger Launch Star. This brings you to another broken celestial body.
Several Sling Pods await you again on the second asteroid, but this time you have to collect five blue Star Chips to clear the way to the next Launch Star. Run first over the lower stone platforms and examine the different sides of the celestial body. Some Star Chips float directly over the paths, while others can only be reached using the Sling Pods. First, use the small trampoline on the lower platform to catapult you to the next higher level. From there you can jump into the first cocoon and hurl towards the next Star Chip. Be careful not to pull the cocoon back too far if the desired chip is only a few meters away, otherwise Mario may fly over the target. The individual Star Chips are distributed over several levels, so you have to switch back and forth between the cocoons. Watch the coin tracks, which often show you the intended flight direction. Once you have collected all five Star Chips, several blue Pull Stars appear on the upper left side of the area. Target the first star and hold the A button to pull Mario up. Then follow the series of Pull Stars to the big Launch Star and use it to leave the asteroid.
You now arrive at a group of small hollow celestial bodies whose surfaces consist only of narrow rings and individual platforms. In the middle of one of these planets is a large, pink jumping ball, with which you can reach the next level. Let yourself carefully fall into the opening of the planet and land as centrally as possible on the elastic ball. This throws Mario immediately back up when touched. Use the momentum to reach a higher Launch Star that takes you to the last section of the galaxy. Before you fly on, however, it is worth a short detour into the interior of the celestial body, because there is a 1-Up Mushroom. Collect it and then catapult yourself from the jump ball back up. On the following way, you can expect several floating mines, which you should avoid as large a space as possible. If necessary, you can explode some of them with Star Bits to create a safe passage. Finally, you reach another Launch Star that transports you directly to the ghost boss planet.
After landing, you will find yourself on a small platform above a large, circular battle arena. Here is a Lumalee, where you can buy either a 1-Up Mushroom or a Life Mushroom for 30 Star Bits. The Life Mushroom increases your maximum health from three to six units and is especially recommended for the following boss fight. If you do not yet have enough Star Bits, you can first examine the reachable crystals and? blocks in the area. Then you walk down the narrow path to the large stone platform, on which several coins are already scattered. Once you reach the center of the arena, Bouldergeist finally appears, a mighty spirit whose body is composed of numerous floating rocks. Unlike the ordinary Boos, this enemy possesses several different attacks and can only be defeated using the explosive spirits that he himself makes appear during combat.
In the first phase of the fight, Bouldergeist floats above the center of the arena and starts to hurl large boulders in your direction. Observe their trajectories and keep moving as much as possible so as not to be hit. Some of the chunks break into smaller stones on impact, while others leave dangerous obstacles on impact on the ground. Especially unpleasant are the long stone tips, which Bouldergeist suddenly grows from the ground. Once you realize that such a peak is forming under your position, you should immediately run to the side before it shoots completely out of the ground. The easiest way to avoid these attacks is to first move around the outer edge of the arena and not stay in one place unnecessarily long. Meanwhile, pay attention to the color of the rocks that Bouldergeist throws at you. The ordinary gray chunks are merely obstacles, while the golden chunks release coins to fill up your health. The black chunks, on the other hand, are particularly important, because they create the Bomb Boos, which you have already met in the haunted house.
As soon as a black boulder hits the ground and turns into a Bomb Boo, you should attract him. Wait until the ghost is within reach, then perform a spin to capture it. He then circles around Mario for a short time and can be thrown in the direction of the opponent by another spin. Your goal is to meet the stone body of Bouldergeist with these explosive spirits. Align yourself as directly as possible to the center of his body and throw the Bomb Boo as soon as Bouldergeist stands still for a moment. A successful hit destroys part of his stone shell. Repeat the process three times in total until all of the outer armor is broken and Bouldergeist's actual little spirit body comes out. Now you must act especially quickly, for the spirit exposed is vulnerable only for a short time. Attract another Bomb Boo and hurl it directly at the visible spirit body. If you succeed in this additional hit, the first combat phase is completed. Bouldergeist initially disappears, but after a short time puts his body together again and appears with a more dangerous form.
In the second phase of combat, Bouldergeist now has two huge stone arms with which he can beat Mario and crush on the ground. Pay special attention to when he raises his arms, because shortly after he hits the arena. Try to stay as laterally as possible from the opponent and move in time from the range of his hands. In addition, Bouldergeist continues to use his known attacks with rocks and stone tips growing from the ground. Also this time you have to use the black chunks to get Bomb Boos. Catch one of the explosive ghosts with a spin and throw him directly against the main body of Bouldergeist. However, his two stone arms can intercept your projectiles, so you should look for a favorable position before dropping. If a hand blocks your way, you can also destroy it with a Bomb Boo. This gives you a temporary free trajectory to the body of the opponent. However, Bouldergeist's arms grow back after a short time, so you should not spend too long with them.
Hit Bouldergeist's main body again three times with Bomb Boos until his stone shell completely shatters a second time. Once the little spirit body is exposed, you need one last bomb hit to finally end the fight. If possible, try to have another Bomb Boo near you when the third hit lands. This allows you to attack the exposed spirit immediately afterwards without having to wait for the next black boulder. Throughout the battle, you should also collect the coins from the golden rocks if your health runs out. Also the gray stones that Bouldergeist throws at you, you can partially shoot with Star Bits before they reach you. After the last successful hit, Bouldergeist finally loses his entire form, disintegrates into its individual components and disappears from the arena. In its place appears the desired Power Star, which you can now safely collect. With this, you have completed the third regular mission of the Ghostly Galaxy and defeated the spirit that had previously held Luigi in the haunted house. Remember the attack technique, however, well, because in the later Daredevil Cometen you have to defeat Bouldergeist again, but this time without taking even a single hit.
Matter Splatter Mansion
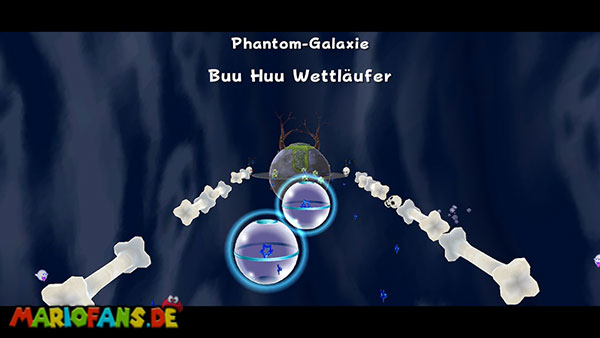
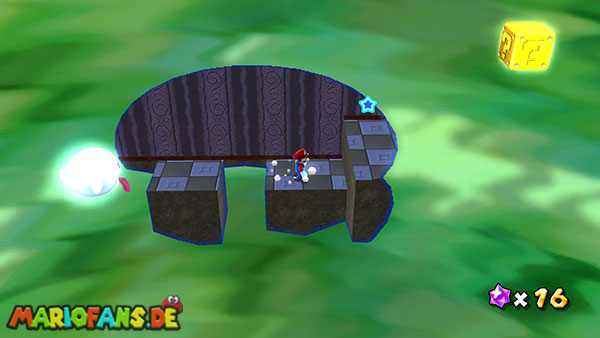
In the Ghostly Galaxy hides another secret Power Star, which you can already discover during the second mission “A Very Spooky Sprint”. Select this mission again and use the Launch Star on the bottom of the mushroom spaceship to get to the cemetery planet in front of the haunted house. Instead of immediately walking to the entrance of the villa, this time you should take a closer look around the small planet. Between the pumpkin Goombas and bats are two striking rock formations, one of which stands slightly elevated and glistens slightly brighter than the remaining stones. Run to this shimmering rock and destroy it with a spin. Below is a secret Launch Star that brings you to a completely new celestial body. Use it to leave the cemetery and reach an unusual area that is almost completely shrouded in darkness. Here you can expect a special obstacle course, whose paths and platforms are not permanently present, but only appear when they are detected by a moving circle of light.
After landing on the shadow platform planet, you stand on a small fixed platform from which a circular light wanders across the dark underground. As soon as the light touches an area, the platforms hidden there become visible and can be entered by Mario. If the light disappears again, the corresponding surfaces dissolve and leave a dangerous abyss. Therefore, you should always move within the illuminated area and not run too far ahead. First enter the first visible platform and follow the light slowly forward. As you approach the edge of the circle of light, more floor plates appear in front of you, on which you can continue your path. Along the way, you’ll encounter some pumpkin Goombas and boos who haunt you through the dark corridor. Avoid prolonged battles with the spirits, for while you take care of them, the circle of light can already move on and make the underground disappear under your feet. Instead, use a spin if necessary to briefly push back the opponents and focus on the safe way forward.
At the end of the first section, a golden key hovers over a small platform. Follow the circle of light to this point and collect the key so that the locked door opens at the other end of the corridor. Then you can get through the door into the next room. Here the movement of the light changes: instead of moving straight ahead, it now runs back partially and uncovers new paths that were not visible before. Therefore, follow the light attentively and do not try to orient yourself solely on the course of the previous path. Some platforms lead over small gaps, which you have to overcome with an ordinary jump. Wait until the next platform is fully visible before you jump off. Along the way, she encounters another key that unlocks two doors at the end of the section. Then go through the left door, behind which a yellow coin is waiting for you. Touch them so that the light changes again and now illuminates a vertically upward path. This allows you to reach the higher levels of the shadow planet in the next section.
Now begins the most difficult part of the secret mission, as the moving light circles expose several platforms and narrow walls that you have to climb with wall jumps. Run first to the lit wall and jump against its surface. Once Mario touches her, press the jump button again to push yourself off to the opposite wall. Repeat this movement alternately between the two walls and work your way up as the light glows the next platforms. Be careful not to make your jumps too early, as some sections of the wall will not be visible until the circle of light has moved far enough up. Especially with the narrower platforms you should briefly check after landing in which direction the light circle continues. On your way, you will also encounter other bats and pumpkin Goombas that can hinder you from jumping. Stun them with Star Bits or a spin before you prepare the next wall jump. Once you reach the highest level, follow the circle of light a little further forward until you discover another golden key.
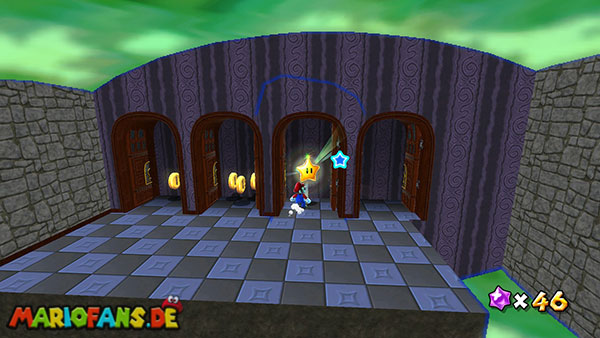
This last key opens four side-by-side doors located at the end of the dark corridor. Behind the doors are different objects and smaller surprises, but only one of them leads to the desired Power Star. Stand in front of the row of four doors and choose the second door from the right. Run through the entrance and follow the short path behind it until you finally reach the secret Power Star. Collect him to complete the mission. You have successfully crossed the hidden shadow world of the Ghostly Galaxy. It was particularly important not to run faster than the light, because the platforms only last as long as they are illuminated. If the path seems too difficult on the first attempt, you can enter the mission again at any time via the hidden Launch Star on the cemetery planet and memorize the movements of the light circles in peace.
Bouldergeist's Daredevil Run
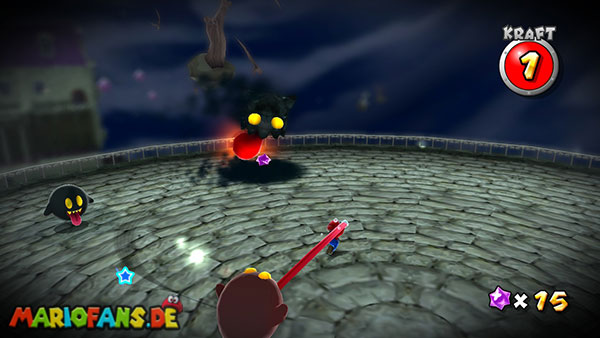
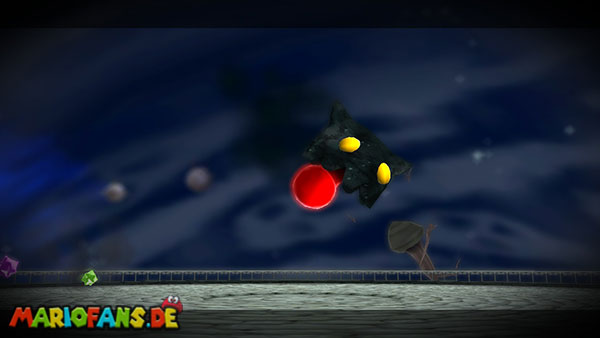
As soon as a Daredevil Comet appears over the Ghostly Galaxy, you can face a particularly challenging variant of the fight against Bouldergeist. Unlike the regular Beware of Bouldergeist mission, this time you don’t have to travel the long way through the haunted house, the broken asteroids and the minefield. Instead, you start immediately on the Ghost Boss planet and can focus directly on the fight. The difficulty is that Mario has only one energy point during this challenge. Even a single touch with a rock, a stone tip or one of Bouldergeist’s mighty arms leads to immediate failure. Coins cannot help you here, and the Life Mushroom from the ordinary mission is not available to you as a way to take additional hits. You must win the battle completely without damage. For this, the actual process remains unchanged, so you can use the same attack technique as in your first victory.
Right at the beginning, Bouldergeist reappears in its original form and begins to hurl large boulders of rock over the arena. First, keep moving at the outer edge and try to keep as large a distance as possible between you and the impacting rocks. Pay special attention to the stone tips that suddenly grow out of the ground, as they can hit you even if you are trying to avoid another attack. Therefore, watch the opponent’s movements and if possible do not run through the middle of the arena as long as Bouldergeist drops his stones to the ground. Once one of the black chunks appears and turns into a Bomb Boo, you can attract the explosive spirit. Wait until he gets close enough to you and catch him with a shoot. Then you throw him with another spin against Bouldergeist's body. Repeat this procedure three times until its outer stone shell completely breaks. Now you have to throw a fourth Bomb Boo against his exposed spirit body to complete the first phase of battle. Do not try to be particularly fast, but rather wait for a safe moment in which Bouldergeist is not preparing a new attack.
In the second phase of combat, Bouldergeist again has his two large stone arms, with which he can beat Mario and press against the ground. These attacks are especially dangerous because they hit a larger area of the arena and at the same time restrict your freedom of movement. Therefore, keep as much distance as possible from the arms and move laterally around the opponent as soon as he reaches for the next strike. Also this time you need three hits with Bomb Boos against the main body before Bouldergeist's small ghost body becomes visible again. However, his stone arms can intercept your projectiles, which is why you should look for a free trajectory before throwing. If a hand blocks the way, you can temporarily destroy it with a Bomb Boo. Then use the short time before it grows back to meet the actual body. Once you have completely destroyed its outer shell, you need one last bomb hit against the exposed spirit. After this attack, Bouldergeist finally disappears, leaving behind the Power Star of Daredevil Comet. In doing so, you have also completed this particularly difficult challenge. If you need several attempts, you should focus on the rhythm of his stone attacks. Since you start directly with the boss, you can repeat the fight as often as you like without having to cover the entire path through the Ghostly Galaxy again.
Purple Coins in the Bone Pen
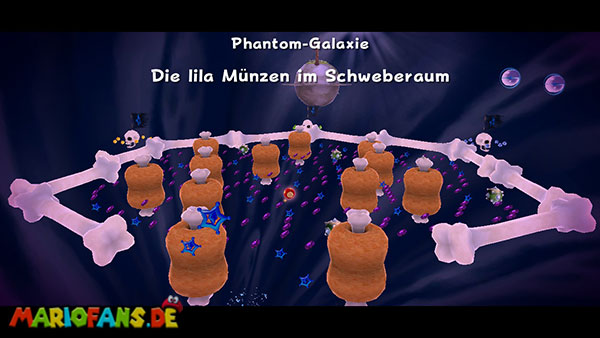
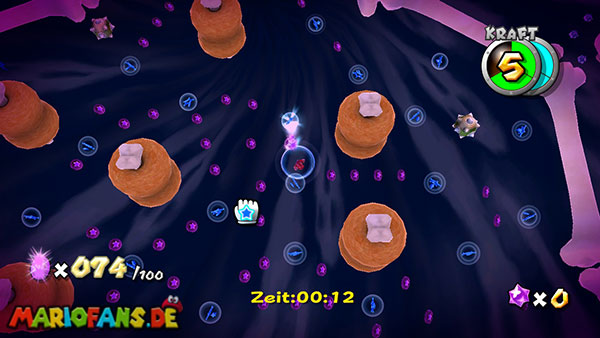
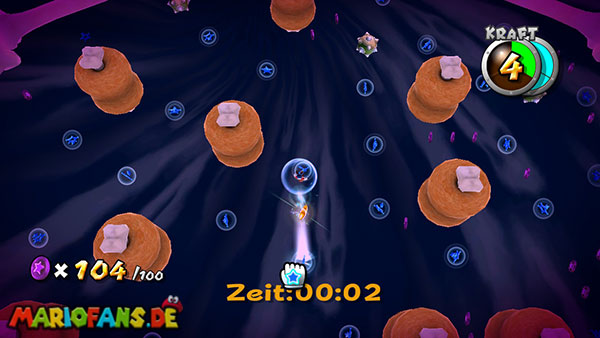
The Ghostly Galaxy’s final mission will be available once you defeat Bowser at the center of the universe and a purple comet appears over the galaxy. Unlike the previous tasks, you do not have to defeat opponents or find hidden keys this time, but within an extremely tight time limit collect a total of 100 Purple Coins. You start on a small celestial body at the edge of the large hovering room, which you already know from the second mission “A Very Spooky Sprint”. However, the entire area has now been changed and provided with numerous additional coins. Between the bone constructions and the floating obstacles there are a total of 149 Purple Coins, of which you only need 100. This sounds like a generous choice at first, but you only have 60 seconds for the entire challenge. It is particularly important that the countdown continues even after collecting the hundredth coin. So you not only have to reach the required amount, but then also collect the released Power Star before the time is completely expired. Since the star is in the middle of the floating room, you should plan your route so that you land as close to the center as possible after the last coins.
Immediately after the start, point your pointer to the first blue Pull Star and hold the A button to pull Mario into the floating room. In front of you stretches a large area of several circularly arranged bone walls, floating flesh bones and numerous explosive mines. Between these obstacles run long rows of Purple Coins, which you can collect when flying by. The easiest way is to first fly along the outer edge of the floating room and take along as many coin rows as possible. Do not hold your pointer unnecessarily long on a single Pull Star, but switch to the next during the movement. This keeps Mario in motion and you can travel longer distances in a short time. Try to cross the rows of coins as centrally as possible, so that you collect several copies during a single flight. If you move too far from a row, you should not try to reverse because of a single coin. Since there are significantly more than 100 coins in total in the area, you can easily omit some copies and follow the next longer coin trail instead. Particularly worthwhile are the coins, which are arranged in large arcs between several Pull Stars. With a uniform flight movement, you can collect a larger amount here within a few seconds.
As you move along the outer area, you must pay particular attention to the floating flesh bones. At first glance, these seem like ordinary obstacles, but when touched, they throw Mario in a different direction and can cost valuable seconds. You should also avoid the large bone walls if possible, because a collision interrupts your movement and forces you to target a new Pull Star. Therefore, try to recognize the obstacles early on and easily shift your trajectory to the side before you reach them. In the case of explosive mines, caution is also required. Some of these float directly between the Pull Stars and can hurt Mario when touched. Although a collision does not necessarily mean the end of the mission, if you can catch yourself in time with a Pull Star, the collision costs you valuable time. Therefore, if possible, find the open areas between the minefields and try not to fly directly through their center. If you have enough time, you can also explode individual mines with Star Bits to create a safe passage. In the center of the floating room you will also find a Life Mushroom that increases your maximum health and thus gives you a little more security against the mines. For a particularly fast run, however, this detour is not absolutely necessary, which is why you have to decide for yourself whether you prefer to gain additional security or collect as many coins as possible.
Once you have circled the outer area and already collected a larger number of coins, you should slowly move towards the inner rows of coins. There, the Purple Coins are partly arranged closer together, so that you can collect several copies on a shorter route. Try to use the Pull Stars in a kind of spiral and gradually approach the center of the hover. In this way, you can collect a large number of coins without having to fly back and forth between far away areas. Pay regular attention to the coin counter on the screen and at the same time keep an eye on the remaining seconds. Once you have about 80 to 90 Purple Coins, you should already be near the center. Here you can collect the last required coins from the more densely arranged rows and at the same time prepare for the final flight to the star. It is particularly important that you do not only start after the hundredth coin with the search for the later star location. Since the Power Star appears immediately in the middle of the floating room, you should collect your last coins in this area if possible. This saves you a few crucial seconds at the end and does not have to fly again across the entire minefield.
Once you have collected the hundredth Purple Coin, the desired Power Star appears in the middle of the floating room. However, the countdown continues, which is why you should not lose any more time collecting additional coins. Point the pointer immediately at one of the Pull Stars near the star and draw Mario as directly as possible to its position. If you are already in the middle, a short change between two Pull Stars is often enough to reach the star. Be careful not to be distracted by the nearby bone walls or flesh bones, but focus entirely on the final flight route. Once Mario touches the Power Star, the mission is complete and you have successfully mastered the final challenge of the Ghostly Galaxy. If the time on the first attempt is not enough for you, you should pay particular attention to changing fewer Pull Stars unnecessarily and collecting the coin rows in the longest possible, even movements. A further arc along the outer edge and the subsequent movement in the direction of the center prove to be particularly reliable. It is less important to take every single coin with you, but to collect a sufficient amount as quickly as possible and return to the star in time at the end.