

Heavy Metal Mecha-Bowser
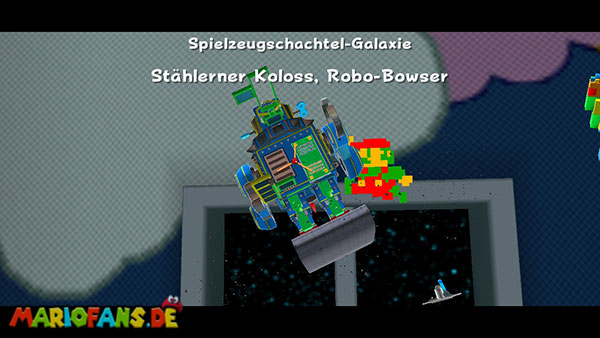
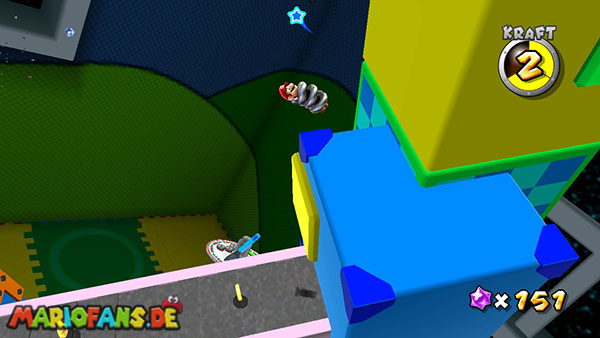
Run from the launch platform to the circular railway line and wait until one of the two toy trains passes in front of you. Jump onto one of the wagons and get transported to the opposite side, where a Launch Star is located. The longer train offers you a little more space and makes the jump easier. Activate the Launch Star and land on a large construction of toy trains, screws and colored gravity surfaces. Before you follow the main path, a small detour to the left is worth: between two vertical pipes there is a hidden 1-Up Mushroom, which you can reach with several wall jumps. Jump alternately against the two pipes and work your way up to the upper edge. Collect the extra life and then return to the main platform.
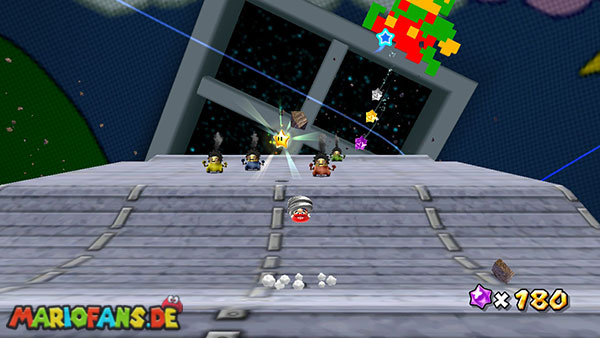
Run forward now and defeat the little robo-coopas with a ground pound. An ordinary spin is not enough for these mechanical opponents to finally eliminate them. Then follow the pink gravity surface to the right. Once Mario enters, gravity changes and you can walk along the previously vertical wall. Stay on the safe surface and follow the way up. On the way, you can activate a? block to collect additional Star Bits. Further forward, a laser robot awaits you, whose beam regularly swings over the narrow path. Wait until the laser points to the opposite side, and then walk past it. Next to the next platform is a large movable screw construction. Use a twist on the associated screw to stop the movement and collect the Star Bits there.
Follow the pink area further to a yellow screw that sticks out of a small platform. Stand right next to it and perform a spin to turn it out. This will expose the Launch Star at the other end of the section. However, don’t jump right away towards the Launch Star as there is a bigger gap between you and him. First returns to the lower plane via the gravity surfaces and runs to the platform with the blue mechanic-Luma. There is another large screw head. Turn the yellow screw out of the ground and then jumps through the resulting opening onto the platform below. Run to the blue screw and turn it into the ground with a twist. This drives out a bridge that previously blocked the way to the Launch Star. Climb back up via the adjacent platforms, cross the new bridge and activate the Launch Star.
On the next planet, several conveyor belts, large toy blocks and other laser robots await you. Run straight ahead and collect the yellow? coin. This makes the first Spring Mushroom of this galaxy appear. Once you touch it, Mario turns into Spring Mario and jumps up and down continuously. If you hold the A button during the landing, you perform a particularly high spring jump. With this you can overcome the large height differences between the individual toy platforms. First jump onto the first conveyor belt and move against its running direction to the next platform. Further forward, a laser robot awaits, the beam of which terminates your spring transformation upon touch. Therefore, wait until the laser swings straight to the other side, and then jumps over it with a high spring jump. Follow the second conveyor belt and use further high jumps to reach the toy blocks stacked on top of one another. At the top is the next Launch Star.
This brings you to a large plate on which a glass container stands next to various kitchen utensils. Inside it, the next Launch Star is included. Collect the spring mushroom next to the container and jump on its top with the A button pressed. There is a large round stone closure, which you have to destroy with a ground pound. Jump high enough over the shutter and presses the Z button in the air. Once the stone is broken, you can jump down into the container and activate the Launch Star inside. This will finally give you the massive robo-bowser.
You first land at the feet of the mechanical bowser. Run forward over the conveyor belt and be careful not to be crushed by the large rollers at the end of the platform. On the left side of the robot is a narrow opening between two walls. Climb upwards with several wall jumps and thus reaches the first green gravity surface. Once you enter it, you can walk along the vertical surface of the robot leg. Follow her to the big blue screw and turn it into the ground with a twist. This activates a part of the mechanism that brings you to the upper body. Then jump into the nearby red warp tube that transports you to the other leg of Mecha-Bowser. Again, you have to follow the green gravity surface and turn the next blue screw into the ground. After the second screw, a Launch Star appears, which you use to get to the large platform on the robot's belly.
On Mecha-Bowser's upper body is a large green metal plate, which is fastened with a total of four yellow screws. You have to turn all four out so that the plate falls down and clears the way inside. First runs to the two easily reachable screws on the lower half of the platform and removes them with spins. Then you move to the top two screws. Pay attention to the rotating fire bars that swing regularly over the plate. Wait until a fire bar has passed and only then runs to the next screw. Once the fourth screw has been removed, the metal plate detaches from its holder and falls downwards. Go immediately to the small notch below the former plate. There is a warp tube, through which you reach the next section.
After leaving the tube, you stand on one of the massive robotic arms. Run first over the hand and follows the narrow arm towards the shoulder. On the way, you will encounter several small robo-coopas as well as bats, which you can eliminate with spins or ground poundn. Be careful not to run too far sideways on the narrow platforms, as there is no safe ground below you. At the upper end of the arm is another yellow screw. Turn it out with a spin so that the entire arm of Mecha-Bowser’s body is released. Once the screw has been removed, the construction begins to fall down. Therefore, run immediately to the released Launch Star near the shoulder and activate it before you are torn with your arm into the depths.
The Launch Star takes you to the top level next to Mecha-Bowser’s huge head. Run over the narrow metal bridge and first eliminate the Magikoopa, who attacks you with his magic bullets. Particularly dangerous here are the large fireballs, which are regularly fired from a cannon on the head of the robot. Wait for a gap between the floors and follow the bridge to the right side. There is another Spring Mushroom that you need for the final ascent. Collect it and then jump with a high spring jump on the first platform on the robot's head. From there you can reach several smaller stone platforms, which are located on top of each other. Pay special attention to the laser robot whose beam can hit you during a jump and end your spring transformation. Therefore, if possible, wait until the laser has changed direction before jumping to the next block.
At the top of Mecha-Bowser's head is a large stack of round stone slabs. Jump with Spring Mario to the top plate and then perform a ground pound. As a result, you break the entire construction and destroy the mechanism inside the robot. Mecha-Bowser then begins to break up and finally explodes completely. The mechanic Lumas previously trapped in his body are freed and give you the Power Star as a thank you. With this, you have completed the first mission of the Toy Time Galaxy.
Mario Meets Mario
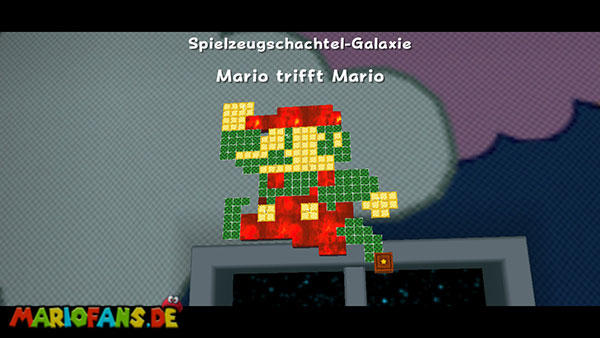
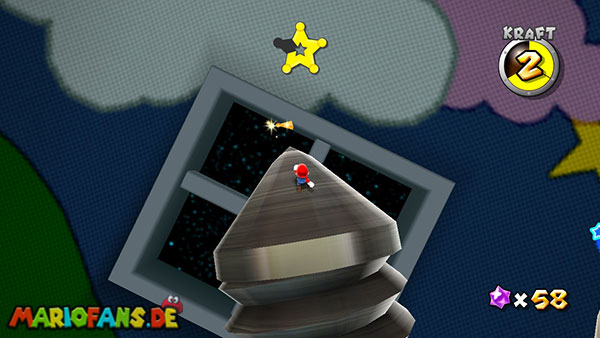
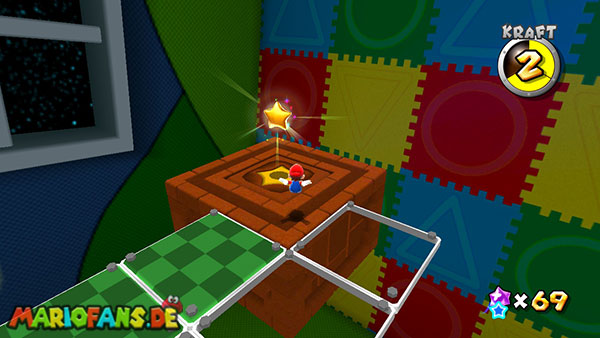
Run from the starting point to the circular railway line and jumps on one of the passing trains. Get taken to the opposite side and activate the Launch Star there. You land on a huge, helical planet where you have to collect a total of five blue Star Chips. Immediately after your landing, there is a laser robot nearby. Wait until his laser beam swings to the side and then jumps to his head. This is where the first Star Chip hovers. You can also temporarily turn the robot off by landing, so that it cannot attack you again immediately when you jump off.
The second Star Chip is located in a large crystal on one of the green blocks. Run over the lateral gravity surfaces to the corresponding platform and destroys the crystal with a spin. Collect the star piece and then follow the surface of the planet to a small jump platform. Stand on it and use a high jump to reach the third Star Chip floating above it. Pay attention to the electric balls that travel across several areas of the planet. If you touch one of these balls, Mario loses vital energy and can be pushed off the platform. Therefore, wait for a vacancy before you make the next jump.
On the upper side of the planet is a large screw whose head protrudes beyond the rest of the platforms. Climb over the green surfaces and jump on the screw head. There, the fourth Star Chip floats directly over a small blue screw. Collect the star piece first and then turn the blue screw into the ground with a twist. This lowers the massive main screw and you can get to its previously inaccessible tip. Run over the exposed surfaces to the opposite side and collect the fifth Star Chip there. Once all five have been found, a major Launch Star appears at the top of the screw. Before you use it, you can destroy the reachable crystals on the planet to collect additional Star Bits. On the bottom is also a Hungry Luma, which unlocks the secret Power Star “The Flipswitch Chain” for 50 Star Bits.
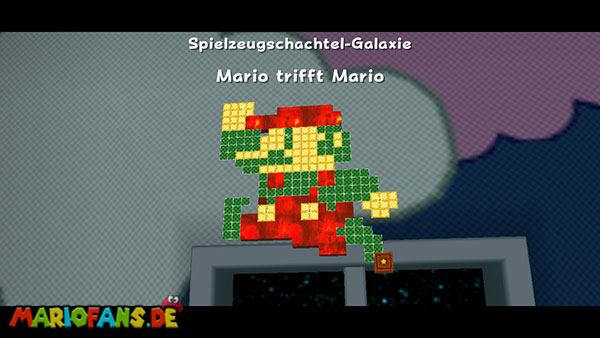
Now use the Launch Star and you land on a huge planet whose surface looks like the classic 8-bit Mario. The entire figure consists of small square platforms on which five Silver Stars are distributed. However, not all fields are permanently accessible. The green platforms shrink as soon as you enter them and disappear completely shortly thereafter. The yellow platforms, on the other hand, start to rotate after entering, which allows you to easily slide into the abyss. In addition, some red fields are filled with lava, which injures Mario when touched. Therefore, you should only use the platforms you actually need for your path. Above all, avoid walking back and forth over several green fields, as this allows you to cut off the way back later.
From the starting point, follow the outer green platforms to the right. There is the first Silver Star, which you can reach with a short jump. Then jump up the adjacent fields and collect the Silver Stars on the middle platforms. Use long jumps as possible to cross several vanishing fields at once. For this purpose, hold the Z key while running and then press the jump key. However, be careful not to jump over a Silver Star that lies directly on one of the intermediate platforms. On the rotating yellow fields you should land as centrally as possible and jump immediately to the next safe surface before the platform has completely rotated under your feet.
Then work your way over the top half of the Mario figure to the opposite side. There are the nearest Silver Stars on the outer fields. Run as counterclockwise as possible over the platforms and avoids re-entering already used green fields. If you have to overcome a larger gap, you can gain a little extra flight distance with a long jump and a subsequent spin. Before you collect the last Silver Star, you should make sure that there are still enough platforms left between your current position and the starting point. Especially the green fields immediately before the original landing site should be left as untouched as possible during the collection. They are your safest way back.
Once you find all five Silver Stars, they combine to form a Power Star that appears on the small wooden launch platform. Therefore, jump over the remaining green fields back to the middle of the lower side of the Mario figure. Once again, use long jumps to overcome larger gaps and pay attention to the rotating yellow platforms. The vanished green fields do not reappear during this attempt, so you may have to take your original way back via an adjacent row. Once you have reached the launch platform, you collect the released Power Star.
Bouncing Down Cake Lane
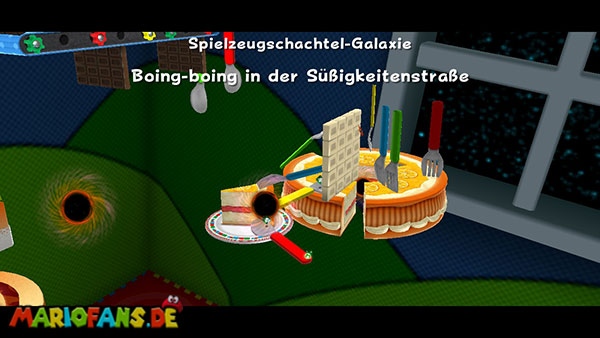
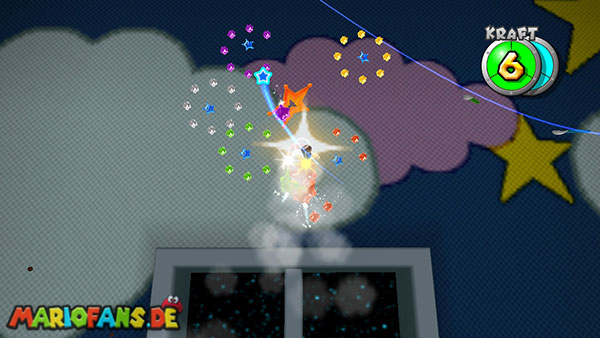
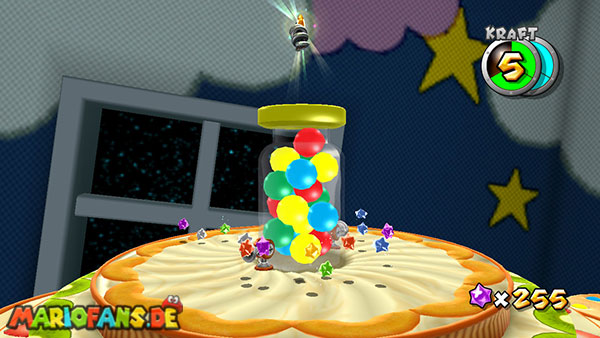
Run on the starting platform this time to the right side of the circular railway line and wait for one of the passing toy trains. Jump onto a wagon and get transported to Launch Star on the opposite side. After the flight you land in an area of huge pies and chocolate plates. First run to the Spring Mushroom and turn into Spring Mario. Then jump up between the two tall cake walls. Hold the A button during landing so that you perform a particularly high spring jump. Once you reach the upper platform, follow the long conveyor belt to the right. Here, several large pieces of chocolate move against your running direction. Jump over it with your spring jumps and try to land in the middle of the band if possible. An inaccurate jump can carry you laterally into the depth, so you should be especially careful with the narrower obstacles.
At the end of the conveyor belt you reach a large plate. Jump from there to the next piece of cake and then to a huge rotating cake. Their surface is interspersed with several holes that immediately cause Mario to fall into the abyss. Move as far as possible against the direction of rotation of the cake and keep yourself on the wider surfaces between the openings. Once the next safe section is near you, you’ll jump on and follow the path to the small Launch Star at the edge of the cake. This will take you to a fully iced area consisting of ice cream, frozen sweets and large lollipops.
First you land on the underside of a huge ice wafer. Run up over the iced areas and then jump to the first of the narrow ice bars that float between the individual sweets. Follow them to the right and work your way from one pole to the next. At the end, you reach several rotating lollipops, in the middle of which an electric opponent regularly emits circular energy waves. Wait until the next wave of energy has passed, then jump to the first lollipop. As soon as the opponent creates another wave, you jump over it in time. It is particularly safe to change the platforms as quickly as possible and not to stay on a single lollipop for too long. After the last lollipop you reach a larger ice platform.
Follow the icy path forward and pay attention to the electric Goombas that can hurt you if touched. Eliminate them with targeted jumps or stun them with Star Bits before you run past them. The narrow ice platforms are partly separated, so you have to overcome the larger gaps with ordinary jumps. Avoid running unnecessarily fast on the ice, as Mario is much easier to slide here. At the end of the path you reach the second group of rotating lollipops. Here, too, the opponent in the middle regularly emits electrical energy waves. Jump between the lollipops and avoid the waves with jumps set in time until you reach the last larger ice platform.
Before you climb further up, you should examine the back of the ice platform. There is a hidden Life Mushroom that increases your maximum health from three to six units. Run carefully along the edge and collect it before returning to the front. The additional protection is especially helpful for the later boss fight. Then climb up the long pole until you reach a small platform with a cannon. Jump in and point them toward the floating blue Pull Stars above the nearest celestial body. Fire Mario and catch him with the first Pull Star. Then move on to the next Pull Star and finally activate the big Launch Star in the middle to get to the huge birthday cake.
On the next planet stands a large birthday cake, the top of which is surrounded by numerous burning candles. Run first to the huge forks and spoons that stick out of the cake to the side. Use them as platforms to work your way up. Jump from one piece of cutlery to the next, taking care not to fall on the narrow gaps. Once you have arrived at the top, you will encounter several small robo-coopas that you can defeat with ground poundn. Before you clear the candles, you can examine the accessible crystals and enemies to collect more coins and Star Bits. Then run around the top of the cake and perform a spin next to each burning candle. This extinguishes the respective flame. Make sure to reach the candles on the opposite side as the Launch Star will not appear until all the flames are extinguished. Once the last candle is cleared, a Launch Star will appear on the top of the cake, taking you to the boss planet.
There you will find another Monty cannon, this time on a huge candy container. The mole is in an electric gun dome and regularly fires yellow energy balls at Mario. Run around the outer edge of the arena first and eliminate the smaller enemies so that they don’t hinder you when you jump later. Behind the large gun platform is a Spring Mushroom that you have to collect. As Spring Mario you can get to the top of the machine with a high jump. First, wait until an energy ball has flown by, and then stand close to the gun platform. Hold the A button on the next impact so that Mario jumps particularly high. As soon as you float over the glass dome, press the Z button and execute a ground pound. This will land you the first hit.
After the first hit, Monty cannon begins to fire his energy balls faster. Jump off the machine and find yourself again a favorable position for the next high spring jump. Stay moving, so that the bullets do not hit you. As soon as there is a larger gap between the energy balls, you jump up to the top of the machine and insert another ground pound. After the second hit, Monty's gun gets angry and regularly charges her gun dome. As long as the dome is under power, you must not touch it, otherwise Mario will be injured and thrown by the machine. Therefore, first wait at a secure location next to the gun platform until the electric discharge is completed.
Once the glass dome is no longer under power, you use a high spring jump again to get over the machine. Pay attention to the energy balls, which the opponent now fires much more often. When you are safely above the dome, press the Z button and execute a final ground pound. After a total of three successful hits, the Monty cannon is destroyed. On the top of the candy container, the Power Star appears, which you can collect afterwards.
The Flipswitch Chain
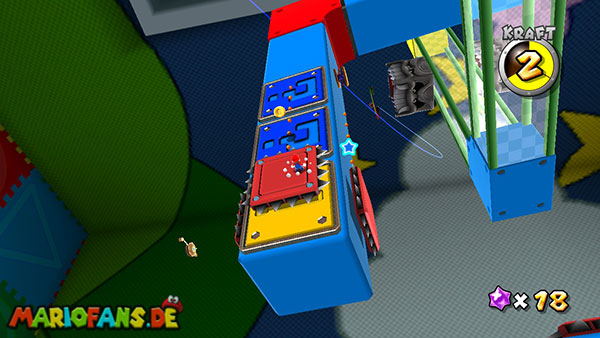
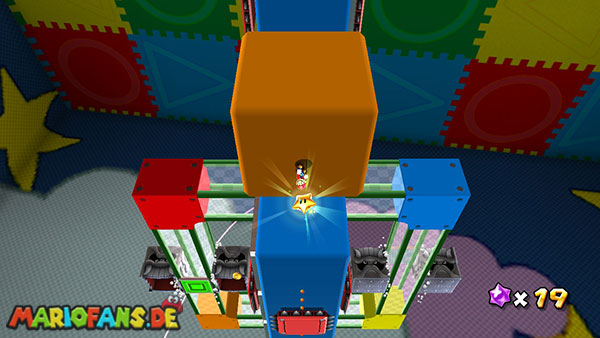
The secret power star of the Toy Time Galaxy can be found in the second mission "Mario meets Mario". Select this mission and get to the first Launch Star via the toy train. During the subsequent flight to the large helical planet, you should collect as many Star Bits as possible with the pointer of the Wii remote control. Especially the Star Bits, which float in a heart shape next to the huge crayons, are important, because you can make them later only difficult. On the screw planet, you need a total of 50 Star Bits to feed the Hungry Luma there. Collect the reachable Star Bits between the crystals and on the bottom of the planet. In addition, small Star Bits occasionally appear near the large electric spheres. Once you have enough Star Bits, you run to the bottom of the helical planet, where the Hungry Luma is waiting for you on a small platform.
Speak to the Hungry Luma and feed it with the 50 Star Bits you need. He then transforms into a new planet consisting of two intertwined chains. Activate the released Launch Star to get there. Your task is to activate a total of 15 blue rotating fields. As soon as Mario runs over a blue field, it turns yellow. However, if you enter the same field again, it turns blue again. You must therefore plan your route so that you do not touch already activated fields again if possible. It is also particularly important that many of the turning fields are located directly on the runways of dangerous opponents. On some sections, large tox boxes roll back and forth, while on others moving platforms with spikes glide across the fields.
After landing, you are on the first chain. In front of you is a group of three turning fields, over which a Tox box rolls. First, wait to see in which rhythm the opponent crosses the individual fields. The Tox box has a large opening on one side. If this open side faces down, you can safely stand underneath without being crushed. Therefore, if possible, run on one of the squares as soon as the opponent is away from you, and wait there until the opening of the Tox box is above Mario. Then activate the remaining two fields and leave the area before the opponent makes his next turn. After the first three fields, you reach a narrow transition to the second chain. Overcome it with a long jump or a backflip and land as centrally as possible on the next platform.
On the second chain, another group of three turning fields awaits you, over which a tox box also rolls. This time, however, only one of the fields is reliably within the safe opening of the opponent. Therefore, first activate the two outer fields as soon as the Tox box has rolled past you. Then wait for the moment when the opening is directly above the middle field and stand below it. Once the opponent has continued to roll, you can jump to the next platform. Make sure not to touch any of the already yellow fields again. If necessary, you can overcome the short distances between the field groups with a targeted jump instead of running over them again.
On each of the next three sections there are a further three turning fields over which movable barbed platforms slide. First, watch their movement and wait until they are at one end of their path. Then runs over the three fields and leaves the platform as soon as possible on the opposite side. Especially with the second group you should be careful not to jump off too early, because there is a larger gap between the two chains. First land safely on the next platform and wait there for the movement of the spikes. Then activates the last three fields of the third group. Once all 15 turning fields are colored yellow, they switch to green at the same time and the Power Star in search appears on a small orange cube underneath the chain construction. Jump onto the cube from the nearest secure platform and collect the star to complete the secret mission.
Fast Foes of Toy Time
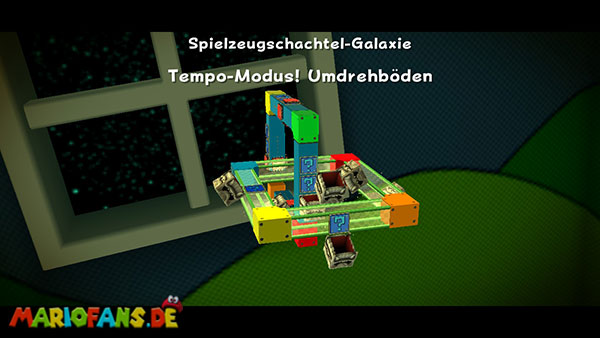
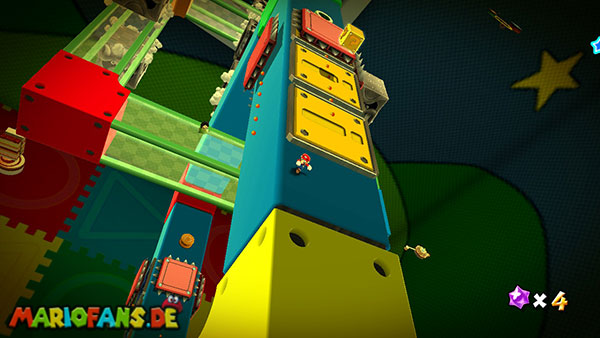
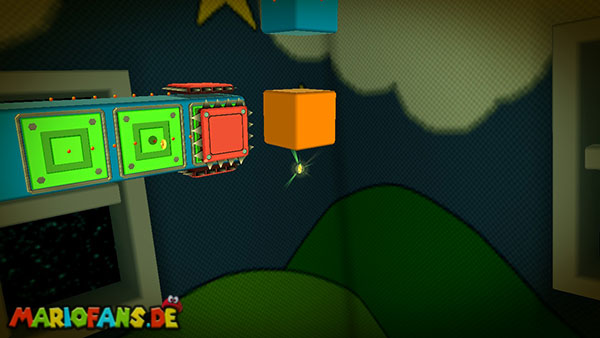
This mission appears as soon as a Tempo comet hovers over the Toy Time Galaxy. You start directly on the chain planet from the secret mission “The Flipswitch Chain”. The task is unchanged: You have to activate all 15 blue flip fields for the Power Star to appear. However, the Tox boxes and barbed platforms move much faster this time than before. You must therefore pay particular attention to their movement rhythm. After landing, wait for a complete cycle of movement of the first Tox box and observe in which order it rolls over the three fields. As soon as it moves away from you, you run to the first field and activate the two neighboring fields as soon as possible afterwards. If the opponent meets you, stand on the field over which his open side is located and wait there until he has rolled past.
After the first three fields are colored yellow, jump to the next chain. Do not try to run directly after the opponents, as the Tox boxes appear at their high pace already after a short time in the same place. Instead, use the safe spaces and jump specifically over already activated fields. In the second Tox box, you have to pay particular attention to the fact that only one of the three fields lies within its secure opening. Therefore, activate the two outer fields as directly as possible after they pass and then stand on the middle field as soon as a suitable opportunity arises. Wait there for the next complete run of the opponent and then jump to the next platform.
The last nine fields are located on three groups with fast moving barbed platforms. Wait until the spikes are at one end of their path, and then run as quickly as possible over the three blue fields. Then jump straight to the next secure platform before the spikes return. It is especially helpful to activate the fields in a single straight movement so that you do not have to brake unnecessarily or change direction. If you accidentally enter an already yellow field again, you must activate it again later. Once all 15 squares are yellow at the same time, the Power Star reappears on the small orange cube below the chains. Jump there carefully and collect him to complete the Tempo mission.
Luigi's Purple Coins
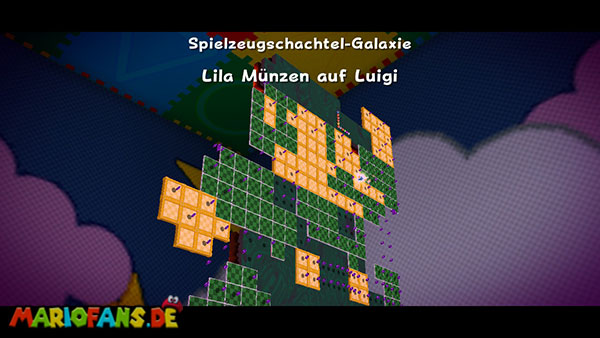
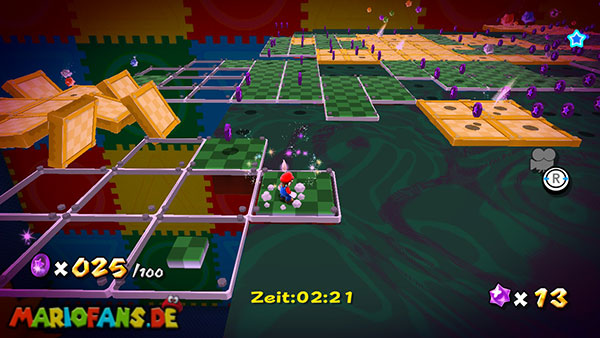
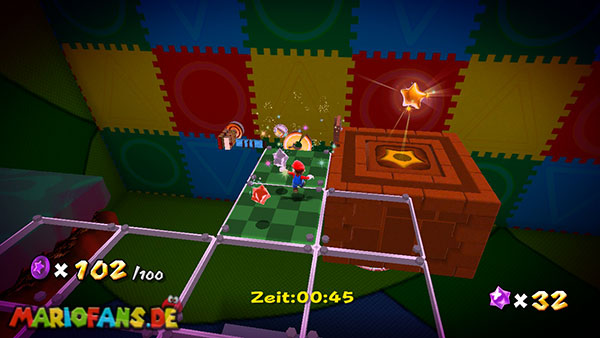
This mission will be available after you defeat Bowser at the center of the universe and a purple comet appears over the Toy Time Galaxy. This time you land on the bottom of the giant 8-bit planet that looks like Luigi. A total of 150 Purple Coins are distributed across the entire surface, of which you have to collect 100 coins within three minutes. You can leave out the remaining 50 coins. However, after the hundredth coin, you still have to return to your original launch platform where the Power Star appears. The countdown continues even after collecting the hundredth coin. Especially difficult is therefore not only the search for the coins, but the planning of a safe way back via the disappearing platforms.
The Luigi Planet consists of several different soil types. The green platforms begin to shrink immediately after entering and disappear completely a few moments later. The yellow platforms spin as soon as Mario lands on them and can tip you into the abyss. The dark surfaces, on the other hand, represent poisonous swamp, into which Mario must not fall under any circumstances. In addition, there are larger gaps between the individual platforms, which you can only overcome with a well-designed jump. During this mission, therefore, especially long jumps are helpful. While running, hold the Z key and then press the jump key to cross several fields at once. At the end of a long jump, you can also perform a spin to stay a little further in the air and correct the landing.
At the beginning, you should not collect the larger coin group immediately next to the starting platform if possible. These coins will later serve as a reserve for you, so that you can get the hundredth coin in the immediate vicinity of the Power Star. Therefore, run first to the outer right side of the Luigi figure and jump with a long jump over the first disappearing platforms. Follow the outer edge and collect the coins that lie on the green and yellow fields. Try to move mostly on a single narrow route so that the neighboring platforms are preserved for the way back. Especially for larger coin groups, you should not jump back and forth between the fields indiscriminately, but choose your route if possible so that you only have to enter each platform once.
First work your way up the right half of the Luigi figure. There you will find several groups of five Purple Coins each, which are close together on the platforms. As far as possible, collect the connected rows and skip individual coins far away if they would require a risky detour. Since there are a total of 150 coins, you can use enough secure alternatives in this way. Further up you reach an area with several yellow rotary platforms. Do not wait for a platform to turn completely, but jump on to the next surface as soon as possible after landing. This prevents Mario from sliding laterally into the abyss. Try to have already collected a larger part of the outer right side after about a minute and continue the path towards the upper Luigi half.
On the upper half of the planet there are other densely spaced coin groups. Follow the green platforms as much as possible in a large arc and first collect the easily accessible coins on the wider surfaces. Of particular interest are several small coin groups that float freely over larger gaps. You can collect them with a well-aligned long jump and then return to the nearest safe platform with a spin. However, these jumps are risky and not absolutely necessary. If you already find enough coins with the coin groups on the fixed platforms, you should omit the free-floating specimens. Also, be sure not to skip a larger gap without first checking where you can land on the opposite side.
After the upper half you run down again over the left side of the Luigi figure. Here are other green and yellow platforms, on which several coin rows are distributed. Use long jumps as long as possible to bridge longer distances and spare the remaining platforms for the way back. For narrow rows, however, you should use ordinary jumps in order not to fly over individual coins. Try to collect the Purple Coins so that you have about 85 to 95 coins at the end of this section. Once you have reached this area, you should orient yourself back towards the original launch platform. Now collect only coins that are immediately on your way back and avoid new detours to already visited areas.
The most important part of the mission begins as soon as you get back near the launch platform. Here you should not have entered the green platform row, which leads directly to the landing site, if possible. If you are missing only a few coins up to the required number, you now collect the previously omitted coin group near the start. It is particularly convenient to collect the hundredth coin on a platform from which you can reach the starting position with a single long jump. Once the hundredth coin has been collected, the desired Power Star appears there. Run or jump over to him immediately and pay attention to the few green fields that are still available to you. Do not wait until the platforms disappear among you, but jump as directly as possible to the safe wooden starting surface.
If you fail repeatedly in the same place, you should adjust your route via the disappearing platforms on the next try. A simple procedure consists in first running the Luigi figure along the edge in a large arc, collecting most of the coins on the safe fields and only on the way back to use the larger coin group next to the starting point. So you avoid that after the hundredth coin you lack all ways to the Power Star. Also, do not try to collect all 150 coins: there is no further reward for the additional 50 copies, and any additional detour increases the risk of crashing. Once you reach the Power Star within three minutes, the last mission of the Toy Time Galaxy is complete.