

Sunken Treasure
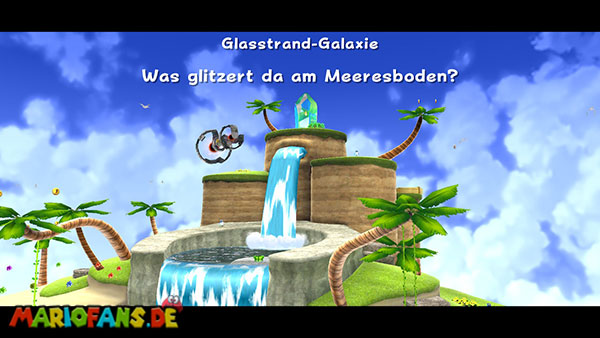
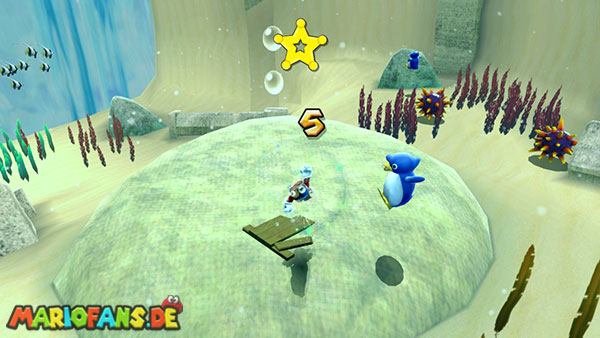
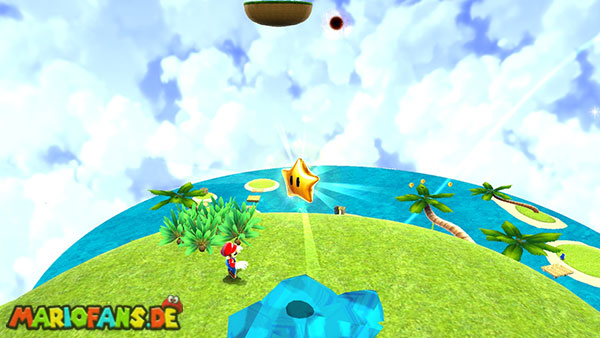
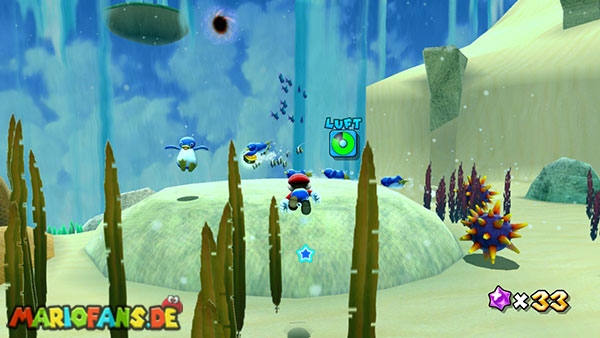
The Beach Bowl Galaxy is one of the first galaxies you can visit in the kitchen of the Comet Observatory. Once you have collected at least 16 Power Stars and defeated Bowser in his Star Factory, this area is open to you. Unlike in previous galaxies, a tropical island awaits you here, the interior of which is almost completely filled with water. Numerous penguins have settled on the beach and spend their time swimming, diving and various competitions. On your first visit, however, you have to venture yourself into the water, because the desired Power Star is initially unattainable. Instead, it is necessary to collect five Star Chips on the seabed in order to expose a Launch Star. Run forward from your launch platform, jump into the water and dive down at Nunchuk with the Z button. With the control stick, you can determine your swimming direction while you make swim moves with the A button. Through a spin, you also get a short speed boost, which is especially helpful when avoiding opponents. Pay attention to your aerial display while diving, because Mario cannot stay underwater indefinitely. If necessary, collect a coin to replenish your air supply or return to the surface for a short time. There are also numerous Star Bits and some treasure chests on the seabed, which you can open later using Koopa shells. For the first Power Star, however, you will first focus on the five Star Chips.
The first Star Chip can be found below the wooden jetty that leads from the beach into the water. Dive to the bottom of the sea and look among the rocks until you discover the yellow star piece. Then you swim further into the larger underwater area, where numerous colorful corals and sea urchins await you. You should swim around the spiky opponents as generously as possible, as a touch hurts Mario and costs you additional valuable time. The second Star Chip is located in a wooden box on the seabed. Swim close to them and destroy them with a spin to expose the trapped chip. For the next star piece you have to visit a large shell, which regularly opens and closes its two shells. Inside it is the third Star Chip. First, wait until the shell has fully opened, and then swim in quickly to collect the chip. However, do not stay too long between the shells, because as soon as the shell closes again, Mario can be injured by the collision. Then swim outside again and orient yourself towards the large rock face on the edge of the island.
Near the waterfall are two large eels that rush out of their caves and snag for Mario as soon as you approach them. Right between these dangerous enemies, the fourth Star Chip is waiting. First, observe at what intervals the eels stretch their heads out of the openings, and then approach as far as possible from the side. Once both enemies have retreated, you quickly swim to the star piece, collect it and immediately remove yourself from their range. If one of the eels catches you, you should first check your air supply and return to the surface if necessary before continuing the search. The fifth and final Star Chip is located in the open underwater area below the small island, where the penguin trainer later stays. It is clearly visible on the seabed and is not protected by any special obstacles. Once you have collected all five Star Chips, a Launch Star will appear near the previously destroyed wooden box. Swim over to him and activate him with a spin to catapult you out of the water to the higher side of the island.
After landing, you are on a narrow grass area above the beach. From here, a path leads past some piranha plants that can stop you with their attacks. It is best to eliminate the opponents with a spin and a subsequent kick before you continue running. Along the way, you’ll also discover a? coin that makes a series of musical notes appear when touched. These form a small course over the adjacent platforms. If you collect all the notes within the given time, a 1-Up Mushroom appears as a reward. The challenge is optional, but it is especially worthwhile if you can still use some extra life for the later galaxies. If possible, follow the musical notes in their predetermined order and try not to take any unnecessary detours, as the notes disappear again after a short time. Then go to the big red ground switch at the end of the path. Activate it with a ground pound by jumping into the air above it and pressing the Z button. Then several wooden platforms and steps appear, allowing you to ascend to the next level. However, these only remain for a short time, which is why you should move as quickly as possible after activating the switch.
Run over the newly released platforms and follow the way up before the individual parts disappear again. Alternatively, you can shorten a part of the route with a well-executed backflip. Stand on the raised edge near the switch, hold the Z button and then jump back with the A button. At the highest point of the jump, perform a spin to gain some extra height and range. With the right position you can get directly to the next higher platform and do not have to use the entire wooden staircase. At this level, the second red ground switch awaits you. Activate it also with a ground pound, whereupon two tall wooden walls appear, between which you have to climb up. Jump against one of the two walls and press the jump button again immediately upon contact so that Mario performs a wall jump. Repeat this movement alternately between both walls and work your way up. Hurry up, because this construction also disappears after a short time. Once you reach the top edge, you pull onto the platform and walk to the large crystal at the top of the island.
Inside the crystal is finally the sought-after Power Star. Stand directly in front of it and perform several spins until the outer shell completely breaks. Then you can collect the star and complete the first mission of the Beach Bowl Galaxy. Not only did you get to know the tropical island, but you also learned the most important basics for the following underwater adventures. Above all, remember the position of the Koopa shells on the seabed, because these you need both for the next swimming test and for the later access to the secret vortex cave.
Passing the Swim Test
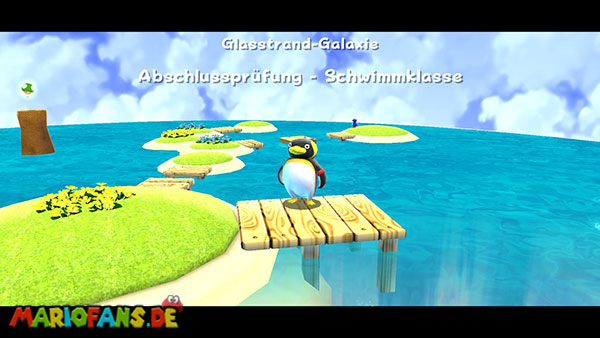
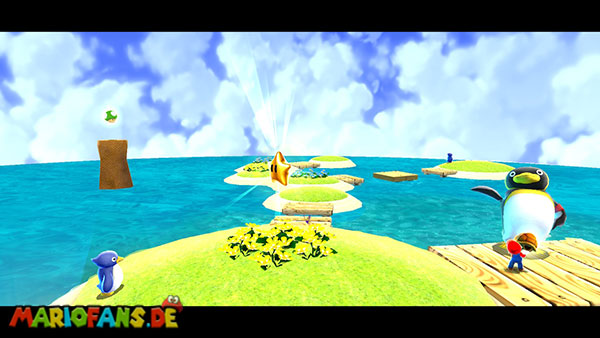
On your second visit to the Beach Bowl Galaxy, a special penguin challenge awaits you. This time you do not have to search for Star Chips or climb the top of the island, but to prove your skills in diving and swimming. Immediately after your landing you run over the wooden jetty towards the small island, where a particularly large penguin is located. You recognize him by his red armband, which identifies him as the coach of the swimming school. Talk to him and learn that he is currently holding a final exam for his students. Your task is to find the golden Koopa shell that one of the floating penguins carries. If you manage to take the shell and bring it back to the coach, the test is deemed passed. Jump from the bridge directly into the water and dip down. First, orient yourself on the large open pool, in which several small penguins turn their rounds. These swim in a group one after the other, with the foremost penguin carrying the desired golden shell.
Do not try to catch up with the group with ordinary swims, because the penguins move comparatively quickly through the water. Instead, use your spin repeatedly to bring Mario forward with short speed spurts. If possible, do not swim permanently behind the group, but try to shorten their path a little and approach you from the side. Once the penguin with the golden shell is within reach, you perform another spin. As a result, he drops the shell and Mario can pick it up. With the shell in your hands, you move much faster under water because you can be pulled by its drive. Take advantage of this and swim without any major detours back towards the small island. Keep an eye out for the urchins and other obstacles, because you do not want to accidentally lose the captured shell. Once you have reached the surface, get on land and run back to the Penguin Trainer with the golden shell. Speak to him again so that he will acknowledge your achievement. As a reward, he gives you the second Power Star of the Beach Bowl Galaxy, which you can collect immediately.
Before you leave the galaxy again, you should also take a closer look at the surroundings. On the right side of the beach is a larger treasure chest, which you can open with a Koopa shell. In it hides the access to a secret mission that leads you to a completely different celestial body. If you want to collect this additional Power Star already now, you just have to get one of the green Koopa shells from the seabed and throw it targeted against the chest. Then a Launch Star will appear, which will take you to the secret waterfall planet. The complete path to this star can be found below under “Create and Climb the Ice Wall!” You can also enter the secret section on a later visit to the Beach Bowl Galaxy, so you don’t necessarily have to complete it before the third regular mission.
The Secret Undersea Cavern
The third mission of the Beach Bowl Galaxy takes you to a secret cave system below the tropical island. Immediately after your landing you should therefore not stay long on the beach, but jump directly into the water and dive down. Your first task is to find a green Koopa shell that will allow you to uncover the locked entrance to the cave. Several of these shells are distributed on the seabed and can be easily accommodated by Mario. Once you hold one of these in your hands, you swim towards the large rock face, which is to the left of the main beach. There is a penguin waiting near a particularly striking spot in the rock. While the rest of the wall is made of ordinary rocks, here you can see a large, circular structure with spiral notches. Exactly behind this is the secret access to the whirlpool cave. Align yourself with the Koopa shell as straight as possible to this point and throw it with a movement of the Wii remote control against the rock. The impact breaks the wall and releases an underground passage. If you did not aim correctly on the first attempt, you can simply get another shell from the bottom of the sea and try again.
Swim through the resulting opening and follow the corridor until you reach the inside of the cave. Here you will find a larger number of wooden boxes, which are partially stacked on top of each other and block your further path. Destroy them with spins to expose the passage and collect the contained Star Bits. Be careful though, because in one of the boxes hides a Goomba who can attack you immediately after his release. It is best to eliminate it immediately with a spin and a subsequent kick. Then run to the rear end of the cave, where you encounter a large metal grid. On the right side are other wooden boxes that cover a small passage. Destroy them too, so you can get behind the barrier. There is a large wooden plug waiting in the ground. Jump directly over it into the air and executes a ground pound to push it completely underground. This activates a hidden mechanism and a new Launch Star appears. Use it to leave the cave and be hurled to a dangerous obstacle course in space.
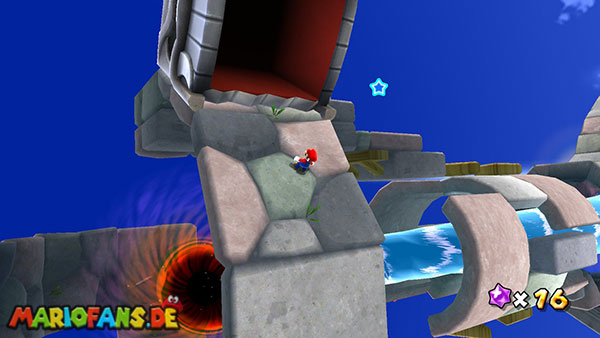
The so-called Sky Corridor consists of numerous small stone platforms that float over a huge black hole. Just one wrong step can cause Mario to fall into the depths. Additionally, the entire trail is guarded by massive stone blocks and rotating tox boxes that can crush you when touched. Run a bit forward and then hold on the left until you reach the first large stone block. This moves regularly up and down and blocks the narrow path. Wait out of his reach until he goes upstairs, and then walk through it as quickly as possible. Shortly after, you will encounter the first Tox box. Unlike an ordinary stone block, this opponent moves across the ground by tilting over and over on one of its four sides. However, one side has a large, square opening in which Mario can stand safely. First, watch the movement of the Tox box and watch when its open side lands on the floor. Then stand exactly on the appropriate floor plate, so that you stand inside the opening at the next step of the opponent. The Tox box rolls over you without crushing Mario. Once she has moved on, you can continue your journey.
After the first stone blocks, you reach a section with several moving platforms floating over a dangerous vortex of water. This leads directly into the black hole below the sky corridor, so you should not fall into the water under any circumstances. First, wait until one of the platforms gets close enough to your position, and then jump over carefully. Observe their direction of movement and try to keep yourself in the middle if possible so that you do not slip off the edge due to an unforeseen rotation. Once the next platform is within reach, you jump on. Some massive stone blocks move between platforms and can push you aside in a careless movement. Therefore, wait for a complete movement run before jumping to the next section. It is especially helpful if you first let the rotating platforms run a bit up and only then change to the next safe surface. This makes it easier to overcome some of the larger distances. On the opposite side you finally reach solid ground again, from which a narrow stone path leads further up.
In the last part of the sky corridor, several Tox boxes await you again, whose movements you have to watch closely. Some roll over short, straight distances, while others change direction at certain points and are therefore more difficult to estimate. It is particularly important that you do not simply stand on a seemingly safe floor plate without first checking the open side of the Tox box. Only if the square opening is actually above your position at the next step, you can stand safely underneath. In addition, pay attention to the large stone blocks that fall on the floor again and again between the Tox boxes. Wait here until the block moves up, and use the short break for your next run section. Along the way, you will find some 1-Up Mushrooms that you can collect, as long as you do not have to approach the abysses unnecessarily. If you are often caught by the Tox boxes, it is worthwhile to observe the movements first from a safe distance and only then continue. At the end of the obstacle course, you finally reach a larger platform on which a crystal with the desired Power Star awaits. Destroy the crystal case with several spins and collect the third Power Star of the Beach Bowl Galaxy. At the same time, you have learned the sky corridor, which you will have to cross again later in the tempo mode.
Wall Jumping up Waterfalls
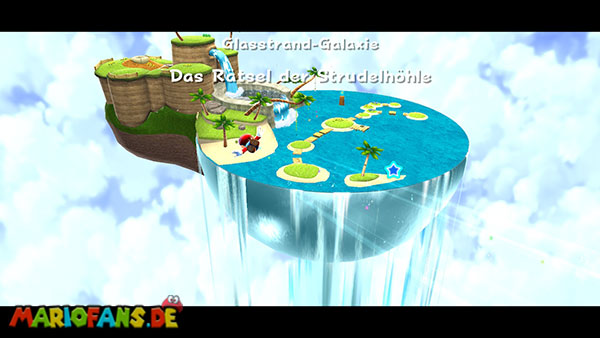
In the Beach Bowl Galaxy hides an additional secret Power Star, which you can already discover during the second mission “Final Exam – Swimming Class”. Select this mission and run from the starting point down to the beach. Your destination this time is not the penguin coach, but a hidden treasure chest located on a lower platform near the waterfall. To open them, you first need a green Koopa shell. Jump into the water and dive down to the seabed, where several shells lie between the rocks. Take one of these and float back to the surface. Then go to the right side of the waterfall and look for the narrow platform on which the treasure chest stands. Run carefully and stand in front of the chest with some distance. Now ship the Koopa shell specifically against it, so that it breaks up and releases its contents. Inside is a Launch Star that will transport you to a secret celestial body with several waterfalls. Use it and you will reach a small planet consisting of a lake, some green islands and several steep rock faces. Here you get to know a new transformation, with which Mario can even walk over water.
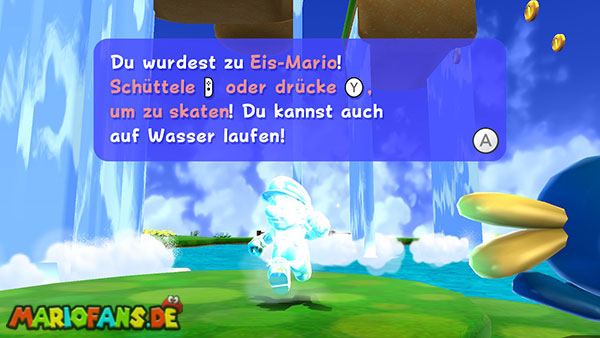
After your landing, you already recognize a golden coin that floats high above the ground and is not reachable with an ordinary jump. Nearby is a cataquax, a blue duck-like creature with a long beak. These opponents do not attack Mario with ordinary blows, but throw him high into the air when touched. You have to use this property to reach the? coin. Approach the Cataquacks and wait until it notices and follows you. Then guide him directly under the floating coin and let him throw you into the air. Try to correct your position during the flight so that Mario touches the? coin. Once you collect it, an ice cream flower appears on the nearby platform. Take it up so that Mario will transform into Ice Mario for a short time. In this form, you can walk over the water surface, creating small ice sheets under your feet. The new ability also allows you to climb certain waterfalls using their surfaces for wall jumps. Since the transformation only lasts for a limited time, you should leave for the next section as quickly as possible.
Run as Ice Mario across the lake to the two large waterfalls on the opposite side. Once you have reached it, you jump against one of the two water walls and immediately afterwards make a wall jump. Due to the ice transformation, you can use the water surface like a solid wall and reject it. Jump back and forth between the two waterfalls until you reach the higher platform. There is another Launch Star that takes you to the next level. Here, too, two waterfalls await you, which you have to climb with successive wall jumps. Make sure to make your jumps as even as possible and not wait unnecessarily long between the two walls. If your ice transformation ends during the ascension, you lose the opportunity to repel yourself from the falls and may need to return to the lower level. Once you reach the second platform, you will use the next Launch Star and get to another rock face. This time you just have to work your way up a single waterfall before you reach the last Launch Star. This catapults you to the upper, snowy area of the secret planet.
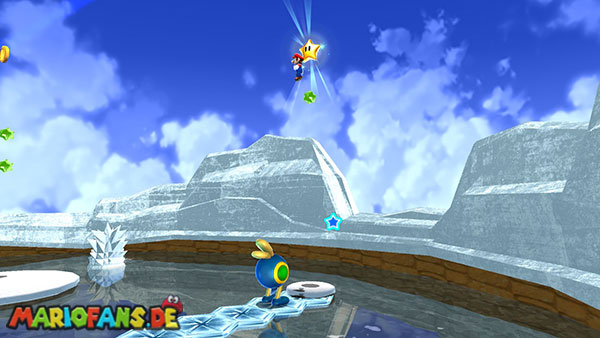
At the highest level, a small ice landscape with another lake awaits you. You can already recognize the Power Star you are looking for on a remote island, but it is so high above the ground that you can not reach it with an ordinary jump. Here, too, you need the help of a Cataquacks. First, grab the next ice cream flower available on one of the platforms and turn into Ice Mario again. Then you approach the Cataquacks on the neighboring island and lure it behind you. As soon as he chases Mario, you run across the water surface to the island with the Power Star. Your ice transformation creates temporarily solid ice sheets under your feet, over which the cataquax can also run. However, make sure that several larger chunks of ice move in the water, which can destroy your formed ice sheets. Therefore, try to take as direct a path as possible to the opposite island and keep enough distance to these obstacles. If the Cataquacks falls into the water on the way, you have to attract him again and try the way again.
Once you have reached the island with the Power Star, you lead the Cataquacks directly under the floating star. Orient yourself by the shadow on the ground, which shows you the exact position of the star. Wait until the Cataquacks gets close enough to Mario and let him hurl you upwards. During the flight, you can easily correct your position so that you touch the Power Star safely. If you succeed, the secret section is completed and you have collected another one of the six power stars of the Beach Bowl Galaxy. It is particularly important for this mission that you do not confuse the ice transformation with the Spring Mushroom: For the waterfalls and the ice bridge you actually need the ice flower. The feather mushroom, on the other hand, only plays an important role later in the search for the 100 Purple Coins on the beach.
Fast Foes on the Cyclone Stone
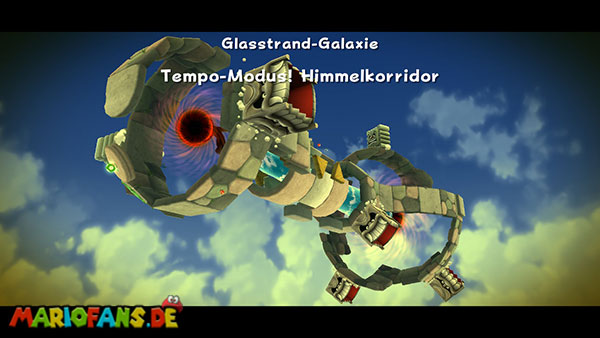
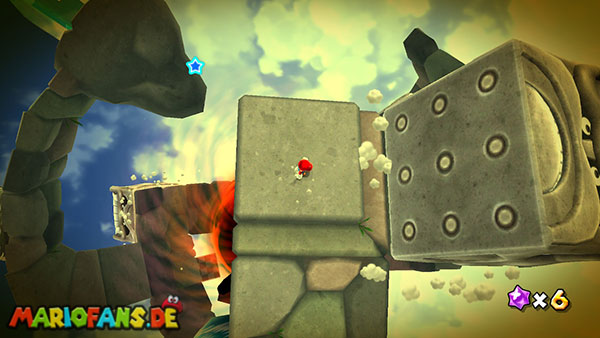
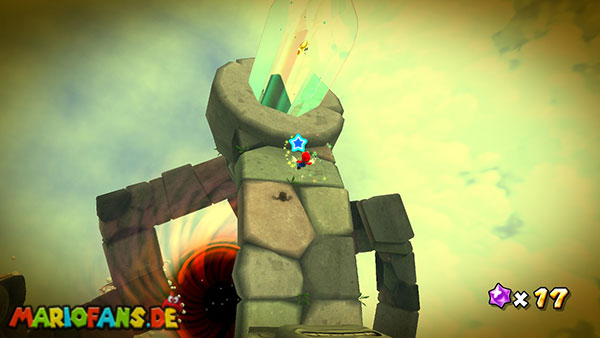
This additional mission will be available once a Tempo Comet appears over the Beach Bowl Galaxy. The prerequisite is that you have already completed the regular mission “The Secret Undersea Cavern”. Unlike the first visit, this time you do not have to search for a Koopa shell in the sea again and open the secret cave entrance. Instead, the mission begins directly on the Heaven Corridor, which you already know from the third mission. The course of the obstacle course has remained basically unchanged, but all stone blocks and Tox boxes move much faster than before. This leaves you much less time to observe their movements and find safe gaps to continue running. Particularly dangerous are the rotating Tox boxes, which now roll over the platforms in a short sequence and can immediately crush Mario in a careless movement. There is no ordinary time limit here, so you can basically take as much time as you need. Nevertheless, you have to react much faster to the movements of the individual obstacles and should not stop in the middle of a dangerous path.
Run forward from the starting point and then hold on the left until you reach the first large stone block. Wait until it goes upstairs and use the short opening to get to the other side. Shortly afterwards, the first Tox box appears, whose movement rhythm has now become much faster. Observe exactly when their open side faces down and stand on the appropriate floor plate in time. As soon as the Tox box with its opening rolls over Mario, you can stand safely and then continue running. It is especially helpful to estimate the direction of movement of the opponent from a distance, so that you do not have to search for a safe position immediately in front of him. After the first obstacles you reach the moving platforms above the water vortex again. Here you should be especially careful, because not only the stone blocks, but also the moving parts of the construction have become faster. Wait until a platform moves near you, and then jump on it as centrally as possible. Only move to the next platform when you can safely assess their movement. A rash jump into the water vortex leads directly into the black hole and ends your attempt.
Once you have overcome the movable platforms, you can expect a longer series of stone blocks and tox boxes. Try to reach a safe floor plate between each of the obstacles, where you can stand short and prepare for the next section. With the Tox boxes, the large square opening is still your safest refuge. However, make sure that the opponents partially change their direction of movement and return to your position faster than you are used to from the usual mission. Once you reach the last section, all you have to do is pass the large block at the end and walk to the platform with the included Power Star. Destroy the crystal with several spins and collect the comet power star. You have also successfully completed the tempo mode of the Heaven Corridor. Since the mission begins immediately on the obstacle course, you can still repeat failed attempts without the long way through the underwater cave.
Beachcombing for Purple Coins
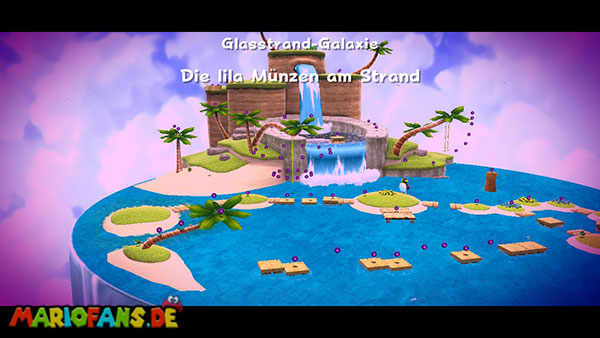
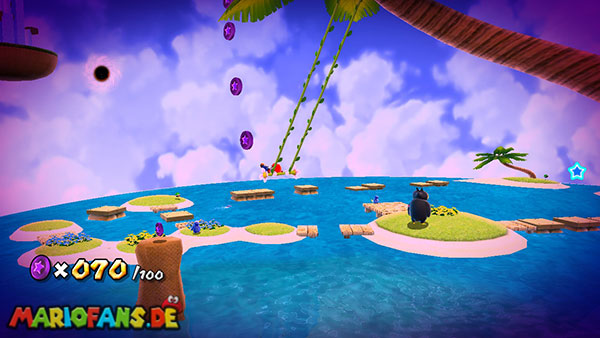
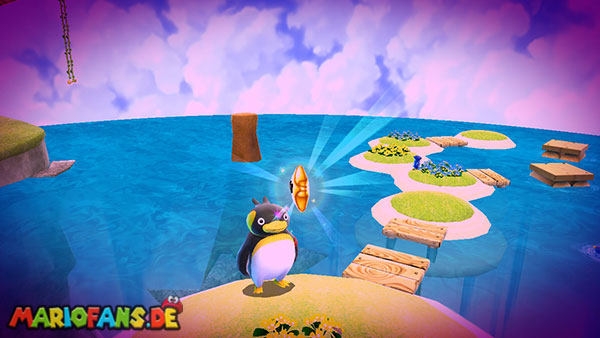
The final challenge of the Beach Bowl Galaxy will be available once you defeat Bowser at the center of the universe and a purple comet appears over the galaxy. As with all cometary missions, you will need to collect a total of 100 Purple Coins to uncover the last Power Star. Unlike some other galaxies, the coins here are distributed over the entire launch planet. Therefore, you not only have to search the beach and the small islands, but also climb to the highest rock platforms, climb palm trees and finally dive down to the seabed. Since there is no time limit for this mission, you can take enough time in the search and examine the individual areas as systematically as possible. However, it is particularly important that you do not search exclusively on the ground for coins. Many specimens float high above the platforms, hanging on lianas or are between the leaves of the palm trees. Some of them can hardly be reached without the Spring Mushroom, which is why you have to use this transformation later. The easiest way to complete the challenge is by first circling the lower islands, then exploring the higher areas of the beach and picking up the five underwater coins until the end.
Immediately after your landing you can discover the first coins near the beach. First swims to the small island with the long liane that hangs over the water. Jump up and hold on to it. To collect the numerous Purple Coins, you have to put Mario in a circular movement with the control stick. As a result, it swings further and further around the liana and can gradually reach the coins distributed at different heights around it. In total, there are 24 Purple Coins here, which is why this section is particularly worthwhile. Be careful not to let go of the liana too early, because some coins float a little higher than the rest and can only be reached with a sufficiently large swinging movement. Once you have collected all 24 coins, return to the wooden jetty and follow the path to the small island with the big penguin trainer. Along the way, you will find four more coins floating directly above the wooden platforms. On the coach's island, three additional copies are waiting, with a coin over his head. Jump on the penguin and use a backsalt if necessary to reach the higher coin. Then follow the path to the right of the coach and collect the next six coins on the small islands. So you should already have 37 out of 100 Purple Coins.
From the last small island, you can see a path from several wooden crates and platforms that leads across the water to the opposite side. Jump carefully from one platform to the next and collect the eight Purple Coins distributed along this route. Especially at the longer intervals, make sure not to accidentally land in the water, otherwise you will have to swim back to the last safe platform. On the opposite side you reach a larger palm tree, on whose trunk and leaves more coins hide. Run up the trunk and then examine the palm fronds until you have collected all four specimens. This increases your counter to 49 Purple Coins. Afterwards you can go back to the original starting area and head to the waterfall from there. Between a fence and a palm tree on the edge of the rock face lies a single coin that is easily overlooked. Be sure to collect them before you begin your ascension. Nearby is another palm tree, on whose smaller and larger leaves a total of three coins are distributed. Climb up and take them with you before heading to the stone platform next to the waterfall. There are the next three Purple Coins waiting, which you can collect without much difficulty.
Follow the path over the small wooden platforms that cross the water basin at the waterfall. On the first platform you can collect another coin, while on the opposite side three additional copies are waiting for you. After that, jump into the shallow water of the upper basin and collect the two coins that are below the surface. Since the water is not particularly deep here, you can easily reach it and then jump back to the stone platform. Now run down to the slightly lower level, where two more coins are next to the path. An additional coin awaits immediately at the edge of the water. From here you can already see a second swing hanging high above the water. Jump over to her and hold on to it. Move the control stick back and forth so that Mario gets more and more momentum and can finally collect the six Purple Coins arranged in an arc around the swing. Make sure to swing sufficiently high so that you also catch the top coins. Then you can detach yourself from the swing and try to land on the narrow platform in the water. There is another coin waiting. If you miss the platform, you can try to get back up from the water with a backflip and a subsequent spin.
After this section, the search leads you back to the waterfall. On one of the lower rock platforms you will now find a Spring Mushroom with which Mario can turn into Spring Mario. In this form, Mario constantly jumps up and down and can perform particularly high jumps if you hold the A button at the right moment. First, use the new ability to get behind the waterfall. There is a single Purple Coin, which you can hardly reach without the spring conversion. However, be careful not to come into direct contact with the water, as Mario loses his transformation again. Then you jump with big spring jumps on the neighboring palm trees and collect the coins that are on their upper leaves. On one of the palm trees you will find a coin, while on another two copies wait. Once you have collected all reachable coins from this area, you should have about 76 of 100 Purple Coins. Keep the spring transformation as much as possible, because it will also help you on the next ascent to the highest platforms of the island.
Jump now using the spring mushroom to the higher rock platform next to the waterfall. Here is a small water basin, on the edge of which two more Purple Coins are located. Be careful not to accidentally jump into the water, as this would cause you to lose the spring transformation. Then follow the grassy path towards a large, bright rock formation. On the way you can collect five more coins, which are clearly distributed along the way. On the elevated rock formation itself there are three other specimens, one of which hovers particularly high. Therefore, use as strong a spring jump as possible to catch this coin. Then you walk past the rock formation on the left and follow the path to the next higher platforms. Near a fence, two Purple Coins are waiting, while on the next level, another two copies can be found at the penguin and a palm tree. From here, work your way up to the highest platform on the island and collect the last five coins of this upper area. Three of them are located on the leaves of a large palm tree, which you can reach with the spring conversion particularly easily. If you have taken all coins along this route, your counter should now display 95 of 100 Purple Coins.
For the last five coins you have to return to the water again. Jump carefully from the highest platform towards the large water basin and then dip down to the seabed. Since the remaining coins are distributed over several points of the underwater area, you should first orientate yourself to the striking rock formations and plants. Two Purple Coins can be found in open water near the middle of the basin. Another two coins are located near a larger underwater tree whose branches protrude from the seabed. The last coin is hidden in a corner of the rock face, near which you have already cleared the secret entrance to the whirlpool cave on the third mission. Swim as close as possible to the edge and examine the appropriate spot until you discover the last specimen. During your search, pay attention to the air supply and collect ordinary coins if necessary so that Mario does not run out of air. Once you have also collected the last Purple Coin, the counter should finally display 100 out of 100 coins. The actual collection task is thus completed.
The sought-after Power Star now appears on the small island, where the great penguin coach is also located. Therefore, swim back to the surface and orient yourself on the wooden bridge that leads to its position. Run over the platforms to the coach and collect the appeared star. Not only did you complete the Purple Comet mission, but you also received all six Power Stars of the Beach Bowl Galaxy. If you still lack individual coins after the described route, you should first check the palm trees and higher rock platforms. It is particularly easy to overlook the coins on the palm fronds, behind the waterfall and on the small platforms above the water. Also, the coin above the head of the penguin trainer is often forgotten during the first search. Since there is no time limit for this mission, you can search the entire island again in peace without being pressurized by a countdown.