

Through the Poison Swamp
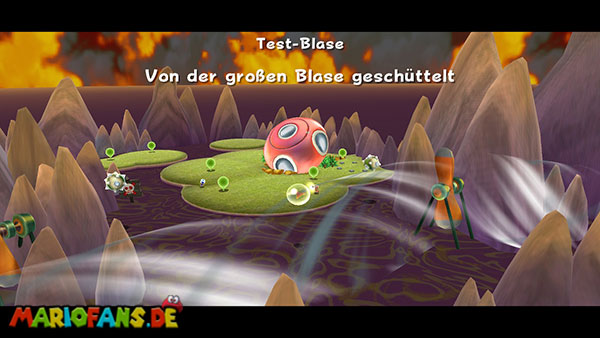
From the starting point of the Bubble Breeze Galaxy, follow the small grass platforms to the right and jump over the narrow gaps until you reach the bubble control sign. Right next to it is a device that produces large air bubbles. Jump into one of these and point the pointer of the Wii remote to the opposite side of the bubble. Hold the A button to blow air against it and move it in the desired direction. For example, if you want to fly to the left, you have to position the pointer to the right of the bubble. Use as short a blast of air as possible so that you do not get too fast and can brake in time from obstacles. First cross the swamp back towards your launch platform and then hold yourselves up. In the first section, you have to collect a total of five Star Chips distributed between the small islands and wind tunnels. The first Star Chip can be found directly in front of the first large fan. Then let the airflow drift to the right and collect the? coin along the way, which makes a series of ordinary coins appear. These also show you a safe way through the following section. At the end of the first wind tunnel, the second Star Chip waits. Then steer the bubble upwards and watch for the first floating mines. A touch immediately bursts your bubble and Mario falls into the poisonous swamp, which costs you a life. On the other hand, you can touch the ordinary rock walls without the bubble bursting immediately. Behind the first mines is the third Star Chip, which is best collected with a slow movement between the obstacles.
Follow the path up and let the next fan drift you through a narrow wind tunnel. In the middle of it is already floating the fourth Star Chip. Be careful not to miss it by the strong airflow. If you are driven past it, you can move the bubble back against the wind direction with targeted air blasts. Behind the wind tunnel you hold on the left and then back up. There are several rocks between which a single mine floats. Control carefully through the opening and collect the fifth Star Chip. Once you own all five pieces, a Launch Star will appear on a small island in the middle of the swamp. First fly back through the rock opening and then hold down and right until you reach the island. Lands as centrally as possible over the solid ground and presses the Z button to leave the bubble. Then activate the Launch Star with a spin. During the flight to the next section you can collect more Star Bits with the pointer. Since the Launch Star also activates a reset point, you do not have to search for all the Star Chips again after a later crash.
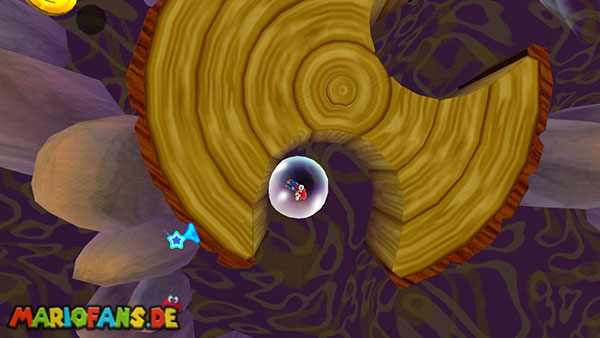
On the next island, another bladder device is already waiting. Jump into a new bubble and first follows the coin track to the top right. Soon you will reach a large rotating log whose surface has several wide openings. Wait in front of the obstacle until one of these openings turns towards you, and then carefully direct the bubble in. Let yourself first take with you the rotation of the trunk and only then fly further when the opening is on the opposite side. Be careful not to get caught between two moving pieces of wood, as this can burst your bubble. Behind the first tree trunk is a? coin that makes additional Star Bits appear. Collect it and then follow the wind tunnels to the next? coin, which releases another set of ordinary coins. Then you reach two additional rotating wooden platforms, which are arranged close together. First, observe its direction of rotation and wait for a sufficiently large opening. Particularly dangerous are the mines, which are located immediately next to the wooden structures. If possible, stay in the middle of the free passages and use only short blasts of air so that the rotating parts do not push you against a mine. Once you have overcome both obstacles, you reach a small green island with a sign and a blue floor switch.
Here the path is divided into two different routes. The lower path is shorter and easier, while on the right path you can expect additional coins and more obstacles. If you want to take the easier route first, you stay in your bubble and steer downwards. Then follow the arrows to the left and use the wind currents to move through the narrow passages. Some wooden gates open as soon as you approach them with the bubble. Stay close to it until the opening is fully formed and then flies through it. On the way, several mines circle around small platforms, which is why you should steer carefully, especially in the tighter corners. If you want to explore the optional right path, you must first press the Z button over the green island to leave your bubble. Then jump over the blue switch and activate it with a ground pound. This opens the wooden gate on the right side for a short time. Immediately jump back into a bubble and flies through the passage before closing again. On this route you can collect several larger coin groups. In addition, there is a particularly well-hidden 1-Up Mushroom surrounded by several orbiting mines. First wait outside the mine circle until a sufficiently large gap arises between two obstacles. Then fly with a short blast of air into the middle, touch the mushroom and then steer out again on the same path as possible. Avoid longer movements along the circular orbit, otherwise you will easily get between two mines. On this route you will find other floor switches and gates, behind which additional coins are waiting. Collect them before you follow the path to the left towards the target area.
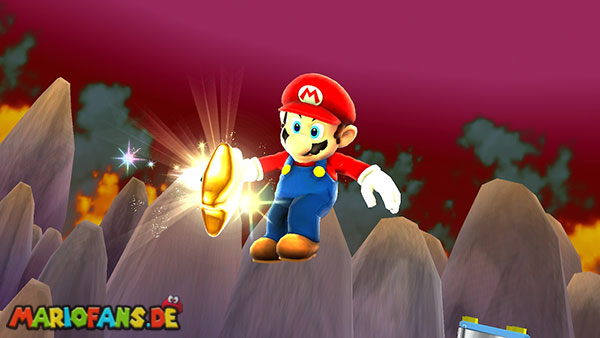
Both routes finally meet again in front of a small sandy island. Follow the last arrows and carefully steer your bubble between the remaining mines. Especially on the last track you should not accelerate unnecessarily, as the obstacles partly hover directly in front of the small target platform. On the island is already the wanted Power Star, which is surrounded by two circulating mines. First, wait out of their range until both mines have enough distance to your trajectory. Then direct the bubble as straight as possible towards the star and touch it without first streaking one of the mines. You can also safely land on the island and leave the bubble with the Z button to take the last steps to the star. Once you collect it, the only mission of the Bubble Breeze Galaxy is completed. In addition to the five required Star Chips, there are numerous optional coins with additional rewards and the hidden 1-Up Mushroom between the mines to discover.