

Bunnies in the Wind
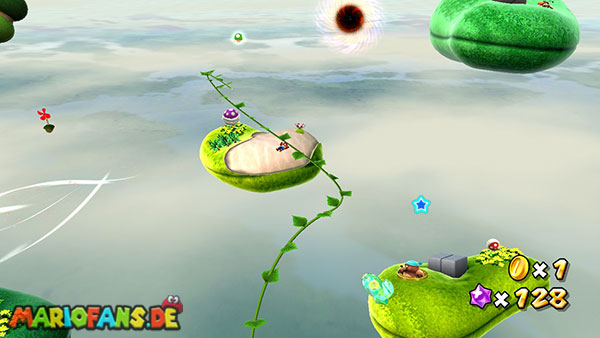
Run on the launch planet first over the edge on the bottom and destroys the crystals scattered there with spins to collect additional Star Bits. You can also defeat the Goombas on the surface before heading to the big pink flower in the middle of the planet. This consists of several fluffweed flowers with which you can float between the individual celestial bodies. Stand right next to the flower and perform a spin so that its flowers detach from the stem and rise into the air. Then jump to one of the floating flowers and hold onto it. Mario is now captured by the wind current and automatically carried towards the next planet. During the flight, you can gain altitude at short notice with another spin. However, this only works three times per flower, which is why you should use the additional upward movements as evenly distributed as possible over the flight. Wait until Mario has lost some altitude before using the next boost. As a result, you also reach planets further away without crashing prematurely. Also floating along the way are several? coins, which make additional Star Bits appear when touched. Try to take them with you, unless you have to change your trajectory too much. On the second planet you can also enter the green warp tube on the bottom. It leads to a small bonus area with several crystals and Star Bits. Destroy the crystals and collect the rewards before returning through the tube.
Then use the next Floaty Fluff flower to get to the next planet. Here you will encounter several Snap Piranhas who snap for Mario as soon as you approach them. Wait for a plant to move its head forward and then attack it with a spin. The usual piranha plants can be eliminated directly in this way. Run across the surface of the planet and use the next flower to continue your path. On the following celestial body, the route takes you over several small grass areas and other piranha plants. Defeat the plant on the yellow flower bed so that in its place a vine grows from the ground. Stand right at her foot and make a spin to hurl Mario along the vine to the next planet. On its surface, in addition to another piranha plant, a mole also moves, which occasionally throws wrenches. Dodge the bullets and remove the plant to expose the next vine. Before using these, however, you should look around the brown underside of the planet. Here you can make additional tendrils appear by destroying more plants. Use the two tendrils one after the other to reach a somewhat remote 1-Up Mushroom. Collect the extra life and then return to the actual path via the tendrils.
On the next planet there is another bud on the bottom. Destroy them with a spin, so that a vine appears that takes you to the last Piranha planet. Here is a particularly large purple-colored snapping piranha, which you can not defeat with an ordinary spin, as long as your head is straight. First approach carefully and wait until the plant comes out to attack. As soon as she hits her heavy head on the ground, she evades to the side and immediately attacks the head with a spin. As a result, the plant is numbed for a short time. Then jump on her head before she can stand up again. After this hit, the opponent is defeated and in its place a Launch Star appears. Collect the reachable Star Bits and then activate the Launch Star to catapult you to the large cube garden.
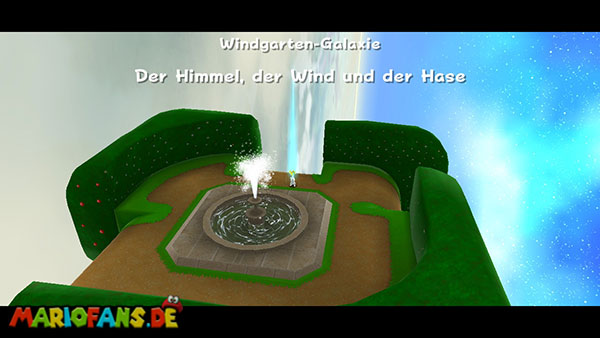
Arriving at the cube garden, you run to the Star Rabbit, which is near the small fountain. Speak to him so that he challenges you to a chase. As soon as the race begins, the rabbit runs through the winding paths and between the hedges. Do not try to run after him constantly on the same track, because the rabbit often makes tight turns and can thus increase his lead. Instead, cut as many corners as possible and use a long jump on longer straight sections. For this purpose, hold the Z key while running and then press the jump key. As a result, Mario covers a much larger distance and can catch up with the rabbit more easily. However, make sure that you do not jump against one of the hedges, as you lose time unnecessarily. As soon as the rabbit changes direction, you can try to run towards it via one of the adjacent paths. Particularly favorable are the points at which several hedge paths converge. There you can often intercept the rabbit before he flees again to another section of the garden.
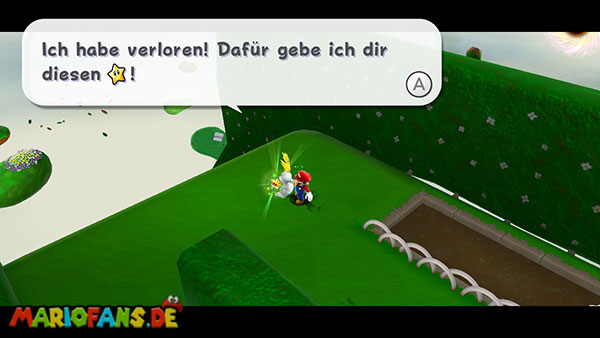
Before you finally catch the rabbit, you can collect another hidden 1-Up Mushroom. Inside the cube garden runs a short tunnel with entrances on two different sides of the planet. The hare occasionally uses this passage itself to get to the opposite side faster. Follow him through the tunnel or look for one of the two entrances between the hedges. Inside are several Star Bits as well as the green 1-Up Mushroom. Collect the items and leave the tunnel on the other side. Then you continue the persecution. Once you have caught up with the rabbit, all you have to do is touch it to complete the challenge. He then stops and hands you the desired Power Star. With this you have completed the first mission of the Gusty Garden Galaxy.
The Dirty Tricks of Major Burrows
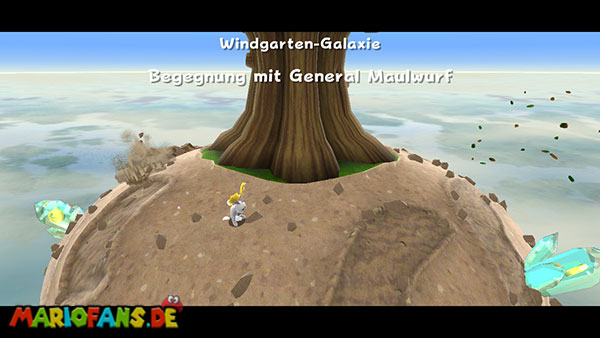
Once again use the Floaty Fluff flowers on the launch planet to carry you from island to island. Collect the reachable? coins on the way to get additional Star Bits. On the first two planets, you can also destroy the crystals again and search for hidden objects. After the second flight, you reach a small round planet on the surface of which a mole digs underground. You can see its position by the moving Earth trail it leaves when it digs. Wait until the opponent stretches his head out of the ground and executes a ground pound immediately next to him. Jump up and press the Z button in the air. As a result of the vibration, the mole is thrown out of its hole and lands dazed on the surface. Then jump on his head or hit him with a spin to defeat him. Then a Launch Star appears, with which you get to the next planet.
The following celestial body consists of several interconnected surfaces that look like a large question mark from a distance. On its surface, three more moles dig their tunnels. You must defeat all three for the next Launch Star to appear. First run over the top surface and wait until the first mole looks out of the ground. Use a ground pound near him again and defeat him as soon as he lies dazed on the ground. Then you follow the path to the opposite side of the planet, where the second enemy is located. The third mole is on the bottom, which you can reach via the narrow transitions. Be careful not to run unnecessarily close to the edge while chasing an opponent. Once all three moles are defeated, a Launch Star appears at the top of the planet. Use it to fly on. During the flight, she passes a large stone ring, on which several blue Pull Stars float. If you want to collect the additional coins and Star Bits on this ring, you can let yourself be pulled there with the Pull Stars. Otherwise, you will be transported directly to the next celestial body.
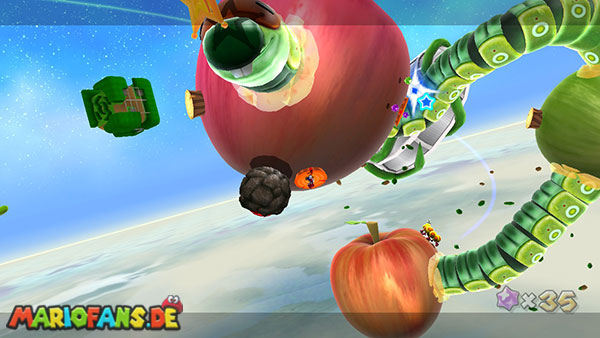
You now land on a group of giant apple planets, between which a huge worm moves. On the first apple, a large wooden plug sticks out of the surface. Jump over it and run a ground pound to squeeze it into the apple. This startles the worm inside and drills out of the planet into the next apple. His long body forms a walk-in connection between the two heavenly bodies. Run over the back of the worm to the second apple and look for the next wooden plug. Also activate this with a ground pound so that the worm continues to move through the planets. Repeat this procedure until you reach the last apple. Here is a wooden plug, above which the shadow of a Launch Star or Launch Star symbol can be seen. Also push it into the ground so that the worm stretches its large head out of the surface. Jump on the head of the worm and get promoted to the higher Launch Star. Activate it and fly to the next planet.
On the small planet immediately before the boss fight, you should definitely collect the optional Life Mushroom. You first land on a large wooden plug, which you can press into the ground with a ground pound. As a result, a red Life Mushroom appears that increases your maximum health from three to six units. After its appearance, the mushroom moves across the surface of the planet. Run after him and collect him before he disappears. Pay attention to the spiky tendrils that wind around the small celestial body. A touch costs you health and can cause you to miss the mushroom. Another wooden plug on the surface makes additional Star Bits appear. Collect those too and then use the Launch Star on the top of the planet to get to Major Burrows.
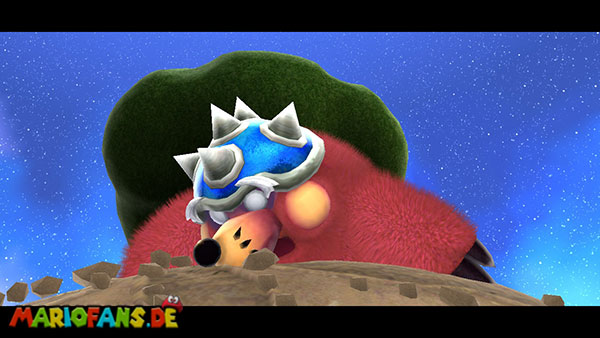
On the boss planet, Major Burrows first pursues a small star rabbit. The enemy moves mostly under the ground and appears only occasionally with his head from the ground. Wait until you can see its position from the Earth's track and run near it. As soon as he sticks his head out, you jump up and perform a ground pound. As a result, Major Burrows is completely thrown out of the ground and stops dazed for a short time. Run over to him immediately and attack him with a spin. After this first hit, he disappears again underground and now begins to pursue Mario instead of the rabbit. Stay moving and wait until he stretches his head out of the ground again. Use a ground pound again and try to hit him with a spin. After the second successful hit, Major Burrows becomes angry, turns red and moves much faster through the floor.
In the third phase of combat, you need a slightly different approach. Major Burrows now pursues Mario much more aggressively and tries to meet you with his claws immediately after appearing. Wait until he stretches his head out of the earth, and again executes a ground pound near him. This time, however, it is not immediately permanently stunned, but first disappears again underground and then storms directly towards you. Jump up in time and use a second ground pound as soon as it reappears near you. As a result, it is completely thrown out of the ground and begins to flee dazed over the surface. Run after him immediately and hit him with a spin before he can dig himself in again. After the third successful spin hit, Major Burrows is defeated. The liberated Star Rabbit thanks you and hands you the Power Star. Remember the double ground pound of the last phase, because in the later Daredevil Cometen you have to defeat the same opponent again, but this time without taking damage.
Gusty Garden's Gravity Scramble
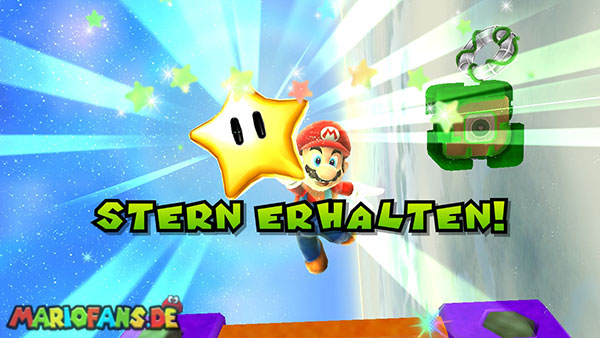
Use the next Floaty Fluff flower on the launch planet to carry you through space to the next celestial body. On the underside of the launch planet, there is also an almost invisible enemy whose footprints are visible in the sand. Stay short and watch the tracks until you can determine its position. Hit him with a spin and then jump on him to expose a larger amount of Star Bits. Then you fly to the next planet and defeat the piranha plant there for a vine to appear. Through these you reach the next planet, where you have to eliminate a piranha plant again. She also leaves a vine that takes you to the next Launch Star. When climbing, make sure not to perform another spin during the movement, otherwise you may jump off the tendril prematurely. Instead, let yourself first be transported to the top end and only there activate the Launch Star. Along the way, there are also several “coins” that belong to a secret Power Star. If you want to collect it now, you will find the complete route under “The Golden Chomp”. For the regular mission, you can ignore the coins.
After Launch Star, you land on an elongated planet, the surface of which is covered by rolling rocks and spiky plants. First, move in the same direction as the rolling boulders so that you do not run towards them head-on. Between the large spiky flowers are several narrow gaps through which you can continue your way. If necessary, wait until a boulder has rolled past and then run quickly through the next opening. On the opposite side of the planet, you discover a golden wowau rolling over the surface on a fixed path. You cannot defeat this with ordinary attacks. However, it contains the secret Power Star of the galaxy, which you can get exclusively as a rainbow Mario. For the regular mission, you first walk past it and follow the path to the other end of the planet. There is another Launch Star that takes you to three large, disk-shaped celestial bodies.
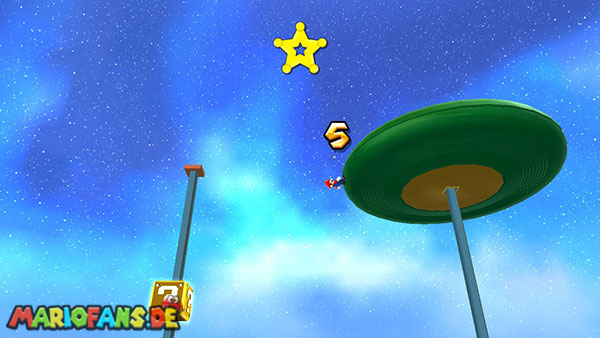
On the three discs you have to collect a total of five Star Chips. Run on the first disc first over the edge to the underside, where the first Star Chip floats clearly visible. Then you return to the top and climb up on the long rod. Jump from the top of the rod to the second disc, whose gravity Mario automatically attracts. On this disc you will find the second Star Chip near the upper platform. Then run over the edge on the underside and climb down on the rod there. Pay attention to the electric ball, which regularly circles around the rod. Wait until she has moved away from you, and only then continue to climb. At the bottom you jump back towards the first disc and collect the third Star Chip during the jump. Then you return over the rod to the second disc and jump on to the third platform.
On the third disc is the fourth Star Chip on the outer edge. Since the star piece is a little away from the middle, you should carefully run over the surface when collecting and not jump unnecessarily far. Then you go to the bottom of the disc, where another long rod leads down. Climb along it and observe again the movements of the electric balls. Jump back from the lower end of the rod to the left in the direction of the second disc. During this jump, you can collect the fifth Star Chip. Once all five parts have been found, a Launch Star will appear on the top of the third disc. Therefore, climb up again, jump back to the third platform and activate the ring to reach the next section of the galaxy.
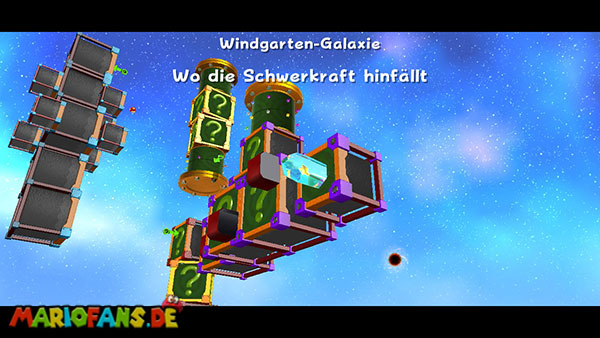
You now land on a large construction of numerous moving! and? blocks, whose gravity changes regularly. Pay particular attention to the yellow areas with the exclamation marks, because only on these areas the gravity is reliable. The dark or question mark marked pages, on the other hand, can be dangerous because Mario is not attracted by the platforms there. Run forward first and keep to the left, where you can get to a higher platform via several small blocks. Wait for the moving parts to be arranged favorably, and then jump from one block to the next. On the left side there is also an optional 1-Up Mushroom, which you can reach via the raised platforms. Take him and then return to the main road. Further forward, the first cannon balls appear, which regularly fly across the blocks. Observe its trajectory and jump to the next section only after the last ball has flown by.
On the upper platform there is a large gravity arrow, which you have to activate with a spin. This changes the direction of gravity and Mario is pulled to the next block construction. Follow the yellow! surfaces up and be careful not to run beyond the dark sides. At the top you will discover another arrow switch, which will transport you to the next section after its activation. Here, several small cubes move laterally back and forth and can push Mario against the edge of the platform. Wait each time until the blocks open a sufficiently large gap and then run through it quickly. One of the sideways platforms also houses a red Life Mushroom that increases your maximum health from three to six units. Wait until the platform gets close enough to your position and jump over. Collect the mushroom and then return to the main path before pushing the moving blocks into an abyss.
At the next gravity arrow, the running direction changes again. This time you have to continue down the path first, with several Goombas and smaller moving blocks crossing your route. Eliminate the enemies with a spin or jump over them so that you are not unnecessarily stopped. Keep an eye out for the yellow! areas that show you the safe way. After another gravity change, you reach the most dangerous section of the construction. Here, several cannons regularly fire large bullets across the platforms while the blocks move under your feet. If possible, keep between the two rows of cannons and wait until the shells clear a sufficiently large gap. Then run down and stay close to the center of the platform so that the cannon balls flying by the side do not hit you. At the bottom, turn right and follow the last yellow blocks to the exit. Between the penultimate and last platform there is a small gap that you can overcome with an ordinary jump. Finally, on the last platform, a large crystal, inside of which the desired Power Star is enclosed. Destroy the case with several spins and collect the third regular power star of the Gusty Garden Galaxy.
The Golden Chomp
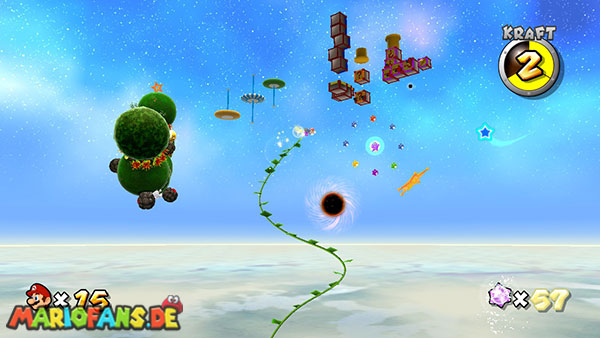
The secret power star of the Gusty Garden Galaxy can be found in the third mission “Gusty Garden’s Gravity Scramble”. Select this mission and use the Floaty Fluff flowers on the launch planet to fly to the next celestial body. Unlike the regular star, this time you have to collect a total of five golden? coins, which appear successively on your flight route. The coins must be touched in the right order, because once you have collected one of them, the next one appears. The first three? coins float in space between the launch planet and the first island. Use the Floaty Fluff flowers and keep yourselves at the height of the first coin if possible. Once you touch it, the second one appears a little further forward. Shake the Wii remote only if Mario loses too much altitude, so that you still have enough upward pushes for the third coin. Since you can only use three additional bursts per flower, you should not use all three unnecessarily early. Collect the coins if possible during a single flight. If you miss one of them, you may have to try the flight route again.
After the third? coin, you land on the next planet, where several piranha plants are located. Defeat the plant that blocks access to the next vine, and then perform a spin to have you hurl up along the appeared vine. During Ascension, you must touch the fourth coin that appears directly on your trajectory. On the next planet, the fifth and last? coin is finally waiting. This is located on the top of the celestial body, near the nearest piranha plant. Collect them and then remove the plant so that another vine appears. Once all five? coins have been collected, a rainbow star appears at the top of this vine. Use the vine and collect the star as soon as possible. This transforms Mario for a short time into Rainbow Mario and becomes invulnerable. In this form, you can defeat enemies with a simple touch without having to perform a spin first.
Hurry now, for the rainbow transformation lasts only a limited time. Immediately after collecting the Rainbow Star, use the nearby Launch Star, which transports you to the elongated planet with rolling boulders and spiky flowers. Upon landing, immediately head towards the golden wowau moving on the opposite side of the planet. As a rainbow Mario, you can destroy the rolling boulders and most ordinary enemies simply by touch. Nevertheless, you should avoid unnecessary detours and walk as straight as possible over the safe grass areas. The golden wowau is located in a shallow depression near the rear end of the planet. Once you discover it, you walk directly towards it and touch its body while your rainbow transformation is still active. The collision immediately destroys the golden Wauwau and releases the secret Power Star. Collect him to complete the mission.
If your rainbow transformation ends before you reach the golden wowau, you can no longer destroy it with ordinary attacks. In this case, you have to start the mission again and collect the five? coins again. It is particularly helpful to use the Launch Star immediately after the transformation and to run straight to Wauwau on the planet. Stay on the inside of the curves and avoid unnecessary jumps so that you do not lose precious time. Once the secret Power Star is collected, you can return to the regular mission with the gravity blocks.
Major Burrows's Daredevil Run
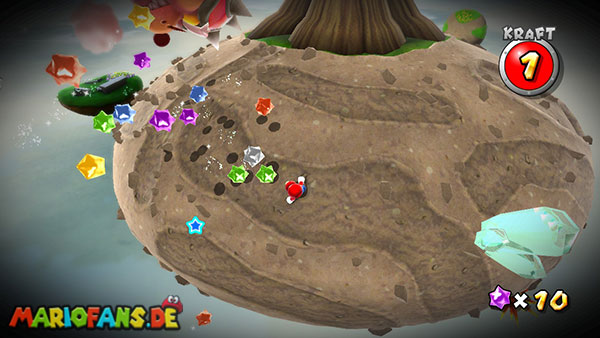
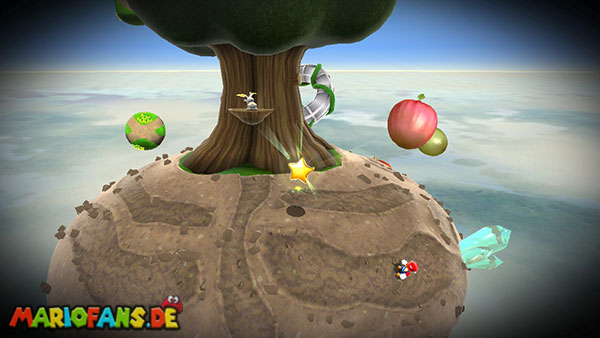
Once a Daredevil Comet appears over the Gusty Garden Galaxy, you can challenge Major Burrows again. This time you start directly on his boss planet and do not have to travel the long way over the Floaty Fluff flowers and apple planets again. However, Mario has only one energy point during this fight. Already a touch with Major Burrowss claws or his spiky helmet ends the attempt immediately. A Life Mushroom is not available to you, which is why you have to survive all three phases of combat without damage. Run first to the center of the planet, where Major Burrows again pursues a Star Rabbit. Wait until he reaches his head out of the earth, and executes a ground pound near him. As a result, it is thrown out of the ground and stops dazed for a short time. Run over to him and hit him with a spin. Try to hit his unprotected side of the body and avoid jumping directly on his helmet.
After the first hit, Major Burrows disappears again underground and begins to pursue Mario. Keep moving constantly and watch the Earth trail that tells you its position. As soon as he sticks his head out of the ground, you jump up and perform a ground pound again. Make sure that you do not land directly on the opponent, but a small piece next to him, so that his helmet does not hurt you. As soon as it lies dazed on the surface, you attack it again with a spin. After this second hit, Major Burrows turns red and moves much faster through the ground. Now you should be especially careful not to run your ground pound too early. Wait until he gets close enough to Mario and then jumps off. After the first ground pound of the third phase, it disappears again underground and storms directly towards you. Therefore, use a second ground pound as soon as it reappears. As a result, he is thrown out of the ground again and tries to escape.
Tracks down the dazed Major Burrows and hits him with one last shot before he can disappear underground again. After this third successful attack, the boss is defeated and the Power Star appears. It is especially safe if you remain on an open surface during the entire combat and destroy the crystals on the planet before the first attack. This creates fewer obstacles that you can get stuck on during the pursuit. Also, don’t try to run after Major Burrows as long as he’s completely underground. Let him come to you and wait for the moment when his head emerges from the floor. So you can use the ground poundn specifically and avoid unnecessary collisions. Once you have collected the Power Star of the Daredevil Comet, this challenge is also completed.
Purple Coins on the Puzzle Cube
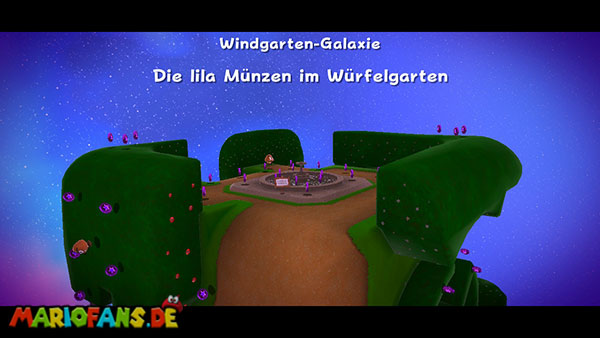
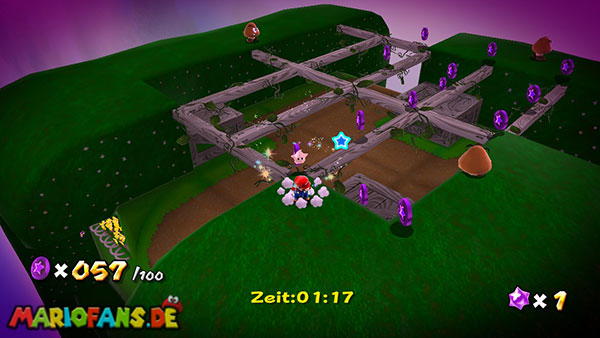
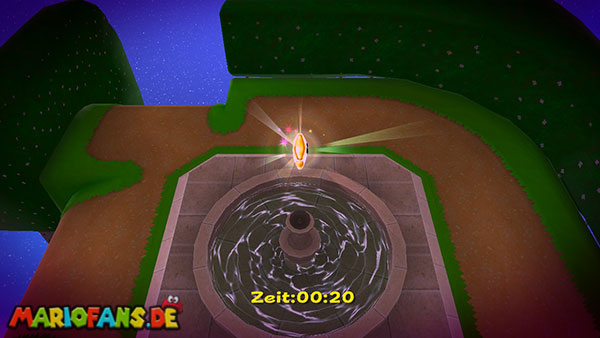
This comet mission will be available after you defeat Bowser at the center of the universe and a purple comet appears over the Gusty Garden Galaxy. This time you will start directly on the large cube garden, where you have already caught a Star Rabbit in the first mission. A total of 150 Purple Coins are distributed across the six sides of the cube-shaped planet. For the Power Star, however, you only need 100 coins, which you have to collect within two minutes and 30 seconds. So you can skip 50 coins and not have to examine every hard-to-reach location. It is particularly important that the countdown continues after the hundredth coin. The Power Star appears on the original front page of the cube, above the small fountain. You should therefore remember its position right at the beginning, so that you can get back there as quickly as possible after collecting the coins. Since you have to walk over several sides of the cube throughout the mission, the changing gravity can seem a bit confusing at first. It is best to orient yourself on the eye-catching hedges, wooden structures and the fountain to see which side you are on at any time.
Start with the Purple Coins on the homepage, as they are mostly easy to reach and you do not have to overcome any major obstacles. First run around the fountain and collect the coins distributed along the narrow paths and between the hedges. Some specimens hover a little higher above the ground and can be reached with an ordinary jump. However, it avoids making several jumps one after the other because of a single high-floating coin, as long as there is a larger number of easily accessible coins next to it. Once you have collected most of the coins on the first side, you run over one of the adjacent edges to the next side of the dice. Gravity adapts automatically, allowing Mario to continue running on the new surface. There you can expect more coin groups along the hedges and small grass areas. If possible, follow the longer rows and try not to constantly switch between already visited paths back and forth. The Goombas that move on some of the surfaces can simply be skipped or eliminated with a spin. However, do not dwell unnecessarily long with them, as the countdown continues during this time.
On one of the nearest dice sides are several elevated hedges and wooden structures on which additional Purple Coins are distributed. Some of them can be reached with a backsalt. Stand directly in front of the higher edge, hold the Z button and then jump backwards. In this way, you get to the most low hedges without having to walk a longer detour. However, you should be careful especially on the narrow wooden walkways, because an inaccurate jump can cause you to fall off the construction and land on another side of the cube. If you find enough coins on the lower paths, you can easily leave out the more difficult specimens on the highest wooden walkways. On the opposite side of the cube there are further large coin groups on several adjacent grass areas. If possible, it runs in a continuous arc and collects the coins with ordinary jumps. Be careful not to accidentally run back the same way if you have already collected all the coins there. Instead, try to move on to the next adjacent cube side after each larger coin group.
Particularly worthwhile are the coins on the wide surfaces of the hedges, which you can reach from the adjacent paths. Some of them float in short rows over the plants and can be collected completely with a targeted jump. If you still need many coins, you can also use the narrower bridges on the side with the larger wooden structures. There are several coins close together, but the risk of a crash is higher. Therefore, do not wait too long on the edges and jump if possible only on a jetty, if you have it directly in front of you. The coins on the lower hedges and open grass areas are usually enough to reach the required 100 copies. Regularly keep an eye on the coin counter on the screen. As soon as you have about 80 to 90 Purple Coins, you should orient yourself again towards the homepage with the fountain. Look for other easily accessible coin groups on the adjacent sides of the cube and try to collect the last needed specimens as near the fountain as possible.
After the hundredth Purple Coin, the Power Star you are looking for appears directly above the fountain on the original homepage of the cube. However, the countdown continues, which is why you should return there immediately. If you are already on an adjacent side, just walk over the next cube edge and orient yourself to the large hedges until you see the fountain again in front of you. If you are still on the opposite side, try to run back via the direct transitions between the dice sides instead of crossing the complete hedge paths again. Once you have reached the well, you jump on its edge and collect the Power Star floating over it. You have also completed the last mission of the Gusty Garden Galaxy. For a particularly safe run, you should focus on collecting the easily accessible coins on the grassy areas and low hedges. Since 50 coins are surplus, it is not necessary to examine all the tall wooden webs or hard-to-reach corners of the cube.