

Darkness on the Horizon
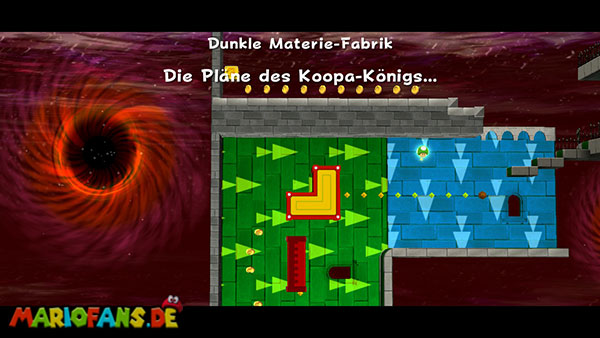
The Bowser’s Dark Matter Plant can be reached in the bedroom of the Comet Observatory once you have collected at least 33 Power Stars. Run straight from the starting point and jump to the first yellow platform moving across the dark matter. Switch to the right platform as soon as both approach each other and get transported to the higher level. Under no circumstances touch the violet-black matter among you, for it immediately costs Mario a life. Once you have arrived at the top, you will encounter a bone dry, which you can temporarily turn off with a spin. Then runs over the rotating stone plates, which move about a common axis. If possible, stay in the middle of the individual surfaces and jump to the next plate in time before the current one among you turns away. After the last rotating platform you reach the first section with changing gravity. The colored areas indicate in which direction Mario is pulled. Pay particular attention to the arrows in the background: in the blue area, gravity acts downwards, in the red upwards, in the green to the right and in the gray to the left. Once you cross the boundary between two areas, gravity changes immediately. Therefore, you must already be before the transition so that there is a fixed platform in the new direction.
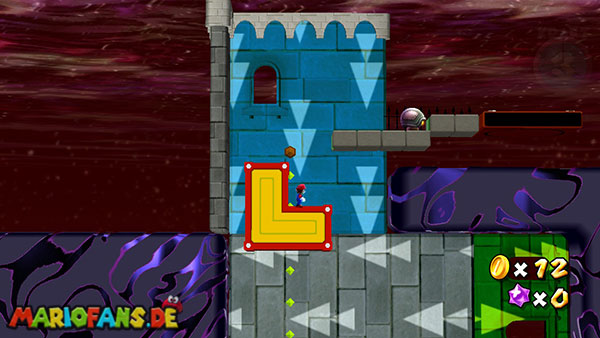
Jump up into the red area at the beginning of the first gravity room and drop Mario to the ceiling. Run to the right and jump to the first moving yellow platform. This brings you to the green area where Mario is drawn to the right side. Stand on the left side of the L-shaped block so that you do not fall into the dark matter when changing gravity. Once the block has reached the next safe position, jump onto the platform passing it and get transported to the next L-shaped block. Change to its upper left surface in time. As the block moves into the blue area, gravity pulls Mario back down. Due to your position you land safely on the block and can then jump on the solid ground to the right. If you want to collect additional lives, you should examine the upper area more closely before leaving this section: Away from the direct path there is a 1-Up Mushroom, which you can reach via the mobile platforms. There is also a hidden area above the first section of gravity with a? block from which you can get additional items. For the regular way you do not have to take this detour. Then run past the Goombas or eliminate them with jumps and climb the long pole up to reach the next section.
A narrow path awaits you at the top, where several blue holes appear in the platforms. These lead directly into the dark matter and must not be entered. First, wait until the first moving platform approaches your position and jump to its middle surface. Watch the holes and switch to the neighboring platform in time as soon as one of them crosses your path. It is particularly easy to use the middle path if possible and only then switch to the upper or lower platform if a hole appears immediately before Mario. Once you reach the opposite side, several pink platforms follow, moving across larger clusters of dark matter. Jump to the first platform and get transported to the right. Switch to the next one as soon as they are side by side and jump over the blue holes that occur during the ride. One of the moving platforms has an optional 1-Up Mushroom. Wait until the platform with the mushroom comes near you, and jump on it as centrally as possible so that you are not caught by one of the holes when collecting. Further ahead, you will find two pairs of rotating stone plates, each of which is traversed by a region of dark matter. In the first arrangement, hold yourself as right as possible and change to the left side in the second. Jump between the plates as soon as the safe half is turned upwards. Then you reach solid ground again and follow the ascending path to the right to the second large gravity space.
This section is much more difficult because you have to accompany several moving, cruciform platforms through different gravity fields. Wait at the beginning until the first blue platform goes near you, and jump to its left side. Let yourself be transported over the dark matter and then switch to the next, side-facing platform. Once you reach the next blue area, you jump to the large plus-shaped block. First stand on its upper left side and wait until the block moves into the green gravity area. Now that Mario is pulled to the right, you have to move to the lower left side of the block. There you can safely wait for the next transition without falling into the black hole next to the platform. Once the block reaches the red area and gravity pulls up, you switch to the lower right side. This lands Mario after the gravity change on the right surface. However, do not wait too long, because the block continues to move towards a wall of dark matter. Therefore, climb to the upper right side in time and jump from there to the next L-shaped block. Stand as far as possible in its protected corner so that Mario is not pulled from the platform during the following change. In this way, you can safely get through the four different areas of gravity.
At the end of the second gravity space, you reach a small yellow platform that moves vertically upwards. Jump on it and get transported to the next fixed level. Also in this section is an optional 1-Up Mushroom off the direct route. If you want to collect it, you should closely observe the lateral platforms and the position of the gravity fields. A crash into the dark matter immediately costs you a life, which is why the detour is especially worthwhile if you already control the movements of the platforms safely. At the upper level, you finally discover several large crystals. In the first, a Luma is enclosed, which you free with a spin. Then several floating stairs appear, via which you reach the next platform. There is another captured Luma, which you also freed from the crystal with a spin. This creates the last steps to the boss area. Before you run on to Bowser, you should definitely collect the red Life Mushroom, which is enclosed in an additional crystal on this platform. Destroy the crystal envelope with a spin and take the mushroom with you so that your maximum health increases from three to six units. With the newly released steps you finally reach the top platform, on which Bowser is already waiting for you.
After a brief encounter with Bowser, you will be transported to a small spherical planet where the actual battle takes place. The process is similar to the first duel in the Bowser fortress, but Bowser has several additional attacks this time. Already at the beginning, he shoots large fireballs, which are distributed over the surface of the planet and partially completely fly around him. Therefore, does not run permanently in the same direction, but observes the trajectories and jumps over the projectiles if necessary. In addition, Bowser regularly jumps high into the air and generates several electric shock waves when he lands. These propagate circularly over the surface. Jump over it in time as the waves approach your position. Initially, up to three waves appear one after the other, later it can even be five. If possible, stay on the small green areas that can protect you from the shock waves. The existing crystals are also useful: they can intercept individual fireballs and, when destroyed, leave coins with which you can replenish your health.
To hurt Bowser, you have to get him to land on one of the blue glass fields as you did in the first fight. Stand on one of these surfaces and wait for Bowser to make a big jump. As soon as he is in the air, you quickly run to the side. Bowser tries to land on your last position, breaking through the glass surface and burning his tail on the hot underneath. Then he begins to run wildly over the surface of the planet. Do not try to follow him in the same direction, as he is much faster than Mario. Instead, run against his direction until he meets you. Once his burning tail is within reach, you perform a spin. As a result, Bowser is thrown on his back and begins to roll across the planet in his shell. Change direction again and catch it at a favorable point. Hit it with another spin to cause the first complete damage. If he should rise again before you land the second hit, you must land him again on a blue glass field and repeat the attack.
After the first successful hit, Bowser becomes more aggressive and uses his fireballs and shock waves more often. Particularly dangerous is his new Dark Shooting Attack, in which he rotates with outstretched arms around his own axis and can hit Mario with long range. Once Bowser prepares this movement, you should not stop right in front of him. Run laterally past it and increase the distance until its turning stop is ended. An ordinary jump is not always enough to avoid this attack. Therefore, wait until Bowser has calmed down, and then lure him to a blue glass field again. Repeat the process: let him break through the glass, run towards his burning tail and hit him with a spin. If it rolls on its back across the planet, you must intercept it a second time and attack it again. This lands you the second full hit.
In the final phase of the battle, Bowser combines all attacks with each other. He now shoots especially many fireballs, uses his Dark spin and sometimes generates five shock waves in succession. Therefore, keep moving and try to use the existing green areas as protection. If your health becomes scarce, you can destroy one of the remaining crystals with a spin or shoot at the green plates with Star Bits to expose more coins. However, be careful not to stop immediately in front of Bowser as long as he fires his fireballs. Wait again until he prepares for a high jump, and lure him to a still undamaged blue glass field. Dodge its landing and then run against its direction until you reach the burning tail. Hit Bowser with a spin and catch him one last time as he rolls across the planet on his back. After the third full hit, Bowser is defeated and disappears from the arena.
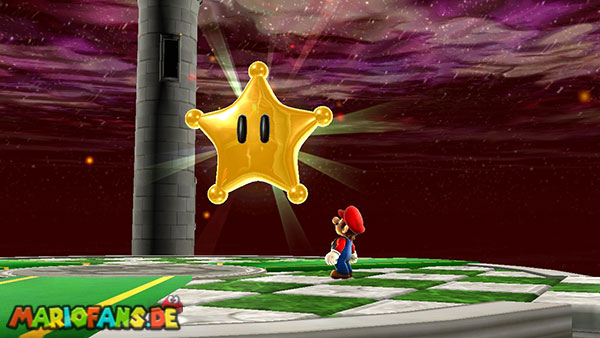
In its place appears the Grand Star, which you can now collect. With this, you have completed the Bowser’s Dark Matter Plant and received the fifth Grand Star of the adventure. In the comet observatory, the next dome, the engine room, is supplied with energy and accessible. There are no other regular or secret Power Stars in the Bowser’s Dark Matter Plant; the optional collectibles are limited to the additional 1-Up Mushrooms, the Life Mushroom, and the Star Bits along the way.