

King Kaliente’s Spicy Return
The Bowser Jr. creature factory can be reached in the engine room of the Comet Observatory once you have collected at least 45 Power Stars. After landing on the first planet, you already see a Launch Star, which is locked in a glass cage. To free him, you need a Bullet Bill from the cannon on the opposite side of the planet. First, follow the narrow stone path forward and eliminate the Goombas with jumps or turning attacks. Especially the enemies immediately next to the abysses you should turn off, so that they do not hinder you later in the chase. Jump over the individual gaps and stay on the wider stone surfaces, because in the center of the partially broken planet there is a black hole. Once you reach the cannon, wait until a Bullet Bill is fired. Approach the projectile so that it targets Mario and begins to pursue. Then you turn around and walk back to the locked Launch Star on the same path. Try not to guide the Bullet Bill through too narrow curves or against the rock walls, otherwise it will explode prematurely. As soon as you reach the glass cage, you stand just in front of it and dodge laterally at the last moment. The Bullet Bill thus flies against the glass envelope and destroys it. Activate the exposed Launch Star to get to the large lava planet.
On the launch planet you can also collect a hidden 1-Up Mushroom. This is also enclosed in a glass cage and can only be freed by a Bullet Bill. Look for the appropriate cage along the outer stone path and attract another projectile from the cannon there. Stand in front of the glass case as at the Launch Star and jump to the side in time for the Bullet Bill to destroy it. Collect the exposed 1-Up Mushroom and then use the Launch Star. A small shortcut is also possible: With a well-designed long jump you can skip individual gaps between the stone platforms and thus shorten the path between cannon and glass cage. While a Bullet Bill is chasing you, the usual route is safer, because the projectile can hit the rock face in an unfavorable jump.
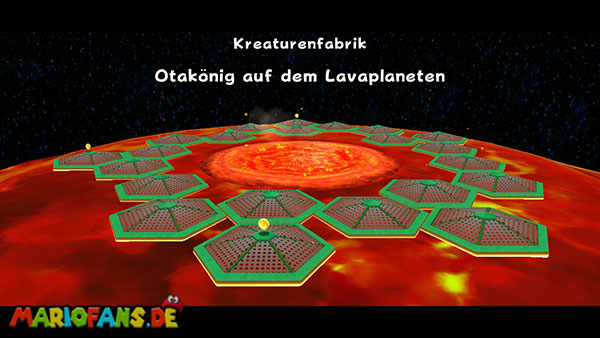
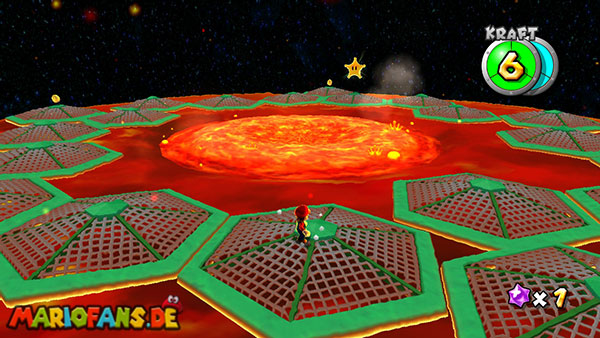
After the flight you land on a row of green grid platforms that float over a huge lava lake. These platforms slowly begin to sink as soon as Mario enters them, and eventually disappear completely into the lava. Therefore, do not stay in one place for too long, but jump as far as possible from one platform to the next. To the left of your landing position is an optional Life Mushroom that you should definitely collect. Jump onto the lateral grid platform and take the mushroom with you to increase your maximum health from three to six units. Then return to the main path and follow the platforms forward. Meanwhile, fire bubbles and burning boulders regularly rise from the lava. Observe their trajectories and, if necessary, wait on a platform that is still high enough until the next attack has passed. If a platform has already sunk dangerously low, you can stay in the air for a few seconds with a backflip and a subsequent spin. Meanwhile, the abandoned grid platform rises a bit from the lava again.
At the end of the platform path, two octopods await you, who shoot you with green coconuts. Run first on one of the wider grid platforms and position yourself so that you have a clear view of the first opponent. Wait until he fires a green coconut and performs a spin shortly before the collision. As a result, Mario flings the coconut back directly to the octopus and defeats him. Avoid the remaining shells and repeat the same procedure on the second enemy. Meanwhile, make sure your platform doesn’t sink too deep into the lava. It is particularly practical to jump briefly on an adjacent platform after each projectile flung back and only then wait for the next attack. Once both octopods are defeated, a Launch Star appears in the middle of the range. Activate it to get to the circular boss arena where Bowser Jr. unleashes the King Kaliente on you.
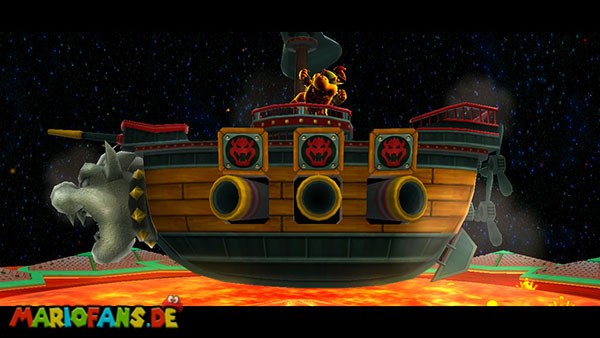
The fight against King Kaliente works similarly to your first encounter in the Good Egg Galaxy. This time, however, you are on a ring of sinking grid platforms that move directly above the lava. In addition, King Kaliente uses fireballs more often and fights off your thrown back coconuts several times in a row. At the beginning, stand on one of the broader platforms and observe his attacks first. King Kaliente regularly shoots three burning bullets that fly in your direction. You must not throw them back with a spin. Instead, jump over it or switch to a neighboring platform. A group of three adjacent grid platforms is particularly suitable, between which you can jump back and forth. This means that you always have an escape option if a platform sinks too low. Wait until King Kaliente shoots a green coconut instead of the fireballs. Stand on a platform as centrally as possible and perform a spin as soon as the coconut reaches Mario. King Kaliente, however, hurls them directly back to you. Therefore, perform a second spin to finally transport the coconut against his head. This will land you the first hit.
After the first hit, King Kaliente appears briefly in the lava and then appears again. At the same time, several small fire bubbles are added, which jump over the grid platforms and restrict your freedom of movement. Do not try to remove each fire bubble individually, but remain in motion and avoid them laterally as far as possible. Continue to watch the platforms under your feet and regularly jump on a neighboring surface so you don’t sink into the lava. As soon as King Kaliente fires a green coconut again, you aim at him and throw it back with a spin. This time, too, he repels the projectile. Wait for the return flight and perform a second spin to land the second hit. Make sure not to jump to another platform during the first setback, otherwise Mario may not be right with the coconut. When your platform begins to sink, it is best to jump before the green floor on a freshly ascended grid surface and stop there only for the short exchange of strikes.
In the third and final phase of the fight, King Kaliente becomes much more aggressive. In addition to the fire bubbles, large meteorites are now raining down on the arena as the boss continues to shoot firing bullets. Watch the falling boulders and run sideways in time as a meteorite approaches your position. If possible, stay close to several adjacent grid platforms so that you can quickly avoid a dangerous impact. If your life points are tight, try to avoid the next attacks instead of starting a risky exchange. Thanks to the previously collected strength mushroom, you ideally still have enough health for the last hit.
As soon as King Kaliente fires a green coconut again, you stand on a platform as high as possible and point Mario directly at the opponent. Sling the coconut back with a spin. Unlike before, King Kaliente now fights them off twice in a row. So you have to throw the same coconut back three times in total with a spin before it hits his head. Pay close attention to the trajectory, because the projectile becomes faster with each setback. Try not to run unnecessarily to the side during this exchange of blows so that you keep the coconut right in front of you. Once you have successfully executed the third setback, the projectile hits King Kaliente one last time. After a total of three successful hits, the boss is defeated and disappears into the lava. The sinking grid platforms now remain permanently upstairs and a Grand Star appears in the middle of the arena. Jump across the secure platforms and collect it. With this you have completed the creature factory and gain access to the garden dome of the comet observatory.