

The Fate of the Universe
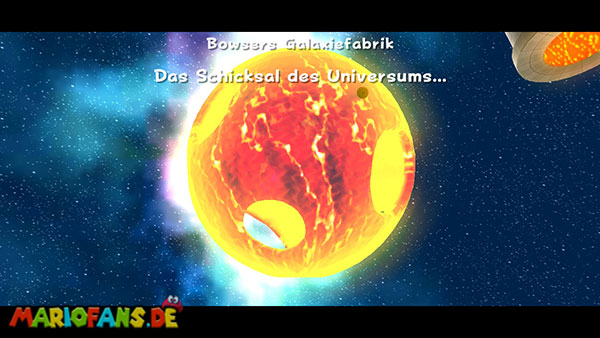
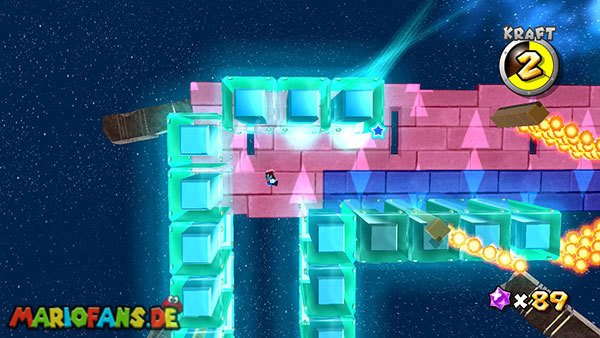
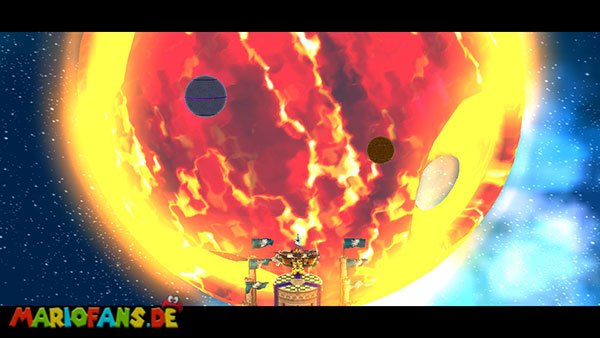
Once you’ve collected at least 60 Power Stars and completed the Koopa King’s Plans mission at Bowser’s Dark Matter Factory, you’ll be ready to embark on the final battle against Bowser. Talk to Rosalina in the central area of the comet observatory and confirm that you want to travel to the center of the universe. Bowser’s Galaxy Reactor, the last regular galaxy of the adventure. However, you do not have to challenge Bowser immediately: You can collect missing power stars from the already unlocked galaxies beforehand. Upon arrival, you enter the transformed castle of Princess Peach and enter a long obstacle course consisting of various gravity areas and several dangerous planets.
Run straight from the starting point to the high stone wall. There moves a large blue headlamp whose light cone changes gravity. Jump into the light and get Mario drawn from the wall. As long as you are within the illuminated area, you can walk along the vertical wall. If the headlamp leaves your position, normal gravity reappears and Mario falls down. Therefore, follow the movement of the light up and jump to the next platform as soon as you can safely reach it. Then move to the right and use the next headlight to climb the next wall. Along the way, you will encounter several bone drys, which you can temporarily disintegrate with a spin. Near the first headlights there is also an optional 1-up mushroom. It lies on a small lateral projection, which you reach via the lit wall. Collect it when the spotlight is in a favorable position and continue your ascent.
Further up, you’ll have to switch between several cones of light as large rotating fire bars move across the walls. Wait until the first fire bar has swung past, then follow the headlight to the next higher platform. If possible, do not jump out of the light too early, otherwise you will fall back to the lower level. After the next bone drying, you reach two more headlights, which lead through a particularly dangerous area with several fire bars. Use the first cone of light to get to the upper wall and then switch directly to the second. Once you reach the highest platform, you run up the stone stairs and jump into the great gravity spotlight that transports Mario to the next planet.
You land on a giant lava planet whose surface is almost entirely made of glowing lava. Only individual green metal platforms and dark rock surfaces provide secure support. Jump first to the first green platform and then, if possible, without a longer interruption to the next. The green areas sink as soon as Mario stands on it, and finally disappear in the lava. Don’t wait too long with the next jump. Further forward, the path leads you onto a large rotating rock ring whose surface moves against your direction of travel. Run against rotation and jump over the gaps between the individual rock plates. At the same time, several burning boulders roll over the path. Avoid them as early as possible and use the wider rock areas to get past them. On a small side platform is an optional 1-up mushroom. For this you have to deviate briefly from the main path and then jump back on the rotating ring. In the end, you reach more sinking platforms as well as several lava geysers. Wait for the flame columns to recede briefly and then jump quickly over the last metal plates to the next blue spotlight.
The next planet consists of an icy surface whose touch also hurts Mario. Your safe path is therefore formed by large blocks of ice assembled immediately before you. Once you reach a section, more blocks of ice are created in front of Mario, while the platforms already entered disappear after about six seconds. Therefore, if possible, run without stopping over the emerging path and jump over smaller gaps before the blocks under your feet dissolve. Along the way, there are two optional 1-up mushrooms: one is located on an elevated ice platform approximately halfway, the other to the right of the last larger section. Both can be achieved with a reverse balance or a well-set jump. Especially with the first mushroom, however, you should hurry, as the neighboring ice blocks continue to decay during the detour. If you already have enough life, it is safer to skip this bonus. At the end, the path turns sharply to the left and leads upwards over several rapidly forming ice stages. Jump from one step to the next and reach the large spotlight at the end of the path.
The next planet is completely surrounded by quicksand, in which Mario immediately sinks. Therefore, stay only on the narrow stone platforms that move slowly over the surface. Jump to the first platform and wait until it takes you to the next one. Once both are close enough together, you change over with a short jump. Pay attention to the rotating fire bars that swing regularly across the platforms. If possible, jump to the next surface when the fire bar is just spinning away from you. On the middle section is a larger platform with several fire bars rotating around a common axis. Run along their outer edge and jump over the flames as soon as they reach your position. Then the path to the right leads to another moving platform that takes you to the next spotlight. You do not have to use the three hurricanes on the surface of the planet for this mission. They are out of the way and will not benefit you.
After the drifting sand planet follows a two-dimensional section with disappearing platforms. As in the Matter Splatter Galaxy, large stone blocks assemble in front of Mario and dissolve shortly afterwards. Run to the right until you reach two vertical walls. Jumps alternately against the left and right wall and climbs up with several wall jumps. Then follow the newly formed path to the left and pay attention to the large fire bar that rotates across the aisle. Wait until she has moved away from Mario, and then quickly cross the platforms. Further up appear more walls, between which you have to climb again with wall jumps. This section has an optional 1-up mushroom on a higher protrusion. The detour requires some extra wall jumps while the lower platforms are already disappearing. Therefore, only collect it if you can already recognize the next safe landing point.
At the upper end of the section, gravity changes again. Pay attention to the large arrows in the background, which indicate in which direction Mario is pulled. Continues on the right side and follows the gravity change to the ceiling. Here are other rotating fire bars, whose flames you have to avoid with short jumps. If possible, wait on a safe platform until the next fire bar has passed, and then continue on your way. At the end of the ceiling you reach another gravity area where Mario is pulled back down. Jump off only when there is a platform among you and let yourself fall to the lower level in a controlled manner. Then run to the last big spotlight and use it to reach the most dangerous section of the galaxy.
You end up inside a huge lava tunnel whose walls are covered with cannons, stone blocks and moving platforms. First jumps over the first sinking metal plates to the opposite stone surface. There are two large Bowser statues, behind which you can look for protection from the target-seeking Bullet Bills. As soon as a bullet willi chases Mario, you stand behind a statue and wait for the bullet to fly against it. The statue is destroyed and leaves coins with which you can fill up lost health. Use the short break after the explosion to continue to the right. There you will find a large stone block that regularly hits the ground. Wait until he lifts up again, and then walk quickly underneath. Further forward are several sinking platforms, through which you can reach a group of rotating green platforms. Jump to the first and get transported around the tunnel before moving to the next.
During the journey over the rotating platforms, further cannons fire off target-seeking ball willis. Don’t try to run away from them permanently on the same platform. Instead, jump to the next surface on an opportune occasion, so that the projectiles would have to fly a tight curve and often hit the tunnel wall. A little further forward are two more Bowser statues, behind which you can look for cover again. Here a particularly large cannon shoots a giant ball willi. This projectile does not track Mario, but flies straight through the tunnel. Therefore, wait behind a statue or on a side platform until the Giant Ball Willi has flown by. Then jump over the next sinking metal plates to another group of rotating platforms. On the bottom of one of the large stone blocks is an additional 1-up mushroom, which you can collect during a well-timed jump. Pay particular attention to the bullet will that can push you off the platform.
On the last section of the lava tunnel, you can expect several giant bullet willis as well as numerous smaller target-seeking floors. Hold on the right side and wait until the next big ball willi passes. Then jump quickly to the green platforms, which run circularly around the tunnel. Try not to stop in the middle of the big storeys, but switches early between the individual platforms. Shortly before the exit, several smaller Bullet Bill cannons are directly next to each other. Runs as fast as possible over the last sinking metal plates and jumps over larger gaps if necessary with a long jump. For this purpose, hold the Z key while running and then press the jump key. Once you have reached the solid stone path, you walk right up the small stairs and activate the Launch Star. You have overcome the entire obstacle course.
After a short cutscene, she meets Bowser Jr., who is imprisoning Princess Peach on his airship. Bowser is already waiting at the top of a long stone staircase. Once you get moving, Bowser Jr. starts shooting large meteorites at the stairs. The impacts destroy parts of the way, so you have to run up as quickly as possible. Jumps over the gaps created and does not stop on the damaged steps. On the left is a particularly important red power mushroom that increases your maximum health from three to six units. You should definitely collect this, as you can use the additional energy for the upcoming final battle well. On a small platform on the right is also a 1-up mushroom. Take it only if you can make the detour without much time loss. Once you have reached the top stairs, the final confrontation with Bowser begins.
Bosskampf: Bowser – The Last Duel
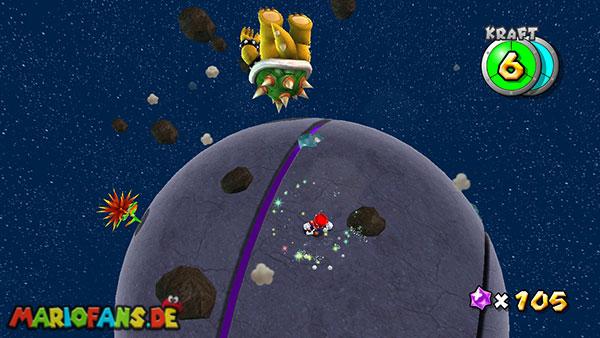
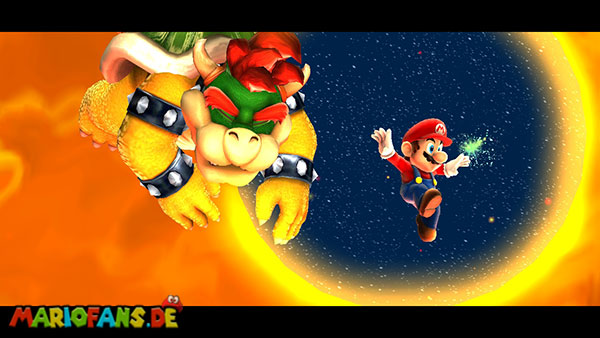
The final battle against Bowser consists of three phases on three different planets. Each phase requires two complete hits before you get to the next planet. You have to use each other’s vulnerabilities. Bowser uses his known shock waves, fast fireballs and jump attacks throughout the fight. The most important rule therefore remains to keep moving and only attack when Bowser becomes vulnerable through his own actions. If you collected the red power mushroom before the fight, you have six energy units. On the individual planets, you can also get more coins through destroyed obstacles and certain items to restore lost health.
Phase 1: Bowser as a rolling rock
On the first planet, Bowser begins with several high jumps whose landings produce circular shock waves. Jump over the waves as soon as they reach your position and keep enough distance from Bowser. After his first attacks, he turns into a large boulder, from the surface of which his head protrudes. In this form, he rolls over the planet at high speed and tries to run over Mario. You have to hit him directly on the head with a spin to destroy his stone shell. Do not run after him, but move against his rolling direction and wait until his unprotected head side points to you. Performs the rotary action only shortly before the collision. If you meet only the ordinary stone surface, Bowser remains uninjured and rolls on.
After a successful spin, the rock shell shatters and Bowser begins to hurl on his back across the planet. Run again against his direction of motion so that he meets you, and hit him with another spin. This will land you the first full hit. Bowser then straightens up again and uses his shock waves as well as several fireballs. Wait until he turns into a boulder again and attacks his head again. After the second successful hit against the rock shape, Bowser begins to rotate again on his back. This time, however, a single rotary attack is no longer sufficient. You have to hit him with a spin twice in a row during his rotation before he straightens up again. After this second complete hit, the first planet is destroyed and you reach the next battlefield.
Optional: Several thorn bushes grow on the first planet. When Bowser rolls against it in its rock shape, its shell can also break. So you can specifically lure him towards a thorn bush instead of hitting his head himself. In addition, destroyed thorn bushes leave coins and Star Bits. If you already lack health, you should first let Bowser roll through one of the bushes and collect the coins that have appeared.
Phase 2: Bowser and the rubber plants
On the second planet, in addition to several thorn bushes, there are also large green rubber plants. These are crucial for the next stage of the struggle. Bowser first attacks you with fast fireballs, some of which fly several times around the small planet. Therefore, keep moving and use the gum plants as cover if necessary. After several fireballs, Bowser retreats completely into his tank and begins to roll again across the planet. Unlike in the first phase, you can not stop it this time directly with an ordinary spin. Instead, stand next to one of the green rubber plants and wait until Bowser rolls towards you. Then perform a spin against the plant so that it rushes back and hits Bowser. Due to the impact, he is torn out of his rolling motion and begins to fling on his back over the planet again.
As soon as Bowser rotates on his back, you run against his direction of motion and hit him with another spin. This lands you the first complete hit of the second phase. Bowser gets up again and starts shooting fireballs again. Run to the next rubber plant and wait until he retreats back into his tank. Sling the plant against him at the right moment so that he becomes vulnerable again. For the second full hit, you have to attack his rotating tank twice in a row. Try to catch it as early as possible before its rotation becomes too fast. A useful shortcut is to hurl a rubber plant against Bowser when he is still shooting fireballs and stands next to the plant. When hit, he is immediately stunned, so you do not have to wait for his roll attack. After the second full hit, this planet also breaks apart.
Phase 3: Bowser’s Last Resistance
In the final stage of combat, you land on a small planet inside Bowser’s Galaxy Reactor. This fight works again similar to the two previous clashes with Bowser. On the surface are several blue glass fields, under which glowing lava is hidden. Bowser first uses his shock waves and fast fireballs. Jumps over the electric waves and avoids the fireballs by lateral movements. As soon as he retreats into his tank and rolls over the planet, you should keep as much distance as possible. After this attack, Bowser jumps high into the air and tries to land with a ground pound on Mario. Stand now on one of the still undamaged blue glass fields and wait until Bowser has set his jump. Runs aside immediately before landing. Bowser thereby shatters the glass and burns its tail on the lava below.
With a burning tail, Bowser then runs over the planet. Do not run after him, but move in the opposite direction. As soon as he meets you and turns around briefly, you attack his burning tail with a spin. As a result, Bowser is thrown on his back and begins to rotate again across the planet. Runs towards its direction of movement and hits it with a further rotary attack. This is the first complete hit of the last phase. Bowser straightens up again and begins to use his fireballs and shock waves faster in succession. On this planet, the small obstacles offer you little protection. Therefore, try to keep moving as far as possible in the outer area of the planet and always keep an undamaged blue glass field in view for the next ground pound.
After the next roll attack, Bowser jumps up again and tries to land on Mario. Lure him to another blue glass field and dodge in time for him to burn his tail a second time. Run again in the opposite direction and hit him with a spin on the tail. Then you have to hit his rotating tank twice in a row with a spin attack for the last complete hit. Try to intercept him early, because Bowser is becoming increasingly faster during his rotation. Once you have landed the second hit against his tank, Bowser is finally defeated.
Bowser falls into the glowing core of his galaxy factory and the last Grand Star appears. Collect him to complete the mission “The Fate of the Universe…” and save Princess Peach. After the final cutscene and the credits, you can continue your score. In addition, the Purple Comets will now be unlocked, allowing you to get more Power Stars in numerous already visited galaxies by collecting Purple Coins.
For a complete 120-star run, you must then collect all missing regular, secret and comet stars. Once you own all 120 stars with Mario, you can defeat Bowser again in his Galaxy Factory. This will unlock Luigi as a playable character, with which you can also complete the adventure with 120 stars. Those who have collected all 120 stars with both Mario and Luigi and defeated Bowser again will finally gain access to the game’s last bonus galaxy.