

Chapter 8-2: The Crash
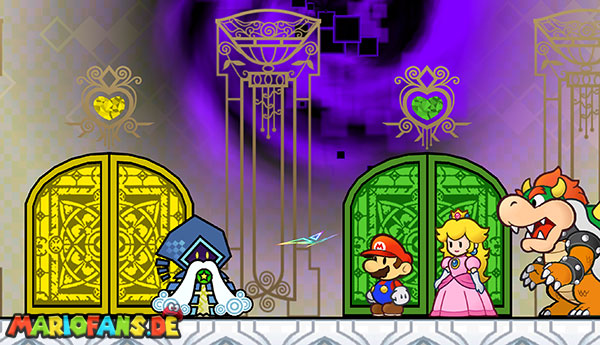
Without Bowser by Castle Bleck
After the collapse at the end of the previous section, you have to do without Bowser for the time being. His high attack power and his fire breath are missing, but with Mario, Luigi and Princess Peach you are still well equipped.
Run through the long corridor to the right. Here are several stronger opponents and curses waiting for you. You can defeat them with your Pixl or switch to 3D view with Mario and walk past a lot of the dangers.
Goes through the door at the end of the aisle. In the next room, she surprisingly encounters Merlon. Already his strange statements and the suspiciously placed counter reveal that something is wrong. Since the other door is locked, you still have no choice: jump against the blue switch.
Under your feet, a trap door opens. While the heroes plunge into the depths, the false Merlon turns back into Mimi.
Escape from prison
You end up in a locked prison cell. Examine the wall on the right. There is a clearly visible crack.
Set Boomer down before the crack and explosion the bomb. The wall is burst open, so that behind it a narrow passage is created. Switch to the 3D view with Mario and walk through the opening.
On the other hand, you get into a room with several tube openings in the Blanket. Their position is changed by the switches in the neighboring rooms. For the direct solution you first enter the door on the left.
The tube puzzle
In the following gear, several fire bars rotate and make the path difficult for you. Switch to the 3D view to walk sideways past the fire traps. Also pay attention to the magic bullets of the opponents.
At the back of the room is a red switch. Jump against it twice overall. With each hit, the position of the tubes in the previous room is changed.
Then return to the middle room. The required warp pipe is now directly in front of you. Get in and open all three treasure chests at the top. In it you will find:
a courage shell, a Knickwitz key and a life mushroom.
The Life Mushroom is especially valuable because it automatically revives you after a defeat. If necessary, remove a less important item from your inventory.
Then switch to the 3D view with Mario. Behind the chests you can see an opening in the ground. Drop in to land again in the room where Mimi set her first trap. Open the locked door with the Knickwitz key.
The hidden Ultra mushroom mix
In the next room, a large staircase leads up. Enter the first door you pass.
Follow the corridor to the right. At the apparent end of the path, you move with Mario into the 3D view. This allows you to see a narrow passageway that leads behind the wall.
Follow the hidden path to the treasure chest. Therein lies an Ultra mushroom mix that restores 50 HP. Take it with you if you still have space in the inventory.
Then return to the big staircase, climb all the way up and enter the second door.
The Three Hanging Mushrooms
In the following room, three mushrooms hang on long threads from the Blanket. Once you touch a mushroom, a trapdoor opens among you.
The first two mushrooms lead only to optional trapping spaces. You can take them with you, but then you have to fight against additional opponents and return via a warp pipe.
For the further solution you need the third mushroom. Therefore, move to the right and touch the last of the three mushrooms. You fall into a deeper room.
Switch immediately with Mario to the 3D view. In the normal perspective, the room seems almost empty, but in 3D you discover a Chromeba. The opponent creates several copies of himself.
Attack the copies until you get the original. Thoreau is particularly suitable because you can pick up one of the doppelgangers and throw it against the rest. Once the real Chromeba is defeated, a Knickwitz key appears.
Take the key and climb back up through the warp pipe. On the far right are a storage block and the next locked door. Save your score and open the door.
Mimis’s second panel
In the next room, Merlee is waiting for you. This encounter, too, is obviously a trap: the real Merlee would normally speak in rhymes, while Mimi’s verses sound little convincing.
The wrong Merlee asks you three questions. You should choose each of which you are particularly afraid of. Your answers determine what awaits you in the following three rooms.
Since Mimi wants to keep you with the selected things, you can use her trap to your advantage. Select the following answers:
1. Ultra Mushroom 2. Thunder Rage 3. Failure
In the first room, an Ultra Mushroom appears, which immediately heals 50 HP when touched. Therefore, do not take it with you until you have actually lost energy. In the second room you get a Thunder Rage, with which you can attack all visible enemies.
In the third room there are several failures. These items have little practical use and can simply be ignored. Run past them and enter the next door.
Optional: If you want to compete against Francis again, you have to choose him as the biggest fear on the third question. He is waiting for you in the third room. However, for the easiest solution and the most useful rewards, failure remains the better choice.
Mimi does not understand how you were able to overcome her supposedly terrible obstacles. Finally, she realizes that you lied in the answers, and she takes off her Merlee disguise.
Boss Fight: Mimi
Mimi challenges Princess Peach to a final duel. Mario and Luigi must leave the room, so you can only use Princess Peach and the Pixl during the fight.
Mimi is once again transforming into her spider form. You already know the basic tactic from chapter 2-4: You have to use her red crystals against her and then jump on her head. After each successful attack, she loses one of her legs.
Equip Thoreau and wait until Mimi distributes red crystals on the floor. Grab one of them and keep it in your hands first. As a result, you are ready to attack immediately as soon as a good opportunity arises.
If Mimi crawls on the Blanket, you stand below her head. Jump up and throw the crystal against them. You can even hit the crystal partly by holding it and bumping directly with Mimi in the jump.
After a successful crystal hit, Mimi falls off the blanket or briefly collapses on the floor. Run to her immediately and jump on her head. Once the hit counts, one of her legs breaks off.
Mimis fight off attacks
Mimi uses various crystal attacks. It can throw individual bullets at Princess Peach or rain down numerous crystals from above. Hold down the controls so that Princess Peach opens her umbrella and protects herself from much of the bullets.
In her most dangerous attack, Mimi pulls her legs in and races through the room like a rotating wheel. You should not attack here. Jump over them or run to the other side in time.
As soon as Mimi ends her shooting attack, she stops for a brief moment. This is a good opportunity to throw an already captured crystal at her head.
With each lost leg, Mimi gets faster. Therefore, keep calm and focus on safely picking up a crystal first. Then wait for an attack where Mimi stops short or crawls along the blanket.
If you cut off all your legs, Mimi is defeated.
Princess Peach’s decision
After the fight, Mimi tries to escape. Due to the shocks of the castle, however, the ground under it collapses. Mimi can just hold on to the edge of the abyss.
Although Mimi has betrayed the group several times and lured them in traps, Princess Peach extends her hand. Mimi cannot understand why her opponent wants to save her after all.
The soil continues to give way. Princess Peach loses his grip and plunges into the depths together with Mimi. Mario and Luigi want to return to her, but the door cannot be opened anymore.
The two brothers have no time to search for Princess Peach. You must move on to Count Bleck before the Dark Heart destroys all worlds.
Run to the right and jump against the star block. This concludes Chapter 8-2.